Thank you for choosing a Beko appliance. This instruction manual provides essential information for the safe and efficient operation of your new Beko WUX81232WI washing machine. Please read this manual thoroughly before using the appliance and keep it for future reference.
The Beko WUX81232WI is an 8 kg capacity, front-loading washing machine designed for household use. It features advanced programs such as StainExpert for tough stains, Xpress Super Short 14 Min for quick washes, AntiCrease with IonGuard to reduce wrinkles, and AquaWave technology for gentle fabric care.
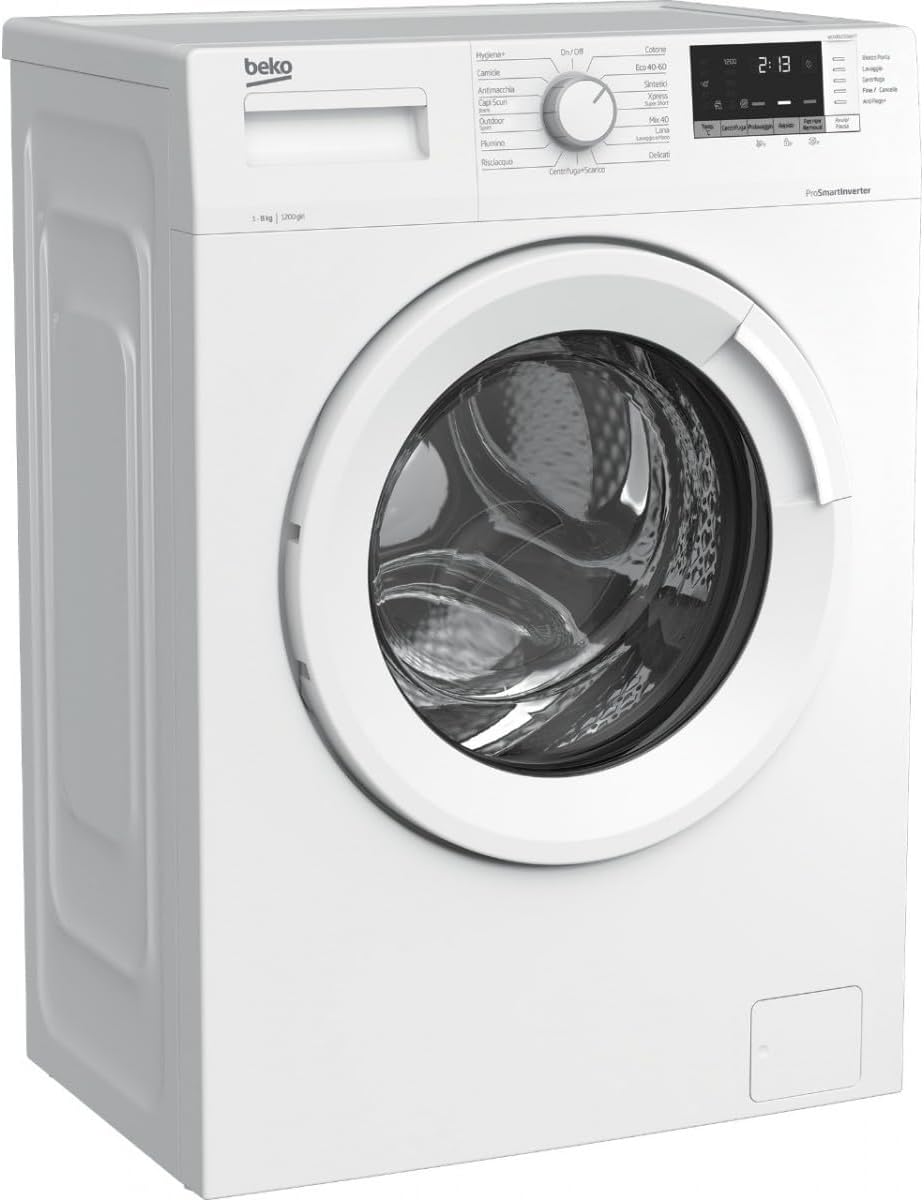
Figure 1: Front view of the Beko WUX81232WI Washing Machine.
2. Safety Information
Always follow basic safety precautions when using electrical appliances to reduce the risk of fire, electric shock, and injury to persons.
Ensure the appliance is properly grounded.
Do not operate the washing machine if the power cord is damaged.
Keep children and pets away from the appliance during operation.
Do not reach into the drum while it is spinning.
Unplug the appliance before cleaning or performing any maintenance.
Do not wash items that have been cleaned in, washed in, soaked in, or spotted with combustible or explosive substances.
3. Setup and Installation
Proper installation is crucial for the safe and efficient operation of your washing machine. It is recommended to have the appliance installed by a qualified technician.
3.1 Unpacking
Carefully remove all packaging materials. Ensure no foam (EPS) residues remain on the appliance. Keep packaging materials out of reach of children.
Figure 2: Interior view of the Beko WUX81232WI Washing Machine with the door open.
3.2 Removing Transport Bolts
Before using the washing machine, you must remove the transport bolts located at the rear of the appliance. Use a 13 mm wrench to remove the 4 transport bolts. Cover the holes with the plastic caps provided in the accessories kit. Do not remove the clamp holding the drain hose.
3.3 Water Connection
Connect the inlet hose to the cold water inlet valve at the back of the machine. Ensure the connection is tight to prevent leaks. The water pressure should be between 0.05 and 1.0 MPa (7-145 psi).
3.4 Drain Hose Installation
Insert the drain hose into a drainage pipe. Ensure the drain pipe diameter is between 0.6-1m. The end of the drain hose should be positioned to prevent siphoning.
3.5 Leveling the Appliance
Adjust the leveling feet at the bottom of the washing machine to ensure it is stable and level. Check by pressing down on the top corners of the machine. Once level, tighten the lock nuts on the feet.
3.6 Power Connection
Plug the power cord into a grounded electrical outlet. Ensure the power supply is correctly earthed and the voltage is within ±15% of the nominal voltage.
3.7 Installation Video Guide
For a visual guide on the installation process, please refer to the video below. This video demonstrates unpacking, transport bolt removal, water connections, and leveling.
Video 1: Midea Washing Machine Installation Guide. This video provides a general overview of washing machine installation steps, including unpacking, connecting water hoses, and leveling the appliance.
4. Operating Instructions
This section guides you through the basic operation of your Beko WUX81232WI washing machine.
4.1 First Use
Before the first wash, it is recommended to run a drum cleaning cycle without laundry to remove any manufacturing residues.
4.2 Loading Laundry
Open the door and load your laundry into the drum. Do not overload the machine. Close the door firmly.
4.3 Adding Detergent and Softener
Pull out the detergent drawer. Add detergent to the main wash compartment and fabric softener to its designated compartment. Close the drawer.
4.4 Selecting a Program
Turn the program selection knob to choose the desired washing program. The display will show the default settings for the selected program.
StainExpert: Effectively removes 24 types of common stains.
Xpress Super Short 14 Min: Washes up to 2 kg of laundry in 14 minutes.
AntiCrease with IonGuard: Reduces wrinkles by rotating the drum periodically after the cycle.
AquaWave: Gentle drum action for delicate fabrics.
4.5 Adjusting Settings
You can adjust temperature, spin speed, and add auxiliary functions (e.g., pre-wash, extra rinse) using the control panel buttons.
4.6 Starting the Wash Cycle
Press the Start/Pause button to begin the selected program.
4.7 Operating Programs Video Guide
This video highlights some of the quick wash cycles available on similar washing machines, demonstrating how to select and use programs that complete in under an hour.
Video 2: 5 cycles that last less than an hour. This video demonstrates quick wash cycles on a washing machine, which can be useful for understanding similar features on your Beko appliance.
5. Maintenance
Regular maintenance ensures the longevity and optimal performance of your washing machine.
5.1 Cleaning the Detergent Drawer
Periodically remove and clean the detergent drawer to prevent detergent residue buildup.
5.2 Cleaning the Drum
Run a drum cleaning program (if available) or a hot wash cycle with a suitable cleaning agent to maintain drum hygiene.
5.3 Cleaning the Pump Filter
The pump filter should be cleaned regularly to prevent blockages. Refer to the full user manual for detailed instructions on accessing and cleaning the filter.
5.4 Microfiber Filter Maintenance
Your Beko washing machine may feature a FiberCatcher filter designed to capture microfibers. Regularly clean this filter to ensure its effectiveness and contribute to environmental protection.
Video 3: Beko Fiber Catcher. This video demonstrates the function and maintenance of the FiberCatcher filter, which helps reduce microfiber release into wastewater.
6. Troubleshooting
If you encounter issues with your washing machine, consult the following common troubleshooting tips before contacting service.
Problem
Possible Cause
Solution
Machine does not start
Power cord not plugged in; door not closed properly; program not selected; Start/Pause button not pressed.
Check power connection; ensure door is latched; select a program and press Start/Pause.
Water not filling
Water tap closed; inlet hose kinked; water supply cut off.
Open water tap; straighten hose; check water supply.
Machine vibrates excessively
Transport bolts not removed; machine not level; laundry unevenly distributed.
Remove transport bolts; adjust leveling feet; redistribute laundry in the drum.
Water not draining
Drain hose kinked or blocked; pump filter clogged.
Straighten/clear drain hose; clean pump filter.
If the problem persists after attempting these solutions, please contact Beko customer service.
7. Specifications
Below are the key technical specifications for the Beko WUX81232WI washing machine.
Model Name: WUX81232WI
Product Dimensions (DxWxH): 55P x 84l x 60H cm (Depth: 55 cm)
Capacity: 8 Kilograms
Appliance Placement: Freestanding
Loading Type: Front Load
Color: White
Material: Stainless Steel (Drum material: Plastic or enameled steel)
Weight: 97 Kilograms
Max Spin Speed: 1200 Revolutions per minute
Voltage: 230 Volts (AC)
Number of Standard Cycles: 15
Number of Programs: 6
User Interface Input: Touchscreen
Display Type: LCD or LED
Special Features: StainExpert, Xpress Super Short 14 Min, AntiCrease with IonGuard, AquaWave
Manufacturer Part Number: 7000840035
Figure 3: Energy label for the Beko WUX81232WI washing machine, showing energy consumption and water usage.
8. Warranty and Support
Your Beko WUX81232WI washing machine comes with a manufacturer's warranty.
Warranty Period: 2 years for private individuals, 1 year for businesses.
For warranty claims or technical support, please refer to the contact information provided with your purchase or visit the official Beko website.
Ask a question about this manual
Ask about setup, troubleshooting, compatibility, parts, safety, or missing instructions. Manuals+ will review the question and use this page’s manual context to help answer it.