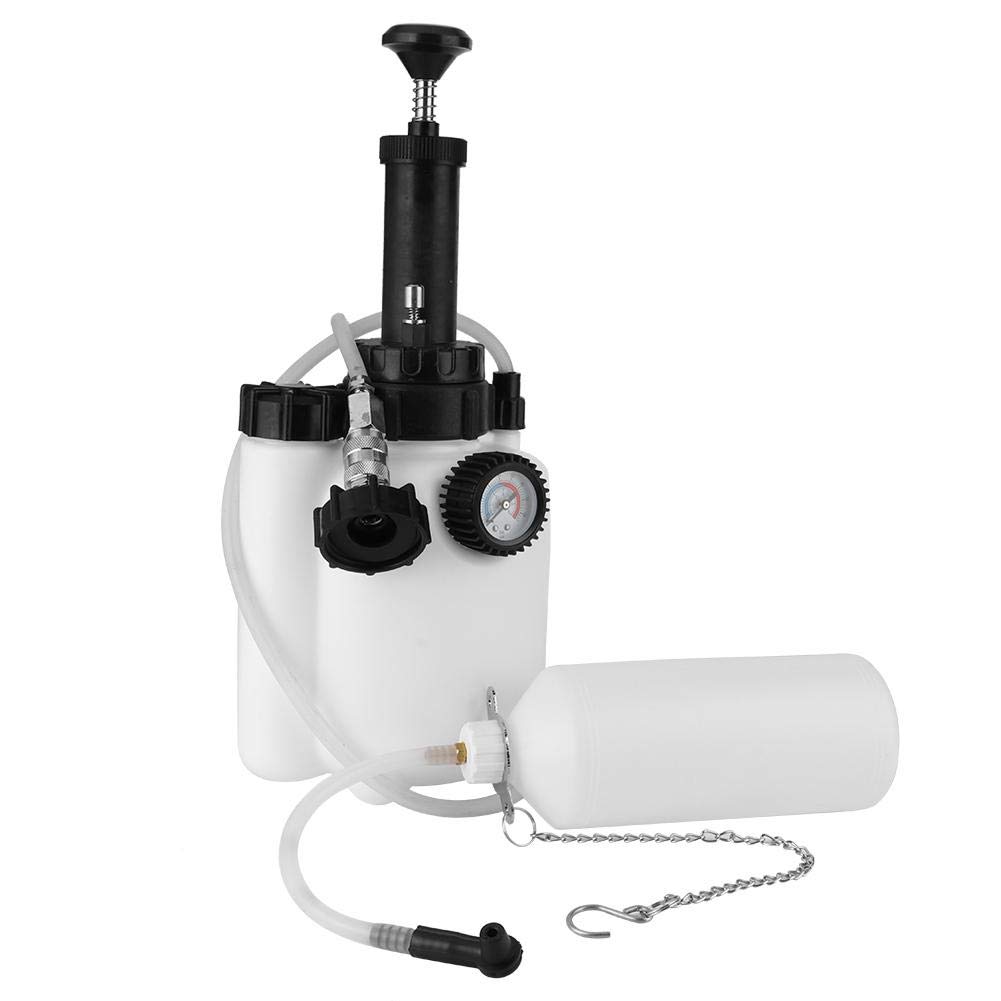
Figure 1.0: koulate 3L Manual Brake Bleeder Kit.
1. Introduction
This manual provides instructions for the safe and effective use of the koulate 3L Manual Brake Bleeder Kit. This tool is designed for purging air bubbles from hydraulic brake lines and for flushing old brake fluid, which are essential maintenance procedures. Air bubbles in the brake system can significantly reduce hydraulic pressure, affecting braking performance. Regular bleeding and flushing ensure optimal brake system function and safety.
The brake bleeder is constructed from durable, anti-corrosion PE plastic, ensuring longevity and ease of maintenance. It is compatible with most European models and vehicles featuring a 42mm threaded hydraulic fluid reservoir cap, capable of absorbing up to 3 liters of fluid.
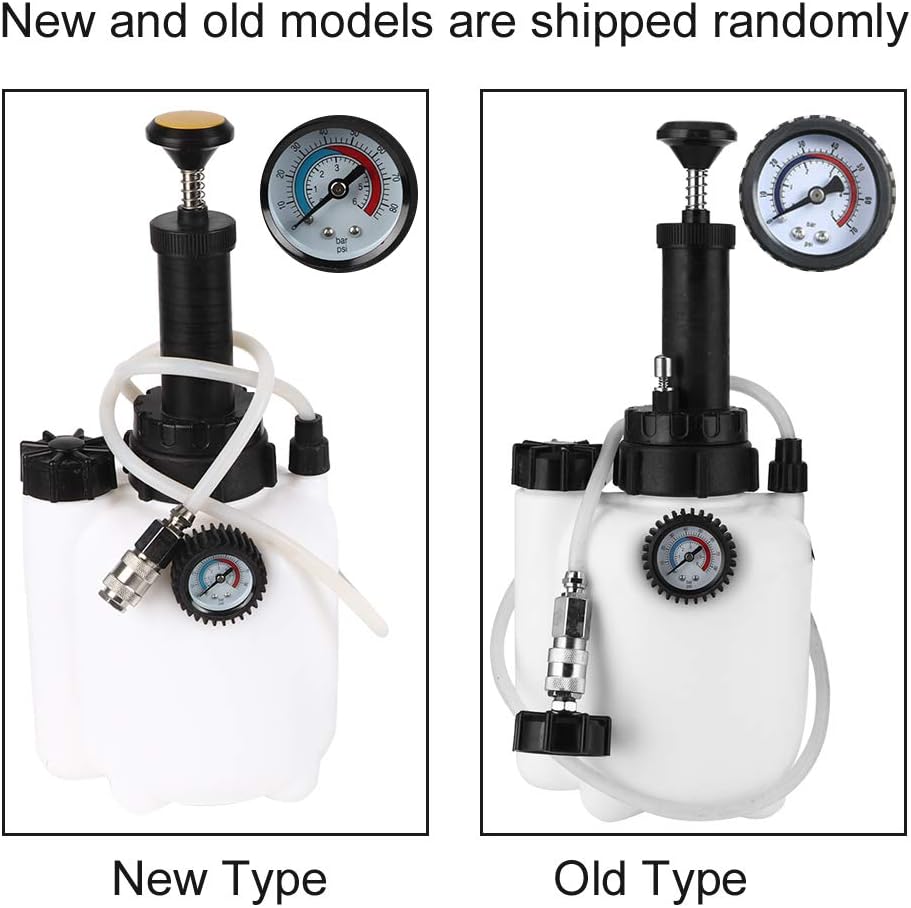
Note: The product may be shipped as either the new or old type, which are functionally similar.
2. Safety Information
Always observe the following safety precautions when using the brake bleeder kit:
- Wear appropriate personal protective equipment, including safety glasses and gloves, to protect against brake fluid contact.
- Brake fluid is corrosive and can damage paintwork. Clean up any spills immediately.
- Ensure the vehicle is securely supported on a level surface using jack stands before working underneath.
- Do not exceed the maximum recommended working pressure of 80 PSI (6 bar).
- Keep children and pets away from the work area.
- Dispose of old brake fluid responsibly according to local regulations.
- Refer to your vehicle's service manual for specific brake bleeding procedures and fluid type recommendations.
3. Package Contents
Verify that all items are present in the package:
- 1 x Brake Clutch Bleeder Set (Main unit with pressure gauge and pump)
- 1 x Accessory Pack (Includes various fittings and hoses)
- 1 x Manual (This document)

Figure 3.1: Overview of the brake bleeder kit components, including the main unit, collection bottle, and connection parts.
4. Specifications
| Item Type | Brake Clutch Bleeder |
| Material | PE Plastic |
| Color | White |
| Brake Bleeder Capacity | 3 Liters |
| Waste Fluid Bottle Capacity | 1 Liter |
| Working Pressure | 10-30 PSI (0.7-2.0 bar) |
| Maximum Pressure | 80 PSI (6 bar) |
| Compatibility | Vehicles with 42mm threaded hydraulic fluid reservoir caps (Suitable for most European models) |

Figure 4.1: Product dimensions for the main bleeder unit and the fluid collection bottle.
5. Setup
Before beginning the brake bleeding process, ensure the vehicle is parked on a level surface and the engine is off. Follow these steps to set up the brake bleeder kit:
- Prepare the Vehicle: Open the vehicle's hood and locate the brake fluid reservoir. Clean the area around the reservoir cap to prevent contaminants from entering the system.
- Attach Reservoir Cap: Select the appropriate adapter cap from the accessory pack that matches your vehicle's brake fluid reservoir. The kit includes a 42mm threaded cap suitable for many European models. Securely attach the adapter cap to the brake fluid reservoir.
- Connect Pressure Hose: Connect the pressure hose from the main bleeder unit to the adapter cap on the brake fluid reservoir. Ensure a tight connection to prevent air leaks.
- Prepare Waste Fluid Bottle: Connect the hose from the waste fluid collection bottle to the bleeder nipple on the brake caliper or wheel cylinder you intend to bleed first. Ensure the hose is submerged in a small amount of fresh brake fluid in the collection bottle to prevent air re-entry.
- Fill Bleeder Unit: If performing a fluid flush, fill the main bleeder unit with new, clean brake fluid of the correct type for your vehicle. Do not overfill.
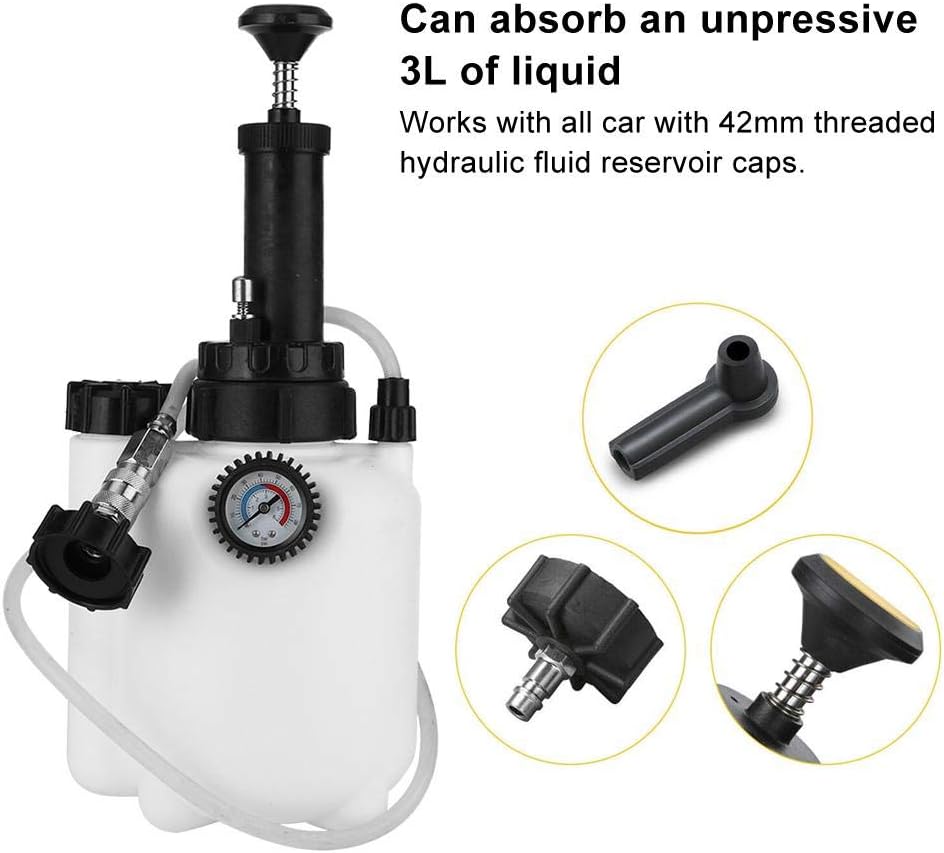
Figure 5.1: The main bleeder unit connected to a brake fluid reservoir, highlighting its capacity and cap compatibility.
6. Operating Instructions
Once the kit is set up, proceed with the bleeding or flushing process:
- Build Pressure: Use the hand pump on the main bleeder unit to pressurize the system. Observe the pressure gauge and maintain a working pressure between 10-30 PSI (0.7-2.0 bar). Do not exceed 80 PSI (6 bar).
- Bleed Brakes: Starting with the brake caliper or wheel cylinder furthest from the master cylinder (typically the rear passenger side), open the bleeder screw approximately 1/4 to 1/2 turn.
- Monitor Fluid: Observe the fluid flowing into the waste collection bottle. Air bubbles will appear as the system is purged. Continue to let fluid flow until no more air bubbles are visible and the fluid appears clean (if flushing).
- Close Bleeder Screw: Once the fluid is clear of bubbles, tighten the bleeder screw.
- Repeat for All Wheels: Repeat the bleeding process for the remaining wheels, typically in the order: rear driver side, front passenger side, front driver side.
- Depressurize and Disconnect: After bleeding all wheels, release the pressure from the main bleeder unit. Carefully disconnect the pressure hose from the reservoir cap and remove the cap.
- Check Fluid Level: Top up the brake fluid reservoir to the MAX line with fresh brake fluid.
- Test Brakes: Before driving, pump the brake pedal several times to ensure a firm pedal feel. Test the brakes at low speed in a safe area.
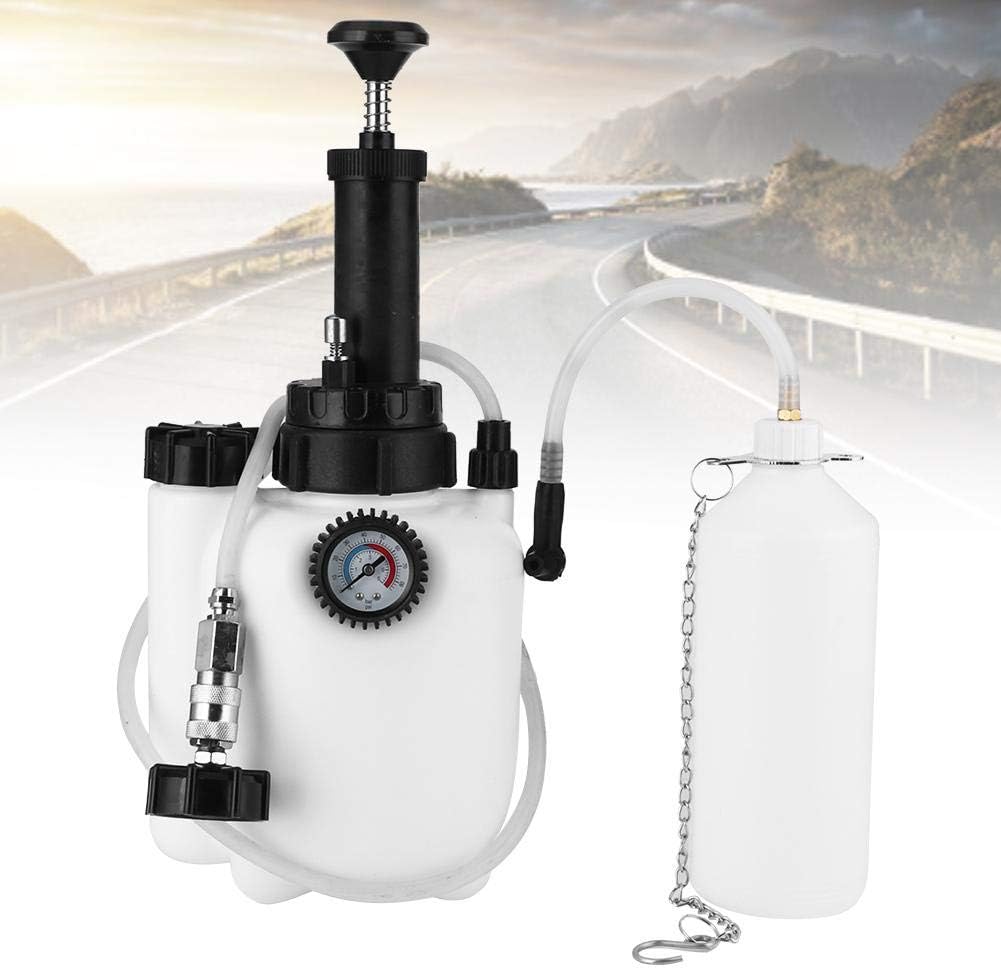
Figure 6.1: The brake bleeder kit connected and ready for operation.
7. Maintenance
Proper maintenance ensures the longevity and reliable performance of your brake bleeder kit:
- Cleaning: After each use, thoroughly clean the main unit, hoses, and collection bottle with appropriate cleaning agents to remove all traces of brake fluid. Rinse with water and allow to air dry completely.
- Inspection: Regularly inspect all hoses, connections, and seals for signs of wear, cracks, or damage. Replace any worn components immediately.
- Storage: Store the kit in a clean, dry place, away from direct sunlight and extreme temperatures.
8. Troubleshooting
| Problem | Possible Cause | Solution |
|---|---|---|
| System does not hold pressure. | Loose connections, damaged hose, faulty reservoir cap seal. | Check all connections for tightness. Inspect hoses for cracks. Ensure the reservoir cap creates a proper seal; a new gasket may be required. |
| Brake fluid leaks from connections. | Connections not tight enough, damaged O-rings or seals. | Tighten all connections. Inspect and replace any damaged O-rings or seals. |
| Air bubbles continue to appear in fluid. | Air entering through a loose connection, bleeder screw not fully open, or air in the main bleeder unit. | Verify all connections are secure. Ensure the bleeder screw is open sufficiently. Check the main bleeder unit for air leaks. |
| Pressure gauge not working. | Gauge malfunction or blockage. | Ensure there are no blockages in the pressure line. If the gauge still does not function, it may require replacement. |
9. Warranty and Support
For warranty information or technical support regarding your koulate 3L Manual Brake Bleeder Kit, please contact the manufacturer or your point of purchase. Keep your purchase receipt as proof of purchase.
Manufacturer: koulate
Model Number: koulateways8chun3