LAFORMO LSWRGM002+003
LAFORMO Front Power Window Regulator with Motor Assembly
Instruction Manual for GM Trucks & SUVs (2000-2006)
1. Introduction
This manual provides detailed instructions for the installation, operation, and maintenance of your LAFORMO Front Power Window Regulator with Motor Assembly. This product is designed as a direct replacement part for specific Chevrolet, Cadillac, and GMC vehicle models. Please read this manual thoroughly before beginning installation to ensure proper function and safety.
2. Product Overview
The LAFORMO Power Window Regulator with Motor Assembly is an integrated unit responsible for raising and lowering the vehicle's window glass. It includes the regulator mechanism and the electric motor, providing a complete solution for window repair.
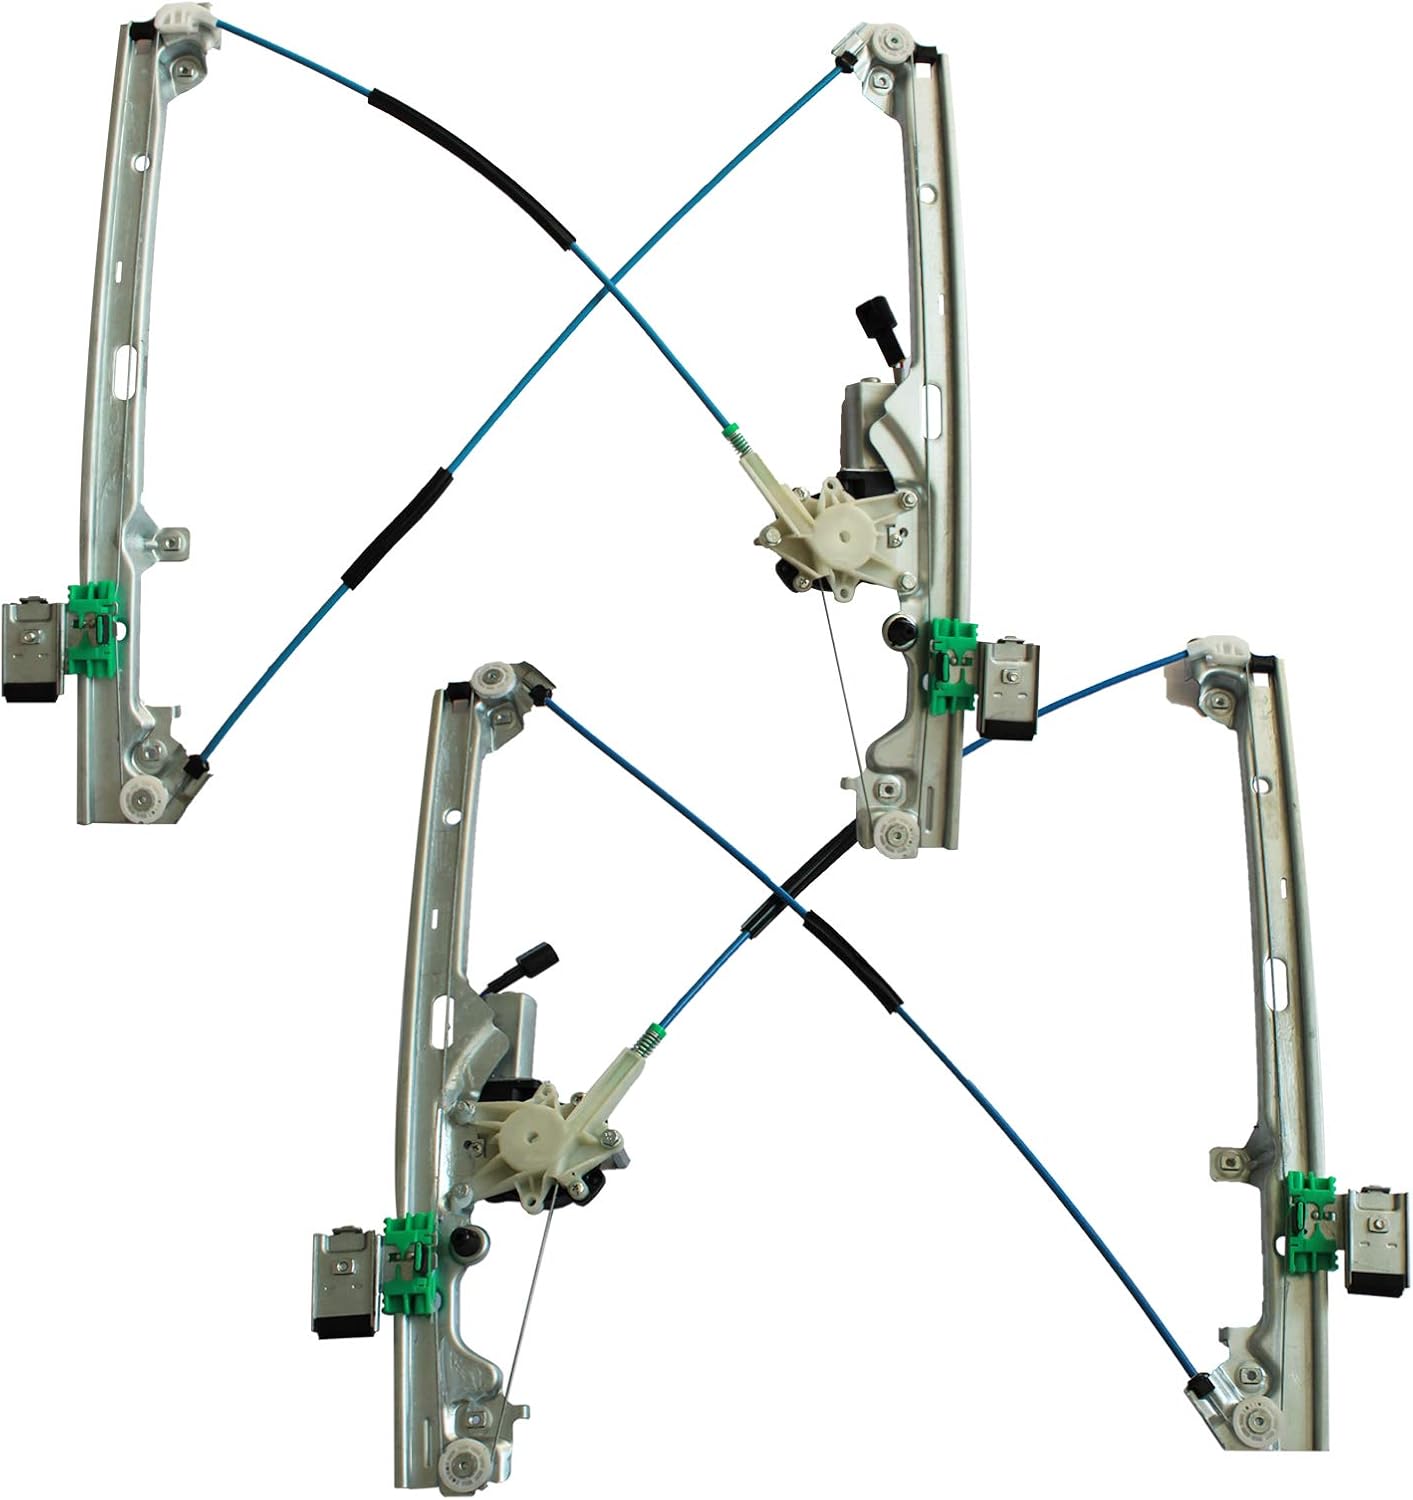
Image 2.1: Overview of the LAFORMO Front Power Window Regulator with Motor Assembly.
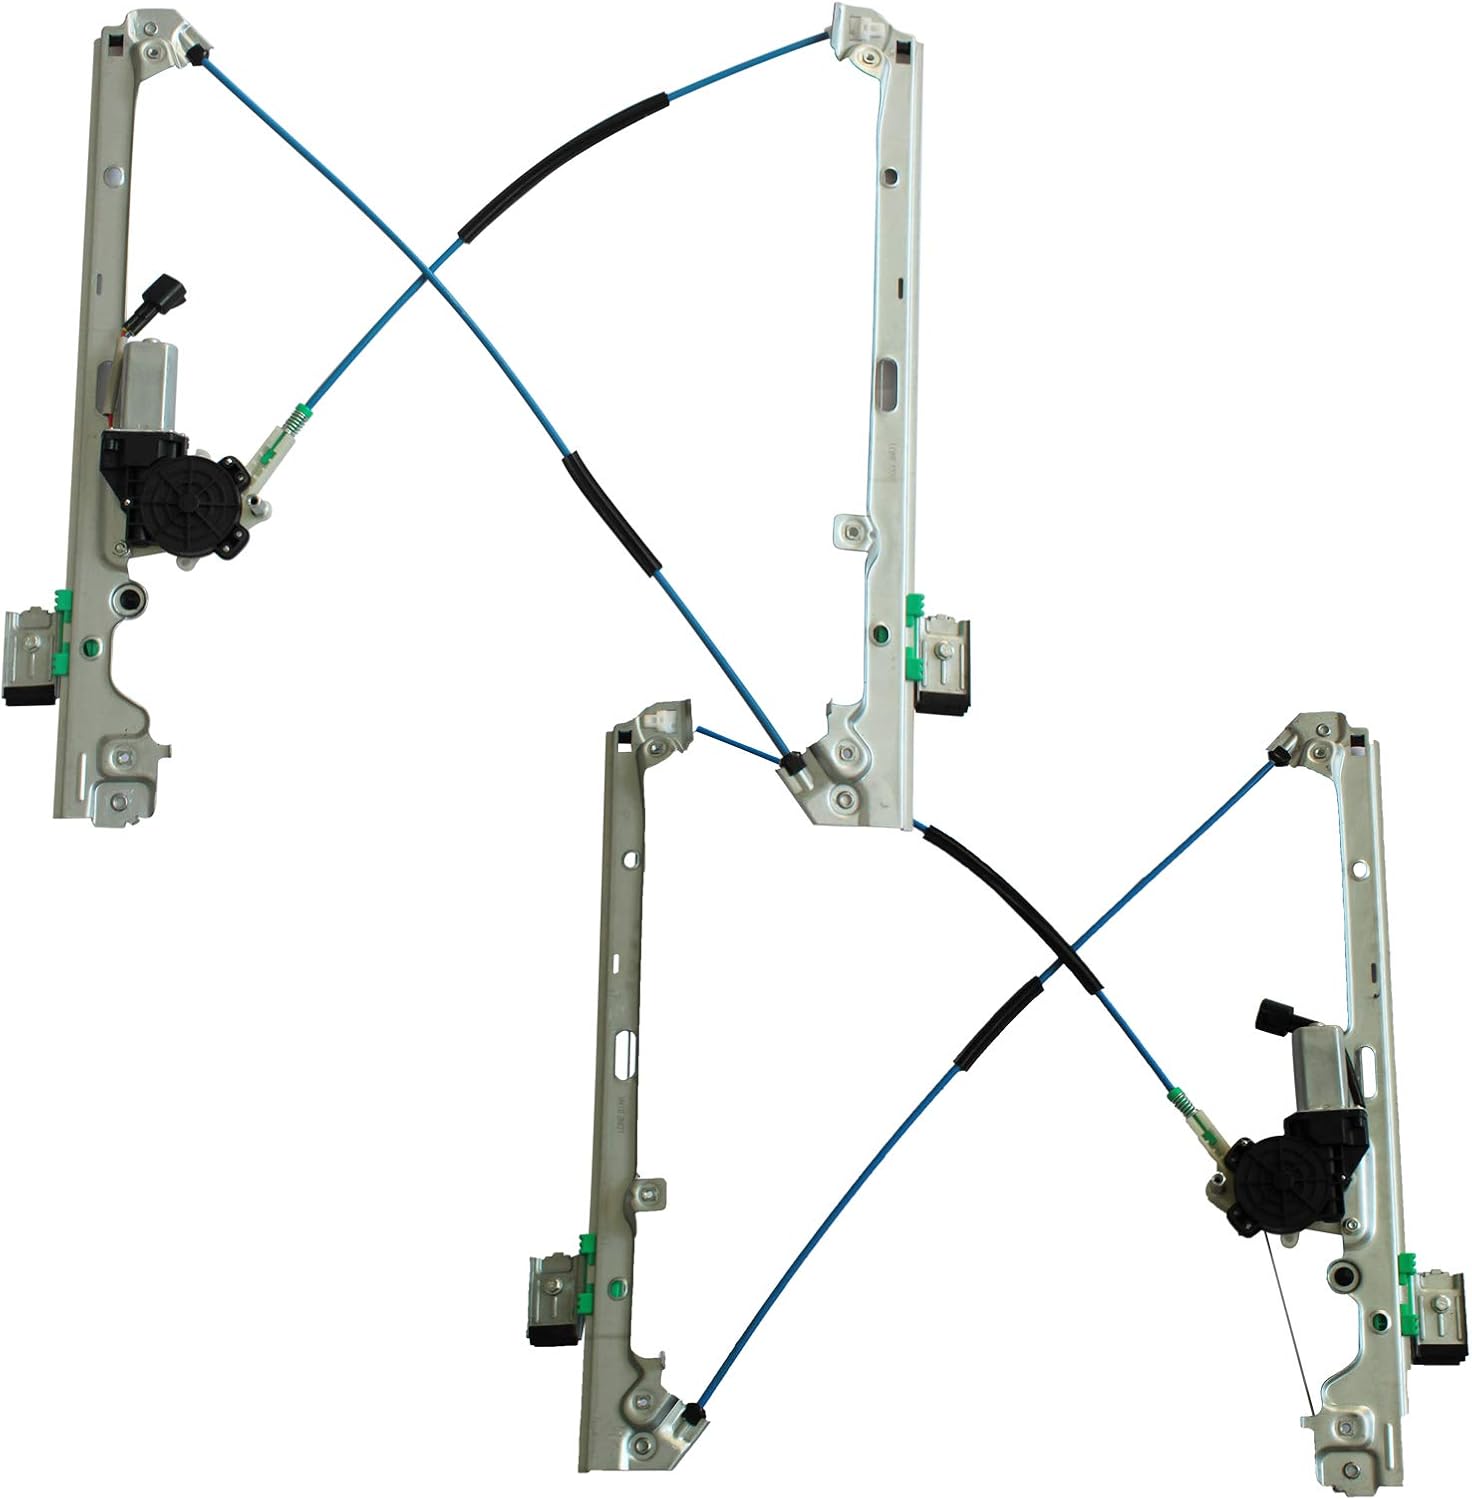
Image 2.2: Another view of the LAFORMO Power Window Regulator Assembly, showing the cable and motor components.
3. Compatibility
This LAFORMO Power Window Regulator with Motor Assembly is compatible with the following vehicle models and years:
- Chevrolet: Silverado 1500, 2500, 3500 (2000-2006), Tahoe (2000-2006), Suburban (2000-2006), Avalanche (2000-2006)
- Cadillac: Escalade (2002-2006)
- GMC: Yukon (2000-2006), Yukon XL (2000-2006), Sierra 1500, 2500, 3500 (2000-2006)
This assembly is designed for the Front Left (Driver Side) and Front Right (Passenger Side) of the vehicle.
4. Setup and Installation
Safety Precaution: Before beginning any automotive repair, ensure the vehicle's battery is disconnected to prevent electrical shorts or accidental operation of components. Wear appropriate personal protective equipment, such as gloves and eye protection.
Required Tools (Not Included):
- Socket Wrench Set
- Screwdriver Set (Phillips and Flathead)
- Trim Panel Removal Tool
- Torx Bit Set (if applicable)
- Pliers
Installation Steps:
- Prepare the Vehicle: Park the vehicle on a level surface and engage the parking brake. Disconnect the negative terminal of the vehicle's battery.
- Remove Door Panel: Carefully remove the interior door panel. This typically involves removing screws hidden behind trim pieces, door handles, and window switch bezels. Use a trim panel removal tool to pry off the panel without damaging clips.
- Access Window Regulator: Peel back the plastic moisture barrier from the door frame to expose the window regulator and motor assembly.
- Support Window Glass: If the window glass is still in place, secure it in the up position using tape or a wedge to prevent it from falling once the regulator is disconnected.
- Disconnect Electrical Connector: Unplug the electrical connector from the old window motor.
- Remove Window Glass from Regulator: Carefully detach the window glass from the regulator's mounting clips. Lower the glass slightly if necessary to access the clips. Once detached, secure the glass in the fully up position again.
- Remove Old Regulator: Unbolt the old window regulator and motor assembly from the door frame. Note the position of all mounting bolts.
- Install New Regulator: Position the new LAFORMO window regulator and motor assembly into the door frame. Align the mounting holes and secure it with the original bolts. Do not overtighten.
- Attach Window Glass: Carefully reattach the window glass to the new regulator's mounting clips. Ensure the glass is seated correctly and securely.
- Reconnect Electrical: Plug the electrical connector into the new window motor.
- Test Functionality: Reconnect the vehicle's battery. Test the window's up and down operation using the window switch. Ensure smooth movement and full travel. If the window operates slowly or makes unusual noises, recheck all connections and mounting points.
- Reassemble Door Panel: Once proper operation is confirmed, reattach the plastic moisture barrier and reinstall the interior door panel, ensuring all clips and screws are secured.
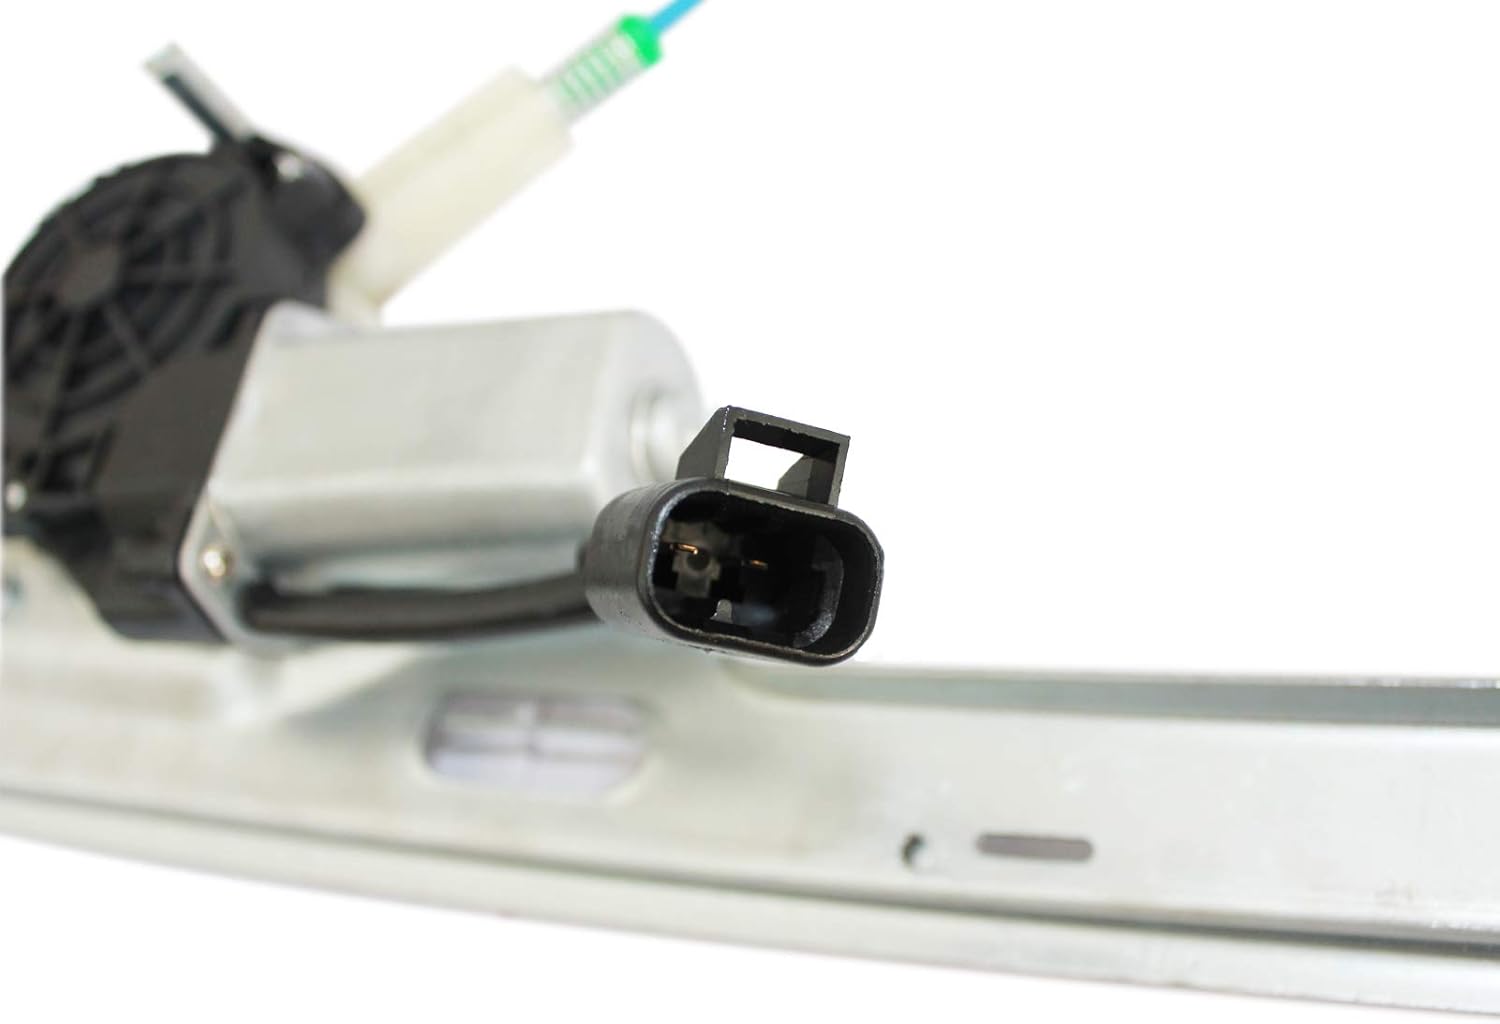
Image 4.1: Close-up view of the electrical connector on the window motor. Ensure this is disconnected before proceeding.
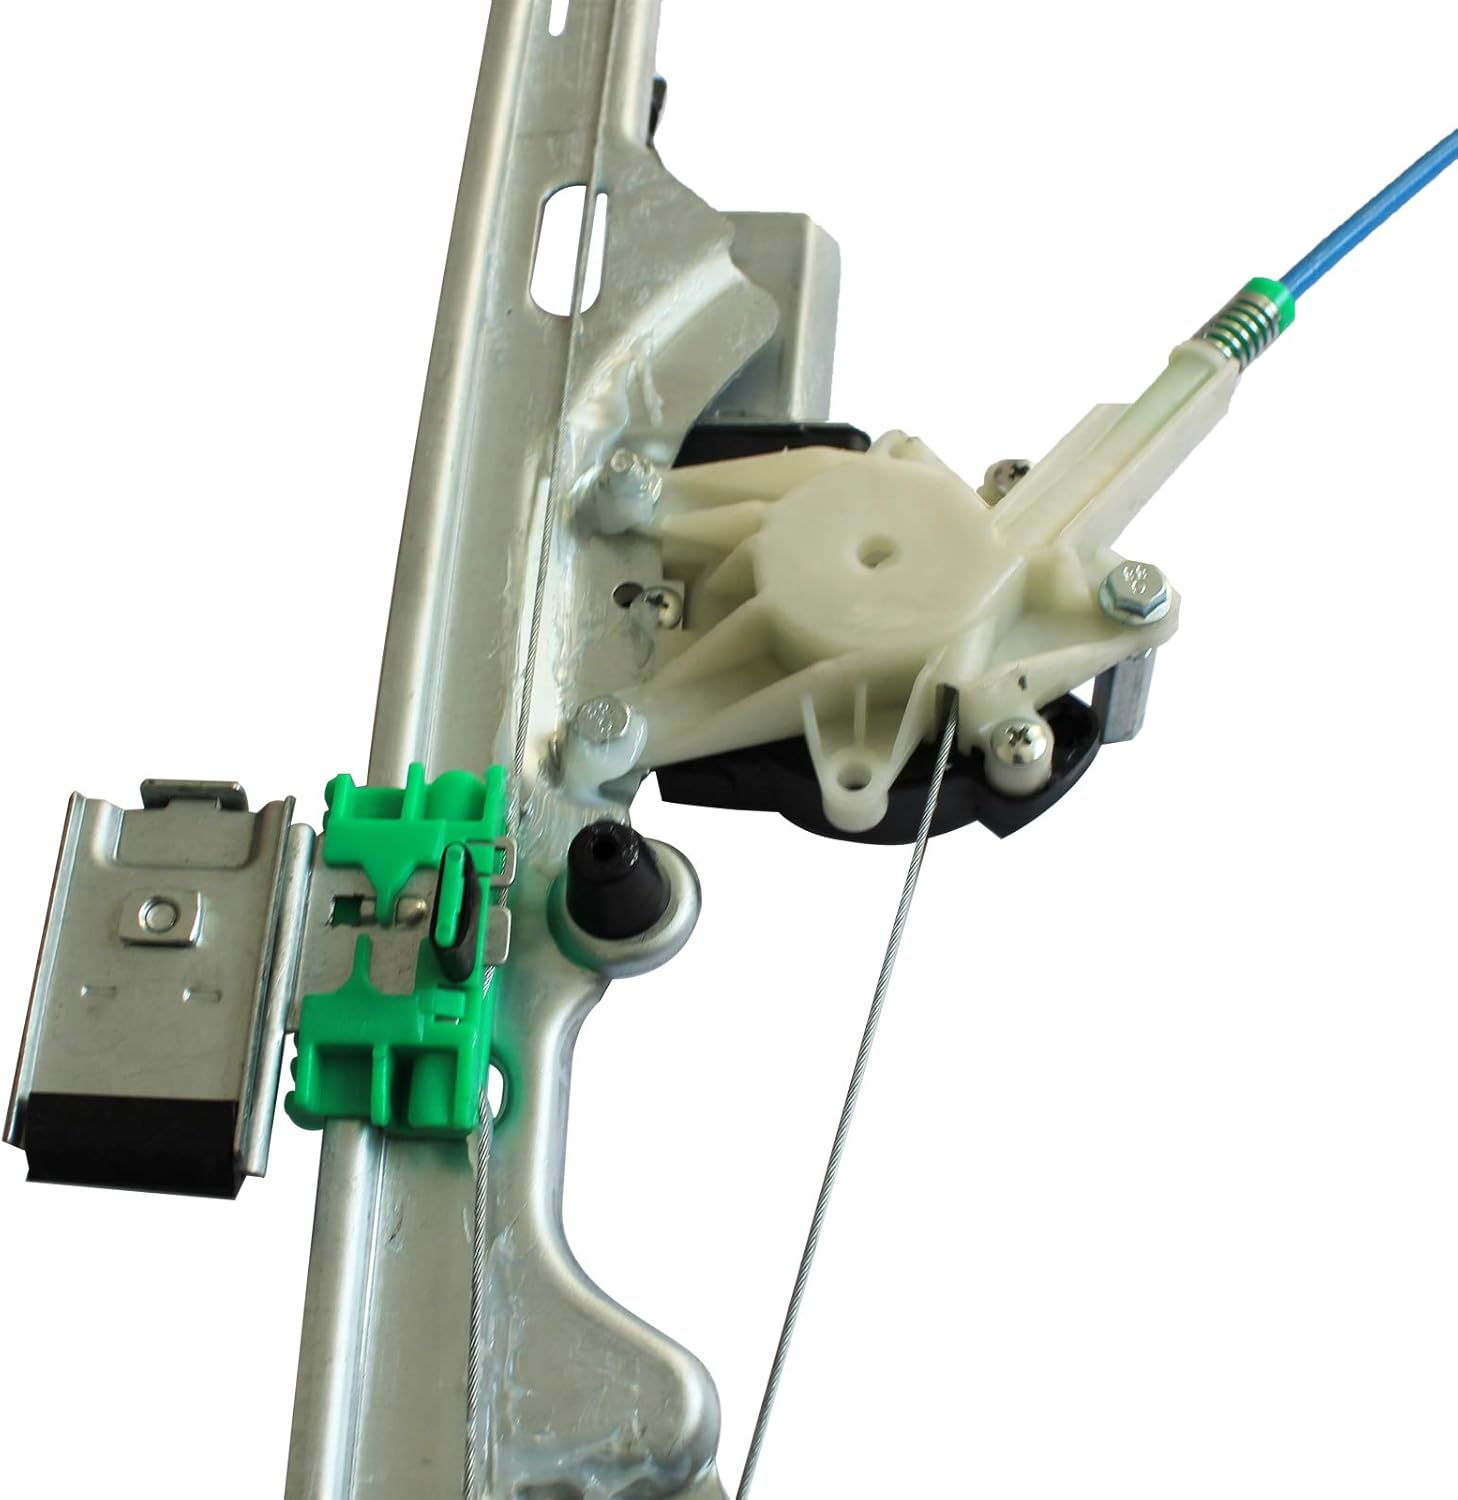
Image 4.2: Detail of the window regulator's mounting points and cable guide. These points align with the door frame.

Image 4.3: Close-up of the window motor and cable assembly, showing the integrated design.
5. Operating Instructions
After successful installation, the LAFORMO Power Window Regulator with Motor Assembly operates identically to the original factory unit. Use your vehicle's existing window switches to control the window's movement. Ensure no obstructions are present in the window path during operation.
6. Maintenance
The LAFORMO Power Window Regulator with Motor Assembly is designed for long-term, maintenance-free operation. However, the following general maintenance tips can help ensure optimal performance:
- Keep Window Tracks Clean: Periodically clean the window tracks to remove dirt and debris that can impede window movement.
- Inspect Electrical Connections: If you experience intermittent issues, check the electrical connector for corrosion or looseness.
- Avoid Excessive Force: Do not attempt to force the window if it encounters an obstruction. This can damage the motor or regulator mechanism.
7. Troubleshooting
If you encounter issues with your LAFORMO Power Window Regulator, consider the following troubleshooting steps:
- Window Does Not Move:
- Check the vehicle's fuse box for a blown fuse related to the power windows.
- Ensure the electrical connector to the motor is securely plugged in.
- Verify the window switch is functioning correctly (you may need to test with a multimeter or swap with a known good switch).
- Window Moves Slowly or Jerkily:
- Inspect the window tracks for dirt, debris, or worn weatherstripping that might be causing friction. Clean or lubricate as necessary.
- Ensure all mounting bolts for the regulator are secure but not overtightened, which could cause binding.
- Check the vehicle's battery voltage; low voltage can affect motor performance.
- Grinding or Popping Noises:
- This may indicate an issue with the regulator cables or gears. Re-inspect the installation to ensure no components are binding or misaligned.
- If the noise persists, professional inspection may be required.
If these steps do not resolve the issue, it is recommended to consult a qualified automotive technician.
8. Specifications
| Feature | Specification |
|---|---|
| Brand | LAFORMO |
| Part Number | LSWRGM002+003 |
| Placement on Vehicle | Front Left (Driver Side), Front Right (Passenger Side) |
| Motor Included | Yes |
| Fitment Type | Direct Replacement |
| Material | Acrylonitrile Butadiene Styrene (Handle), Powder Coated Finish |
| Item Weight | Approximately 8.98 - 9 Pounds |
| Package Dimensions | Approximately 24.5 x 12 x 5 inches |
| UPC | 738712272513 |
9. Warranty Information
This LAFORMO Power Window Regulator with Motor Assembly comes with a 1-year unlimited-mileage quality guarantee. This warranty covers defects in materials and workmanship under normal use. For warranty claims or further details, please contact LAFORMO customer support.
10. Support
For technical assistance, installation questions, or warranty inquiries, please refer to the contact information provided with your purchase or visit the official LAFORMO website. When contacting support, please have your product model number (LSWRGM002+003) and purchase details readily available.
Ask a question about this manual
Ask about setup, troubleshooting, compatibility, parts, safety, or missing instructions. Manuals+ will review the question and use this page’s manual context to help answer it.