
1. Introduction
Thank you for choosing the HH-G01 Pneumatic Engraver. This high-quality tool is designed for precision engraving tasks, offering excellent control and performance for jewelry making, metalworking, and other detailed applications. This manual provides essential information for the safe and efficient operation, setup, maintenance, and troubleshooting of your engraver. Please read it thoroughly before use to ensure optimal performance and longevity of the device.
2. Safety Instructions
Always observe the following safety precautions to prevent injury or damage to the equipment:
- Read all instructions: Before operating the engraver, read and understand all safety warnings and operating instructions.
- Eye Protection: Always wear appropriate eye protection (safety glasses or goggles) to shield against flying debris.
- Hearing Protection: Wear hearing protection during extended use, as pneumatic tools can generate noise.
- Respiratory Protection: If engraving materials that produce dust or fumes, use appropriate respiratory protection.
- Work Area: Ensure your work area is clean, well-lit, and free from clutter. Keep children and bystanders away.
- Ventilation: Work in a well-ventilated area to disperse any fumes or dust.
- Secure Workpiece: Always secure the workpiece firmly to prevent movement during engraving.
- Air Supply: Use a clean, dry, regulated air supply. Do not exceed the recommended air pressure.
- Disconnect Power: Always disconnect the power and air supply before changing accessories, performing maintenance, or when the tool is not in use.
- Avoid Accidental Starting: Ensure the power switch is off before connecting to a power source.
- Proper Attire: Do not wear loose clothing, jewelry, or long hair that could get caught in moving parts.
- Tool Condition: Do not operate the engraver if it is damaged or malfunctioning. Seek professional repair.
3. Product Overview
The HH-G01 Pneumatic Engraver system consists of the main control unit, two impact handpieces, a foot control, and an air filter/regulator unit. Below are images illustrating the main components.
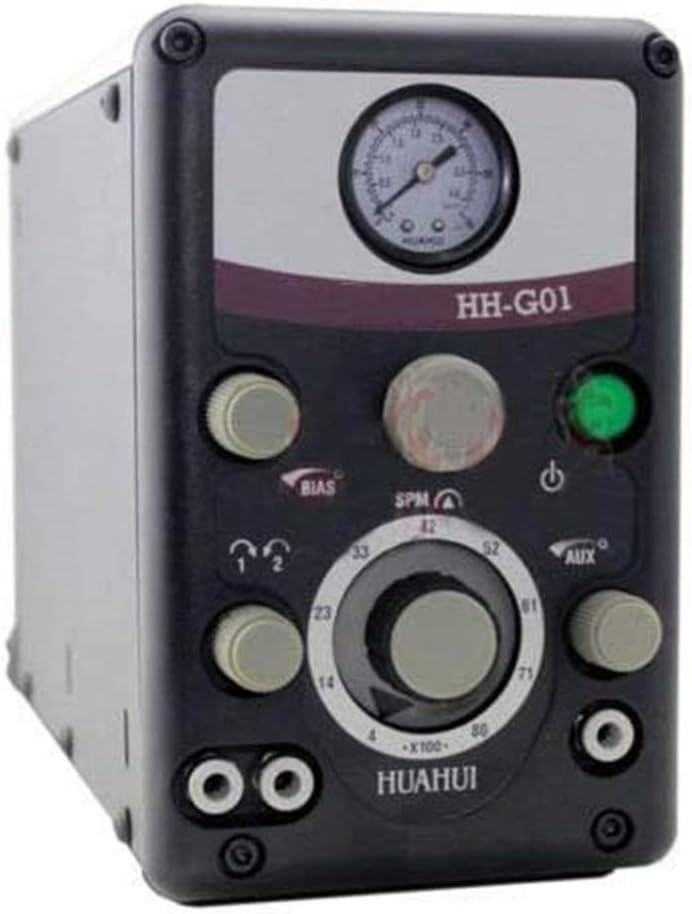
Figure 3.1: Front view of the HH-G01 Pneumatic Engraver main unit. This unit houses the controls for strokes per minute (SPM), throttle bias, and air pressure adjustment, along with connections for handpieces and auxiliary air tools.
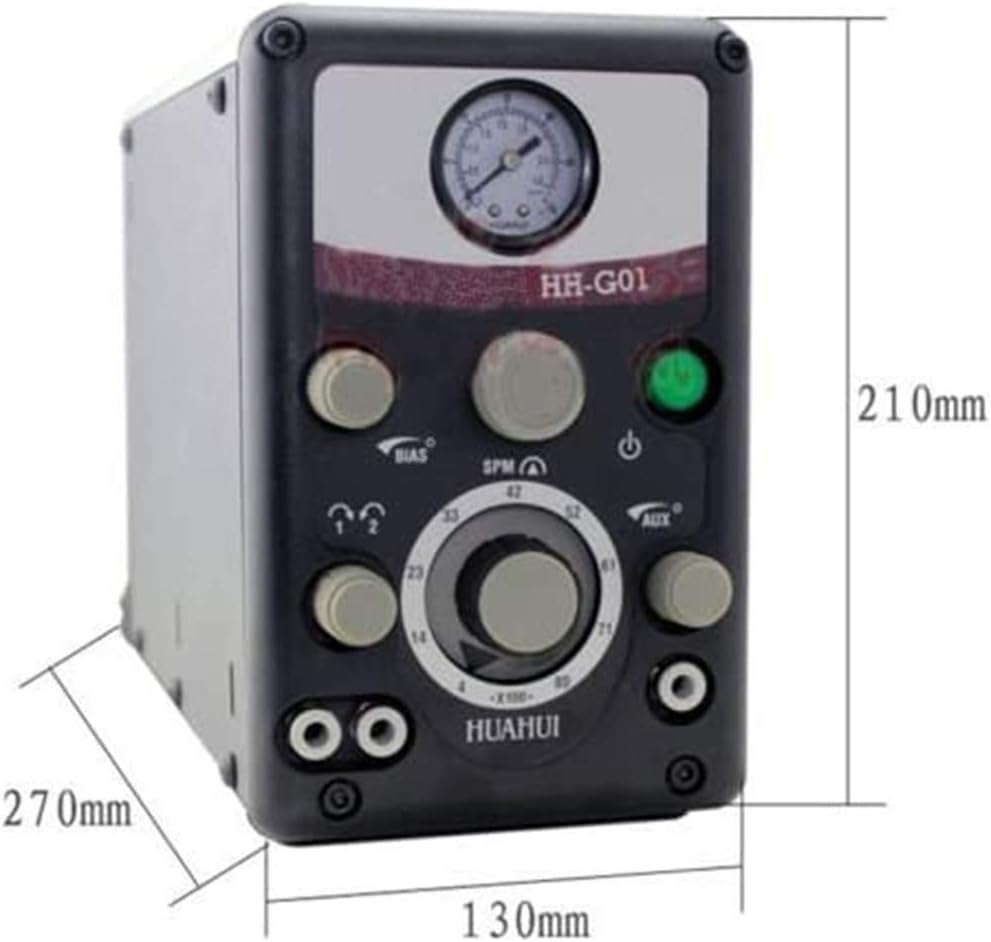
Figure 3.2: The HH-G01 main unit with approximate dimensions: 270mm (depth), 130mm (width), and 210mm (height). These dimensions provide an understanding of the unit's physical footprint.
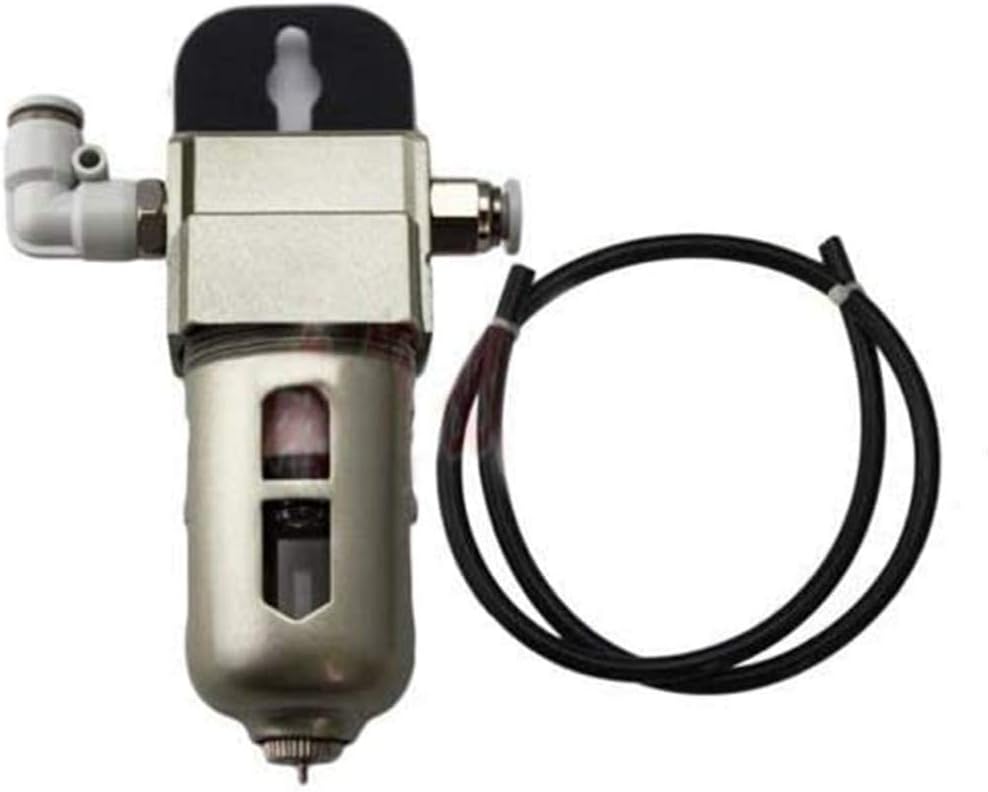
Figure 3.3: The external air filter and regulator unit. This component is crucial for ensuring a clean and regulated air supply to the engraver, protecting internal components and ensuring consistent performance.

Figure 3.4: One of the impact handpieces included with the HH-G01, shown with its connecting air hose. The system supports two such handpieces for versatile engraving operations.
Key Features:
- Strokes Per Minute (SPM): Adjustable from 400 to 8000 strokes per minute for various engraving needs.
- Throttle Bias Adjustment: Allows for fine-tuning of throttle response.
- Dual-Stage Precision Air Regulator: Ensures consistent and precise air pressure delivery.
- Dual Handpiece Connections: Supports two impact handpieces simultaneously.
- Auxiliary Air Connection: For connecting other air tools, such as a rotary handpiece.
- Foot Control: Provides hands-free operation and precise control over engraving.
4. Setup
Follow these steps to set up your HH-G01 Pneumatic Engraver:
- Unpacking: Carefully remove all components from the packaging. Verify that all parts listed in the packing list are present.
- Placement: Place the main engraver unit on a stable, level surface in a well-ventilated area.
- Power Connection: Ensure the power switch on the engraver unit is in the OFF position. Connect the power cord to the engraver unit and then to a compatible 110V/60Hz or 220V/50Hz power outlet, depending on your model.
- Air Supply Connection:
- Connect your air compressor (not included) to the inlet of the external air filter/regulator unit.
- Connect the outlet of the air filter/regulator unit to the main air inlet on the HH-G01 engraver unit.
- Ensure all air connections are secure and leak-free.
- Handpiece Connection: Connect the air hoses from the impact handpieces to the designated ports on the front of the engraver unit. The HH-G01 has connections for two handpieces.
- Foot Control Connection: Plug the foot control cable into the corresponding port on the engraver unit.
- Auxiliary Air Tool (Optional): If using an auxiliary air tool (e.g., rotary handpiece), connect it to the auxiliary air connection port.
5. Operating Instructions
Once the engraver is set up, follow these steps for operation:
- Turn On Air Compressor: Activate your air compressor and allow it to build sufficient pressure.
- Adjust Air Pressure: Use the external air regulator to set the incoming air pressure to the recommended range for engraving (refer to specifications or handpiece requirements). The HH-G01 also has a front air pressure adjustment for fine-tuning.
- Power On Engraver: Flip the power switch on the HH-G01 main unit to the ON position.
- Select Handpiece: If using two handpieces, ensure the correct handpiece is selected or ready for use.
- Adjust Strokes Per Minute (SPM): Use the SPM dial on the front panel to set the desired impact frequency. A lower SPM is suitable for delicate work, while a higher SPM is for faster material removal. The range is 400-8000 strokes per minute.
- Adjust Throttle Bias: The throttle bias adjustment valve allows you to tailor the throttle response of the handpiece. Experiment with this setting to find the optimal feel for your engraving style.
- Engraving: Hold the handpiece firmly and position the graver tip on the workpiece. Depress the foot control to activate the impact mechanism. Apply gentle, consistent pressure and guide the handpiece along your desired path.
- Practice: It is highly recommended to practice on scrap material before working on your final piece to get accustomed to the tool's feel and settings.
- Shut Down: When finished, release the foot control, turn off the engraver unit, and then turn off the air compressor. Bleed any remaining air pressure from the system before disconnecting.
6. Maintenance
Regular maintenance ensures the longevity and optimal performance of your HH-G01 Pneumatic Engraver:
- Air Filter: Regularly check and drain the moisture trap on the external air filter. Replace the filter element as needed to ensure a clean, dry air supply.
- Lubrication: Periodically add a few drops of pneumatic tool oil into the air inlet of the handpieces or the main unit (if specified by manufacturer) to lubricate internal components. Do not over-lubricate.
- Cleanliness: Keep the engraver unit and handpieces clean and free from dust and debris. Use a soft, dry cloth for cleaning. Avoid using harsh chemicals.
- Hoses and Connections: Inspect air hoses and connections regularly for signs of wear, cracks, or leaks. Replace damaged hoses immediately.
- Graver Sharpening: Keep your graver tips sharp for best results. Dull gravers can lead to poor performance and increased effort.
- Storage: Store the engraver in a clean, dry environment when not in use.
7. Troubleshooting
If you encounter issues with your HH-G01 Pneumatic Engraver, refer to the following common problems and solutions:
| Problem | Possible Cause | Solution |
|---|---|---|
| No impact from handpiece |
|
|
| Weak or inconsistent impact |
|
|
| Air leaks |
|
|
| Unit not powering on |
|
|
If the problem persists after attempting these solutions, please contact customer support for further assistance.
8. Specifications
- Model: HH-G01
- Voltage: 110V/60Hz or 220V/50Hz (model dependent)
- Weight: Approximately 9.5 kg (20.9 lbs)
- Strokes Per Minute (SPM): 400 - 8000
- Air Pressure Requirement: Refer to handpiece specifications, typically 0-4 bar (0-58 PSI) adjustable.
- Manufacturer: Hengwei
- Part Number: CNC5139-1@BJ
- Material: Other (refer to product description for specific material composition)
9. Warranty and Support
For warranty information, please refer to the terms and conditions provided at the time of purchase or contact your seller directly. Keep your proof of purchase for any warranty claims.
For technical support, spare parts, or service inquiries, please contact the manufacturer or your authorized dealer. Provide your product model number (HH-G01) and serial number (if applicable) when seeking support to expedite assistance.
Manufacturer: ele ELEOPTION
Contact Information: Please refer to the contact details provided with your purchase or visit the official ele ELEOPTION store on Amazon for support options.