1. Introduction
Thank you for choosing the SUPNOVA Waterproof Digital Battery Monitor. This device is designed to accurately display battery voltage, remaining capacity percentage, and temperature for a wide range of battery types and applications. Its robust, waterproof design ensures reliable performance in various environments.
This manual provides detailed instructions for the proper installation, configuration, and operation of your battery monitor. Please read it thoroughly before use to ensure optimal performance and longevity of the product.

Image 1.1: The SUPNOVA Waterproof Digital Battery Monitor, displaying voltage and battery percentage.
2. Product Features
- Wide Application: Suitable for electric motorcycles, cars, golf carts, automotive, marine, RVs, and boats.
- Versatile Battery Compatibility: Compatible with 7-100V (12V, 24V, 36V, 48V, 60V, 72V, 84V) Ternary lithium batteries, lead-acid batteries, and lithium iron phosphate batteries. Default setting is for 12V lead-acid batteries.
- Enhanced Protection: Features a fully closed shell with IPX7 waterproof and dustproof ratings, making it suitable for both indoor and outdoor use. Includes input reverse connection protection. Designed to operate without generating excessive heat, even during prolonged high-voltage use.
- Buzzer Alarm & Temperature Display: Equipped with a configurable low and high voltage buzzer alarm. Users can switch between voltage and Celsius temperature display by briefly pressing the 'M' key.
- Power-off Memory: Retains all user settings even after power is removed, eliminating the need for re-configuration.
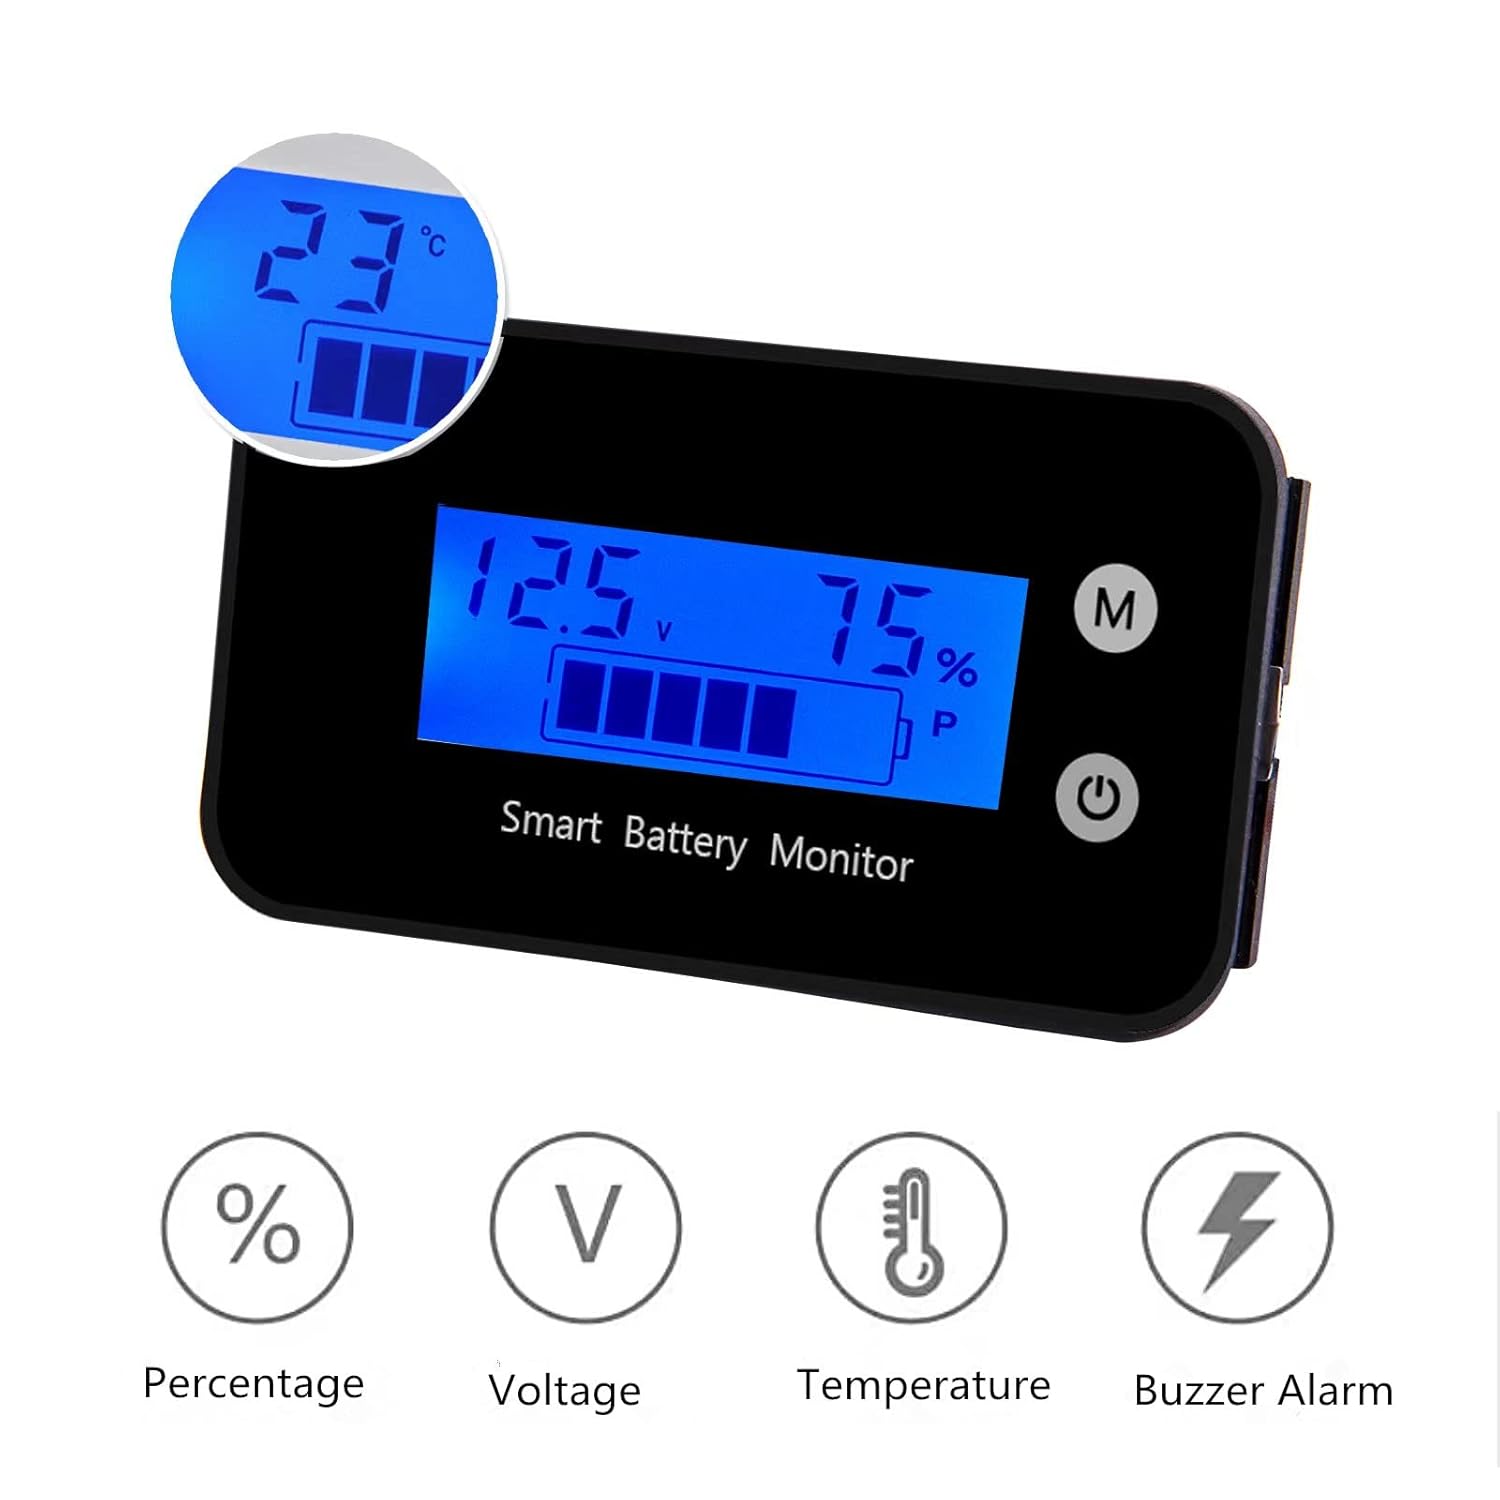
Image 2.1: Display features including percentage, voltage, temperature, and buzzer alarm indicators.
3. Specifications
| Specification | Detail |
|---|---|
| Product Dimensions | 2.4 x 1.4 x 0.5 inches (64 x 36 x 15.3 mm) |
| Item Weight | 0.63 Ounces (17.86 grams) |
| Brand | SUPNOVA |
| Manufacturer | SUPNOVA |
| ASIN | B08HV99FCS |
| Power Source | DC |
| Style | Digital |
| Color | Blue |

Image 3.1: Detailed dimensions of the battery monitor.
4. Setup
4.1 Wiring Instructions
The battery monitor requires a direct connection to your battery system. Follow these steps for proper wiring:
- Ensure the power source is disconnected before beginning installation.
- Connect the red wire from the monitor to the positive (+) terminal of your battery.
- Connect the black wire from the monitor to the negative (-) terminal of your battery.
- The wires are approximately 15.75 inches (40 cm) long. Ensure connections are secure.
4.2 Mounting
The monitor can be mounted using the provided double-sided adhesive. Choose a flat, clean surface for mounting. Alternatively, the monitor's design allows for flush mounting into a panel cutout.

Image 4.1: Wiring diagram showing red wire to positive and black wire to negative battery terminals.

Image 4.2: Rear view of the monitor with connected red and black wires.
5. Operating Instructions
5.1 Powering On/Off
Once correctly wired, the monitor will power on automatically when connected to a battery. To turn the display off or on, briefly press the power button (usually marked with a circle and vertical line symbol).
5.2 Display Modes
The monitor can display voltage, battery capacity percentage, and temperature. Briefly press the 'M' (Mode) button to cycle through the available display modes. The temperature is displayed in Celsius.
5.3 Setting Parameters (Configuration Modes)
The monitor features various configuration modes to adapt to different battery types and set alarm thresholds. Accessing and adjusting these settings typically involves a combination of long presses and short presses of the 'M' and power buttons. Specific mode numbers (e.g., Mode 1, Mode 2) and their functions are detailed below:
- Entering Settings: To enter the setting menu, typically press and hold the 'M' button for several seconds until the display changes to a setting mode indicator (e.g., 'P' for battery type).
- Navigating Modes: Once in settings, short press the 'M' button to cycle through different setting modes (e.g., battery type, display timeout, voltage thresholds).
- Adjusting Values: Use the power button (or another designated button) to increase or decrease values within a selected setting mode.
- Saving Settings: After making adjustments, typically a long press of the 'M' button or waiting for a timeout will save the settings and exit the configuration menu.
Important: Refer to the specific instructions provided with your product for the exact sequence of button presses and mode definitions, as these can vary slightly. Incorrect settings can lead to inaccurate readings or improper alarm functions.
5.4 Buzzer Alarm
The monitor can be configured to sound an alarm for low or high voltage conditions. These thresholds are set within the configuration modes. To silence an active alarm, briefly press the 'M' button.
6. Maintenance
6.1 Cleaning
To clean the monitor, gently wipe the display and casing with a soft, damp cloth. Avoid using abrasive cleaners or solvents, as these can damage the screen or housing.
6.2 Waterproofing
The monitor features an IPX7 waterproof rating, meaning it can withstand immersion in water up to 1 meter for 30 minutes. While designed for outdoor use and exposure to splashes, ensure the wiring connections are also protected from moisture to prevent corrosion or short circuits.

Image 6.1: The battery monitor submerged in water, illustrating its IPX7 waterproof design.
7. Troubleshooting
- Display Not Working:
- Check all wiring connections to ensure they are secure and correctly connected to the battery's positive and negative terminals.
- Verify that the battery has sufficient voltage to power the monitor (within the 7-100V range).
- Inaccurate Readings:
- Ensure the correct battery type and voltage parameters are set in the configuration modes. Refer to Section 5.3.
- For State of Charge (SoC) readings, note that this monitor primarily provides real-time voltage. SoC percentage is estimated based on voltage and may fluctuate with load. For a more accurate SoC, allow the battery to rest for a few minutes without load.
- Alarm Not Functioning:
- Check the low and high voltage alarm thresholds in the settings to ensure they are configured appropriately for your battery.
- Ensure the buzzer itself is not obstructed.
- Difficulty with Settings:
- The setup process can be intricate. Carefully follow the button press sequences outlined in the product's specific instructions.
- If you encounter persistent issues, consider resetting the device to factory defaults (if an option is available) and reconfiguring.
- Wire Durability:
- The monitor uses small gauge wires. When installing, avoid sharp bends or excessive tension on the wires, especially where they exit the unit. Consider adding strain relief or protective sleeving if the installation environment is harsh.
8. Warranty and Support
For warranty information or technical support, please contact SUPNOVA customer service through the retailer where the product was purchased or visit the official SUPNOVA website. Please have your product model (B08HV99FCS) and purchase details ready when contacting support.


