1. Introduction
The SYNCO G2(A2) PRO is a professional-grade dual-channel wireless lavalier microphone system designed for clear and stable audio recording. This system is ideal for various applications including vlogging, live streaming, interviews, and filmmaking, offering broad compatibility with cameras, smartphones, and tablets.

Figure 1: SYNCO G2(A2) PRO Wireless Lavalier Microphone System with Charging Case.
2. What's in the Box
Your SYNCO G2(A2) PRO package includes the following components:
- 1 x SYNCO G2(A2) Pro Wireless Lavalier Microphone with Charging Case
- 2 x External Lav Mic & Wind Muff & Magnet
- 1 x Type C - Type C Cable & Type C - USB A Adapter
- 1 x 3.5mm TRRS Smartphone Cable
- 1 x 3.5mm TRS Camera Cable
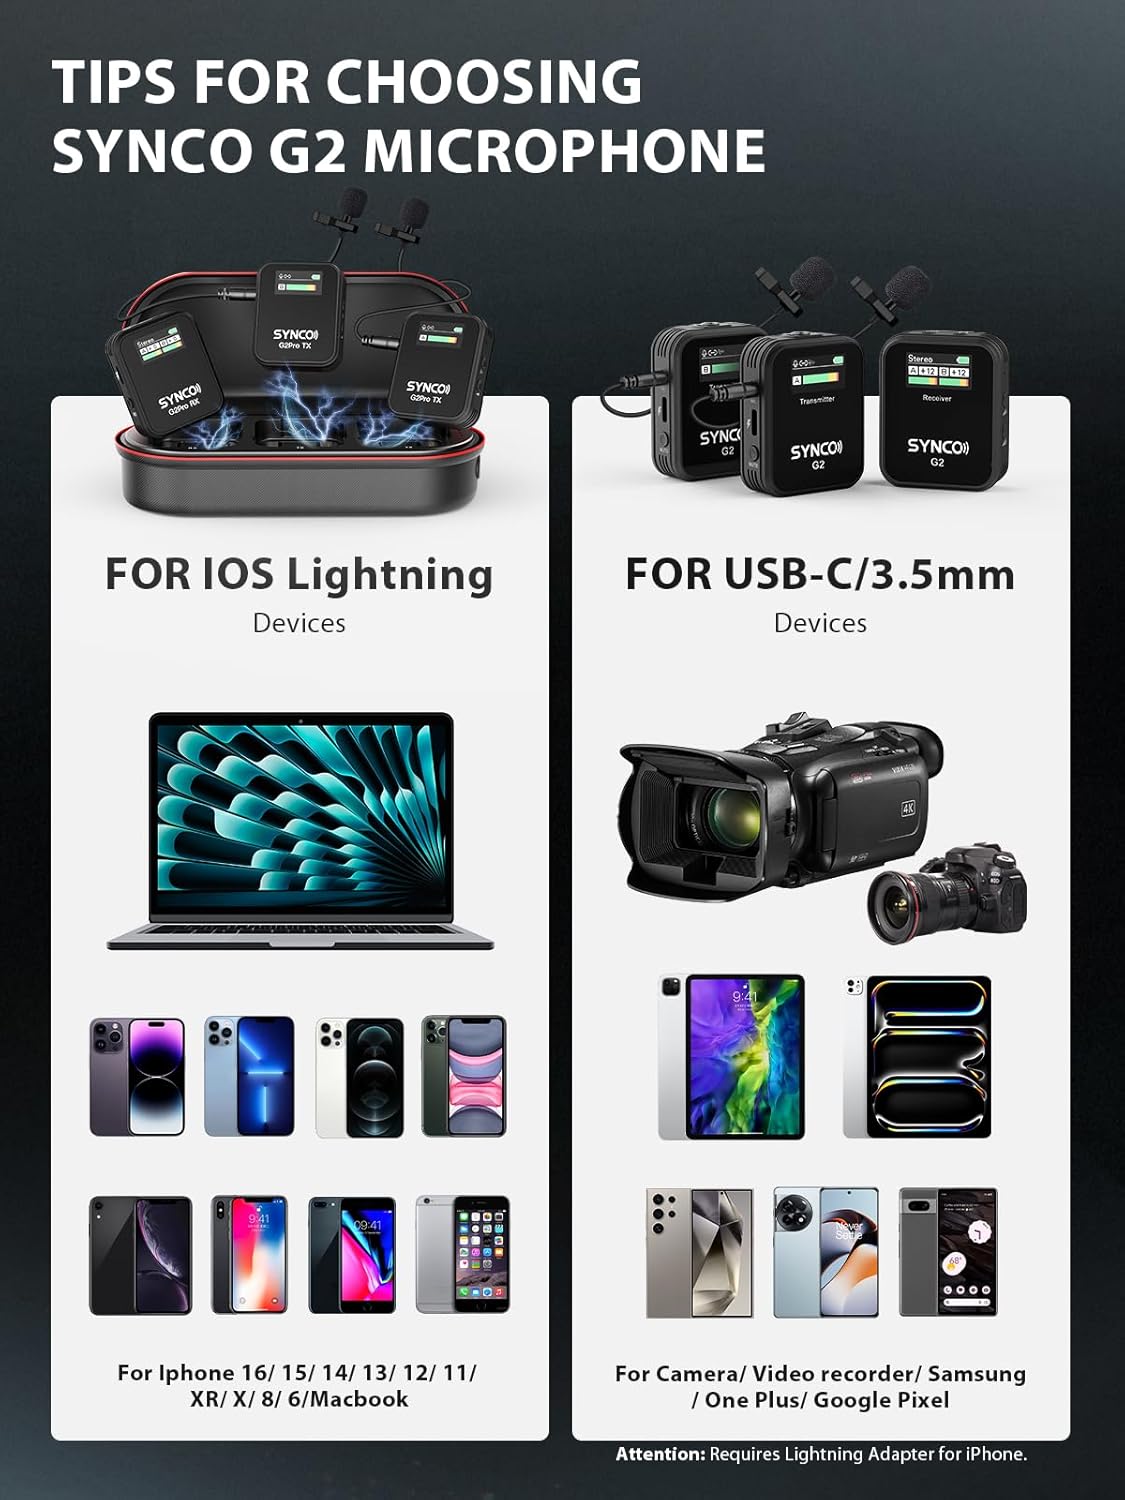
Figure 2: All components included in the SYNCO G2(A2) PRO package.
3. Product Features
- Digital 2.4GHz & Auto-Pairing: Utilizes 2.4GHz frequency spectrum and Syncoder technology for a secure, stable, and hassle-free audio system. Supports automatic connection between transmitter (TX) and receiver (RX) upon power-on.
- Dual-Channel System & Mono/Stereo/Safety Mode: Capable of handling two transmitters and one receiver simultaneously. Features switchable Mono, Stereo, or Safety output modes for flexible post-processing. The upgraded safety mode prevents whistling sounds.
- Universal Mic with 656 ft/200 m Stable Transmission: Offers a transmission range of up to 656 ft/200 m (Line of Sight). Integrated with a new upgraded DSP chip and includes 3.5 mm TRRS/TRS cables for clear, distortion-free sound with DSLRs, smartphones, PCs, tablets, and action cameras.
- Clearer TFT Display Screens: Bright, high-contrast TFT displays on TX and RX units show current recording mode, battery status, audio level, and gain settings clearly in various lighting conditions.
- Noise Reduction & Gain Control: One-Touch Noise Cancellation filters out ambient noises like wind and traffic. Gain control ranges from 0-6 levels for optimizing signal levels.
- One-Button Muting & Real-Time Monitoring: A dedicated mute button allows for temporary pauses without powering off the system. The receiver includes a 3.5 mm headphone jack for real-time audio monitoring.
4. Setup Instructions
4.1 Charging the System
The SYNCO G2(A2) PRO comes with a charging case that allows you to charge all units simultaneously. Connect the Type-C charging cable to the charging case. The units will begin charging automatically when placed in the case.

Figure 3: The SYNCO G2(A2) PRO units charging within their dedicated case.
4.2 Connecting to Your Device
The system offers versatile connectivity:
- For Cameras (DSLR/Mirrorless): Use the provided 3.5mm TRS camera cable. Connect one end to the RX unit's output port and the other end to your camera's microphone input.
- For Smartphones/Tablets (3.5mm Jack): Use the provided 3.5mm TRRS smartphone cable. Connect one end to the RX unit's output port and the other end to your device's 3.5mm audio jack.
- For Smartphones/Tablets (USB-C): Use the provided Type C - Type C cable. Connect one end to the RX unit's output port and the other end to your device's USB-C port.
- For iPhones/iPads (Lightning): An additional Lightning to 3.5mm adapter (not included) is required. Connect the 3.5mm TRRS smartphone cable to the RX unit and then to the Lightning adapter, which plugs into your iPhone/iPad.

Figure 4: Connecting the receiver to a camera using the TRS cable.
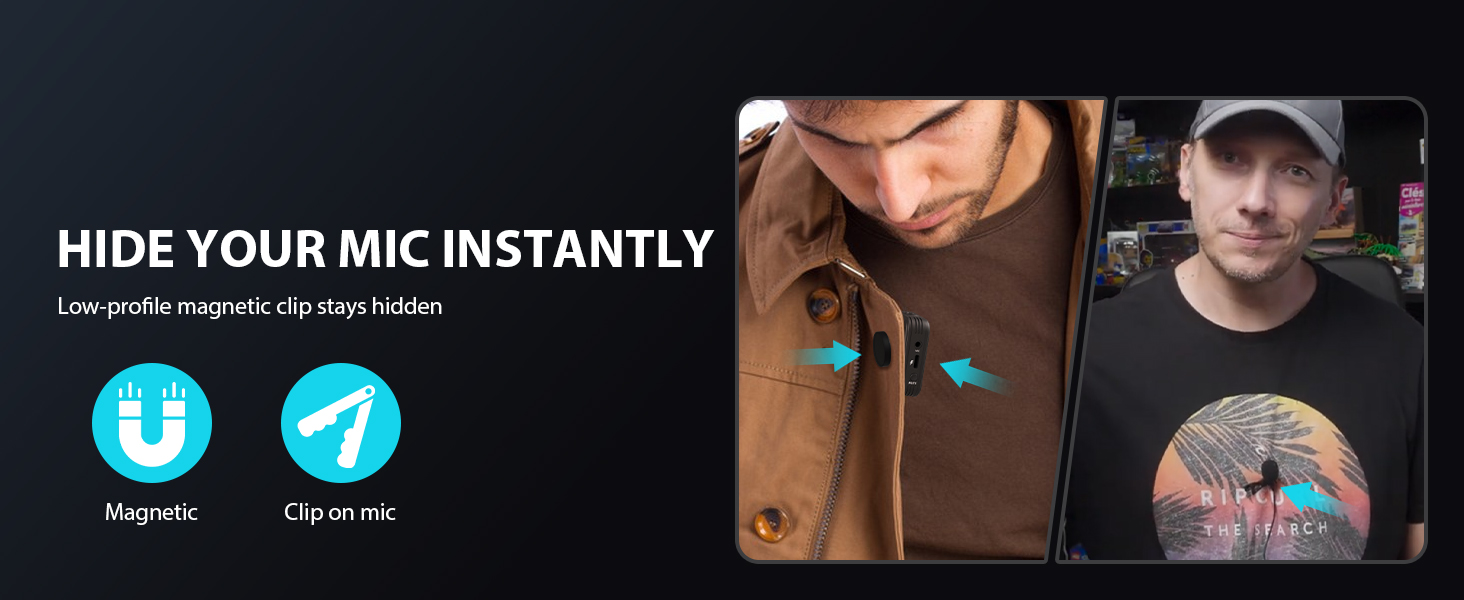
Figure 5: Connecting the receiver to an iPhone (adapter not included).
4.3 Attaching the Microphones
The transmitters have built-in microphones. For optimal sound quality or discreet placement, you can attach the external lavalier microphones:
- Plug the external lavalier microphone into the MIC input port on the TX unit.
- Attach the wind muff to the external lavalier mic to reduce wind noise.
- Use the integrated clip on the TX unit to attach it to clothing, or use the magnetic clips for more discreet placement under clothing.

Figure 6: Proper placement of the lavalier microphone on clothing.
5. Operating Instructions
5.1 Power On/Off and Pairing
- Press and hold the power button on both TX and RX units to turn them on or off.
- The units will automatically pair upon power-on. If manual pairing is needed, refer to the detailed instructions in the included user manual.
5.2 Adjusting Settings
- Noise Reduction: Press the dedicated noise reduction button on the TX unit to activate or deactivate the feature.
- Gain Control: Use the gain control buttons on the TX unit to adjust the microphone input level (0-6 levels).
- Mute Function: Press the mute button on the TX unit for a temporary audio pause.
- Monitoring: Plug headphones into the 3.5mm jack on the RX unit to monitor audio in real-time.
- Output Mode (Mono/Stereo/Safety): Use the mode button on the RX unit to switch between Mono, Stereo, or Safety output modes.
5.3 Video Overview
Video 1: Overview of the SYNCO G2(A2) PRO Wireless Lavalier Mic System, highlighting its dual-channel capabilities and 656ft transmission range.
Video 2: Detailed review and demonstration of the SYNCO G2(A2) PRO 2.4G Dual Lapel Wireless Microphone.
6. Maintenance
- Keep the units and accessories clean and dry.
- Store the system in its charging case when not in use to protect it and ensure it's always charged.
- Avoid exposing the units to extreme temperatures, humidity, or direct sunlight.
- Regularly check cables for any signs of wear or damage.
7. Troubleshooting
| Problem | Possible Cause | Solution |
|---|---|---|
| No audio output | Incorrect cable connection; units not paired; low battery; device mic input not selected. | Ensure cables are correctly connected (TRS for camera, TRRS for smartphone). Check if TX and RX are paired. Charge units. Select external microphone input on your recording device. |
| Poor audio quality/noise | Interference; wind noise; incorrect gain setting; units too far apart. | Activate noise reduction. Use wind muff. Adjust gain levels. Ensure units are within 656ft range. Avoid strong electromagnetic interference. |
| Units not pairing | Out of range; interference; pairing error. | Bring units closer together. Restart both TX and RX units. Refer to manual for manual pairing instructions. |
8. Specifications
- Brand: SYNCO
- Model Name: SY-G2
- Connectivity Technology: 2.4GHz Wireless
- Connector Type: USB Type-C, 3.5 mm Jack
- Special Features: Clip, Battery Indicator Light, Mute Function, Volume Control, Noise Reduction
- Compatible Devices: Laptop, Personal Computer, Camcorder, Camera, Smartphone
- Polar Pattern: Omnidirectional
- Power Source: Battery Powered (1 Lithium Ion battery required, included)
- Signal-to-Noise Ratio: 80 dB
- Number of Channels: 2
- Frequency Response: 20 KHz
- Audible Noise: 30 Decibels
- Enclosure Material: Plastic
- Item Weight: 0.47 Kilograms
9. Warranty and Support
The SYNCO G2(A2) PRO Wireless Lavalier Microphone System comes with a 12-month warranty from the date of purchase. For technical support, troubleshooting assistance, or warranty claims, please contact SYNCO customer service through their official website or the retailer where the product was purchased. Please retain your proof of purchase for warranty validation.