1. Introduction and System Overview
This manual provides detailed instructions for the Cromorc Wireless Security Camera System, Model CwssA2-2. This system is designed for comprehensive surveillance, offering features such as a 16-inch IPS monitor, 5MP cameras, motion detection, night vision, and two-way audio communication. It is suitable for both indoor and outdoor use in various scenarios.
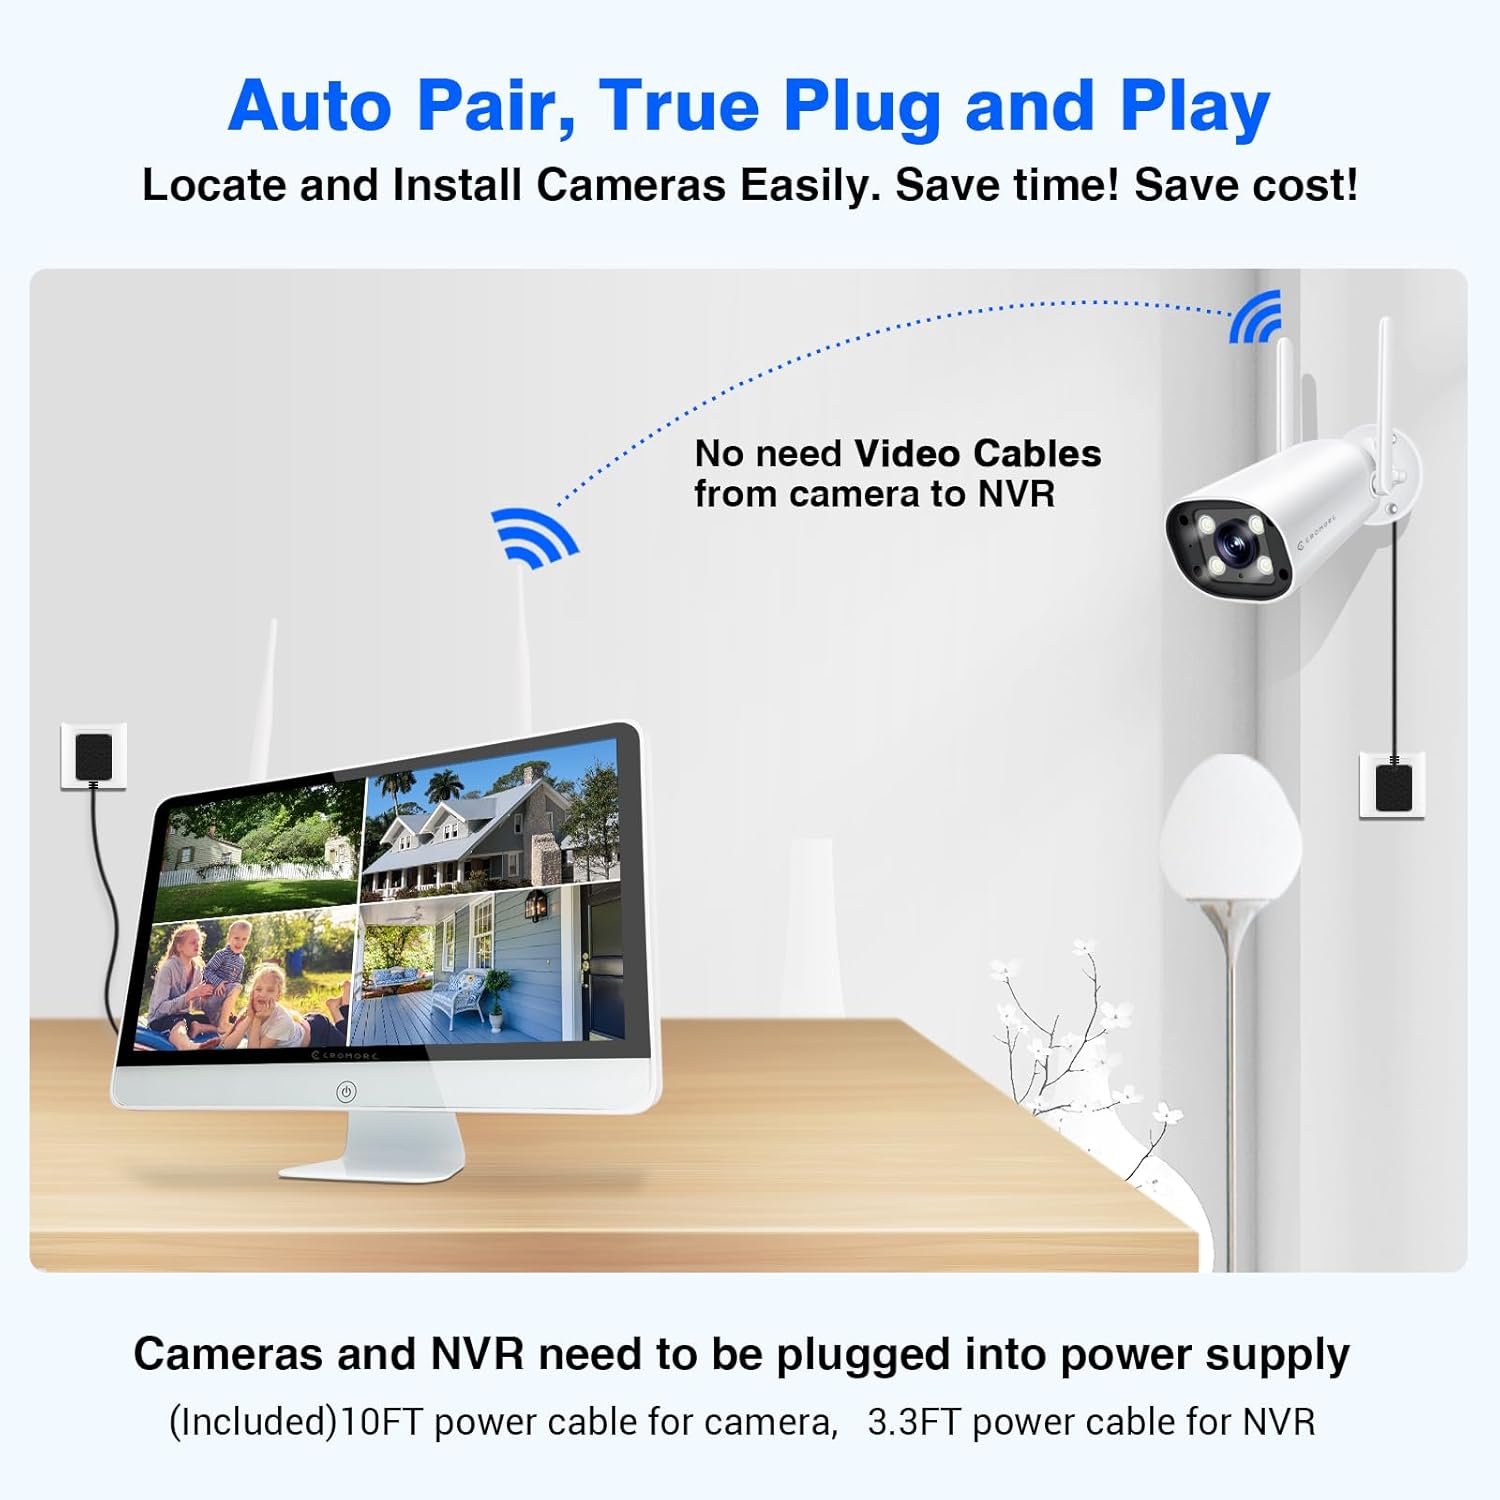
Figure 1: Overview of the Cromorc Wireless Security Camera System components.
2. What's in the Box
Verify that all components are present in your package:

Figure 2: Detailed view of package contents.
- 16CH 16" Screen NVR (with pre-installed 3TB HDD) x1
- 5MP Cameras x4
- USB Mouse x1
- Mouse Pad x1
- 3.3FT 12V3A Power Supply for NVR x1
- 10FT 12V1A Power Supply for Camera x4
- Screw Bag for Camera x4
- Surveillance Warning Note x1
- Owner's Manual x1
3. Setup Instructions
Follow these steps to set up your Cromorc Wireless Security Camera System:
3.1 Unboxing and Initial Connection
This video demonstrates the unboxing process and initial connections for the system.
Video 1: Unboxing and connecting the Cromorc security camera system. This video provides a visual guide to setting up your new system.
- Connect Cameras to Power: Use the provided camera power adapters to connect each 5MP camera to a power outlet.
- Connect NVR to Power: Connect the NVR (Network Video Recorder) to a power outlet using its dedicated power adapter.
- Connect USB Mouse: Plug the USB mouse into an available USB port on the NVR.
- Automatic Pairing: The cameras and NVR are designed for plug-and-play operation. Once powered, the cameras should automatically pair with the NVR and display live feeds on the integrated 16-inch monitor.
3.2 NVR Placement
The NVR can be placed on a flat surface or mounted on a wall for optimal viewing and space-saving.

Figure 3: Flexible placement options for the NVR, either on a table or wall-mounted.
4. Operating Instructions
Your Cromorc security system offers a range of features for effective surveillance:
4.1 Motion Detection and AI Human Activated Floodlight
The system features smart AI human detection to minimize false alarms. When a human figure is detected, the camera's floodlight can automatically activate, and a siren alarm can be triggered. Notifications can be sent via email or phone app.

Figure 4: Humanoid motion detection in action, triggering a floodlight and sending an app notification.
4.2 Night Vision Capabilities
The cameras provide clear video footage even in low-light conditions. Choose between infrared night vision for black and white images or full-color night vision when the floodlights are activated.
Figure 5: Demonstrating the clarity of color night vision compared to standard infrared.
4.3 Two-Way Audio
Each camera is equipped with a built-in microphone and speaker, enabling two-way audio communication via the mobile application. This allows you to speak to visitors or deter intruders directly through the camera.

Figure 6: Two-way audio feature allowing real-time communication through the camera.
4.4 Remote Access and Monitoring
Access live video feeds, recordings, and system settings from anywhere using the free "EseeCloud" mobile application on your smartphone or tablet, or the "EseePro" CMS software on your PC.

Figure 7: Remote access to your security system from various devices.
4.5 Local Recording and Storage
The NVR comes with a pre-installed 3TB HDD, providing approximately 90 days of continuous loop recording without overwriting. This ensures reliable local storage without monthly fees.

Figure 8: The system offers 24/7 local recording to the included 3TB hard drive.
4.6 Customizable Detection Areas and Privacy Zones
You can customize specific detection areas to avoid unnecessary alarms from common movements like trees swaying. Additionally, privacy areas can be set to exclude certain zones from recording, safeguarding personal privacy.
Figure 9: Customizing detection areas to focus on critical zones and minimize false alerts.

Figure 10: Setting privacy zones to ensure certain areas are not recorded.
5. Maintenance
Regular maintenance ensures optimal performance and longevity of your security system:
- Clean Lenses: Periodically clean camera lenses with a soft, damp cloth to ensure clear image quality.
- Check Connections: Ensure all power and network connections are secure and free from damage.
- Software Updates: Check for and install any available firmware updates for the NVR and cameras to enhance features and security.
- Hard Drive Health: Monitor the health of the 3TB HDD through the NVR settings. Back up important footage regularly.
- Weather Protection: While cameras are IP66 weatherproof, ensure they are installed in locations that minimize direct exposure to extreme weather conditions for extended durability.
6. Troubleshooting
If you encounter issues with your system, refer to the following common solutions:
- No Image on Monitor:
- Ensure the NVR is powered on and the power adapter is securely connected.
- Verify that cameras are powered on and within range of the NVR's wireless signal.
- Check if the NVR's monitor is turned on and set to the correct input source.
- Cameras Not Connecting:
- Confirm cameras are receiving power.
- Restart both the cameras and the NVR.
- Ensure cameras are within the effective wireless range of the NVR. Obstacles like thick walls can reduce signal strength.
- Poor Image Quality:
- Clean camera lenses to remove dirt or smudges.
- Check for strong interference sources near the cameras or NVR.
- Ensure sufficient lighting for optimal night vision performance.
- No Remote Access:
- Verify the NVR is connected to the internet via an Ethernet cable.
- Ensure your smartphone or PC has a stable internet connection.
- Check app settings and NVR network configuration.
- False Motion Alarms:
- Adjust motion detection sensitivity in the app settings.
- Configure detection areas to exclude areas with frequent non-human movement (e.g., trees, busy roads).
7. Specifications
Video 2: An overview of the Cromorc Wireless Security Camera System's key features and capabilities.
| Feature | Specification |
|---|---|
| Brand | Cromorc |
| Model Number | CwssA2-2 |
| Connectivity Technology | Wireless (802.11 b/g/n) |
| Video Capture Resolution | 5MP (2880x1620) |
| Special Features | Human Detection, Motion Sensor, Night Vision, Siren Alarm, Two-Way Audio |
| Number of Channels | 16 (Expandable) |
| Memory Storage Capacity | 3 TB HDD (Pre-installed) |
| NVR Monitor Size | 16 inches IPS Screen |
| Night Vision Range | Up to 65 Feet |
| Frame Rate | 15 fps |
| Recording Mode | Continuous, Motion Detection |
| Lens Type | Wide Angle |
| Viewing Angle | 80 degrees |
| Weatherproof Rating | IP66 |
| Operating System | Linux-Based or Embedded System |
| Product Dimensions | 16 x 8.5 x 13 inches |
| Item Weight | 11.92 pounds |
8. Warranty and Support
Cromorc is committed to providing quality products and customer satisfaction. Your security camera system comes with a 1-year free warranty and lifetime efficient support.
If you require any assistance, have questions, or need to claim warranty service, please do not hesitate to contact Cromorc customer support. Refer to the contact information provided in your user's guide or visit the official Cromorc website for support details.
For additional resources and FAQs, you may also visit the Cromorc Brand Store on Amazon.