Introduction
This manual provides detailed instructions for the installation, operation, and maintenance of the WFLNHB Dual Carburetor Replacement, model CMX250. This carburetor is designed for Honda CA250 and CMX250 motorcycles manufactured between 1985 and 2014. Please read this manual thoroughly before attempting any installation or adjustment to ensure proper function and safety.
Product Features
- Simplified Installation: Designed for straightforward installation, requiring only adjustment of the mixing ratio screw for optimal performance.
- Enhanced Engine Performance: Facilitates complete combustion, leading to rapid throttle response and improved acceleration.
- Reliable and Durable Construction: Manufactured to provide dependable operation and long-lasting service for your motorcycle.

Image: WFLNHB Dual Carburetor highlighting its features, including simple installation and reliable performance.
Compatibility
This carburetor replacement is compatible with the following motorcycle models:
- Honda CA250 (1985-2014)
- Honda CMX250 (1985-2014)
Please verify your motorcycle's make, model, and year before installation to ensure proper fitment.
Package Contents
The package typically includes the following components:
- 1 x WFLNHB Dual Carburetor Assembly (Model CMX250)
- Associated jets and needles (as pictured)
- Other necessary installation hardware (e.g., hoses, clamps, gaskets - may vary)
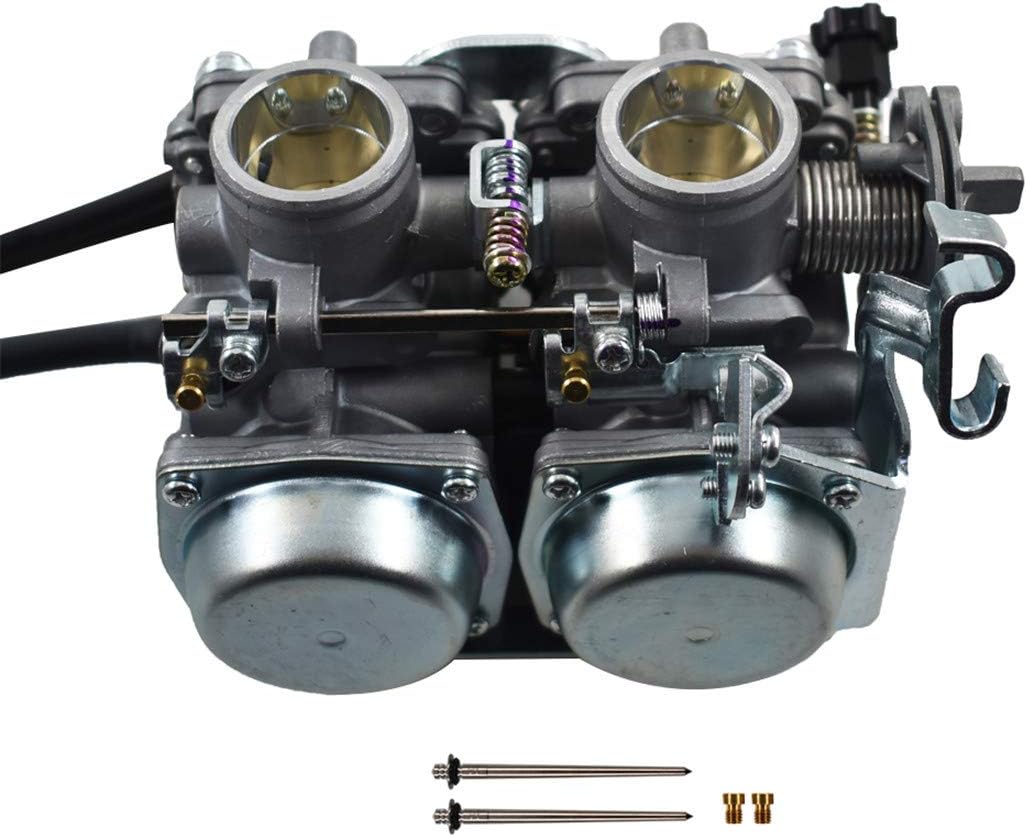
Image: The dual carburetor unit along with additional jets and needles.
Setup and Installation
Installation of a carburetor requires mechanical knowledge and specific tools. If you are not confident in your ability to perform this installation, it is highly recommended to seek assistance from a qualified motorcycle mechanic.
General Installation Steps:
- Preparation: Ensure the motorcycle engine is cool. Disconnect the battery and turn off the fuel supply.
- Removal of Old Carburetor: Carefully disconnect all fuel lines, vacuum lines, throttle cables, and electrical connections from the existing carburetor. Remove mounting bolts and detach the old carburetor.
- Inspection: Inspect the intake manifold and air filter housing for any debris or damage. Clean as necessary.
- New Carburetor Installation: Install the new WFLNHB carburetor, ensuring all gaskets are properly seated. Reconnect all fuel lines, vacuum lines, throttle cables, and electrical connections. Ensure all connections are secure and free from leaks.
- Initial Adjustments: Perform initial adjustments to the idle speed and air/fuel mixture screw as per your motorcycle's service manual or general carburetor tuning guidelines. The product is designed for simple mixing ratio screw adjustment for optimal combustion.
- Fuel Supply and Battery: Reconnect the fuel supply and the motorcycle battery.
- Leak Check: Before starting the engine, check for any fuel leaks.
Important: Refer to your specific motorcycle's service manual for detailed torque specifications and precise installation procedures.

Image: Side view of the WFLNHB dual carburetor, showing various connections and adjustment points.
Operating Instructions
After successful installation, proper operation involves starting the engine and fine-tuning the carburetor for optimal performance.
Initial Start-up and Tuning:
- Engine Start: Start the motorcycle engine. It may require a few attempts to prime the fuel system.
- Warm-up: Allow the engine to reach its normal operating temperature.
- Idle Adjustment: Adjust the idle speed screw to achieve the manufacturer's recommended idle RPM.
- Air/Fuel Mixture Adjustment: Fine-tune the air/fuel mixture screw. Turn the screw slowly in or out until the engine runs smoothly and achieves the highest RPM at idle, then back it out slightly (typically 1/4 to 1/2 turn) to ensure a rich enough mixture for good throttle response.
- Throttle Response Check: Test throttle response. The engine should accelerate smoothly without hesitation or bogging.
Note: Environmental factors such as altitude and temperature can affect carburetor tuning. Further adjustments may be necessary for different conditions.
Maintenance
Regular maintenance ensures the longevity and optimal performance of your WFLNHB carburetor.
- Fuel System Cleanliness: Use clean, fresh fuel. Consider using a fuel stabilizer if the motorcycle is stored for extended periods.
- Fuel Filter: Regularly inspect and replace the fuel filter to prevent contaminants from reaching the carburetor.
- Air Filter: Ensure the air filter is clean and properly maintained. A dirty air filter can restrict airflow and affect carburetor performance.
- Carburetor Cleaning: Periodically clean the carburetor, especially if the motorcycle experiences rough idling, poor acceleration, or starting difficulties. This may involve disassembling the carburetor and cleaning jets and passages with carburetor cleaner.
- Gasket Inspection: Check all gaskets and O-rings for signs of wear or damage and replace as needed to prevent vacuum leaks.

Image: Close-up view of brass carburetor jets, components that require periodic cleaning.
Troubleshooting
This section addresses common issues that may arise with carburetor operation.
| Problem | Possible Cause | Solution |
|---|---|---|
| Engine will not start | No fuel, clogged fuel filter, incorrect choke setting, fouled spark plugs, vacuum leak. | Check fuel level and flow. Inspect/replace fuel filter. Adjust choke. Check/replace spark plugs. Inspect for vacuum leaks. |
| Rough idle or stalling | Incorrect idle speed, dirty pilot jet, air/fuel mixture too rich/lean, vacuum leak. | Adjust idle speed. Clean pilot jet. Adjust air/fuel mixture screw. Check for vacuum leaks. |
| Poor acceleration or hesitation | Clogged main jet, incorrect float level, air filter restriction, throttle cable issues. | Clean main jet. Verify float level. Clean/replace air filter. Inspect throttle cable for proper operation. |
| Fuel leaks | Damaged gaskets, loose fuel lines, incorrect float level. | Inspect and replace damaged gaskets. Tighten fuel line connections. Adjust float level. |
If these steps do not resolve the issue, consult a professional motorcycle mechanic.
Specifications
| Feature | Detail |
|---|---|
| Brand | WFLNHB |
| Model Number | CMX250 |
| Item Weight | 3.07 pounds |
| Package Dimensions | 6.69 x 5.59 x 5.55 inches |
| Vehicle Service Type | Street Bike |
| Recommended Uses | Motorcycle |
| Specific Uses For Product | Honda |
Warranty and Support
For information regarding product warranty, returns, or technical support, please refer to the seller's policy or contact WFLNHB customer service directly. Keep your purchase receipt as proof of purchase.
You can visit the WFLNHB store for more information: WFLNHB Store