
1. Introduction
This manual provides detailed instructions for the installation, operation, and maintenance of your COLORFUL Battle-AX B550M-HD PRO V14 motherboard. Please read this manual thoroughly before proceeding with installation to ensure proper setup and to maximize the performance and longevity of your system. This motherboard is designed to support AMD AM4 socket processors, including 3rd Gen Ryzen CPUs, offering a robust platform for personal computing.
2. Product Overview
2.1 Key Features
- Supports AMD AM4 socket and AMD 3rd Gen Ryzen processors with AMD B550 chipset.
- Dual-channel DDR4 memory support.
- Integrated 6-channel high-definition audio codec.
- M.2 port for high-speed storage.
- PCI Express 4.0 x16 slot for graphics cards.
- Multiple USB ports: 12 USB ports (including internal headers), with USB 3.1 Gen1 and USB 2.0.
- 4 SATA 3.0 6GB/s ports.
- Integrated 1000Mbps wired LAN (10/100/1000Mbps Ethernet).
- Video output options: HDMI, DVI, and VGA ports.
- Supports CPUs up to 95W.
2.2 Motherboard Layout and Components
Familiarize yourself with the various components and connectors on your motherboard. Refer to the images below for visual guidance.
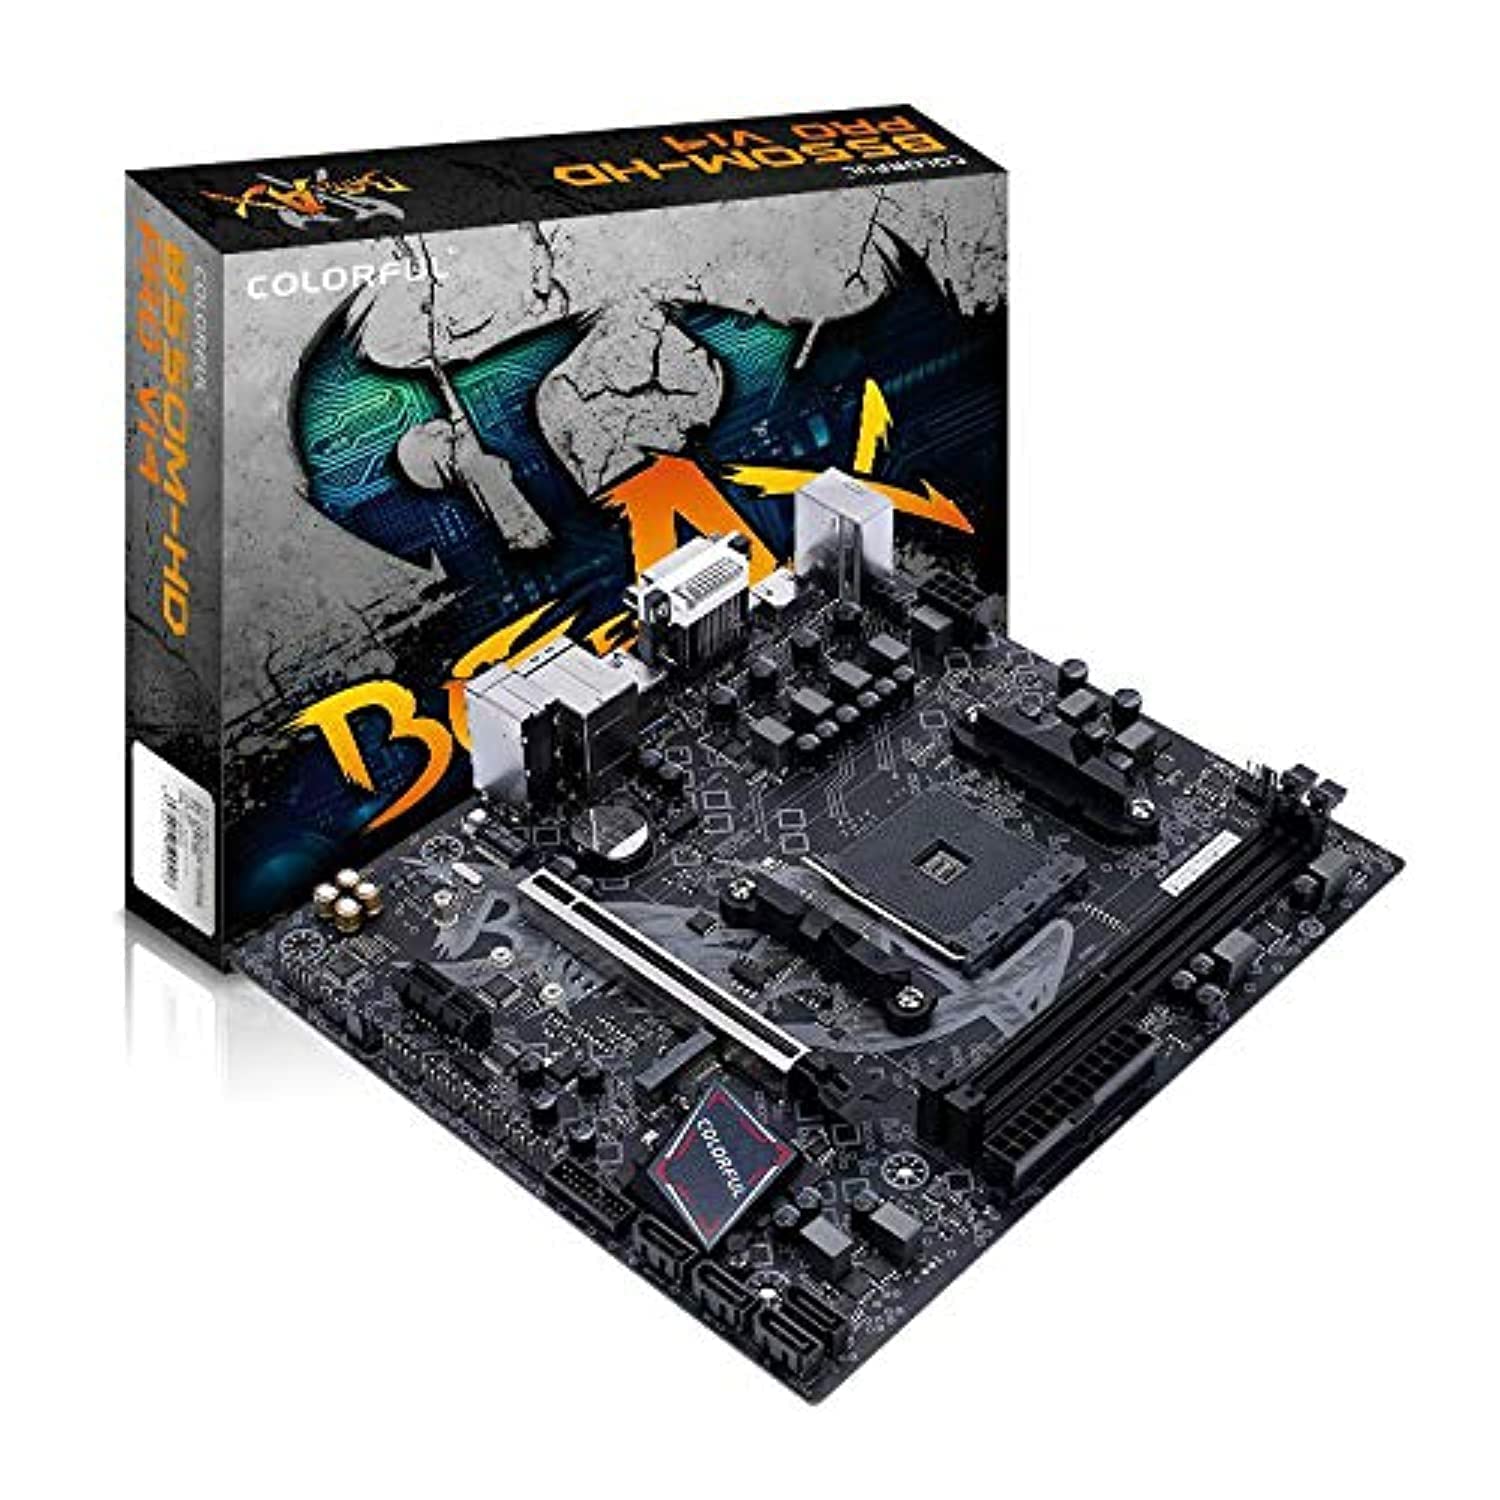
Figure 1: Top-down view of the COLORFUL Battle-AX B550M-HD PRO V14 motherboard, highlighting the CPU socket, RAM slots, PCIe slot, and various headers.

Figure 2: Angled view of the motherboard, providing a clearer perspective of the CPU socket, DDR4 memory slots, and power connectors.
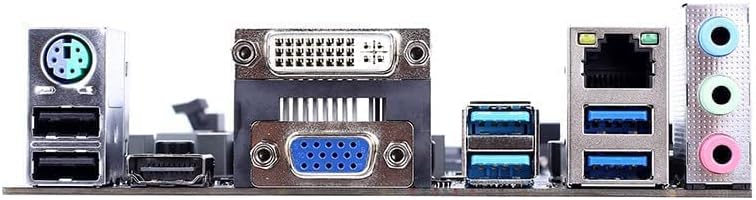
Figure 3: Rear I/O panel connectors, including PS/2, USB, video outputs (VGA, DVI, HDMI), LAN, and audio jacks.
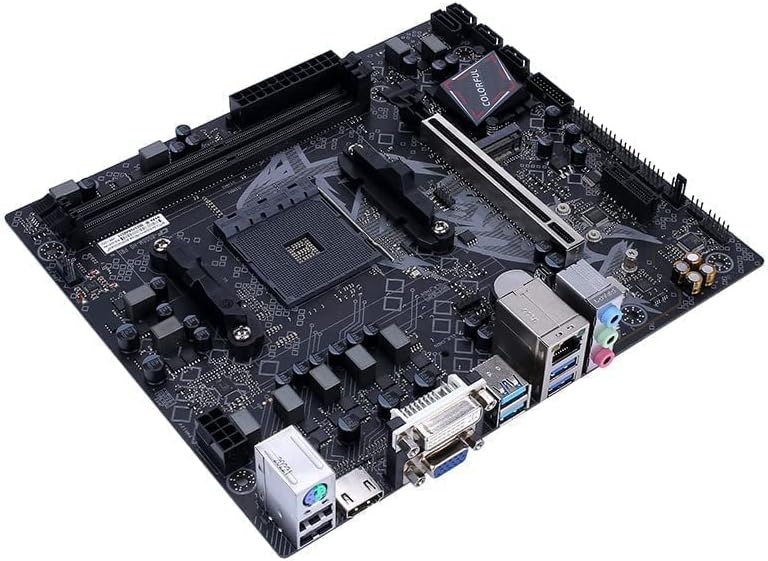
Figure 4: An alternative angled view of the motherboard, highlighting the PCIe x16 slot and the M.2 slot.
3. Setup and Installation
Before beginning installation, ensure your workspace is clean, well-lit, and static-free. It is recommended to wear an anti-static wrist strap.
3.1 Installing the CPU
- Locate the AM4 CPU socket on the motherboard.
- Lift the load lever on the side of the socket.
- Carefully align the triangular mark on the CPU with the corresponding mark on the socket.
- Gently place the CPU into the socket without forcing it.
- Lower the load lever to secure the CPU in place.
- Apply thermal paste and install the CPU cooler according to its manufacturer's instructions.
3.2 Installing DDR4 Memory
- Open the clips on both ends of the DDR4 memory slots.
- Align the notch on the memory module with the key in the DIMM slot.
- Press down firmly on both ends of the memory module until the clips snap into place.
- For dual-channel operation, install memory modules into matching colored slots (if applicable, refer to motherboard manual for specific slot pairing).
3.3 Installing Storage Devices
3.3.1 M.2 SSD Installation
- Locate the M.2 slot on the motherboard.
- Remove the M.2 standoff screw.
- Insert the M.2 SSD into the slot at a 30-degree angle.
- Push the SSD down and secure it with the standoff screw.
3.3.2 SATA Drive Installation
- Connect one end of a SATA data cable to a SATA 3.0 port on the motherboard.
- Connect the other end of the SATA data cable to your SATA hard drive or SSD.
- Connect a SATA power cable from your power supply to the SATA drive.
3.4 Installing the Graphics Card (PCIe)
- Locate the PCI Express 4.0 x16 slot.
- Remove the corresponding expansion slot cover from your PC case.
- Align the graphics card with the PCIe slot and press down firmly until it is seated correctly and the retention clip locks.
- Secure the graphics card to the case with a screw.
- Connect any necessary PCIe power cables from your power supply to the graphics card.
3.5 Connecting Power Supply
- Connect the 24-pin ATX main power connector from your power supply to the motherboard.
- Connect the 4-pin (or 8-pin, if applicable) auxiliary CPU power connector to the motherboard.
- Connect power cables to any other components as needed (e.g., SATA drives, graphics card).
3.6 Connecting Front Panel and Peripherals
- Connect the front panel headers (Power Switch, Reset Switch, HDD LED, Power LED) to their respective pins on the motherboard. Refer to the motherboard diagram for exact pin locations.
- Connect front panel USB and audio headers.
- Connect external peripherals such as keyboard, mouse, and monitor to the rear I/O ports.
4. Operating Instructions
4.1 Initial Boot and BIOS/UEFI Setup
- After connecting all components and power, turn on your system.
- During startup, repeatedly press the DEL key (or F2 depending on BIOS version) to enter the BIOS/UEFI setup utility.
- In the BIOS/UEFI, you can configure boot order, system time, fan speeds, and other hardware settings.
- Save changes and exit the BIOS/UEFI to continue booting.
4.2 Operating System Installation
This motherboard supports Windows 10. To install an operating system:
- Prepare a bootable USB drive or DVD with your desired operating system installer.
- Set the boot order in BIOS/UEFI to prioritize your installation media.
- Follow the on-screen instructions to install the operating system.
4.3 Driver Installation
After OS installation, install the necessary drivers for optimal performance. Drivers can typically be found on the COLORFUL official website or on an included driver CD/USB drive.
- Chipset Drivers
- LAN Drivers
- Audio Drivers
- Graphics Drivers (if using integrated graphics or a dedicated GPU)
- USB Drivers
5. Maintenance
5.1 Cleaning Your Motherboard
Regular cleaning helps maintain optimal performance and extends the lifespan of your motherboard.
- Power Off: Always power down and unplug your PC before cleaning.
- Dust Removal: Use compressed air to remove dust from components, especially heatsinks and fan blades. Hold the can upright to prevent propellant discharge.
- Gentle Cleaning: For stubborn dirt, use a soft, lint-free cloth lightly dampened with isopropyl alcohol. Avoid excessive moisture.
- Avoid Contact: Do not touch sensitive components or circuit traces directly.
5.2 BIOS/UEFI Updates
BIOS/UEFI updates can provide improved compatibility, stability, and new features. Always download BIOS updates from the official COLORFUL website for your specific motherboard model.
- Backup: Back up your current BIOS settings before updating.
- Follow Instructions: Carefully follow the update instructions provided by COLORFUL. Incorrect BIOS updates can render your motherboard inoperable.
- Stable Power: Ensure a stable power supply during the update process to prevent interruptions.
5.3 Driver Updates
Keep your drivers updated to ensure compatibility and optimal performance with new software and hardware. Visit the COLORFUL support website regularly for the latest drivers.
6. Troubleshooting
This section addresses common issues you might encounter during setup or operation.
6.1 No Power / System Not Starting
- Check Power Connections: Ensure the 24-pin ATX and 4-pin/8-pin CPU power connectors are securely seated.
- Power Supply: Verify the power supply unit (PSU) is switched on and functioning correctly. Test with another PSU if possible.
- Front Panel Headers: Double-check that the power switch header is correctly connected to the motherboard.
- Short Circuit: Remove the motherboard from the case and test it on a non-conductive surface to rule out short circuits.
6.2 No Display Output
- Monitor Connection: Ensure the monitor is properly connected to the graphics card or motherboard (if using integrated graphics) and is powered on.
- Graphics Card: If using a dedicated graphics card, ensure it is fully seated in the PCIe slot and any necessary power cables are connected.
- RAM: Reseat the RAM modules. Try booting with only one RAM stick.
- BIOS Reset: Clear the CMOS by removing the motherboard battery for a few minutes or using the CLR_CMOS jumper (refer to motherboard diagram).
6.3 System Instability / Crashes
- Overheating: Check CPU and GPU temperatures. Ensure all fans are spinning and heatsinks are clean.
- RAM Issues: Run a memory diagnostic tool (e.g., MemTest86) to check for faulty RAM.
- Driver Conflicts: Ensure all drivers are up-to-date and correctly installed. Uninstall and reinstall problematic drivers.
- BIOS Settings: Reset BIOS to default settings.
7. Specifications
| Feature | Detail |
|---|---|
| Brand | COLORFUL |
| Model Name | Battle-AX B550M-HD PRO V14 |
| CPU Socket | Socket AM4 |
| Compatible Processors | AMD 3rd Gen Ryzen |
| Chipset Type | AMD B550 |
| RAM Technology | DDR4 |
| Memory Clock Speed | 2133 MHz (Base, higher speeds supported via OC) |
| OS Support | Windows 10 |
| PCIe Slots | 1 x PCI Express 4.0 x16 |
| Storage Interfaces | 1 x M.2 slot, 4 x SATA 3.0 6GB/s ports |
| USB Ports | Rear: 4 x USB 3.1 Gen1, 2 x USB 2.0; Internal Headers: 1 x USB 3.1 Gen1, 2 x USB 2.0 (total 12 ports including headers) |
| Video Outputs | 1 x HDMI, 1 x DVI, 1 x VGA |
| LAN | 1000Mbps Ethernet (RJ45) |
| Audio | 6-channel High Definition Audio |
| CPU Power Support | Up to 95W |
| Auxiliary CPU Power Connector | 4-pin (Note: Main ATX power is 24-pin) |
8. Warranty and Support
For detailed warranty information, please refer to the warranty card included with your product or visit the official COLORFUL website. Technical support and driver downloads are also available on the COLORFUL support page.
Official Website: www.colorful.cn (Please check for regional websites for specific support.)


