INTBUYING SM-2972
INTBUYING Industrial Leather Sewing Machine SM-2972 Instruction Manual
Model: SM-2972
1. Product Overview
The INTBUYING Industrial Leather Sewing Machine SM-2972 is designed for stitching boots, shoes, and other tubular leather and fabric items. It features a robust cast iron construction and can be operated manually or with a motor (motor not included). Key features include a maximum sewing speed of 500 stitches per minute, an arm length of 30cm (11.8 inches), and an adjustable stitch length of 1-5mm. The machine is equipped with a 360-degree rotating presser foot for versatile stitching in any direction.
- Single Needle, Lock Stitch: Ensures strong and durable seams.
- Stop Motion Hand Wheel: Allows for bobbin winding without engaging the stitching mechanism.
- Replaceable Steel Horn: Provides flexibility for various sewing tasks.
- Universal Upper Feed: Enables stitching in any direction without turning the workpiece.
- Double End Needle Plate: Features two sizes of needle holes for different needle sizes.
2. Safety Information
Always exercise caution when operating the sewing machine. Keep hands and fingers clear of the needle and moving parts. Ensure the machine is stable on a flat surface before use. Do not attempt to operate the machine if any parts are damaged or missing. Wear appropriate safety gear, such as gloves, if necessary.
3. Setup
3.1 Base Assembly
Attach the machine to a stable base using the provided screws and wrenches. Ensure all connections are secure before proceeding.
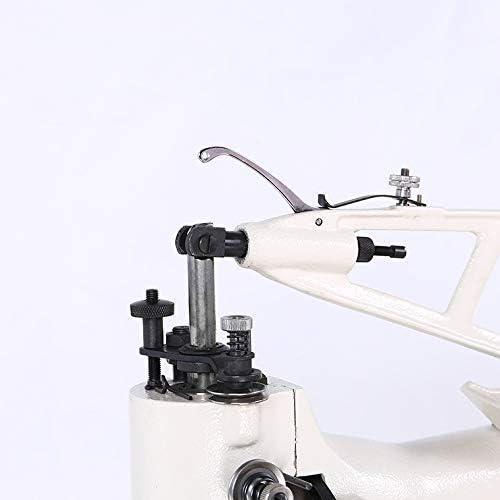
Image: Industrial Leather Sewing Machine securely mounted on a wooden base.

Image: Side view of the sewing machine, showing its robust construction and mounting points.
3.2 Handwheel Installation
Install the handwheel onto the machine's shaft. Ensure it is properly aligned and secured for smooth manual operation.

Image: Close-up of the handwheel, used for manual operation of the sewing machine.
Video: This video demonstrates the correct procedure for installing the sewing machine handwheel, ensuring proper function and secure attachment.
3.3 Bobbin Winder Installation
Attach the bobbin winder mechanism to the machine. This component is essential for preparing bobbins with thread for the lower part of the stitch.
Video: This tutorial guides you through the installation of the bobbin winder, a crucial step for preparing your machine for sewing.
4. Threading the Machine
4.1 Upper Threading
Follow these steps to correctly thread the upper part of the machine:
- Place the thread spool on the thread holder.
- Guide the thread through the first tensioner.
- Pass the thread through the take-up lever.
- Thread the needle from front to back.

Image: Thread spool placed on the holder, with the thread correctly guided through the initial points of the machine.

Image: Detailed view of the upper threading path, showing the thread passing through tension discs and guides.

Image: Side view of the machine head, illustrating the complete upper threading process down to the needle.
4.2 Bobbin Threading and Insertion
Proper bobbin threading and insertion are crucial for a balanced stitch. Ensure the bobbin thread is wound evenly and inserted correctly into the shuttle.
Video: This video provides a step-by-step guide on how to reload an empty bobbin and insert it into the BEAMNOVA Leather Cobbler Sewing Stitching Machine.
Video: This video demonstrates the general use of the machine, including threading the bobbin and preparing for stitching.
5. Operation
5.1 Basic Stitching
Place your material under the presser foot. Lower the presser foot and begin turning the handwheel to initiate stitching. Guide the material smoothly to create an even seam.

Image: Close-up view of the machine's needle actively stitching through a piece of leather material.
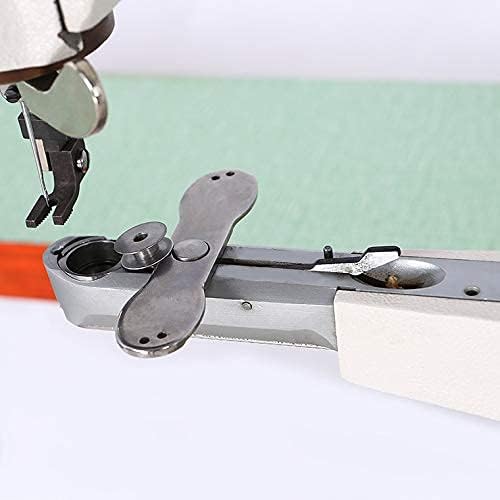
Image: The sewing machine in action, creating a seam on a piece of leather.
5.2 Adjusting Stitch Direction
The 360-degree rotating presser foot allows for easy changes in stitching direction without needing to reposition the material. Simply rotate the presser foot to the desired angle.
Video: This video demonstrates how to operate the machine, including changing the direction of sewing using the rotating presser foot.
6. Maintenance
Regular maintenance ensures the longevity and optimal performance of your sewing machine. Keep the machine clean from dust and lint, especially around the needle area and shuttle. Lubricate moving parts as recommended in the general maintenance guidelines for industrial sewing machines.
7. Troubleshooting
If you encounter issues with your machine, consider the following common troubleshooting steps:
- Skipped Stitches: Check if the needle is inserted correctly, not bent, and is the appropriate size for the material and thread. Ensure the machine is properly threaded.
- Thread Breakage: Verify that the thread is not tangled, tension is correctly set, and there are no burrs on the thread path. Use good quality thread.
- Uneven Stitches: Adjust thread tension for both upper and bobbin threads. Ensure the material is fed evenly.
- Machine Jamming: Remove any tangled threads. Check for obstructions in the shuttle area.
For persistent issues, consult a professional or contact customer support.
8. Specifications
| Feature | Specification |
|---|---|
| Product Dimensions | 23.22 x 11.4 x 19.29 inches (59x29x49cm) |
| Item Weight | 83.6 pounds (38 Kilograms) |
| Manufacturer | INTBUYING |
| Item Model Number | SM-2972 |
| Brand | INTBUYING |
| Color | Black, White |
| Material | Cast Iron |
| Power Source | Hand (Can be driven by motor, motor not included) |
| Is Electric | Yes (with optional motor) |
| Max Sewing Speed | 500SPM |
| Arm Length | 30CM (11.8 Inch) |
| Stitch Length | 1-5mm |
| Sewing System | DP*17 16#-18# |
9. Warranty and Support
For warranty information and customer support, please refer to the documentation included with your purchase or contact INTBUYING customer service directly. Keep your purchase receipt for any warranty claims.
Related Documents - SM-2972
 |
gr!p SM Quick Start Guide - OrthoRPM Quick start guide for the gr!p SM smart hand therapy and exercise device by OrthoRPM. Learn how to set up, use, and charge your device for hand muscle strengthening and rehabilitation. |
 |
ARG HEALTHCARE Smart Portable Hand Massager SM-001 User Manual Comprehensive user manual for the ARG HEALTHCARE Smart Portable Hand Massager (Model SM-001). Learn about its features, how to operate the control panel, troubleshooting tips, and technical specifications for this ergonomic, pneumatic, and heated hand therapy device. |
 |
SEVERIN Hand Blender SM 003760/SM 003761/SM 003762 User Manual Comprehensive user manual for the SEVERIN hand blender models SM 003760, SM 003761, and SM 003762, covering product identification, technical data, safety instructions, cleaning, intended use, operation, and disposal. |
 |
Severin SM 3775 Kabelloser Akku-Stabmixer – Bedienungsanleitung Umfassende Bedienungsanleitung für den Severin SM 3775 kabellosen Akku-Stabmixer. Enthält Informationen zu Aufbau, Anschluss, Sicherheitshinweisen, Reinigung, Pflege und bestimmungsgemäßer Verwendung. |
 |
Minn Kota Riptide SM Bow Mount Trolling Motor User Manual Comprehensive user manual for the Minn Kota Riptide SM bow mount saltwater trolling motor, covering installation, operation, maintenance, troubleshooting, and warranty information. |
 |
SEVERIN Hand Blender SM 003760/003761/003762 User Manual Comprehensive user manual for the SEVERIN hand blender models SM 003760, SM 003761, and SM 003762, covering safety instructions, operation, cleaning, and technical specifications. |
Ask a question about this manual
Ask about setup, troubleshooting, compatibility, parts, safety, or missing instructions. Manuals+ will review the question and use this page’s manual context to help answer it.