1. Introduction
This manual provides essential information for the safe and efficient operation, maintenance, and troubleshooting of your SUPER-EGO 1500001591 SE415 NPT 4-inch Threading Machine. Please read this manual thoroughly before operating the machine to ensure proper use and to prevent injury or damage.
2. Safety Instructions
Always observe the following safety precautions to reduce the risk of electric shock, fire, and serious injury.
- Electrical Safety: Ensure the machine is connected to a 220V power supply with proper grounding. Do not operate in wet conditions. Inspect power cords for damage before each use.
- Personal Protective Equipment (PPE): Always wear safety glasses, gloves, and appropriate work clothing. Avoid loose clothing or jewelry that could get caught in moving parts.
- Work Area: Keep the work area clean, well-lit, and free from obstructions. Ensure adequate ventilation.
- Machine Operation: Never leave the machine unattended while operating. Keep hands and fingers away from moving dies and cutters. Secure the workpiece firmly before starting.
- Maintenance: Disconnect the power supply before performing any maintenance, adjustments, or cleaning.
3. Product Overview
3.1. Components
The SUPER-EGO 1500001591 threading machine typically includes the main motor unit, die head, cutting oil system, and various dies for different pipe sizes.
3.2. Technical Specifications
| Specification | Value |
|---|---|
| Manufacturer | Super Ego |
| Item Model Number | 1500001591 |
| Product Dimensions (L x W x H) | 5.2 x 5.2 x 50.2 cm; 1 Kilogram |
| Reference | 1500001591 |
| Quantity of Items | 1 |
| Included Components | SUPER-EGO 1500001591 - Máquina roscadora 4" se415 npt (220v) |
| Battery(s) / Cell(s) Included | No |
| Battery(s) / Cell(s) Required | No |
| Spare Parts Availability | Information unavailable |
| ASIN | B08HQMLSN8 |
| Date First Available | 24 September 2022 |
| Country of Origin | Spain |
3.3. Product Image
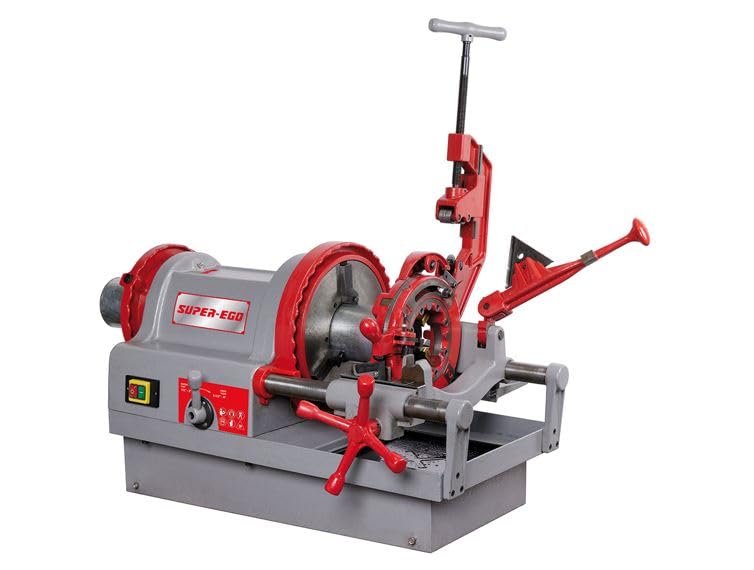
Image: The SUPER-EGO 1500001591 SE415 NPT 4-inch Threading Machine, showing its compact design and main components.
4. Setup
- Unpacking: Carefully remove all components from the packaging. Inspect for any shipping damage. Retain packaging for future storage or transport.
- Placement: Position the machine on a stable, level surface capable of supporting its weight and the workpiece. Ensure sufficient space for operation and maintenance.
- Power Connection: Connect the machine to a dedicated 220V electrical outlet. Verify that the power supply matches the machine's requirements.
- Lubrication System: Fill the cutting oil reservoir with appropriate threading oil. Ensure the oil pump and lines are clear and functional.
- Die Head Installation: Select the correct die head for the desired pipe size and thread type (NPT). Securely attach it to the machine according to the manufacturer's instructions.
5. Operating Instructions
Follow these steps for safe and effective pipe threading:
- Prepare Workpiece: Cut the pipe to the desired length and ream the inside edge to remove burrs. Clean the pipe ends.
- Secure Pipe: Insert the pipe into the chuck and tighten it firmly to prevent rotation during threading. Ensure the pipe is properly aligned with the die head.
- Select Dies: Install the correct NPT dies for the pipe diameter into the die head. Adjust the die head for the desired thread length.
- Apply Cutting Oil: Ensure the cutting oil system is active and continuously supplies oil to the dies during the threading process. This cools the dies and workpiece, and improves thread quality.
- Start Threading: Engage the machine's motor. Slowly advance the die head onto the pipe. The dies will begin to cut the thread.
- Monitor Process: Observe the threading process. If the machine struggles or the thread quality is poor, stop immediately and check for issues (e.g., dull dies, insufficient oil, improper setup).
- Complete Thread: Once the desired thread length is achieved, disengage the die head and reverse the machine to remove it from the pipe.
- Inspect Thread: Visually inspect the newly cut thread for completeness and quality. Remove any metal shavings.
6. Maintenance
Regular maintenance ensures the longevity and optimal performance of your threading machine.
- Cleaning: After each use, clean the machine, especially the die head and chuck, to remove metal shavings and oil residue. Use a brush and appropriate cleaning agents.
- Lubrication: Regularly check and replenish the cutting oil reservoir. Ensure all moving parts are adequately lubricated as specified in the machine's detailed service manual (if applicable).
- Die Inspection: Inspect dies for wear, chips, or damage. Replace dull or damaged dies promptly to maintain thread quality and prevent machine strain.
- Electrical Inspection: Periodically check the power cord and electrical connections for signs of wear or damage.
- Storage: When not in use, store the machine in a clean, dry environment, protected from dust and moisture.
7. Troubleshooting
Refer to the table below for common issues and their potential solutions.
| Problem | Possible Cause | Solution |
|---|---|---|
| Machine does not start | No power, faulty switch, motor issue | Check power connection and circuit breaker. Inspect power cord. Contact qualified service personnel if motor or switch is faulty. |
| Poor thread quality (rough, incomplete) | Dull dies, insufficient cutting oil, incorrect die adjustment, pipe not secured | Replace dies. Ensure continuous oil flow. Adjust die head correctly. Secure pipe firmly in chuck. |
| Machine stalls during threading | Dull dies, insufficient oil, pipe too hard, motor overload | Replace dies. Ensure adequate oil. Reduce cutting speed if possible. Check for motor overheating. |
| Excessive noise or vibration | Loose components, worn bearings, unbalanced workpiece | Tighten all fasteners. Inspect bearings for wear. Ensure pipe is properly centered and secured. |
8. Warranty and Support
This product is covered by a manufacturer's warranty. For specific warranty terms and conditions, please refer to the documentation provided with your purchase or contact SUPER-EGO customer support. For technical assistance, spare parts, or service inquiries, please contact your authorized SUPER-EGO dealer or visit the official SUPER-EGO website.