
1. Introduction
Thank you for choosing the ANENG M118A Digital Multimeter. This device is a compact, high-precision, and versatile tool designed for electrical measurements. It is capable of measuring DC and AC voltage, DC and AC current, resistance, capacitance, and features diode and continuity tests, as well as Non-Contact Voltage (NCV) detection. This manual provides essential information for safe and effective operation, setup, maintenance, and troubleshooting.
2. Safety Information
Always adhere to basic safety precautions when using electrical testing equipment to prevent personal injury or damage to the meter or equipment under test. Read all safety information before using the product.
- Do not exceed the maximum voltage rating of 600V for both AC and DC measurements.
- Ensure the test leads are properly connected and in good condition before each use.
- Do not use the meter if it appears damaged or if the insulation on the test leads is compromised.
- Exercise extreme caution when working with live circuits.
- Keep hands and fingers behind the probe barriers on the test leads.
- Remove test leads from the circuit before changing functions.
- Replace batteries promptly when the low battery indicator appears to ensure accurate readings.
3. Product Overview
The ANENG M118A is a compact and robust digital multimeter, featuring a clear 6000-count display and a durable ABS casing. Its intuitive design includes clearly labeled buttons for function selection and a built-in flashlight for convenience in low-light conditions.

Figure 3.1: Front view of the ANENG M118A Digital Multimeter, showcasing its display and control buttons.

Figure 3.2: Labeled diagram highlighting key components such as the LED flashlight, NCV induction probe, display, buttons, and input jacks.

Figure 3.3: Dimensions of the ANENG M118A Multimeter, showing its compact size of 118.5mm x 62.7mm x 28.4mm.
4. Specifications
The following table details the technical specifications of the ANENG M118A Digital Multimeter:
| Parameter | Value |
|---|---|
| Model | M118A |
| Material | ABS |
| Color | Red |
| DC Voltage Range | 0.5V - 600V |
| AC Voltage Range | 0.5V - 600V |
| DC Current Range | 20mA - 10A |
| AC Current Range | 20mA - 10A |
| Resistance Range | 0.1Ω - 60MΩ |
| Capacitance Range | 20nF - 60mF |
| Display Counts | 6000 Counts |
| Diode Test Voltage | 3.0V |
| Power Supply | 2 * AAA Batteries (Not Included) |
| Product Size | 118.5 x 62.7 x 28.4 mm (4.66 x 2.47 x 1.12 inch) |
| Product Weight | 100g (3.53oz) |
Key Features:
- Integrated Kickstand
- Built-in Flashlight
- Data Hold Function
- Backlight Display
- Automatic Power Off
- Non-Contact Voltage (NCV) Detection
- Live Wire Detection
- Buzzer Continuity Test
- Short Circuit Protection
- Overload Protection
- Overcurrent Protection
5. Setup
5.1 Battery Installation
- Locate the battery compartment cover on the back of the multimeter.
- Use a screwdriver to open the battery compartment.
- Insert two AAA batteries, ensuring correct polarity (+ and -).
- Close the battery compartment cover and secure it with the screw.
5.2 Connecting Test Leads
The multimeter comes with a pair of test leads (red and black). Always connect them correctly for accurate and safe measurements.
- Connect the black test lead to the COM (common) input jack.
- Connect the red test lead to the VΩHz input jack for voltage, resistance, capacitance, diode, and continuity measurements.
- For current measurements (up to 10A), connect the red test lead to the 10A input jack.
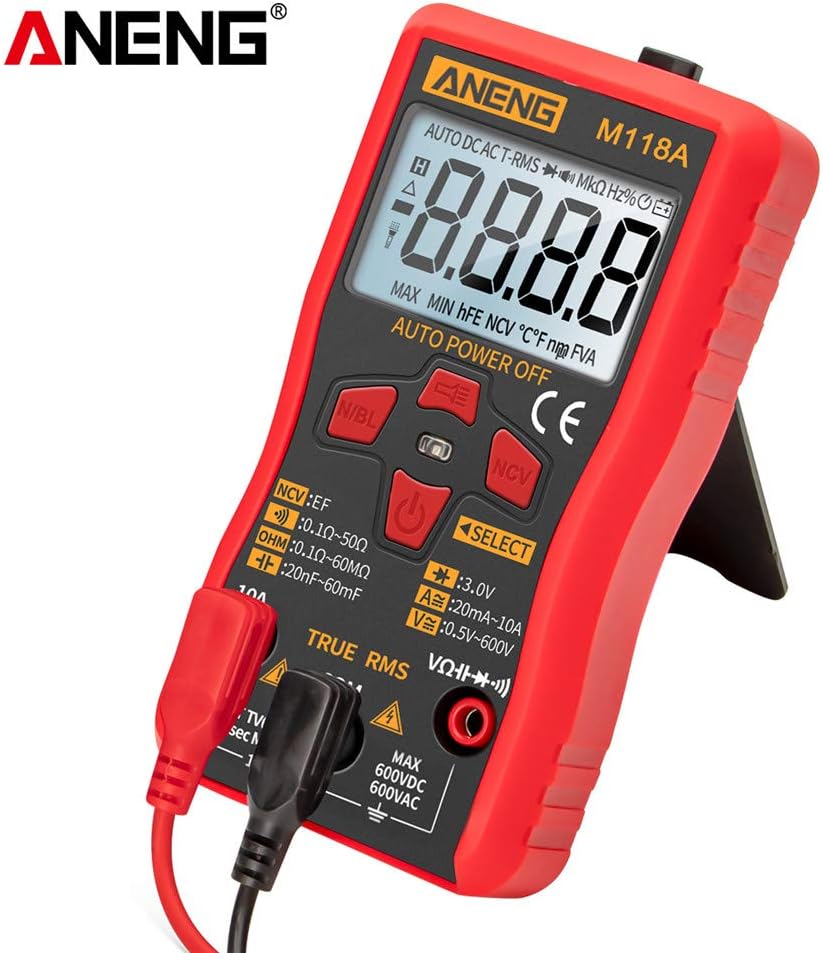
Figure 5.1: The ANENG M118A Multimeter with test leads properly connected to the input jacks.
6. Operating Instructions
6.1 Powering On/Off
- To power on the multimeter, press the Power button (red circle with line).
- The device will automatically power off after a period of inactivity to conserve battery life.
6.2 Function Selection
The ANENG M118A features automatic range selection for most measurements. Use the SELECT button to cycle through different measurement modes within a category (e.g., AC/DC voltage, resistance/continuity/diode).
- Voltage Measurement (V): Connect test leads to the VΩHz and COM jacks. The meter will automatically detect AC or DC voltage.
- Current Measurement (A): Connect the red test lead to the 10A jack and the black to COM. Insert the meter in series with the circuit.
- Resistance (Ω), Capacitance (F), Diode (symbol), Continuity (buzzer symbol): Connect test leads to the VΩHz and COM jacks. Use the SELECT button to choose the desired mode.
- Non-Contact Voltage (NCV): Press the NCV button. Hold the top of the meter near a live wire. The display will show 'EF' and the red LED will flash, accompanied by a beep, indicating AC voltage detection.
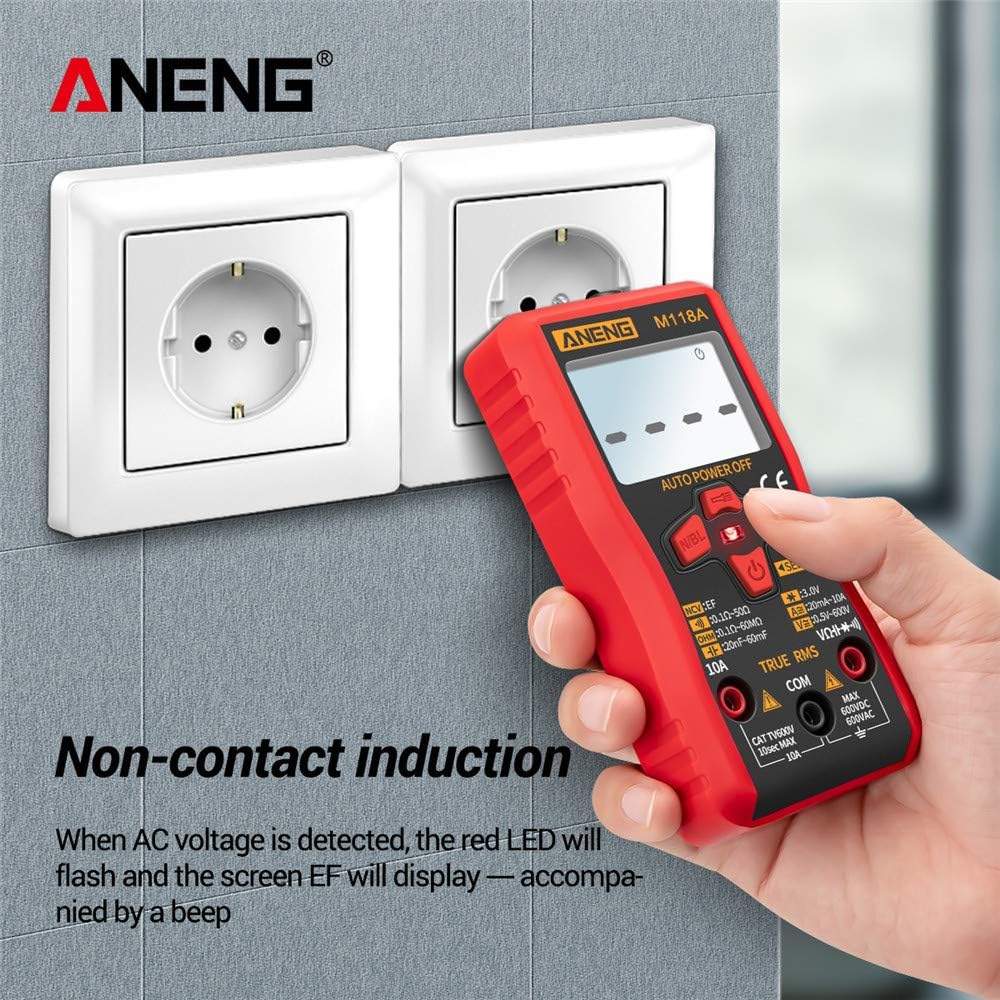
Figure 6.1: Demonstrating the Non-Contact Voltage (NCV) detection feature, indicating the presence of AC voltage.
6.3 Special Functions
- Backlight: Long press the N/BL button to turn on/off the display backlight for improved visibility in dim environments.
- Flashlight: Press the Flashlight button (flashlight symbol) to activate the built-in LED flashlight.
- Data Hold: A single press of the N/BL button will hold the current reading on the display. Press again to release.

Figure 6.2: Illustration of the backlight and flashlight features, enhancing usability in various lighting conditions.
7. Maintenance
7.1 Cleaning
To maintain the multimeter's performance and appearance:
- Wipe the case with a damp cloth and mild detergent. Do not use abrasives or solvents.
- Keep the input terminals clean and free of dust or debris.
7.2 Battery Replacement
When the low battery indicator appears on the display, replace the batteries immediately to ensure accurate readings and proper operation. Refer to Section 5.1 for battery installation instructions.
7.3 Storage
If the multimeter is not used for an extended period, remove the batteries to prevent leakage and damage to the device. Store the meter in a cool, dry place, away from direct sunlight and extreme temperatures.
8. Troubleshooting
| Problem | Possible Cause | Solution |
|---|---|---|
| Meter does not power on | Dead or incorrectly installed batteries | Check battery polarity; replace batteries if necessary. |
| No reading or 'OL' displayed | Open circuit, out of range, or incorrect function selected | Check circuit continuity; ensure measurement is within range; select correct function. |
| Inaccurate readings | Low battery, dirty test leads, or environmental interference | Replace batteries; clean test leads; move away from strong electromagnetic fields. |
| Buzzer not working for continuity | Function not selected, or circuit resistance too high | Ensure continuity mode is active; check if resistance is below the threshold (0.1Ω-50Ω). |
9. Warranty and Support
ANENG products are manufactured to high-quality standards. For any issues or inquiries regarding your ANENG M118A Digital Multimeter, please refer to the retailer or point of purchase for support. Keep your purchase receipt as proof of purchase.


