Product Overview
This 10'x30' White Outdoor Gazebo Canopy Tent is designed for temporary outdoor use, providing shade and shelter for various events such as weddings, parties, meetings, camping, and backyard barbecues. It features a rust and corrosion-resistant white powder-coated steel framework and eight removable side walls with windows, blocking up to 90 percent of the sun's rays. The tent is waterproof and can accommodate approximately 50 people for dining or party activities.
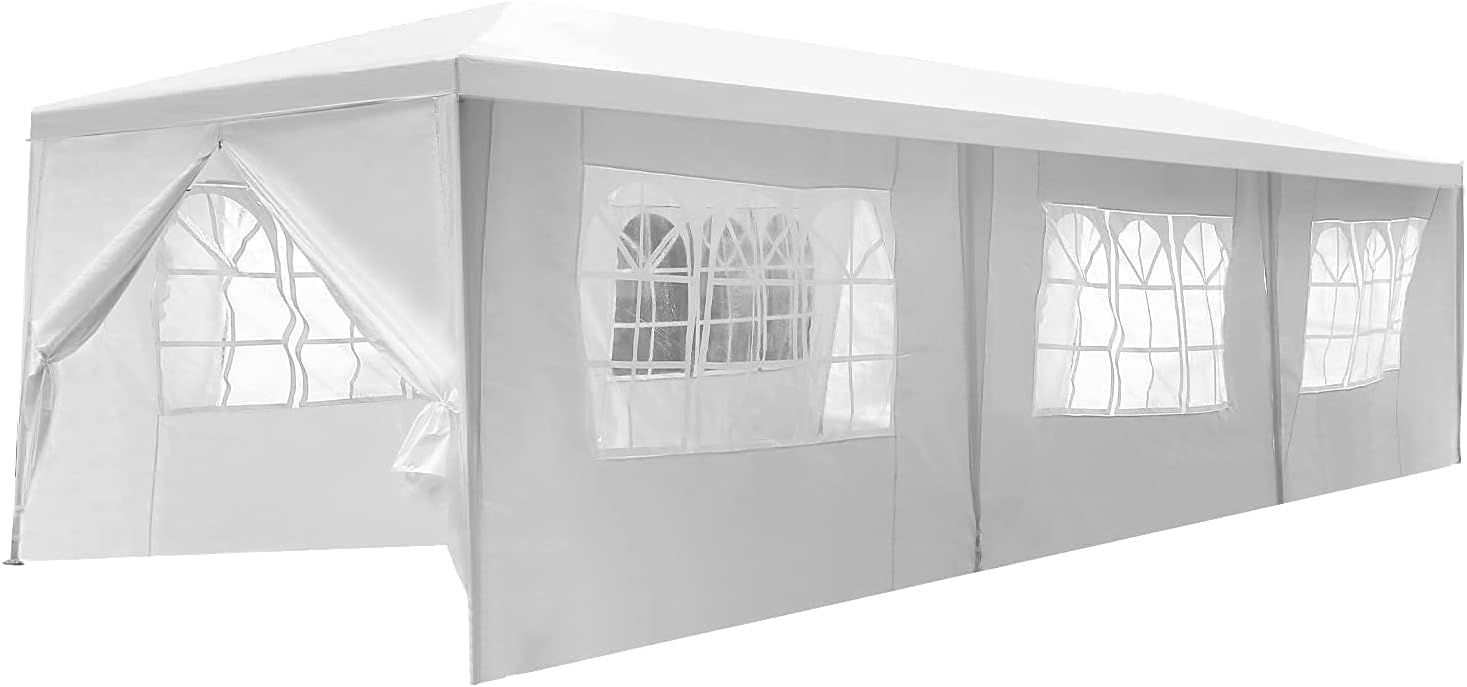
Image: Fully assembled 10'x30' White Outdoor Gazebo Canopy Tent, showcasing its large size and removable side walls with windows, set up in a grassy outdoor area.
Safety Information
WARNING:
- This product is intended for temporary use only.
- Do not leave the patio tent up overnight or under bad weather conditions (e.g., strong winds, heavy rain, snow). The manufacturer is not responsible for weather-related damages.
- Polyethylene fabric is not fireproof. Keep away from sources of fire.
- Ensure the tent is properly secured with ropes and stakes for added stability. Consider using sandbags or weights in windy conditions.
- Assembly requires at least two people for safety and ease of installation.
Setup Instructions
Follow these steps for proper assembly of your gazebo canopy tent. It is highly recommended to have at least one assistant to help with the setup process.
- Unpack and Identify Components: Lay out all pipes, connectors, and fabric pieces on a flat, clear grassy area. Refer to the parts diagram in your package to identify each numbered component.

Image: Diagram illustrating the dimensions of the 10'x30' gazebo tent, showing the overall length, width, and height.
- Assemble the Top Frame (Ground Level):
- Begin by connecting the base pipes (e.g., No. 3 and No. 4) using the plastic connectors (e.g., No. 1 and No. 2) to form the rectangular perimeter of the top frame on the ground.
- Connect the internal pipes (e.g., No. 7, No. 11, No. 8) in the specified order to create the internal support structure for the roof. Pipes No. 11 and No. 8 typically require top connectors for the roof peak.
- Ensure all connections are secure and the frame is flat on the ground.

Image: Close-up view of a plastic connector used in the tent frame, highlighting how it enhances stability compared to frames without such connectors.
- Insert Vertical Support Tubes: Carefully insert the vertical support tubes (e.g., No. 5) into the designated connectors on the assembled top frame. This will raise the tent structure.
- Drape the Roof Cover: Carefully unfold the roof cover and drape it over the assembled frame. Ensure it is centered and aligned with the frame.
- Secure the Roof Cover: Hook the tent fabric under the pipes (e.g., No. 6 tubes) at the base of each vertical support. This helps to secure the roof cover to the frame.
- Install Plastic Feet and Ground Nails: Insert the plastic feet into the bottom of the No. 6 tubes. Then, insert the ground nails through the holes in the plastic feet and into the ground to anchor the tent.
- Fasten Ropes and Stakes: Fasten the provided ropes to the tent's designated attachment points (grommets) and secure them to the ground using the stakes. Ensure the ropes are taut to provide maximum stability.
- Install Side Walls: Attach the six pieces of cloth (side walls) into their proper positions on the tent frame according to your needs. These walls are removable and can be adjusted.
Operating Instructions
- Ventilation: The removable side walls allow for flexible ventilation. Open or close them as needed to manage airflow and temperature inside the tent.
- Sun Protection: The canopy fabric is designed to block 90% of the sun's rays, providing a shaded area.
- Water Resistance: The tent features waterproof material. However, in heavy rainfall, ensure proper drainage around the base to prevent water accumulation.
- Temporary Use: This gazebo is designed for temporary outdoor events. It is not intended for permanent installation.
Maintenance
- Cleaning: Clean the canopy and side walls with mild soap and water. Do not use harsh chemicals or abrasive cleaners, as this may damage the fabric. Allow all components to dry completely before storage to prevent mold and mildew.
- Storage: Disassemble the tent and store all components in a dry, cool place away from direct sunlight when not in use. This will prolong the lifespan of the product.
- Inspection: Periodically inspect the frame, connectors, and fabric for any signs of wear, damage, or corrosion. Replace damaged parts as necessary.
Troubleshooting
| Problem | Possible Cause | Solution |
|---|---|---|
| Tent instability or swaying | Insufficient anchoring; loose connections; strong winds. | Ensure all ropes are taut and stakes are firmly in the ground. Use additional weights (e.g., sandbags) in windy conditions. Double-check all pipe connections for tightness. |
| Difficulty during assembly | Incorrect pipe or connector placement; attempting assembly alone. | Refer to the numbered parts diagram and ensure correct connections. Always assemble with at least one assistant. |
| Water pooling on roof | Improper roof tension; heavy rainfall. | Ensure the roof cover is stretched tightly and evenly over the frame. In very heavy rain, consider temporary disassembly to prevent damage. |
| Tears or damage to fabric | Sharp objects; prolonged exposure to harsh weather; improper handling. | Handle fabric carefully during setup and takedown. Avoid setting up near sharp objects. Do not leave tent exposed to severe weather. Small tears may be repaired with waterproof patch kits. |
Specifications
- Brand: PayLessHere
- Model: 10'x30' White Outdoor Gazebo
- Dimensions (L x W x H): 338 x 113 x 98 inches (approximately 10' x 30' x 8.5')
- Material: Alloy Steel, Plastic, Polyester, Polyethylene (PE)
- Color: White
- Item Weight: 49 Pounds
- Frame Material: Alloy Steel, Plastic
- Water Resistance Level: Waterproof
- Ultraviolet Light Protection: Yes (Blocks 90% of sun's rays)
- Assembly Required: Yes
- Coverage: Water-resistant fabric with mesh wall panels and UV-blocking canopy with detachable side curtains.
Warranty and Support
For detailed warranty information or further assistance, please refer to the official documentation provided with your product. An installation manual in PDF format is available for download:
Download Installation Manual (PDF)
For customer support inquiries, please contact PayLessHere directly through their official channels.


