1. Introduction
Thank you for choosing the Kearui T388 Kids Walkie Talkie. This device is designed for clear two-way communication, making it ideal for outdoor activities, family outings, and adventures. It features 8 channels, an LCD backlit display, an LED flashlight, and a communication range of up to 3 miles in optimal conditions. Please read this manual carefully to ensure proper use and to maximize your enjoyment of the product.
2. Safety Information
- Read all instructions before operating the device.
- Do not mix old and new batteries, or different types of batteries.
- Ensure batteries are inserted with correct polarity (+/-).
- Remove batteries if the device will not be used for an extended period.
- Do not expose the walkie talkie to water, moisture, or extreme temperatures.
- Supervise children during use to prevent misuse or damage.
- Avoid using the device near medical devices or in areas where electronic devices are restricted.
- Use only the specified battery type (AAA).
3. Package Contents
- Kearui T388 Walkie Talkie x 2
- User Manual x 1
4. Product Overview
The Kearui T388 Walkie Talkie is designed for ease of use with a clear LCD display and intuitive buttons.

Figure 4.1: Front view of the Kearui T388 Walkie Talkies.
Key Features:
- 8 Channels: Provides multiple communication options.
- LED Flashlight: Integrated for convenience in low-light conditions.
- Auto Power Save: Helps conserve battery life.
- 10 Call Ring Tones: Customizable alert sounds.
- HD Voice: For clear audio transmission.
- Keypad Lock: Prevents accidental changes to settings.
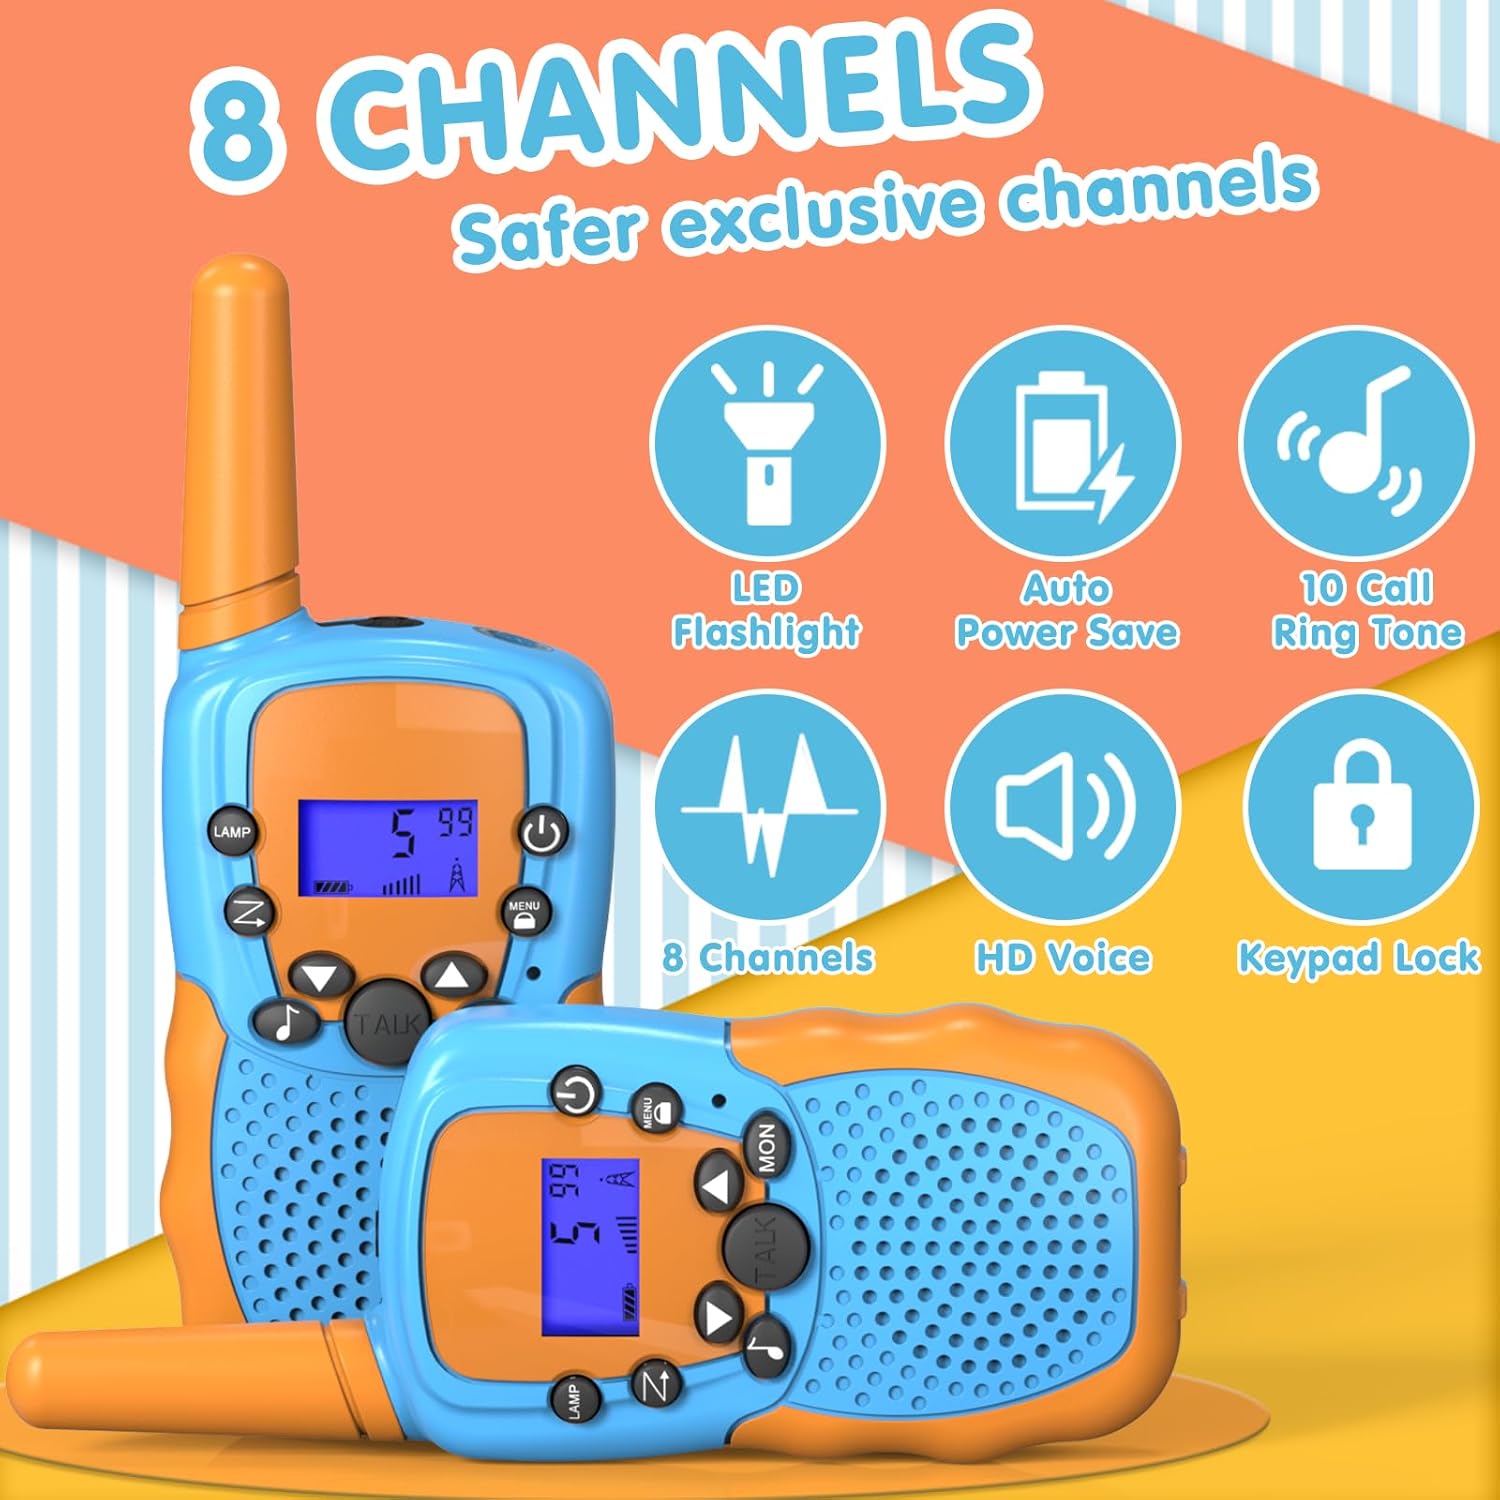
Figure 4.2: Overview of Kearui T388 features.
5. Setup
5.1 Battery Installation
Each Kearui T388 Walkie Talkie requires 4 AAA batteries (not included). Follow these steps to install the batteries:
- Locate the battery compartment cover on the back of the walkie talkie.
- Push the latch or slide the cover down to open the compartment.
- Insert 4 AAA batteries, ensuring correct polarity (+ and -) as indicated inside the compartment.
- Replace the battery compartment cover and slide it up until it clicks into place.
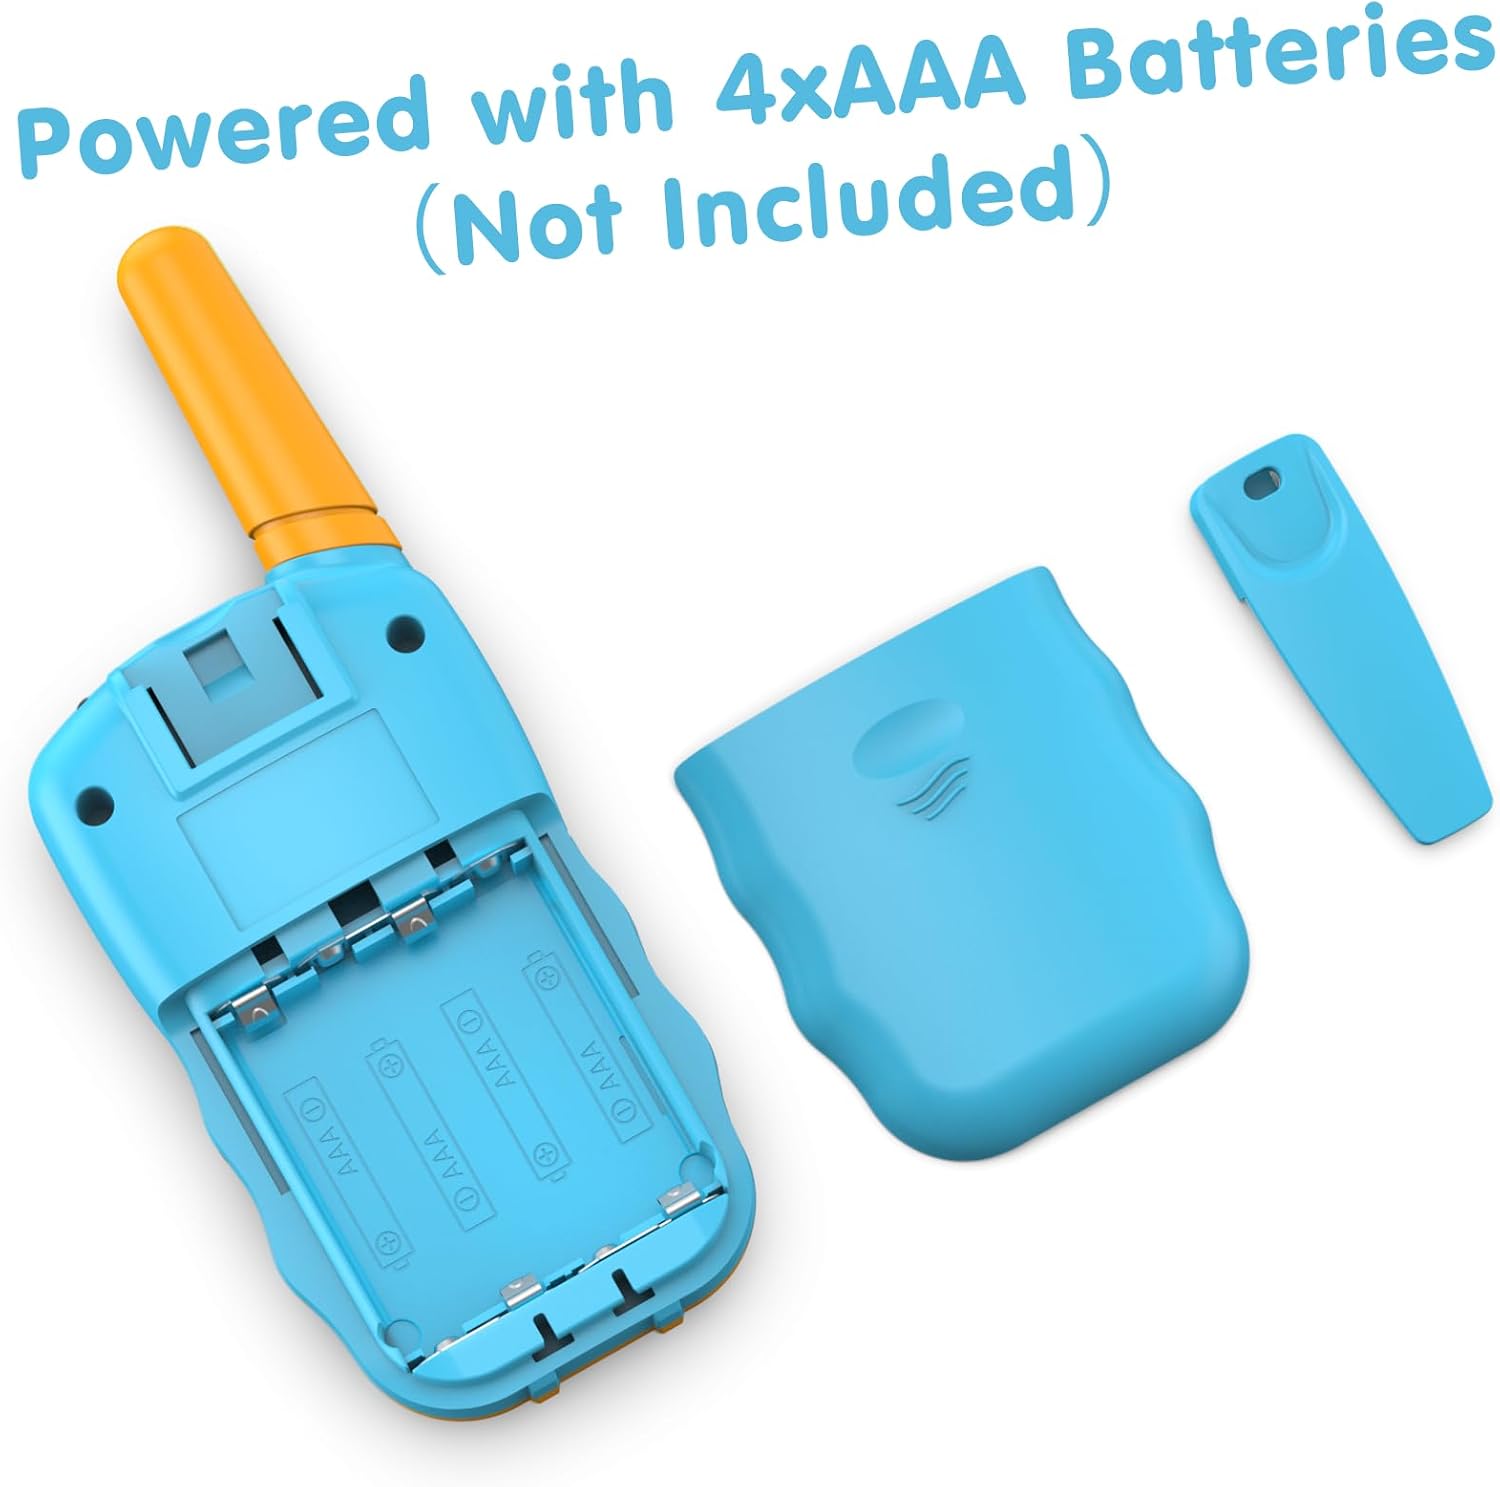
Figure 5.1: Battery compartment for 4xAAA batteries.
6. Operating Instructions
6.1 Power On/Off
- To power on: Press and hold the Power button () until the LCD screen illuminates.
- To power off: Press and hold the Power button until the LCD screen turns off.
6.2 Adjusting Volume
- Use the Up () and Down () buttons to increase or decrease the listening volume. The volume level will be displayed on the LCD screen.
6.3 Channel Selection
To communicate with another walkie talkie, both devices must be on the same channel.
- Press the Menu button () once. The channel number on the LCD screen will flash.
- Use the Up or Down buttons to select your desired channel (1-8).
- Press the Talk button () to confirm the channel selection and exit the menu.
6.4 Transmitting and Receiving
- To transmit (speak): Press and hold the Talk button. Speak clearly into the microphone, which is located near the speaker.
- To receive (listen): Release the Talk button. The walkie talkie will automatically switch to receive mode.
6.5 VOX Function (Voice Operated Exchange)
The VOX function allows you to transmit without pressing the Talk button. This is useful for hands-free operation.
- Press the Menu button multiple times until the VOX icon appears on the LCD screen.
- Use the Up or Down buttons to select the VOX sensitivity level (e.g., 1-3, with 3 being most sensitive). Select 'OF' to turn VOX off.
- Press the Talk button to confirm and exit.
6.6 Keypad Lock
To prevent accidental changes to your settings, you can lock the keypad.
- To lock: Press and hold the Menu button for approximately 3 seconds until the Keypad Lock icon appears on the LCD screen.
- To unlock: Press and hold the Menu button again for approximately 3 seconds until the Keypad Lock icon disappears.
6.7 Call Tone
You can send a call tone to alert other users on the same channel.
- Press the Menu button multiple times until the Call Tone icon appears.
- Use the Up or Down buttons to select from the available call tones (1-10).
- Press the Talk button to confirm and exit.
- To send the selected call tone, double-click the Talk button.
6.8 LED Flashlight
- To turn on/off the LED flashlight, press the LAMP button ().
6.9 Monitor Function
The Monitor function allows you to listen for weak signals on the current channel.
- Press and hold the MON button () to activate the monitor function. Release the button to deactivate.

Figure 6.1: Walkie talkies provide communication over distances.
7. Maintenance
- Cleaning: Use a soft, damp cloth to clean the exterior of the walkie talkie. Do not use harsh chemicals or abrasive cleaners.
- Storage: Store the device in a cool, dry place away from direct sunlight and extreme temperatures. If storing for an extended period, remove the batteries to prevent leakage.
- Battery Care: Replace all batteries at the same time. Do not attempt to recharge non-rechargeable batteries.
8. Troubleshooting
| Problem | Possible Cause | Solution |
|---|---|---|
| Device does not power on. | Batteries are dead or incorrectly installed. | Replace batteries with new ones, ensuring correct polarity. |
| No sound or poor sound quality. | Volume is too low; devices are on different channels; low battery. | Increase volume; ensure both walkie talkies are on the same channel; replace batteries. |
| Short communication range or interference. | Obstacles (buildings, trees); electromagnetic interference; low battery. | Move to an open area; change to a different channel; replace batteries. |
| Keypad is unresponsive. | Keypad lock is activated. | Press and hold the Menu button for 3 seconds to unlock the keypad. |
9. Specifications
- Brand: Kearui
- Model Number: T388
- Color: Orange
- Number of Channels: 8
- Frequency Range: 446.00625~446.09375MHz (PMR446 standard)
- Maximum Range: Up to 3 Miles (in optimal, open conditions)
- Voltage: 6 Volts (DC)
- Batteries: 8 AAA batteries required (4 per walkie talkie, not included)
- Special Features: Easy to Use, Lightweight, LED Flashlight, VOX Function, Keypad Lock, Auto Power Save, 10 Call Tones.
- Compatible Devices: Devices with the same PMR446 standard.
10. Warranty and Support
Information regarding product warranty and availability of spare parts is not provided in the product details. For any support inquiries, technical assistance, or questions about warranty, please contact Kearui customer service directly through their official channels or the retailer where the product was purchased.