1. Safety Information
- Read all instructions carefully before assembly and use.
- Keep small parts away from children to prevent choking hazards.
- Ensure all connectors are securely fastened during assembly to maintain stability.
- Do not overload individual cubes; the maximum load capacity per cube is 11 lbs (5 kg).
- Use the provided anti-toppling fittings to secure the unit to a wall, especially if placed in areas with children or pets, or if building a tall configuration.
- Avoid climbing on or hanging from the unit.
- Place the shoe rack on a flat, stable surface.
2. Package Contents
Please verify that all components listed below are present before beginning assembly. If any parts are missing or damaged, please contact customer support.
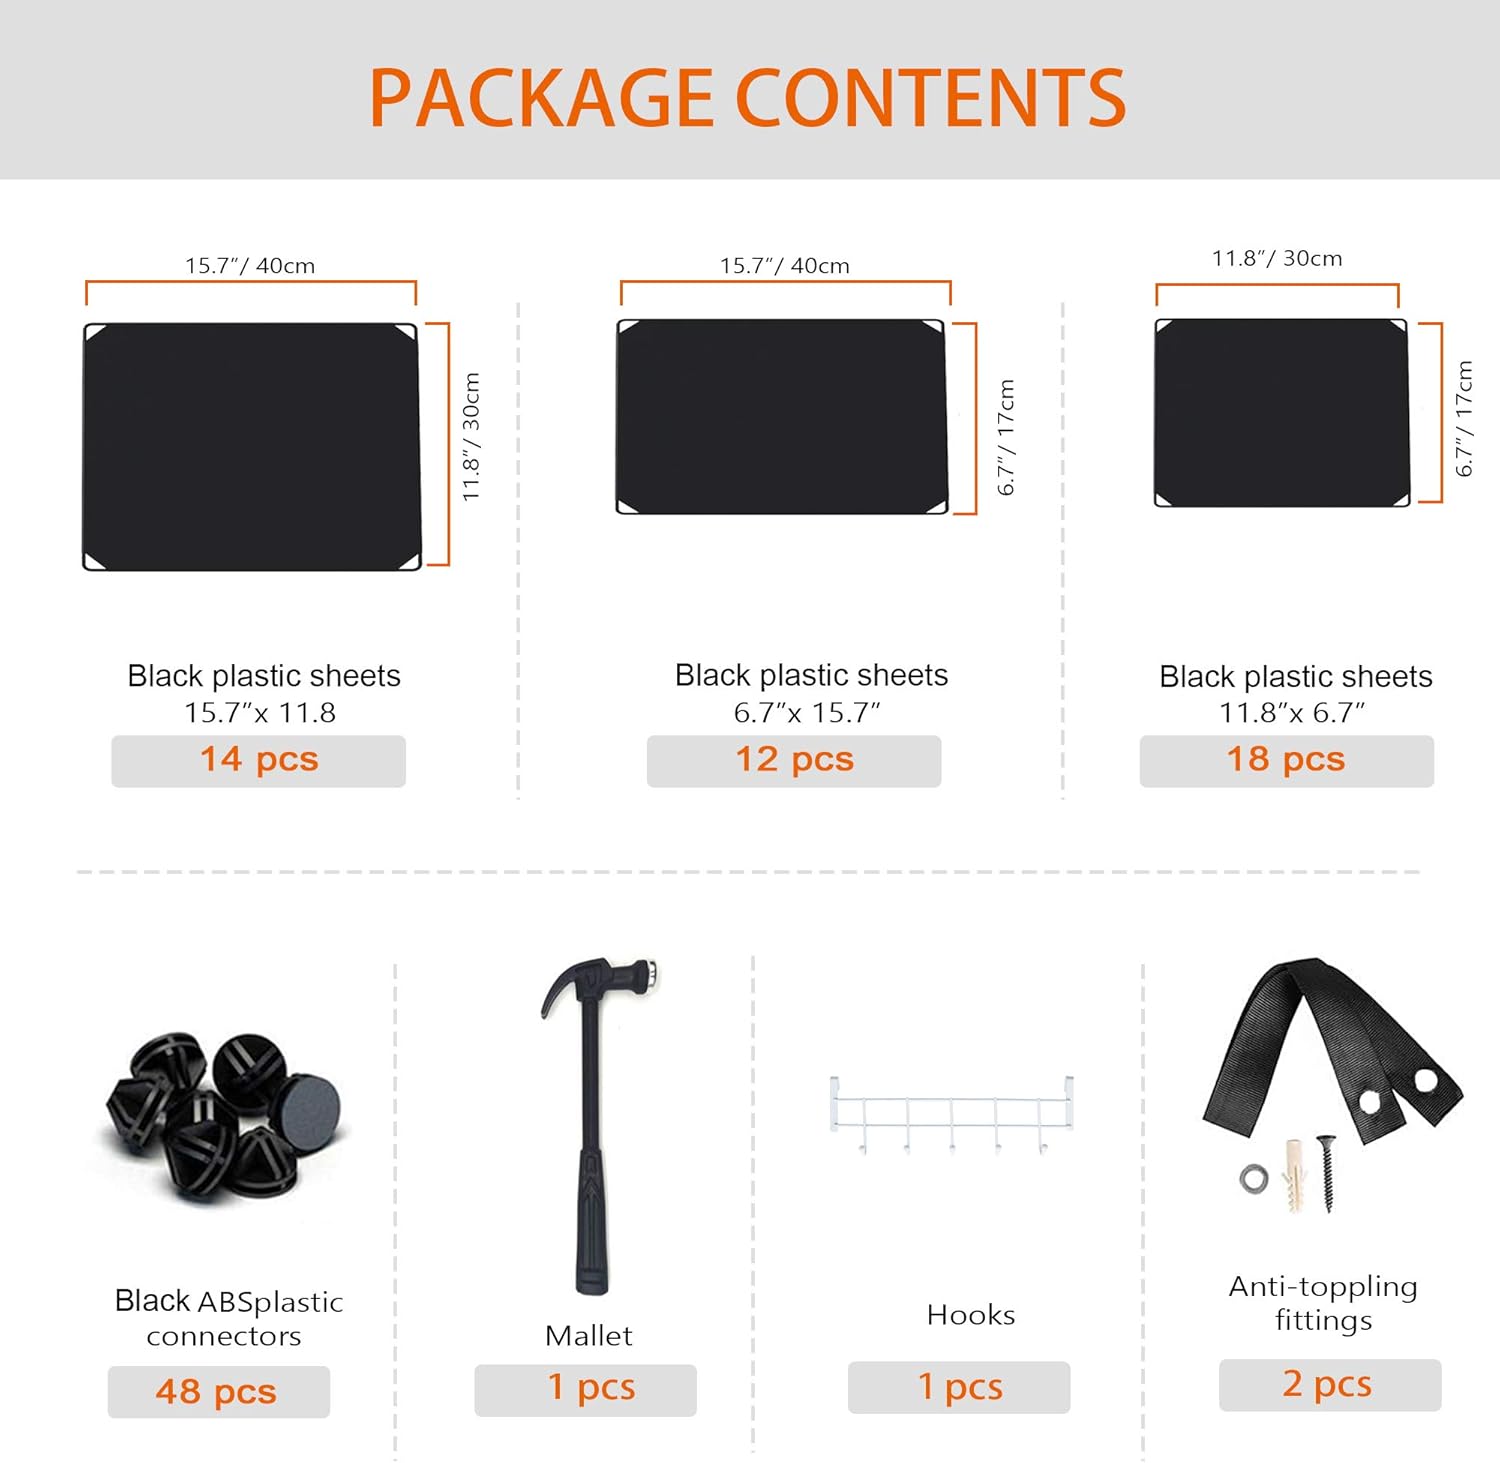
Image: Overview of all components included in the HOMIDEC 6-Tier Modular Shoe Rack package.
- 12 x Black plastic sheets (15.7” x 6.7” / 40 x 17cm)
- 14 x Black plastic sheets (11.8” x 15.7” / 30 x 40cm)
- 18 x Black plastic sheets (11.8” x 6.7” / 30 x 17cm)
- 48 x Black ABS plastic connectors
- 1 x Hooks
- 1 x Mallet
- 2 x Anti-toppling fittings
- 1 x Instruction Manual
3. Product Specifications
| Color | Black+grey |
| Material | PP Plastic Sheets with Metal Wire Frame, ABS Plastic Connectors |
| Single Cube Size (L x W x H) | 15.7” x 11.8” x 6.7” (40 x 30 x 17cm) |
| Max. Load Capacity per Cube | 11 lbs (5 kg) |
| Item Weight | 14.07 lbs (6.38 kg) |
| Overall Dimensions (Example 6-Tier) | Approx. 31.5" L x 11.8" W x 42.1" H (80 x 30 x 107cm) |
| Installation Type | Freestanding, Modular |
| Recommended Uses | Shoe storage, general organization in closets, hallways, bedrooms, entryways, living rooms, offices. |
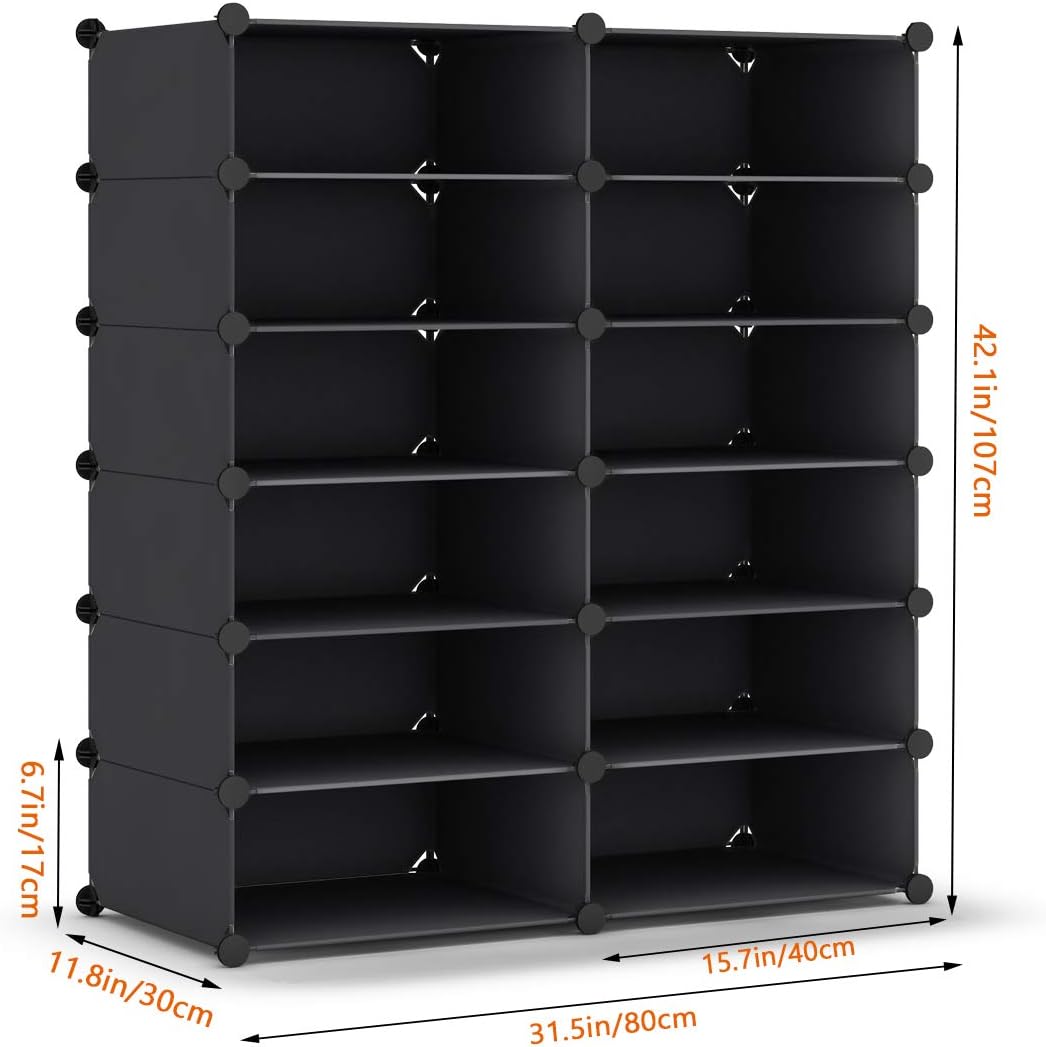
Image: Dimensions of the HOMIDEC 6-Tier Modular Shoe Rack.
4. Assembly Instructions
This modular shoe rack is designed for easy assembly. Follow the steps below, referring to the video and images for visual guidance. A mallet is included to ensure all parts are securely connected.
Video: Official HOMIDEC Shoe Storage Installation Guide. This video demonstrates the step-by-step process of assembling the modular shoe rack using the provided panels and connectors.
Step-by-Step Assembly:
- Prepare the Base:
Begin by connecting the plastic sheets using the ABS plastic connectors. Ensure the rounded side of the connectors faces outwards. For the base, use the larger 11.8” x 15.7” (30 x 40cm) sheets for the bottom and the 15.7” x 6.7” (40 x 17cm) sheets for the sides and back of the first tier. Use the mallet to gently tap the panels into the connectors until they are firmly seated.

Image: Initial assembly of two base units, demonstrating the connection of panels and connectors.
- Build Upwards:
Once the base tier is complete, add the next layer of side and back panels, followed by the top panels for the second tier. Continue this process, building each tier one by one. The 11.8” x 6.7” (30 x 17cm) sheets are typically used for the internal vertical dividers and smaller side panels.
- Add Top Panels:
After constructing the desired number of tiers, place the remaining large plastic sheets on top to form the final surface of the shoe rack. Secure these with connectors.
- Customize Configuration (Optional):
The modular design allows for various configurations. You can build the unit as a tall, narrow tower, a wide, short cabinet, or even separate smaller units. Refer to the product images for inspiration on different layouts.

Image: Tall configuration example.
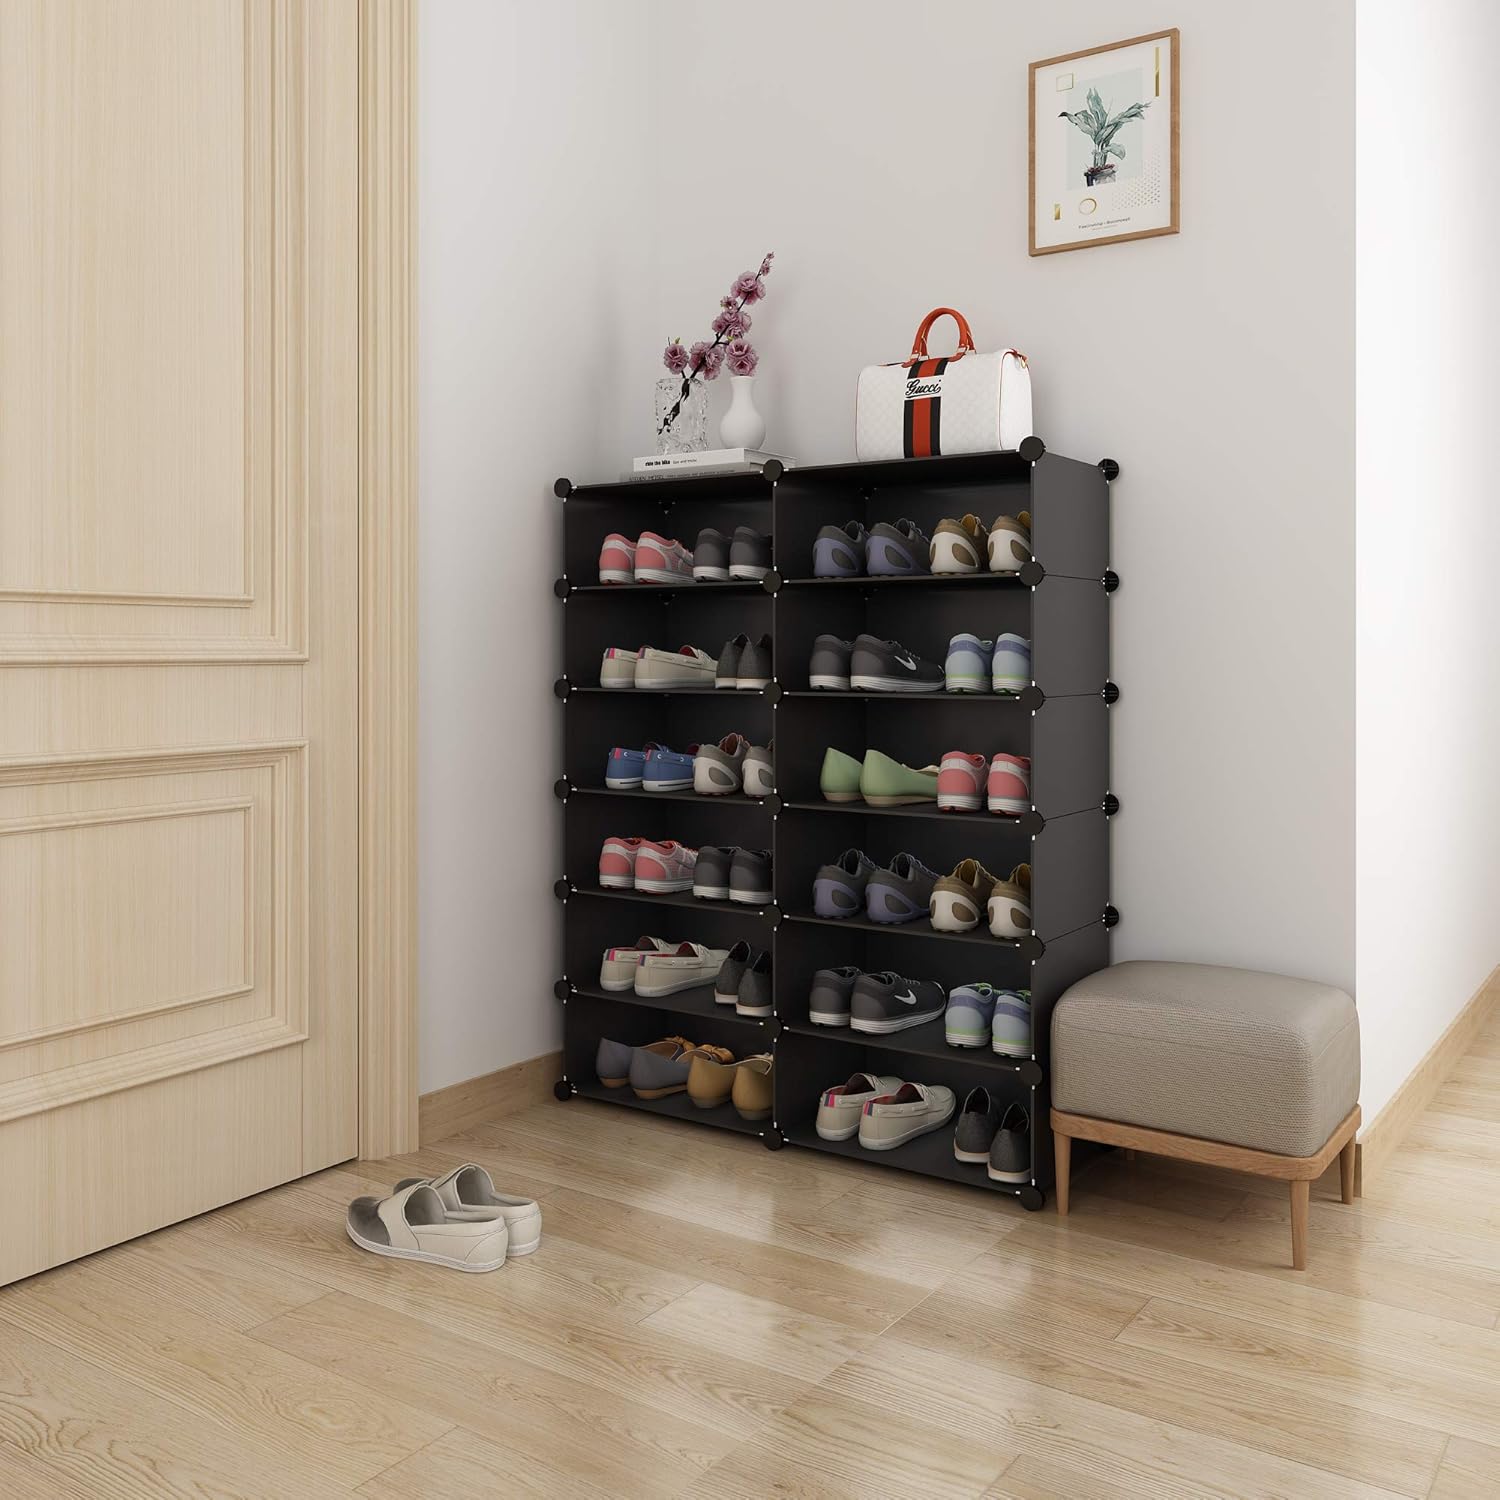
Image: Wide configuration example.
- Install Hooks and Anti-toppling Fittings:
Attach the provided hooks to the side of the unit for hanging small accessories like hats or bags. If building a tall unit, use the anti-toppling fittings to secure the rack to a wall for added safety and stability.
5. Usage
The HOMIDEC Modular Shoe Rack is designed to organize various items efficiently. Each cube can hold shoes, small bags, toys, or other personal belongings.
- Place shoes or other items neatly within each cube.
- Utilize the hooks for hanging lightweight items such as hats, scarves, or small handbags.
- Avoid placing excessively heavy items in any single cube to prevent damage or instability.
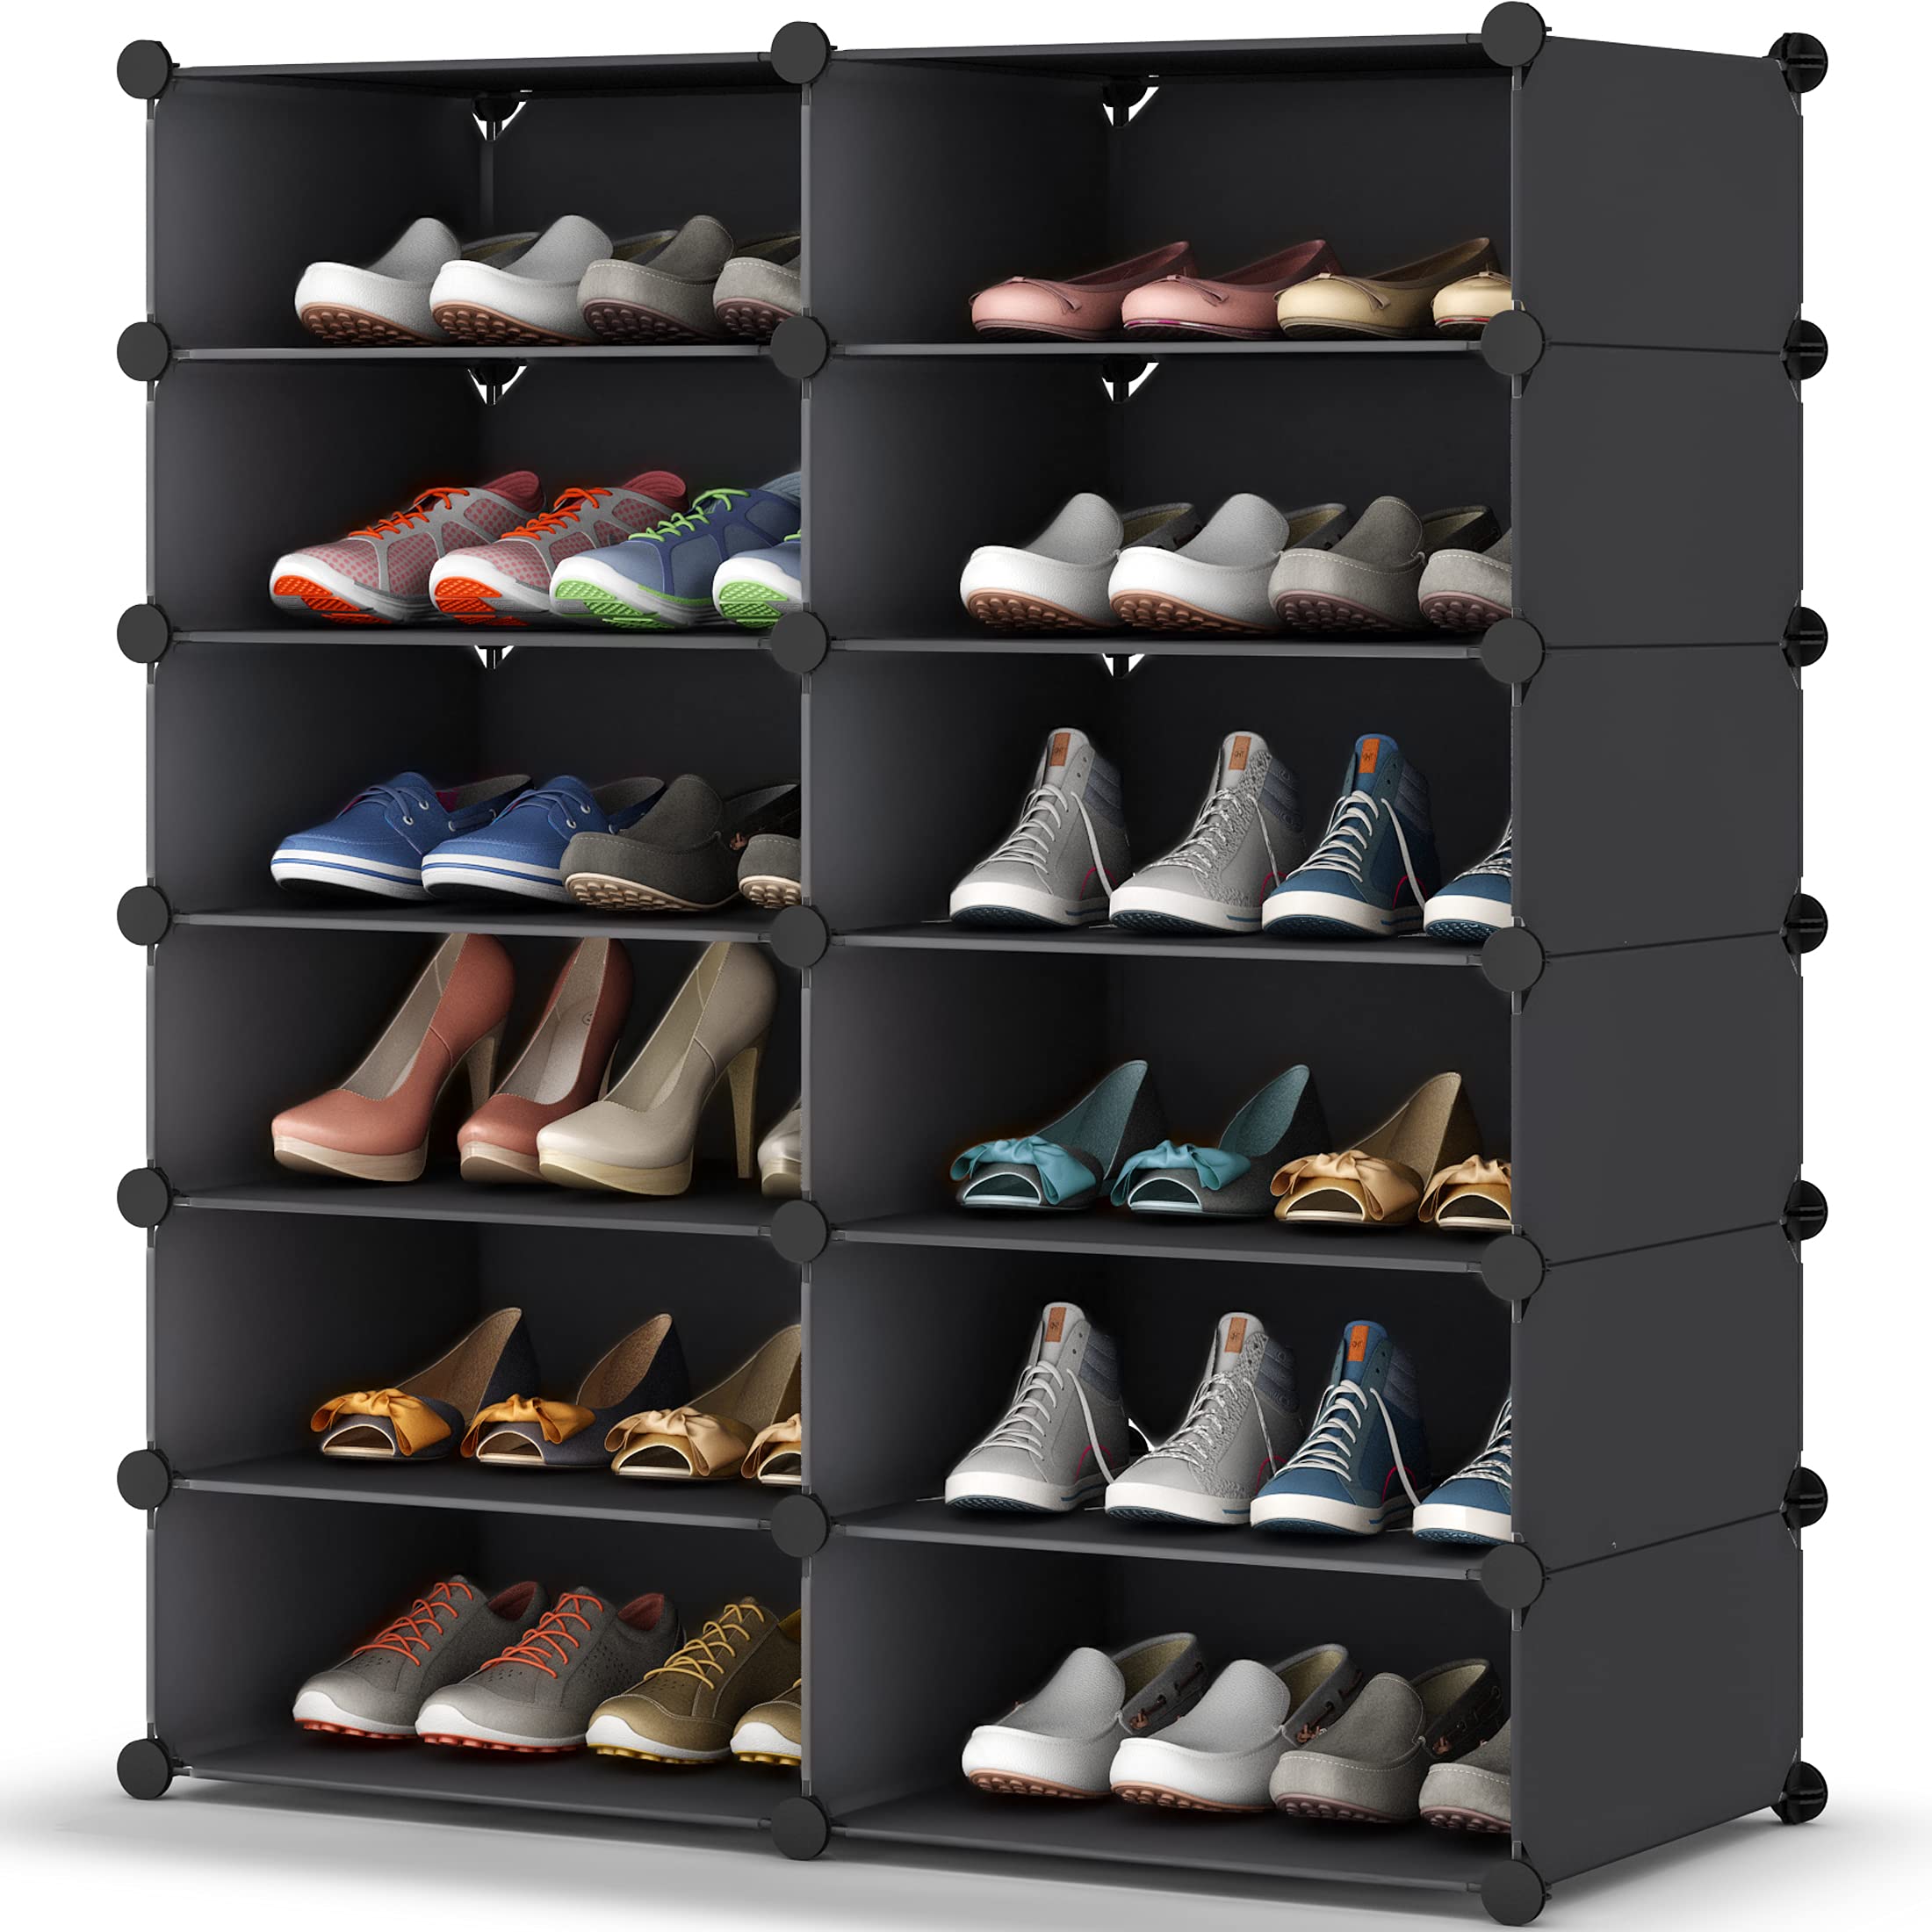
Image: Example of the shoe rack in use, organizing shoes and accessories.
6. Maintenance
To ensure the longevity and appearance of your HOMIDEC shoe rack, follow these simple maintenance guidelines:
- Cleaning: Wipe down the plastic panels with a soft, damp cloth. For stubborn dirt, a mild soap solution can be used. Avoid abrasive cleaners or harsh chemicals.
- Inspection: Periodically check all connectors to ensure they remain securely fastened. Re-tap with the mallet if any feel loose.
- Placement: Avoid prolonged exposure to direct sunlight or extreme temperatures, which may affect the plastic material.
7. Troubleshooting
If you encounter any issues with your shoe rack, please refer to the following common solutions:
- Unit is Unstable/Wobbly:
- Ensure all plastic panels are fully inserted into the connectors. Use the mallet to tap them firmly into place.
- Verify that the unit is placed on a flat, level surface.
- If building a tall configuration, ensure anti-toppling fittings are correctly installed and secured to a wall.
- Missing Parts:
If you find any parts missing from your package, please refer to the "Package Contents" section and contact HOMIDEC customer support immediately for assistance.
- Panels Not Fitting:
Double-check that you are using the correct size panels for each section as indicated in the assembly steps. Ensure connectors are oriented correctly with the rounded side facing outwards.
8. Warranty and Support
HOMIDEC products are covered by a 45-day no-risk money-back guarantee and a 24-month warranty.
If you encounter any problems during use, require replacement parts, or have questions not covered in this manual, please do not hesitate to contact our professional service team. We are committed to providing the best service and will respond as soon as possible, typically within 24 hours.
For support, please visit the HOMIDEC store on Amazon or contact us through the platform where you purchased the product.


