1. Product Overview
The Ocypus Iota A40 is a single tower CPU air cooler designed for efficient heat dissipation. It features a digital display, four heat pipes, and a silent 120mm FDB fan. This cooler is compatible with a range of AMD (AM4/AM5) and Intel (LGA 115X/1200/1700/1851) platforms, offering robust cooling performance for various computing tasks.
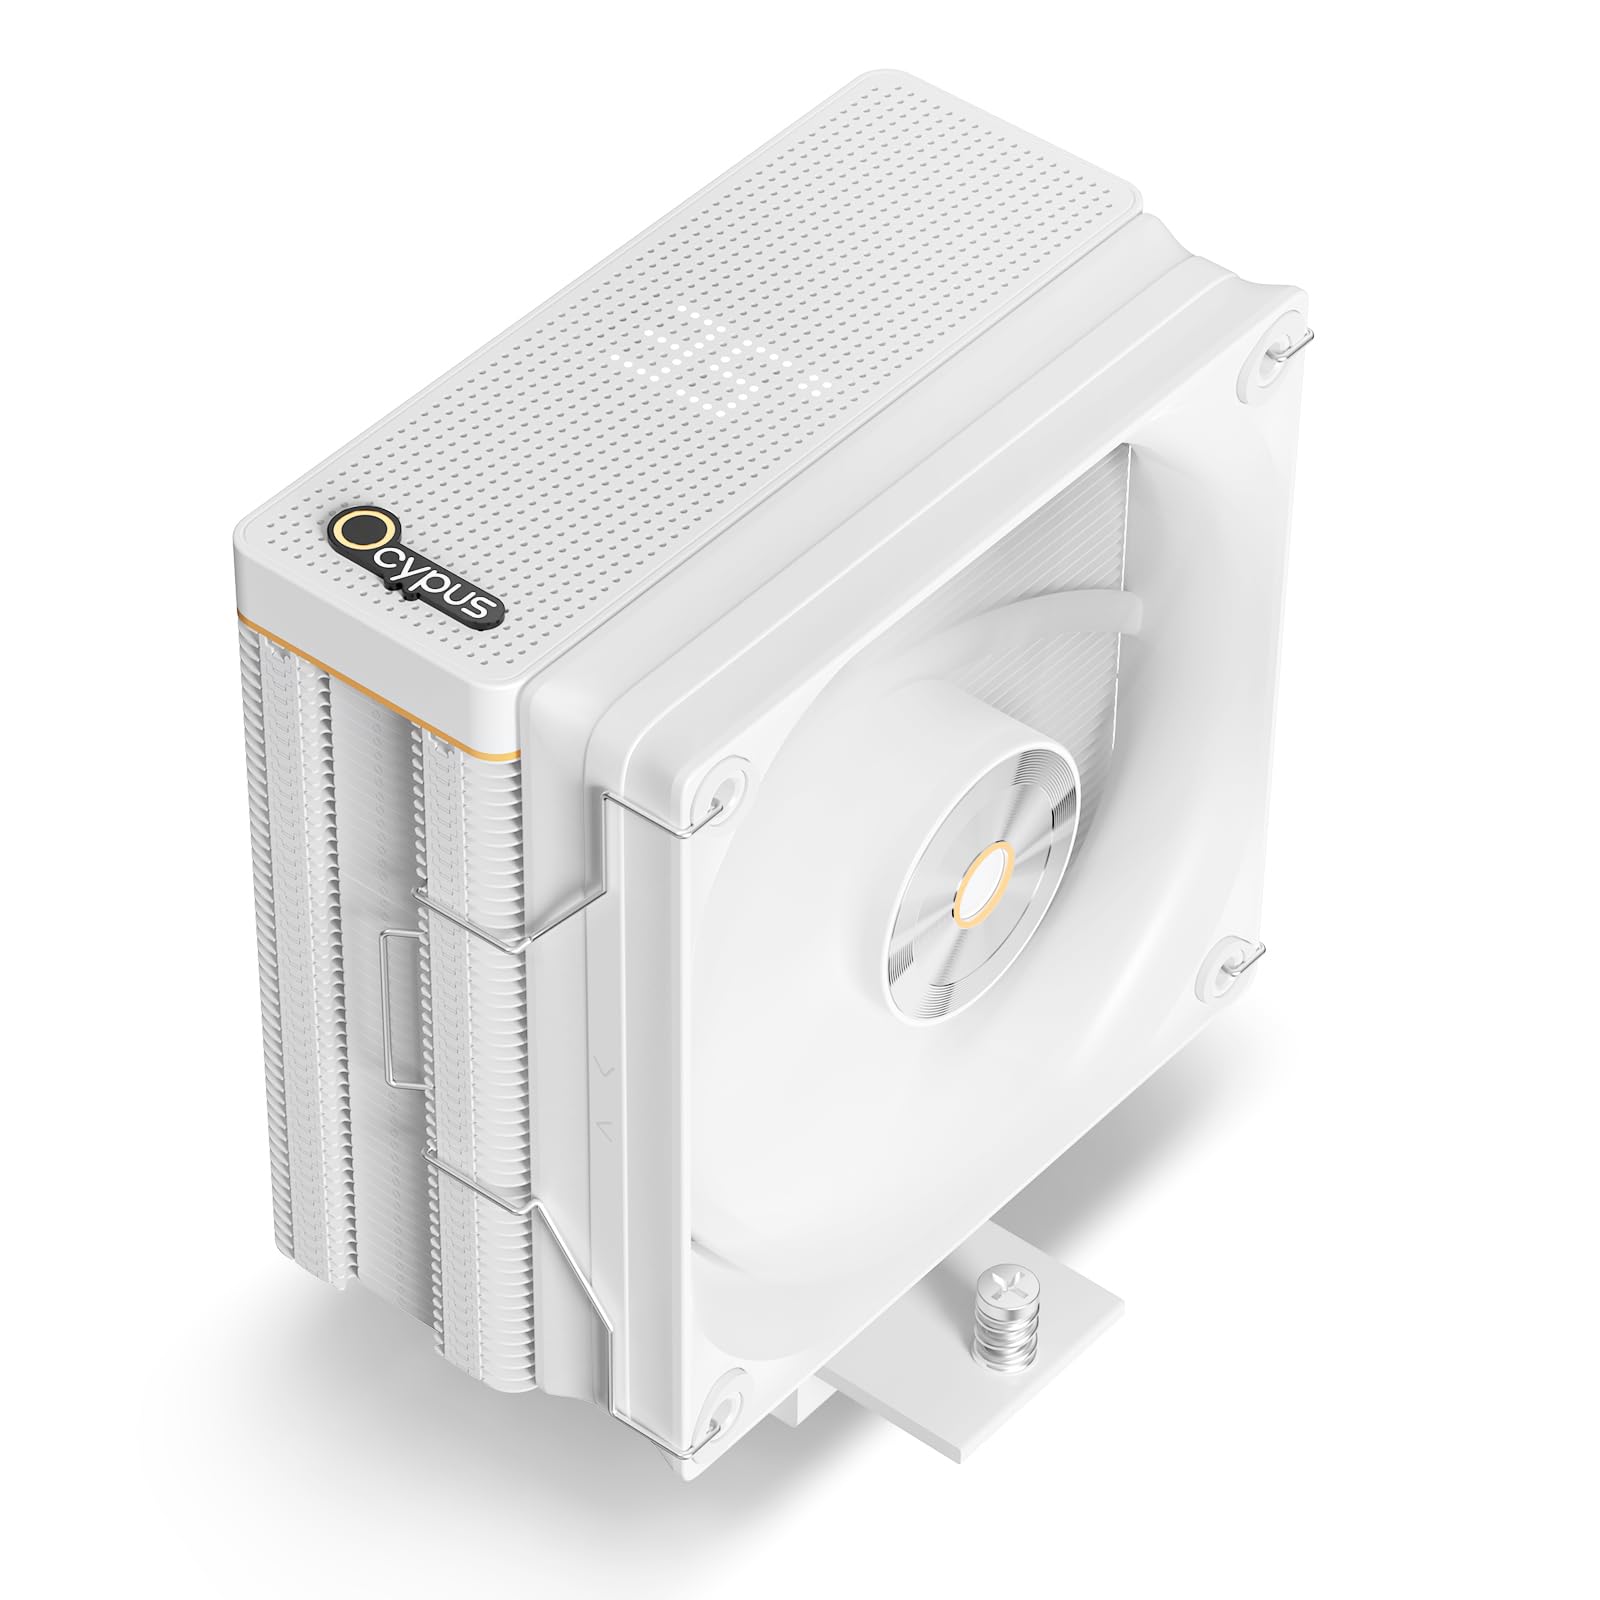
Figure 1: Ocypus Iota A40 CPU Air Cooler, White Model.
Key Features:
- Digital Display: Features a matrix circular perforated design with a digital display for monitoring (requires Ocypus app).
- High Efficiency: Capable of unleashing up to 220W of power for demanding tasks.
- Advanced Radiator Design: Family fin array design with folded edges and clipped FIN technology for enhanced heat dissipation and durability.
- Silent 120mm FDB Fan: High-quality Fluid Dynamic Bearing (FDB) fan with 500-2000 ±10% RPM, 77 CFM airflow, 4.65 mmH2O air pressure, and ≤29 dB(A) noise level.
- Broad Compatibility: Supports AMD AM4/AM5 and Intel LGA 115X/1200/1700/1851 platforms.
2. Installation Guide
The Ocypus Iota A40 CPU Air Cooler is designed for straightforward installation with its all-metal mounting hardware. Please follow these steps carefully for proper setup.
2.1 Package Contents
Before beginning installation, ensure all components are present:
- 1x Ocypus Iota A40 CPU Air Cooler
- Mounting hardware for AMD platforms (AM4/AM5)
- Mounting hardware for Intel platforms (LGA 115X/1200/1700/1851)
- Fan clips
- Thermal paste (usually pre-applied or included separately)

Figure 2: Included accessories for multi-platform support, including brackets, standoffs, and the backplate.
2.2 Pre-Installation Steps
- Prepare your Motherboard: Refer to your motherboard manual for CPU installation. Ensure the CPU is correctly seated in its socket.
- Apply Thermal Paste: If thermal paste is not pre-applied to the cooler's base, apply a small, pea-sized amount to the center of the CPU's integrated heat spreader (IHS).
- Identify Mounting Hardware: Select the appropriate mounting brackets and backplate for your CPU socket type (AMD or Intel).

Figure 3: Illustration of multi-platform mounting hardware for AMD and Intel sockets.
2.3 Cooler Installation
- Install Backplate and Standoffs: For Intel sockets, place the backplate behind the motherboard and secure it with the appropriate standoffs from the front. For AMD sockets, use the existing backplate and attach the AMD mounting clips.
- Mount the Cooler: Carefully place the cooler onto the CPU, aligning the mounting holes with the standoffs/clips. Secure the cooler using the provided screws, tightening them in a diagonal pattern until snug. Do not overtighten.
- Attach the Fan: Use the included fan clips to attach the 120mm fan to the radiator. Ensure the fan is oriented to push air through the heatsink towards the rear or top of your PC case.
- Connect Fan and Digital Display Cables:
- Connect the 4-pin PWM fan cable to the CPU_FAN header on your motherboard.
- Connect the USB 2.0 header cable from the cooler to an available USB 2.0 header on your motherboard for the digital display functionality.
Video 1: An overview of the Ocypus Iota A40 Air Cooler, demonstrating its features and components, which can assist in understanding the installation process.
3. Operation
Once installed, the Ocypus Iota A40 CPU Air Cooler operates automatically, adjusting fan speed based on CPU temperature. The integrated digital display provides real-time temperature monitoring.
3.1 Digital Display Functionality
The cooler features a matrix circular perforated digital display on its top cover. To utilize this feature and view CPU/GPU temperatures, you must install the Ocypus Digital software.
- Software Download: Search for "Ocypus" in your web browser or refer to the product manual for the official Ocypus website. Locate and download the "Ocypus Digital" installation package.
- Installation: Install the software on your Windows 10 or Windows 11 system. It is recommended to add the Ocypus Digital software to your antivirus software whitelist during installation.
- USB Connection: Ensure the cooler's USB 2.0 cable is correctly connected to your motherboard for the digital display to function.

Figure 4: Screenshot of the Ocypus Digital software interface, showing temperature display options and important notes.
3.2 Fan Control
The 120mm PWM fan automatically adjusts its speed (500-2000 RPM) based on CPU temperature, as controlled by your motherboard's BIOS/UEFI settings or fan control software. This ensures an optimal balance between cooling performance and noise levels.

Figure 5: Detailed specifications of the 120mm PWM fan, highlighting airflow, air pressure, noise level, and bearing type.
4. Maintenance
Regular maintenance helps ensure the longevity and optimal performance of your CPU air cooler.
- Dust Removal: Periodically (e.g., every 3-6 months), use compressed air to clean dust from the radiator fins and fan blades. Ensure the fan is held stationary during cleaning to prevent damage to the bearing.
- Fan Inspection: Check the fan for any signs of wear, unusual noise, or obstructions. If the fan is removable, you may clean it separately.
- Thermal Paste: While not frequently required, if you remove the cooler for any reason, it is recommended to clean off old thermal paste from both the CPU and cooler base and apply fresh thermal paste before reinstallation.
5. Troubleshooting
This section addresses common issues you might encounter with your CPU air cooler.
5.1 High CPU Temperatures
- Check Fan Connection: Ensure the fan's 4-pin PWM cable is securely connected to the CPU_FAN header on the motherboard.
- Verify Thermal Paste Application: Confirm that thermal paste was applied correctly and evenly between the CPU and the cooler's base. Reapply if necessary.
- Proper Mounting Pressure: Ensure the cooler is securely mounted and tightened evenly. Uneven pressure can lead to poor contact and reduced cooling.
- Airflow: Check your PC case's airflow. Ensure intake and exhaust fans are properly oriented and not obstructed.
- Dust Buildup: Clean any dust from the radiator fins and fan blades as described in the Maintenance section.
5.2 Digital Display Not Working
- USB Connection: Verify that the cooler's USB 2.0 header cable is firmly connected to an available USB 2.0 header on your motherboard.
- Software Installation: Ensure the "Ocypus Digital" software is correctly installed on your Windows 10/11 system.
- Antivirus Whitelist: Check if your antivirus software is blocking the Ocypus Digital application. Add it to the whitelist if necessary.
- Software Restart: Try restarting the Ocypus Digital software or your computer.
5.3 Excessive Fan Noise
- Dust Buildup: Clean the fan blades and radiator fins.
- Fan Obstruction: Ensure no cables or other components are touching the fan blades.
- BIOS/UEFI Settings: Adjust fan curves in your motherboard's BIOS/UEFI settings to reduce fan speed at lower temperatures.
6. Specifications
| Feature | Detail |
|---|---|
| Model | Iota A40 |
| Brand | Ocypus |
| Product Dimensions (L x W x H) | 4.92" x 2.78" x 6.17" (125mm x 70.5mm x 156.7mm) |
| Cooling Method | Air |
| TDP (Thermal Design Power) | Up to 220W |
| Heat Pipes | 4 x Φ6mm |
| Fan Size | 120mm |
| Fan Speed | 500-2000 ±10% RPM |
| Air Flow Capacity | 77 CFM (Max) |
| Air Pressure | 4.65 mmH2O (Max) |
| Noise Level | ≤29 dB(A) |
| Bearing Type | FDB (Fluid Dynamic Bearing) |
| Power Connector Type | 4-Pin PWM |
| Voltage | 12 Volts (DC) |
| Wattage | 2.4 watts |
| Material | Aluminum |
| Compatible Devices | Desktop |
| Socket Compatibility | AMD: AM4/AM5, Intel: LGA 115X/1200/1700/1851 |
| Item Weight | 1 Kilogram |

Figure 6: Diagram illustrating the product dimensions of the Ocypus Iota A40 CPU Air Cooler.
7. Warranty and Support
For warranty information, technical support, or further assistance, please visit the official Ocypus website or contact their customer service. Keep your purchase receipt as proof of purchase.
You can often find additional resources, FAQs, and driver downloads (such as the Ocypus Digital software) on the manufacturer's support page.
Official Ocypus Store: Visit the Ocypus Store on Amazon