1. Introduction
This manual provides detailed instructions for the installation, operation, and maintenance of the AVer PTZ310N 12X NDI Live Streaming PTZ Camera. Please read this manual thoroughly before using the product to ensure proper setup and optimal performance.
The AVer PTZ310N is a professional-grade PTZ (Pan-Tilt-Zoom) camera designed for live streaming and video production. It features 12x optical zoom, NDI support, and advanced functionalities like SmartShoot and SmartFrame for enhanced video capture.
2. Package Contents
Verify that all items listed below are included in your package:
- AVer PTZ310N Camera
- Remote control
- 12V/5A power adapter
- Documentation (Quick Start Guide, Warranty Card) - Note: Actual documentation may vary.
3. Product Overview
The AVer PTZ310N camera is designed for versatile deployment and high-quality video capture. Familiarize yourself with the camera's components and connection ports.
3.1 Front and Side Views
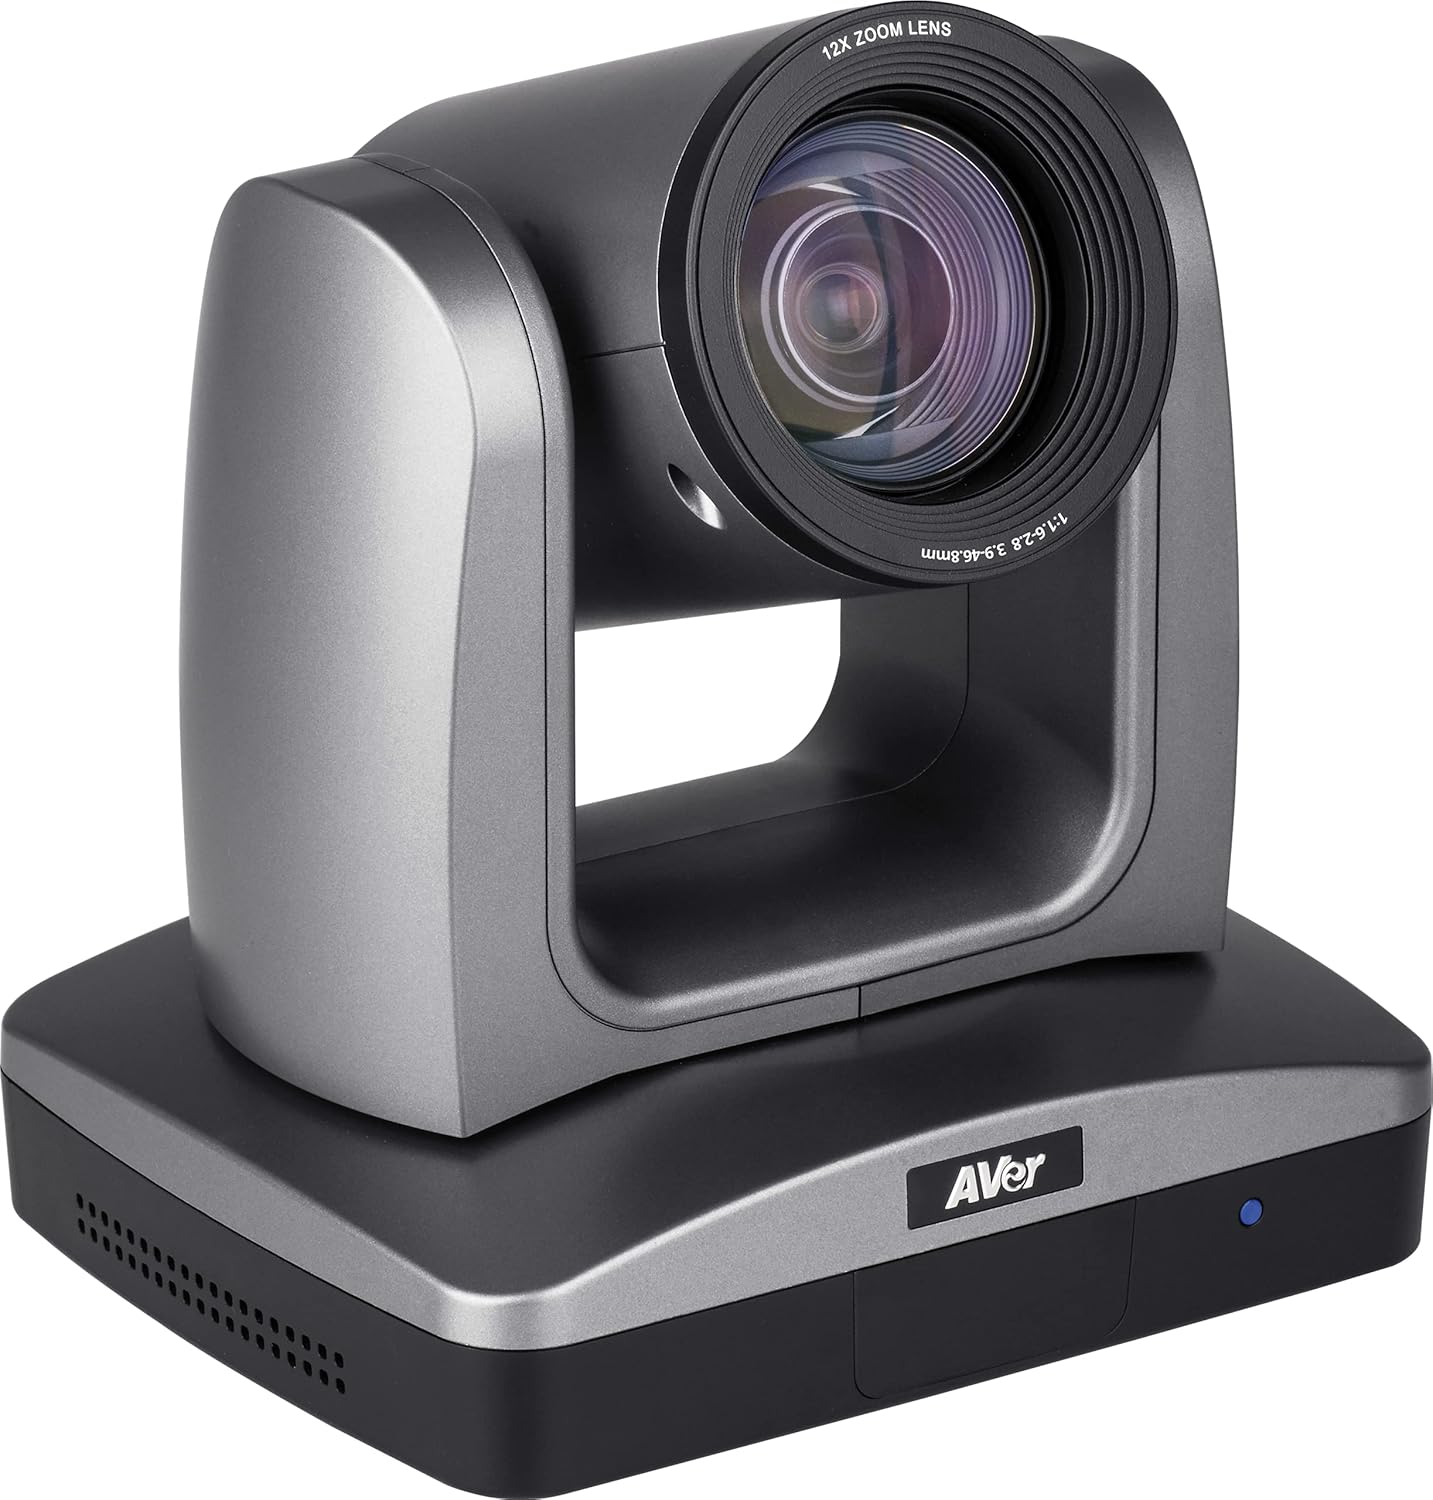
Figure 3.1: Front angled view of the AVer PTZ310N camera, showing the lens and base.
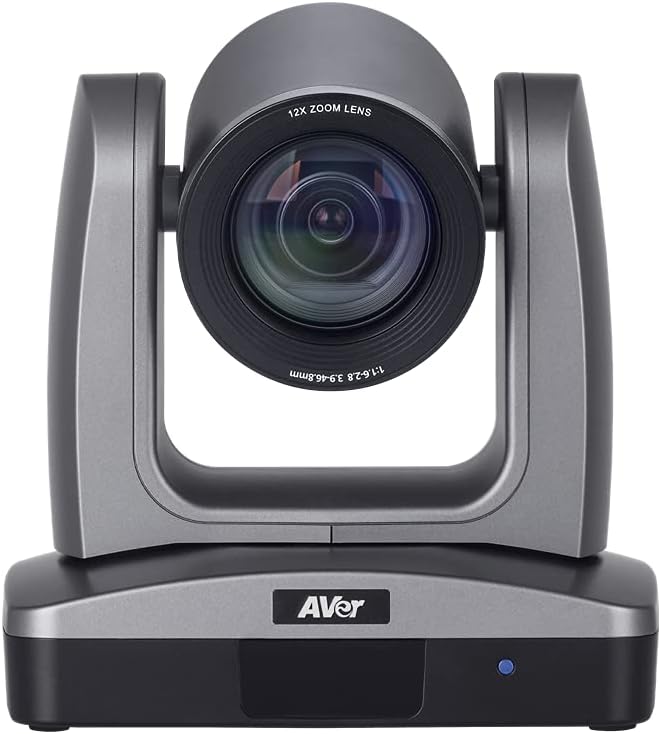
Figure 3.2: Front view of the AVer PTZ310N camera, highlighting the 12X zoom lens.
3.2 Rear Panel Connections
The rear panel of the PTZ310N camera provides various ports for power, video output, audio input, and control.

Figure 3.3: Rear panel of the AVer PTZ310N camera, showing various connectivity ports.
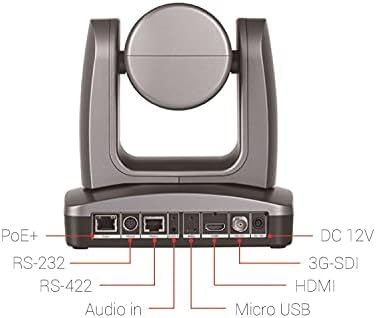
Figure 3.4: Labeled rear panel connections of the AVer PTZ310N camera, indicating PoE+, RS-232, RS-422, Audio In, Micro USB, HDMI, 3G-SDI, and DC 12V ports.
- PoE+ Port: For power and network connectivity (NDI).
- RS-232 / RS-422 Ports: For serial control via VISCA protocol.
- Audio In: 3.5mm jack for external audio input.
- Micro USB: For firmware updates or specific control.
- HDMI Output: For video output to displays or capture devices.
- 3G-SDI Output: For professional video output over longer distances.
- DC 12V: Power input using the provided 12V/5A adapter.
4. Setup and Installation
Follow these steps to properly set up your AVer PTZ310N camera.
4.1 Power Connection
- Connect the provided 12V/5A power adapter to the DC 12V port on the camera's rear panel.
- Plug the power adapter into a suitable power outlet.
- Alternatively, if using Power over Ethernet (PoE+), connect an Ethernet cable from a PoE+ enabled switch or injector to the PoE+ port on the camera. The camera will receive both power and network data through this single cable.
4.2 Video Output Connection
Choose one or more of the following video output options:
- HDMI: Connect an HDMI cable from the camera's HDMI port to an HDMI input on a display, capture card, or video switcher.
- 3G-SDI: Connect an SDI cable from the camera's 3G-SDI port to an SDI input on a professional video switcher or recorder.
- IP (NDI): Connect an Ethernet cable to the PoE+ port (or a separate LAN port if not using PoE+). The camera will be discoverable on your network as an NDI source. Refer to your NDI software documentation for integration.
- USB: Connect a Micro USB cable from the camera to a computer for specific applications or firmware updates.
4.3 Control Connection
The camera can be controlled via the included IR remote, IP, or serial connections.
- IR Remote Control: Point the remote control towards the camera's IR receiver.
- Serial Control (RS-232/RS-422): Connect a serial cable from the camera's RS-232 or RS-422 port to a compatible control system. The camera supports VISCA protocol for control.
- IP Control: Once connected to the network, the camera can be controlled via its web interface or compatible IP control software. Refer to the camera's network settings for its IP address.
5. Operation
This section details the operational aspects of the AVer PTZ310N camera.
5.1 Powering On/Off
- To power on, ensure the power adapter is connected or PoE+ is active. The camera will initiate its startup sequence.
- To power off, disconnect the power adapter or disable PoE+ to the camera.
5.2 Pan, Tilt, and Zoom Control
- Use the directional buttons on the remote control or control software to pan (horizontal movement) and tilt (vertical movement) the camera. The camera offers precise movement with pan/tilt rotation maneuvers as small as 0.1° per step.
- Utilize the zoom buttons to adjust the 12x optical zoom lens. Zoom in for close-ups and zoom out for wider shots.
- Adjustable speed controls allow for smooth and consistent camera movement.
5.3 Preset Locations
The PTZ310N allows you to save and recall specific camera positions (pan, tilt, zoom, focus).
- IR Remote Presets: The IR remote control allows you to set and recall up to 10 pre-programmed locations. Refer to the remote control's specific instructions for saving and recalling presets.
- VISCA Presets: Up to 255 different locations can be preset via VISCA control through the RS-232 or RS-422 ports. Consult the VISCA protocol documentation for detailed commands.
5.4 SmartShoot Feature
AVer SmartShoot streamlines camera controls to automatically and seamlessly capture content between your preset areas. This feature allows for a multi-camera feel with a single PTZ310N by tracking movement between defined preset zones.
5.5 SmartFrame Feature
Aver’s SmartFrame technology provides one-touch facial targeting. It instantly adjusts the camera's Field of View (FOV) to fit all participants on screen, making it suitable for capturing groups in presentations or lectures.
6. Maintenance
Proper maintenance ensures the longevity and optimal performance of your camera.
- Cleaning the Lens: Use a soft, lint-free cloth specifically designed for optical lenses to gently wipe the camera lens. Avoid abrasive materials or harsh chemicals.
- Cleaning the Body: Wipe the camera body with a soft, dry cloth. If necessary, a slightly damp cloth can be used, but ensure no moisture enters the ports or internal components.
- Storage: When not in use for extended periods, store the camera in a dry, dust-free environment, away from direct sunlight and extreme temperatures.
- Firmware Updates: Periodically check the AVer website for firmware updates to ensure your camera has the latest features and performance enhancements. Follow the instructions provided with the firmware update carefully.
7. Troubleshooting
If you encounter issues with your AVer PTZ310N camera, refer to the following common troubleshooting steps.
- No Power:
- Ensure the power adapter is securely connected to both the camera and a working power outlet.
- If using PoE+, verify that the Ethernet cable is connected to a PoE+ enabled port and the PoE+ switch/injector is powered on.
- No Video Output:
- Check all video cables (HDMI, 3G-SDI, Ethernet for NDI) are securely connected.
- Verify the input source on your display or capture device is correctly selected.
- For NDI, ensure the camera is on the same network and discoverable by your NDI software.
- Camera Not Responding to Control:
- IR Remote: Ensure there are no obstructions between the remote and the camera's IR receiver. Check remote battery.
- Serial Control: Verify serial cable connections and ensure the correct baud rate and protocol (VISCA) are configured on your control system.
- IP Control: Confirm the camera's IP address is correct and accessible on the network. Check network connectivity.
- Image Quality Issues:
- Ensure the lens is clean (refer to Maintenance section).
- Check lighting conditions in the environment. The camera performs well in low-light, but optimal lighting is always recommended.
- Adjust camera settings (e.g., exposure, white balance) via the control interface if available.
If the problem persists, contact AVer technical support for further assistance.
8. Specifications
The following table outlines the technical specifications of the AVer PTZ310N camera.
| Feature | Specification |
|---|---|
| Brand | AVer |
| Model Number | PTZ310N |
| Photo Sensor Technology | CMOS (1/2.8" Exmor CMOS sensor) |
| Video Capture Resolution | 1080p |
| Optical Zoom | 12x |
| Maximum Aperture | 1.6 Millimeters |
| Connectivity Technology | Wireless (IP/NDI), HDMI, 3G-SDI, USB, RS-232, RS-422 |
| Supported Audio Format | AAC |
| Video Capture Format | MPEG 4 |
| Item Weight | 8.08 pounds (approx. 3.67 kg) |
| Package Dimensions | 11.5 x 11.2 x 11.2 inches (approx. 29.2 x 28.4 x 28.4 cm) |
| Color | Gray |
| Manufacturer | AVer |
| Date First Available | August 17, 2020 |
9. Warranty and Support
AVer provides support for its products. For detailed warranty information, product registration, and technical assistance, please visit the official AVer website or contact their customer support directly.
Manufacturer: AVer
For the most up-to-date support resources, including FAQs, drivers, and software, please visit AVer's official website.