1. Introduction and Overview
This manual provides detailed instructions for the installation, operation, and maintenance of your ASRock A520M Pro4 Micro ATX motherboard. Designed for AMD AM4 Socket Ryzen™ 3000, 4000 G-Series, 5000, and 5000 G-Series Desktop Processors, this motherboard offers a robust foundation for your computing needs. It features an 8 Power Phase Design with Digi Power for stable power delivery, supports DDR4 memory up to 4733+ (OC), and includes multiple expansion options.
Key features include:
- Supports AMD AM4 Socket Ryzen 3000, 4000 G-Series and 5000 and 5000 G-Series Desktop Processors
- 8 Power Phase Design, Digi Power
- Supports DDR4 4733+ (OC)
- 2 x PCIe 3.0 x16, 1 x M.2 Key E for WiFi
- Graphics Output Options: HDMI, DisplayPort, D-Sub
- 7.1 CH HD Audio (Realtek ALC1200 Audio Codec), Nahimic Audio
- 4 x SATA3, 1 x Ultra M.2 (PCIe Gen3 x4), 1 x M.2 (PCIe Gen3 x2 & SATA3)
- 10 x USB 3.2 Gen1 (5 x Rear, 1 x Rear Type-C, 4 x Front)
2. Setup and Installation
Before beginning installation, ensure your workspace is clean and static-free. Refer to the following steps for proper component installation.
2.1 Motherboard Layout
Familiarize yourself with the motherboard's layout and key components.

Figure 2.1: Top-down view of the ASRock A520M Pro4 motherboard, showing the CPU socket, RAM slots, PCIe slots, and various headers.

Figure 2.2: Detailed view of the ASRock A520M Pro4 motherboard with key features labeled, including RGB LED headers, USB 3.2 Gen1 headers, SATA3 ports, M.2 slots, and triple graphics outputs.
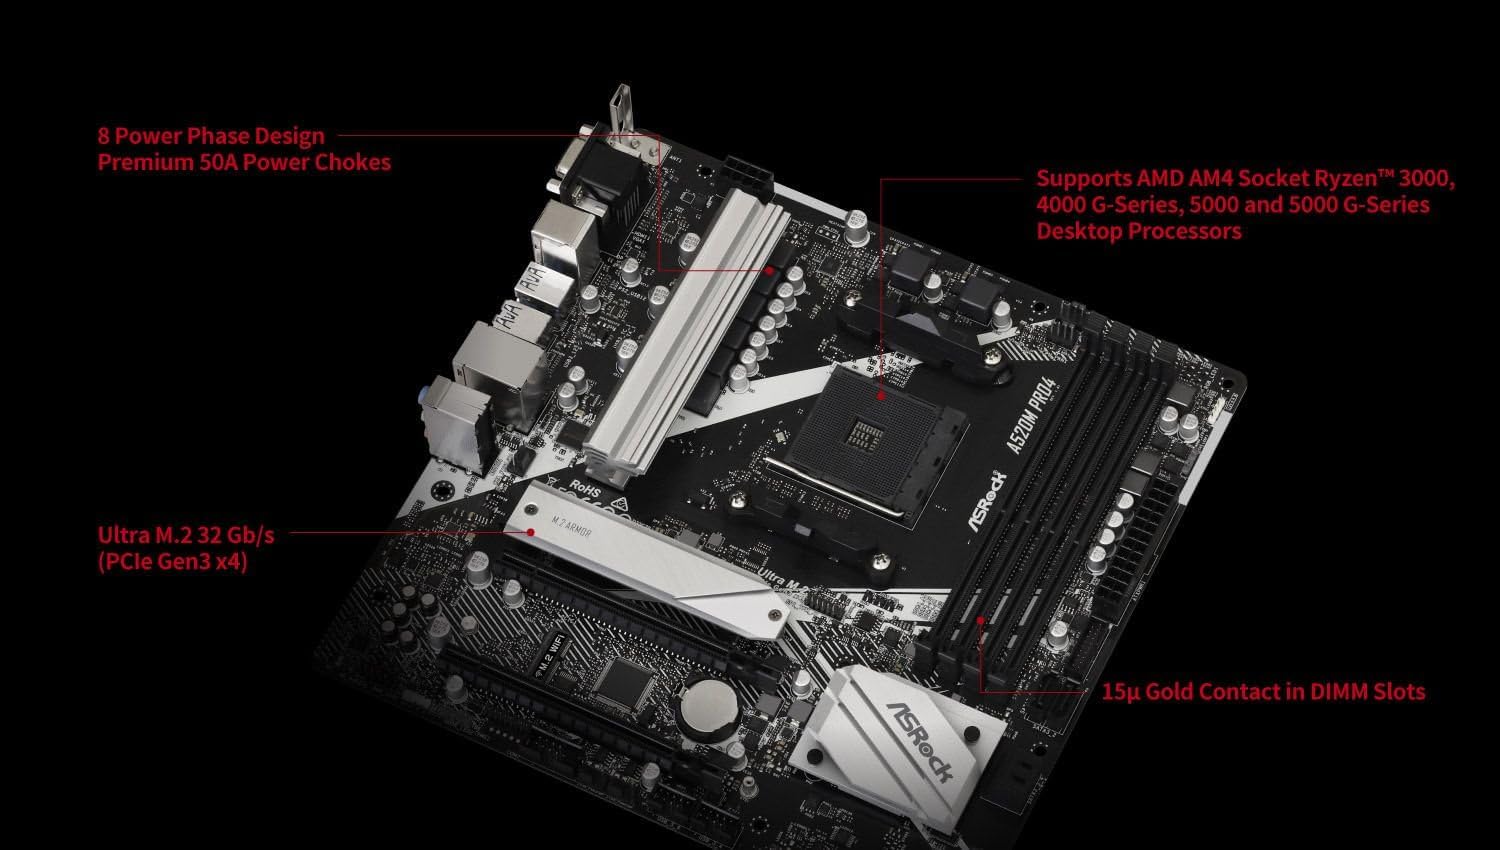
Figure 2.3: Close-up of the ASRock A520M Pro4 highlighting the 8 Power Phase Design, support for AMD AM4 Socket Ryzen™ 3000, 4000 G-Series, 5000, and 5000 G-Series Desktop Processors, and 15µ Gold Contact in DIMM Slots.
2.2 CPU Installation
Carefully open the CPU socket lever. Align the triangular mark on your AMD Ryzen processor with the corresponding mark on the AM4 socket. Gently place the CPU into the socket without forcing it. Once seated, close the lever to secure the CPU.
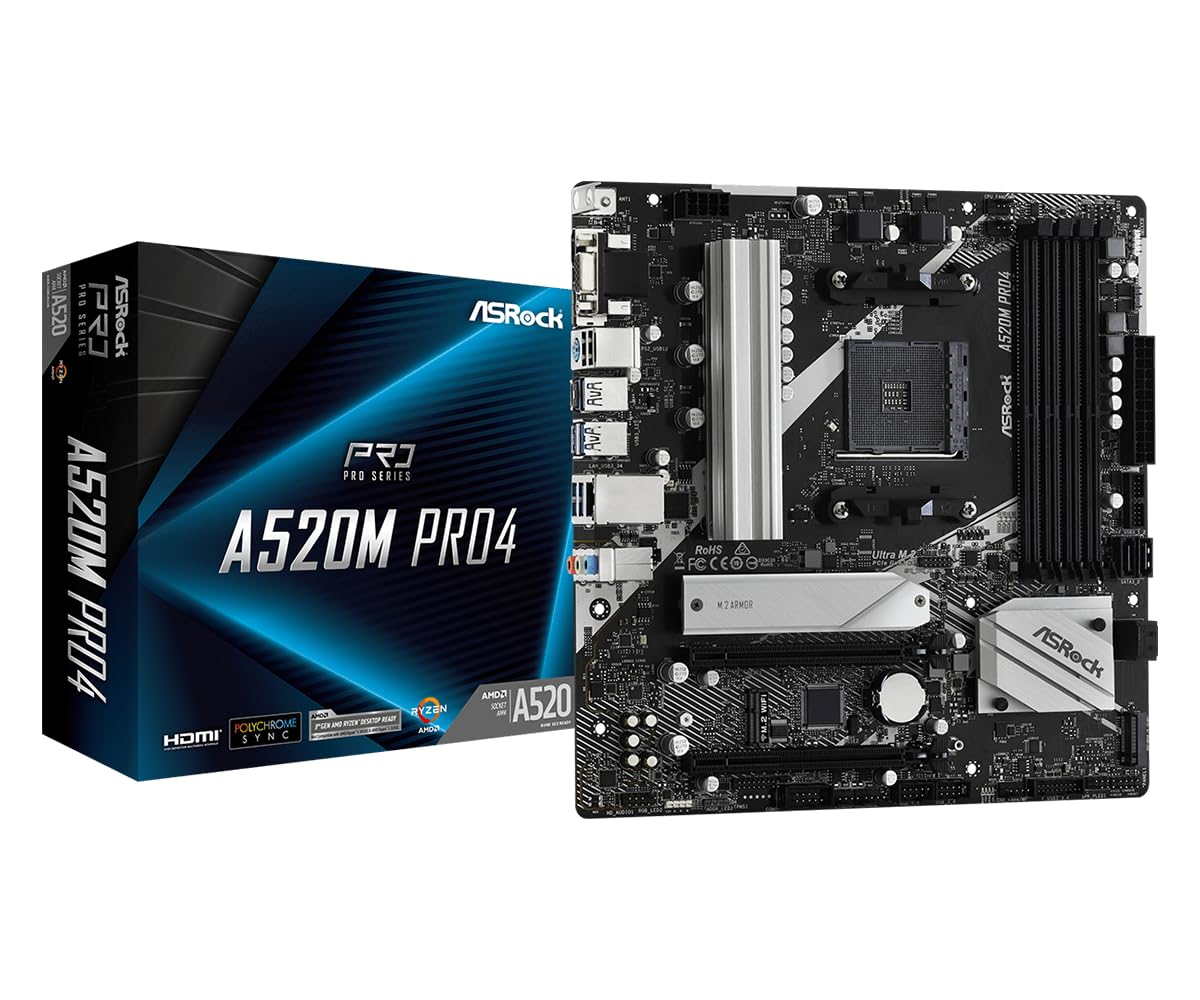
Figure 2.4: Close-up of the AM4 CPU socket on the ASRock A520M Pro4 motherboard, ready for processor installation.
2.3 RAM Installation
Open the clips on both ends of the DDR4 DIMM slots. Align the notch on the RAM module with the key in the DIMM slot. Press down firmly on both ends of the RAM module until the clips snap into place.
2.4 M.2 SSD Installation
Locate the M.2 slots on the motherboard. Insert the M.2 SSD into the slot at an angle, then gently push it down and secure it with the provided screw. The A520M Pro4 includes one Ultra M.2 (PCIe Gen3 x4) and one M.2 (PCIe Gen3 x2 & SATA3) slot.
2.5 CPU Compatibility
Ensure your chosen CPU is compatible with the ASRock A520M Pro4 motherboard. Refer to the CPU support list below for validated processors and their required BIOS versions.

Figure 2.5: A detailed table showing the CPU support list for the ASRock A520M Pro4, including CPU family, model, TDP, core count, frequency, cache, and validated BIOS versions.
3. Operating Instructions
After assembling your system, connect all necessary peripherals and power cables.
3.1 First Boot and BIOS Setup
- Power on your system.
- Press the Del or F2 key repeatedly during startup to enter the BIOS/UEFI setup utility.
- Configure boot order, system time, and other essential settings as required.
- Save changes and exit the BIOS. The system will then attempt to boot from your chosen device.
3.2 Driver Installation
After installing your operating system, install the necessary drivers for the motherboard components. These can typically be found on the ASRock support website for your specific model or on the included driver CD (if applicable). Install chipset drivers, audio drivers, LAN drivers, and any other relevant utility drivers.
4. Maintenance
Regular maintenance helps ensure the longevity and optimal performance of your motherboard.
4.1 Cleaning
- Periodically clean dust from the motherboard and other internal components using compressed air.
- Ensure the system is powered off and unplugged before cleaning.
- Avoid using liquid cleaners directly on components.
4.2 BIOS Updates
ASRock periodically releases BIOS updates to improve compatibility, stability, and performance. Check the ASRock website for the latest BIOS versions for your A520M Pro4 motherboard. Follow the instructions provided by ASRock carefully when performing a BIOS update to avoid system damage.
5. Troubleshooting
If you encounter issues, refer to the following common troubleshooting steps.
- No Power/No Boot:
- Check all power connections (24-pin ATX, 8-pin CPU).
- Ensure the power supply is switched on.
- Verify front panel connections (power button).
- No Display:
- Ensure the monitor is connected to the correct graphics output (motherboard or discrete GPU).
- Reseat the graphics card and RAM modules.
- If using an APU, ensure your monitor is connected to the motherboard's video output.
- System Instability/Crashes:
- Check RAM seating and test modules individually.
- Ensure CPU cooler is properly installed and making good contact.
- Verify all drivers are up to date.
- Check for BIOS updates.
- Component Not Detected:
- Reseat the component (e.g., M.2 SSD, SATA drive, PCIe card).
- Check cable connections.
- Verify BIOS settings for the component (e.g., SATA mode).
6. Specifications
Below are the detailed technical specifications for the ASRock A520M Pro4 motherboard.
| Feature | Specification |
|---|---|
| Brand | ASRock |
| Model Name | A520M PRO4 |
| CPU Socket | Socket AM4 (Supports Ryzen 3000, 4000 G-Series, 5000, 5000 G-Series) |
| Chipset Type | AMD A520 |
| RAM Memory Technology | DDR4 |
| Memory Clock Speed | Up to 4733+ MHz (OC) |
| Memory Slots Available | 4 |
| Ram Memory Maximum Size | 128 GB |
| Graphics Card Interface | PCI-Express x16 (2 slots) |
| Total PCIe Ports | 2 |
| M.2 Slots | 1 x Ultra M.2 (PCIe Gen3 x4), 1 x M.2 (PCIe Gen3 x2 & SATA3) |
| Total SATA Ports | 4 |
| Graphics Output Options | HDMI, DisplayPort, D-Sub |
| Total Number of HDMI Ports | 1 |
| Total USB Ports | 10 (5 x Rear, 1 x Rear Type-C, 4 x Front USB 3.2 Gen1) |
| Number of Ethernet Ports | 1 |
| Audio Codec | Realtek ALC1200 Audio Codec (7.1 CH HD Audio, Nahimic Audio) |
| Form Factor | Micro ATX |
| Item Weight | 2.2 Pounds |
7. Warranty Information
The ASRock A520M Pro4 motherboard comes with a 3-year warranty. For specific terms and conditions, please refer to the warranty card included with your product or visit the official ASRock website.
8. Technical Support
For further technical assistance, driver downloads, BIOS updates, or troubleshooting not covered in this manual, please visit the official ASRock support website: www.asrock.com/support. You may also contact ASRock customer service directly for specialized support.