1. Introduction
This manual provides essential information for the proper installation, operation, and maintenance of your CURT 13579 Class 3 Trailer Hitch. This hitch is designed for select Lexus RX350, RX350h, and RX500h models, offering a dependable 2-inch receiver for various towing needs. It is engineered for strength and durability, tested to SAE J684 standards, and features a robust dual-coat finish for enhanced protection.

Figure 1: Representative image of the CURT Class 3 Trailer Hitch highlighting its vehicle-specific design, standard hitch receiver, fully tested design, and industry-leading dual-coat finish.
2. Safety Information
Always prioritize safety during installation and operation. Read all instructions thoroughly before beginning. Failure to follow these instructions could result in property damage, serious injury, or death.
- Weight Capacity: Never exceed the lowest-rated towing component, including the vehicle's towing capacity, the hitch's capacity, or the trailer's capacity.
- Professional Installation: If you are unsure about any step of the installation process, consult a qualified professional installer.
- Inspection: Before each towing trip, inspect the hitch, trailer, and all connections for wear, damage, or loose fasteners.
- Proposition 65 Warning: This product may contain chemicals known to the State of California to cause cancer, birth defects, or other reproductive harm.
3. What's in the Box
Your CURT 13579 Class 3 Trailer Hitch package includes the following components:
- One (1) CURT Class 3 Trailer Hitch (Model 13579)
Please verify all components are present and undamaged before proceeding with installation.
4. Specifications
| Specification | Value |
|---|---|
| Model Number | 13579 |
| Brand | CURT |
| Receiver Tube Size | 2 inches x 2 inches |
| Gross Trailer Weight (GTW) | 3,500 lbs. |
| Tongue Weight (TW) | 350 lbs. |
| Material | Carbon Steel |
| Finish Type | Gloss, Powder-Coated (Dual-coat: Liquid A-coat & Black Powder Coat) |
| Item Weight | 35 Pounds |
| Vehicle Service Type | Sport Utility Vehicle |
| Automotive Fit Type | Vehicle Specific Fit |

Figure 2: The hitch features a standard 2-inch receiver tube, compatible with a wide range of towing accessories.
5. Setup and Installation
The CURT 13579 trailer hitch is designed for a custom, vehicle-specific fit on select Lexus RX350, RX350h, and RX500h models, making installation straightforward. No drilling is required for this installation.
Required Tools:
- Basic hand tools (wrenches, sockets)
- Safety glasses
- Floor jack or assistance for lifting the hitch (recommended)
Installation Steps:
- Prepare Vehicle: Park the vehicle on a level surface and engage the parking brake. For easier access, consider parking with the rear of the car slightly elevated, such as at the beginning of a driveway slope, ensuring all wheels remain on a level surface.
- Position Hitch: Carefully lift the trailer hitch into position beneath the vehicle's frame. It is recommended to have a second person or use a floor jack to support the hitch during this step.
- Align and Secure: Align the hitch's mounting points with the existing bolt holes in the vehicle's frame. The design allows for direct bolt-on installation without the need to lower the muffler or interfere with the bumper.
- Install Fasteners: Insert the provided bolts and washers into the aligned holes. Hand-tighten all fasteners first to ensure proper alignment.
- Torque Fasteners: Once all bolts are in place, tighten them to the manufacturer's specified torque settings. Refer to your vehicle's service manual for specific torque values if not provided with the hitch.
- Final Check: Verify that all fasteners are securely tightened and the hitch is firmly mounted to the vehicle.
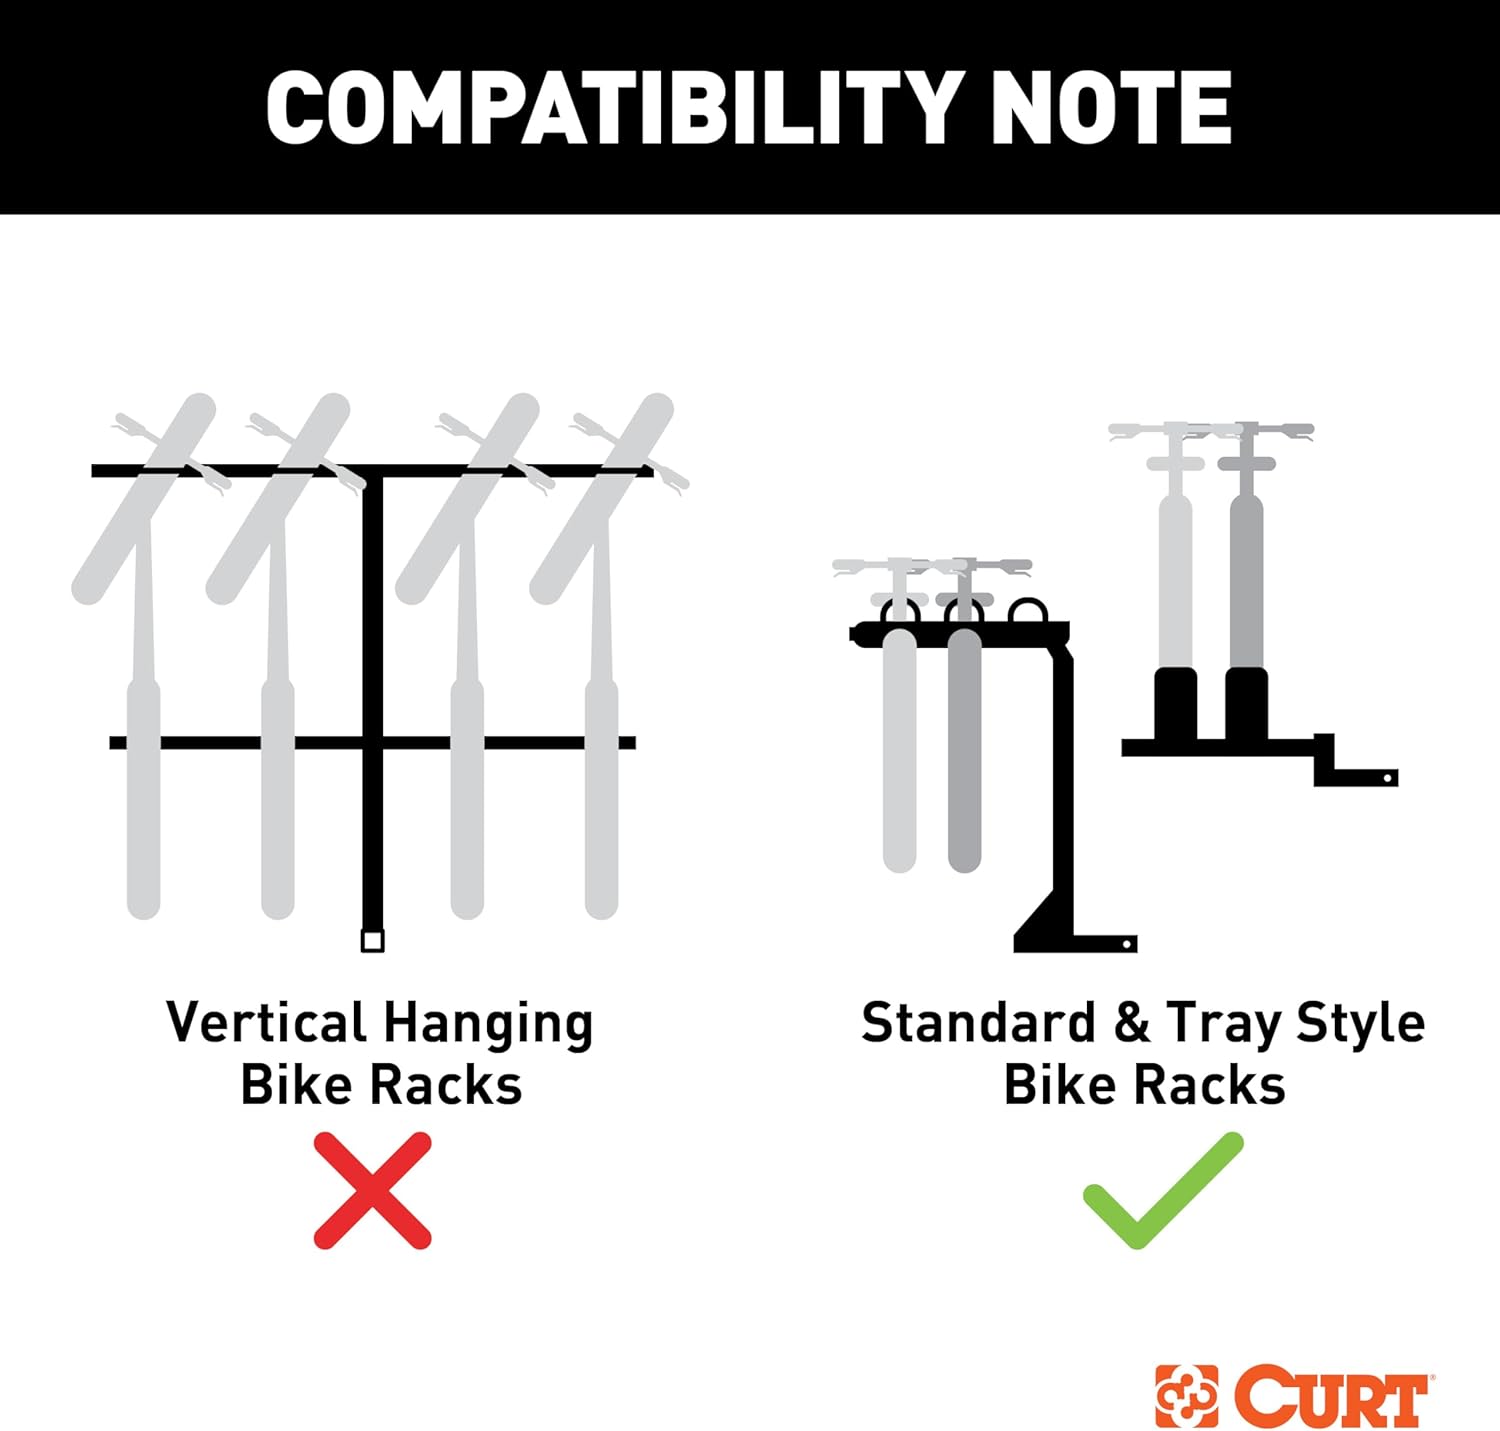
Figure 3: This hitch is designed for a direct bolt-on installation, eliminating the need for drilling into the vehicle frame.

Figure 4: The fully tested design ensures the hitch meets SAE J684 standards for safety and performance.
6. Operating Instructions
Your CURT Class 3 trailer hitch is designed to facilitate towing various types of trailers, including utility trailers, boat trailers, campers, snowmobile haulers, and ATV haulers.
Connecting a Trailer:
- Insert a compatible ball mount into the 2-inch receiver tube and secure it with a hitch pin and clip.
- Attach the trailer coupler to the hitch ball, ensuring it is properly latched and secured.
- Connect the trailer's safety chains to the designated chain loops on the hitch. Cross the chains under the coupler to create a cradle in case of detachment.
- Connect the trailer's electrical wiring to the vehicle's towing harness (if applicable).
- Verify all lights and brakes on the trailer are functioning correctly before driving.
Bike Rack Compatibility:
This Class 3 hitch is compatible with most standard and tray-style bike racks that utilize a 2-inch receiver. It is not compatible with vertical hanging bike racks that require bikes to be hung or mounted vertically, as these may interfere with the vehicle's rear sensors or exhaust.

Figure 5: Compatibility note for bike racks, illustrating that standard and tray-style racks are suitable, while vertical hanging racks are not.
7. Maintenance
Regular maintenance will ensure the longevity and safe operation of your CURT trailer hitch.
- Regular Inspection: Periodically inspect the hitch for any signs of rust, chipping, or structural damage. Check all bolts and fasteners for tightness and re-torque if necessary.
- Cleaning: Clean the hitch with mild soap and water. Avoid harsh chemicals that could damage the finish.
- Protective Finish: The hitch is protected with a unique dual-coat finish of rust-resistant liquid A-coat and highly durable black powder coat. This co-cured finish provides exceptional resistance to rust, chipping, and UV damage.

Figure 6: The hitch's industry-leading dual-coat finish provides superior protection against environmental elements.
8. Troubleshooting
Kick Sensor Malfunction:
Some users have reported that installing the trailer hitch may affect the functionality of the vehicle's kick sensor (for hands-free trunk opening). This can occur due to the hitch's proximity to the sensor's operating area.
- Assessment: After installation, test your vehicle's kick sensor functionality.
- Resolution: If the kick sensor is no longer operational, there may not be a direct fix that maintains both the hitch and sensor functionality simultaneously, as the hitch occupies the sensor's detection zone. Consult your vehicle manufacturer or a professional installer for potential alternative solutions or to confirm if this is an expected outcome with a hitch installed.
9. Warranty and Support
Warranty Information:
The CURT 13579 Class 3 Trailer Hitch comes with a Limited Lifetime Warranty. This warranty covers manufacturing defects for the lifetime of the product. Additionally, there is a One-Year Warranty for the finish and a One-Year Warranty for included parts.
For specific details regarding warranty claims or coverage, please refer to the official CURT warranty documentation or contact CURT customer support directly.
Customer Support:
If you have any questions, require technical assistance, or need to report an issue with your CURT product, please contact CURT customer support. Contact information can typically be found on the official CURT website or on the product packaging.