Alecto DVM-71
Alecto DVM-71 Video Baby Monitor User Manual
Model: DVM-71 | Brand: Alecto
1. Introduction
The Alecto DVM-71 video baby monitor provides reliable surveillance of your baby. This system includes a baby unit with a camera and a parent unit with a 2.4-inch color LCD screen. Key features include infrared night vision for clear viewing in low light, a VOX function for sound-activated monitoring, and a long operating range.
The parent unit is designed to be compact and lightweight for easy portability within your home. The baby unit features a discreet, integrated lens and can be positioned for optimal viewing. Both units are powered by rechargeable batteries, offering flexibility in placement and use.
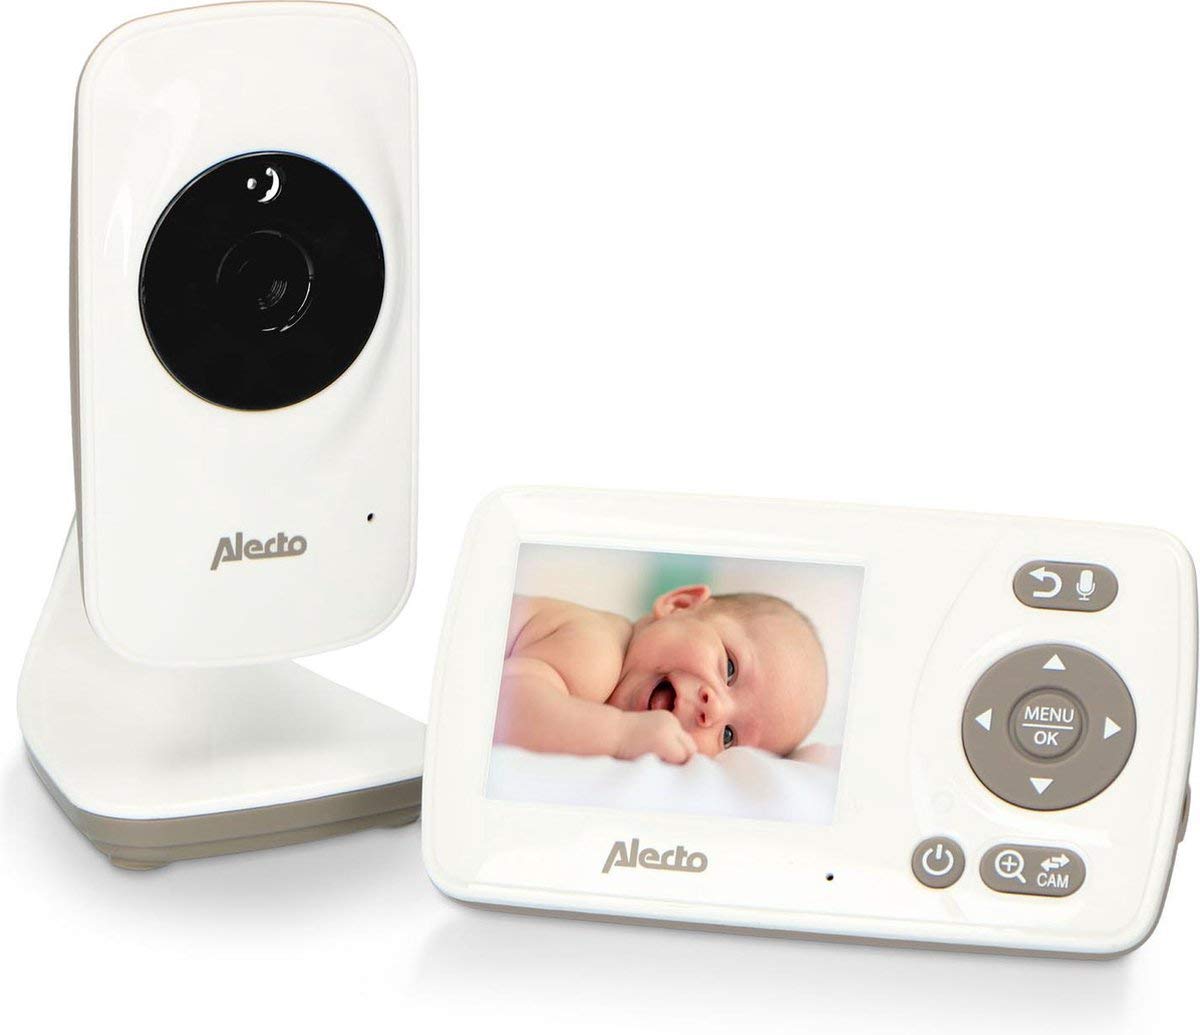
Image 1.1: The Alecto DVM-71 Video Baby Monitor system, including the parent unit and baby unit.
2. Package Contents
Please ensure all the following items are included in your package:
- Alecto DVM-71 Parent Unit
- Alecto DVM-71 Baby Unit (Camera)
- Power Adapter for Baby Unit
- Power Adapter for Parent Unit
- User Manual (this document)
3. Setup Guide
3.1 Initial Charging
- Connect the provided power adapters to both the parent unit and the baby unit.
- Plug the adapters into a standard electrical outlet.
- Allow both units to charge fully before first use. A full charge ensures optimal battery performance.
3.2 Positioning the Baby Unit (Camera)
- Place the baby unit in a location that provides a clear view of your baby's crib or sleeping area. Ensure it is out of your baby's reach.
- The camera can be freestanding on a flat surface or mounted on a wall.
- Avoid placing the unit near sources of heat, direct sunlight, or moisture.
- Ensure there are no obstructions between the baby unit and the parent unit to maximize signal range.
3.3 Powering On and Connection
- After charging, press and hold the power button on both the parent unit and the baby unit to turn them on.
- The units will automatically establish a secure connection. The parent unit's screen will display the video feed from the baby unit once connected.
- If the connection is not established, ensure both units are within range and try restarting them.
4. Operating Instructions
4.1 Parent Unit Overview
The parent unit features a 2.4-inch color LCD screen and intuitive controls for monitoring and managing the baby unit.
- Screen: Displays live video feed, battery status, signal strength, and menu options.
- Menu/OK Button: Accesses the main menu and confirms selections.
- Navigation Buttons: Used to move through menu options and adjust settings (e.g., volume, brightness).
- Talk-back Button: Press and hold to speak to your baby through the baby unit.
4.2 Key Functions
- VOX Function: Voice Operated eXchange (VOX) mode conserves battery by turning off the screen and audio when no sound is detected from the baby unit. The monitor will reactivate automatically when sound is detected. This function can be enabled or disabled via the parent unit's menu.
- Infrared Night Vision: The baby unit automatically activates infrared LEDs in low-light conditions, providing a clear black-and-white video feed on the parent unit, even in complete darkness. The night vision range is up to 50 meters.
- Lullabies: The monitor includes a selection of lullabies that can be played remotely from the parent unit to soothe your baby. Access this feature through the parent unit's menu.
- Two-Way Communication (Talk-back): Use the talk-back function to speak to your baby from the parent unit. This allows you to comfort your baby with your voice without entering the room.
- Range: The DVM-71 offers an impressive range of up to 50 meters indoors and up to 300 meters in open outdoor areas, ensuring you can monitor your baby from various locations within your home or garden.
5. Maintenance
- Cleaning: Use a soft, dry cloth to clean the surfaces of both the parent and baby units. Do not use abrasive cleaners, solvents, or harsh chemicals.
- Avoid Liquids: Do not immerse the units in water or expose them to excessive moisture.
- Battery Care: To prolong battery life, avoid fully discharging the units frequently. Store the units in a cool, dry place if not in use for an extended period.
- Lens Care: Gently wipe the camera lens with a soft, lint-free cloth if it becomes dirty to ensure clear image quality.
6. Troubleshooting
| Problem | Possible Cause | Solution |
|---|---|---|
| No signal on parent unit | Units are out of range; baby unit is off; interference. | Move parent unit closer to baby unit; ensure baby unit is powered on; reduce potential interference from other electronic devices. |
| No image/sound | Baby unit is off; parent unit battery is low; volume is too low. | Check if baby unit is powered on; charge parent unit; increase volume on parent unit. |
| Poor image quality | Camera lens is dirty; insufficient lighting (not night vision); signal interference. | Clean camera lens; ensure adequate lighting or that night vision is active; reposition units to improve signal. |
| Parent unit not charging | Power adapter not connected properly; faulty adapter/outlet. | Ensure adapter is securely plugged into both unit and outlet; try a different outlet or adapter if available. |
7. Technical Specifications
| Feature | Detail |
|---|---|
| Model Name | DVM-71 |
| Video Recording Resolution | 720p |
| Color | White-taupe, Grey, Black |
| Number of Items | 1 |
| Number of Channels | 16 |
| Wireless Communication Technology | Wi-Fi (for internal communication, not external network) |
| Form Factor | Dome |
| Night Vision Range | 50 Meters |
| Material | Plastic |
| Voltage | 5 Volts |
| Power | 5 Watts |
| Dimensions (L x W x H) | 7.1 x 6.1 x 12.5 cm |
| Weight | 296 grams |
| Water Resistance Level | Not waterproof |
| Manufacturer | Lenco GmbH |
| Model Number | A004335 |
| Special Features | Lullabies, Talk-back function |
| Recommended Product Uses | Baby monitoring |
| Connectivity Technology | Wired, Wireless |
| Indoor/Outdoor Use | Indoor |
| Power Source | Battery powered |
| Connectivity Protocol | HomePlug |
| Mounting Type | Freestanding, Wall mount |
8. Warranty and Support
For warranty information, technical support, or service inquiries, please refer to the warranty card included with your product or visit the official Alecto website. Keep your proof of purchase for warranty claims.
Alecto is committed to providing reliable products and support. If you encounter any issues not covered in this manual, please contact Alecto customer service for assistance.
Ask a question about this manual
Ask about setup, troubleshooting, compatibility, parts, safety, or missing instructions. Manuals+ will review the question and use this page’s manual context to help answer it.