
Introduction
Welcome to your new MAG Pfanstiehl 507-DS77 stereo diamond replacement needle. This manual provides essential instructions for the proper installation, operation, and maintenance of your turntable needle to ensure optimal audio performance and extended product life. Please read this manual thoroughly before use.
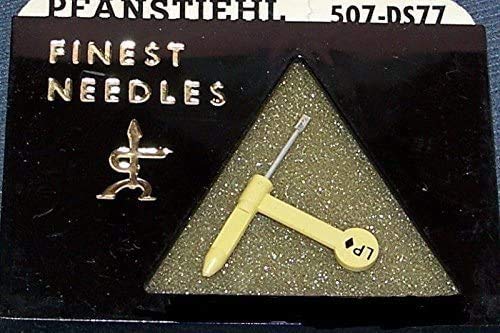
Image: The MAG Pfanstiehl 507-DS77 turntable needle, designed for precise sound reproduction.
Important Safety Information
- Handle the stylus with care. The diamond tip is delicate and can be damaged by improper handling.
- Keep out of reach of children and pets.
- Do not touch the stylus tip with your fingers, as oils and dirt can degrade performance.
- Ensure the turntable is powered off and unplugged before installing or removing the stylus.
Package Contents
Verify that all items are present in the package:
- 1x Pfanstiehl 507-DS77 Turntable Needle
- 1x Instruction Manual (this document)
Setup and Installation
Identifying Your Current Stylus
Before installation, carefully examine your existing stylus to understand its attachment mechanism. Most styli slide into a cartridge housing.
Removing the Old Stylus
- Ensure your turntable is powered off and unplugged from the wall outlet.
- Gently lift the tonearm from its rest and secure it if possible, or hold it steady.
- Carefully grasp the plastic housing of the old stylus (not the needle itself) and pull it forward and slightly downward to detach it from the cartridge. Avoid excessive force.
- Dispose of the old stylus responsibly.
Installing the New Stylus
- With the turntable still powered off, carefully remove the new Pfanstiehl 507-DS77 stylus from its packaging.
- Hold the stylus by its plastic body.
- Align the new stylus with the cartridge housing. The stylus should slide smoothly into place. You may hear a soft click when it is correctly seated.
- Gently push the stylus into the cartridge until it is flush and secure. Do not force it.
- Visually inspect the stylus to ensure it is straight and firmly attached.
Image: Illustrative representation of a stylus being inserted into a cartridge. Ensure proper alignment and gentle pressure during installation.
Operating Instructions
First Use
After installation, ensure all connections to your amplifier or receiver are secure. Power on your turntable and amplifier. Set the tracking force according to your turntable's specifications, typically between 2.5 to 3.5 grams for this type of stylus. Refer to your turntable's manual for precise tracking force adjustment.
Playing a Record
- Place a clean record on the turntable platter.
- Use the cueing lever to gently lower the tonearm onto the record's lead-in groove.
- Adjust the volume on your amplifier to a comfortable listening level.
- When the record finishes, use the cueing lever to lift the tonearm and return it to its rest.
Maintenance
Cleaning the Stylus
Regular stylus cleaning is crucial for optimal sound quality and to prevent record wear. Use a dedicated stylus cleaning brush, brushing gently from back to front (away from the cantilever) to remove dust and debris. Do not use solvents or alcohol-based cleaners unless specifically recommended for diamond styli.
Storage
When not in use, ensure the tonearm is secured in its rest. If your turntable has a dust cover, keep it closed to protect the stylus from airborne particles.
Troubleshooting
| Issue | Possible Cause | Solution |
|---|---|---|
| Distorted sound | Dirty stylus, incorrect tracking force, worn stylus | Clean stylus, adjust tracking force, replace stylus if worn |
| No sound | Loose connections, stylus not seated correctly | Check all cable connections, ensure stylus is fully inserted |
| Skipping | Dirty record, incorrect tracking force, damaged stylus | Clean record, adjust tracking force, inspect stylus for damage |
Specifications
| Feature | Detail |
|---|---|
| Stylus Type | Stereo Diamond |
| Compatibility | GE RP-3130A, GE RP-3130C, GE RP-3130D, GE RP-3131, GE RP-3132, and other compatible models (Sony, Sanyo, Fisher, Kenwood, Crosley Nostalgia, Ion) |
| Material | Diamond tip |
| Tracking Force Range | Typically 2.5 - 3.5 grams (refer to turntable manual) |
Warranty and Support
This MAG Pfanstiehl 507-DS77 turntable needle is covered by a limited warranty against manufacturing defects. Please retain your proof of purchase for warranty claims. The warranty period and terms are subject to the retailer's policy where the product was purchased.
For technical support, troubleshooting assistance, or warranty inquiries, please contact your retailer or visit the MAG brand's official support website. Ensure you have your product model number (Pfanstiehl 507-DS77) and purchase details ready.
For further information, please visit: www.example.com/support