1. Introduction
This manual provides essential instructions for the setup, operation, maintenance, and troubleshooting of your Aonerex 7-inch HD Touch Screen Car GPS Navigation system. Please read this manual thoroughly before using the device to ensure proper functionality and safety.
2. Product Features
The Aonerex 7-inch HD Touch Screen Car GPS Navigation system is designed to provide reliable and convenient navigation. Key features include:
- 7-inch HD Touch Screen display for clear visibility.
- 8GB internal memory and 256MB RAM for smooth operation.
- Satellite navigation with real-time voice reminders.
- Speeding warning alerts to promote safe driving.
- Efficient route planning capabilities.
- Free lifetime map updates for North America.
- Support for 2D and 3D map perspectives.
- FM transmitter functionality.
- Applicable for various vehicle types (Car, Truck, Ambulance, Bus, Taxi, Pedestrian).
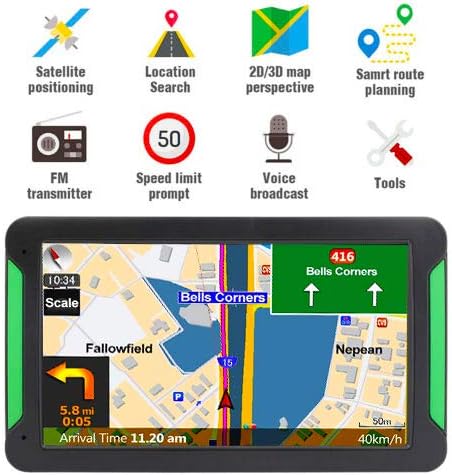
Figure 2.1: Front view of the Aonerex GPS Navigation system highlighting key features such as satellite positioning, location search, 2D/3D map perspective, smart route planning, FM transmitter, speed limit prompt, voice broadcast, and tools.
3. Package Contents
Upon opening the package, verify that all the following items are included:
- 1x Aonerex 7-inch GPS Navigation Device
- 1x Car Charger
- 1x Mini USB Cable
- 1x User Manual
- 1x Car Bracket (Mount)
- 1x Suction Support
- 1x Sun Shade

Figure 3.1: Illustration of the complete package contents, including the GPS device, car charger, USB cable, user manual, car bracket, suction support, and sun shade.
4. Device Overview
Familiarize yourself with the physical components and ports of your GPS device:
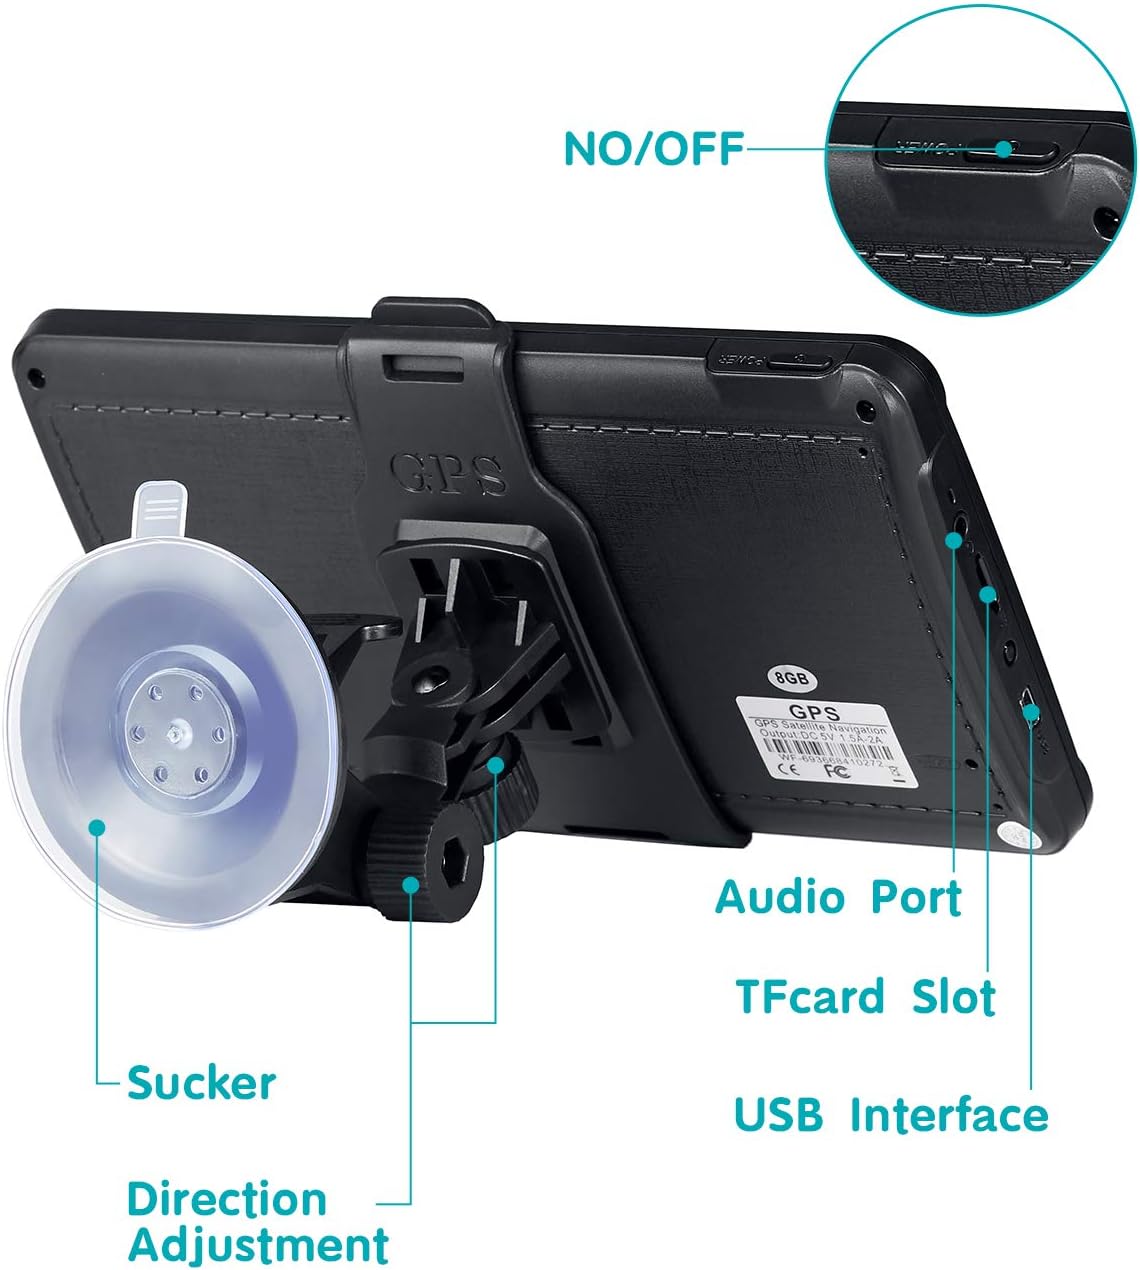
Figure 4.1: Rear view of the GPS device showing the ON/OFF button, Audio Port, TF Card Slot, USB Interface, Suction Cup attachment point, and Direction Adjustment mechanism for the mount.
- ON/OFF Button: Powers the device on or off.
- Audio Port: For connecting external audio devices or headphones.
- TF Card Slot: For inserting a TransFlash (MicroSD) card to expand storage.
- USB Interface: For charging the device and connecting to a computer.
- Suction Cup: Attaches the device mount to a smooth surface like a windshield.
- Direction Adjustment: Allows adjustment of the device's viewing angle.
5. Setup
5.1 Mounting the Device
- Assemble the car bracket and suction support.
- Attach the GPS device to the car bracket.
- Clean the desired mounting surface (windshield or dashboard) thoroughly.
- Press the suction cup firmly against the clean surface and engage the locking mechanism to secure it.
- Adjust the device angle for optimal viewing without obstructing your driving view.

Figure 5.1: The Aonerex GPS Navigation device securely mounted on a car dashboard, displaying a navigation route.
5.2 Powering On and Charging
- Connect the car charger to the device's USB interface and plug it into your vehicle's 12V power outlet.
- Press and hold the ON/OFF button to power on the device.
- Ensure the device is sufficiently charged before long trips.
5.3 Initial Configuration
Upon first use or after a factory reset, you may need to configure basic settings:
- Language: Select your preferred language for the interface and voice guidance.
- Time Zone: Set the correct time zone for accurate time display.
- Vehicle Type: Choose your vehicle type (e.g., Car, Truck) to optimize route planning.
6. Operating the GPS Navigation
6.1 Basic Navigation
- From the main menu, tap on the 'Navigation' icon.
- Select 'Destination' or 'Find Address'.
- Enter the desired address, point of interest, or coordinates using the on-screen keyboard.
- Confirm the destination, and the device will calculate the optimal route.
- Follow the voice prompts and on-screen directions to reach your destination.
6.2 Touchscreen Interaction
The device features a responsive touchscreen for easy interaction:
- Tap: Select items or confirm actions.
- Drag: Scroll through menus or move the map view.
- Pinch-to-Zoom: Adjust map zoom levels (if supported by software).
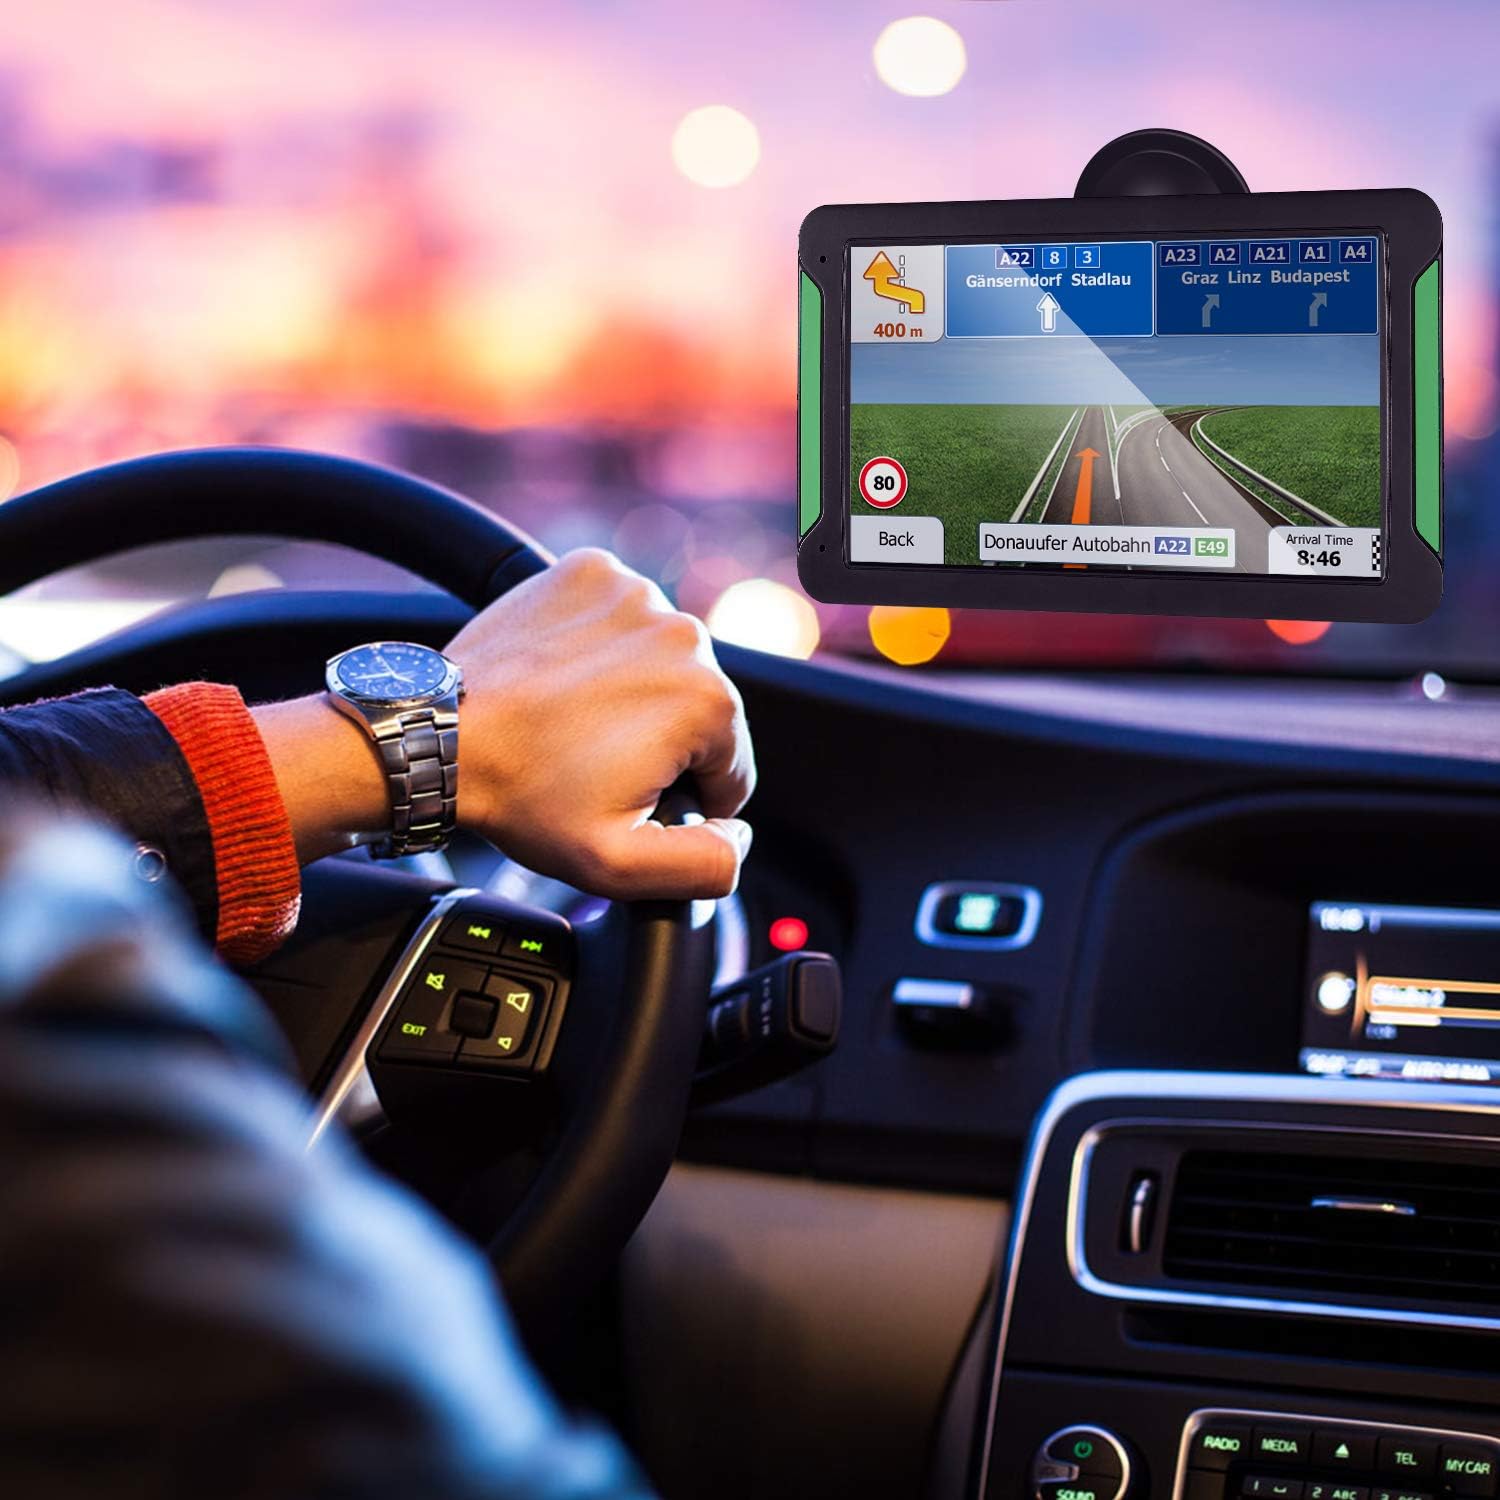
Figure 6.1: A hand interacting with the touchscreen of the Aonerex GPS device, demonstrating ease of use for navigation and menu selection.
6.3 Voice Guidance and Warnings
- The device provides clear, turn-by-turn voice directions.
- Real-time voice reminders for upcoming turns, lane changes, and points of interest.
- Audible and visual speeding warnings alert you when exceeding the speed limit.

Figure 6.2: The Aonerex GPS Navigation device displaying a detailed route with current speed and distance information while mounted in a vehicle.
6.4 Map Updates
Your Aonerex GPS comes with free lifetime map updates. To update maps:
- Visit the official Aonerex support website for map update software and instructions.
- Connect your GPS device to a computer using the provided USB cable.
- Follow the on-screen prompts of the update software to download and install the latest maps.
6.5 Multi-Vehicle Modes
The device supports route optimization for different vehicle types. Access the settings menu to select:
- Car
- Truck
- Ambulance
- Bus
- Taxi
- Pedestrian
7. Maintenance
7.1 Cleaning the Device
- Use a soft, lint-free cloth to clean the screen and exterior.
- Do not use abrasive cleaners, alcohol, or solvents, as these can damage the screen and casing.
- Ensure the device is powered off before cleaning.
7.2 Software Updates
Periodically check the Aonerex support website for firmware or software updates to ensure optimal performance and access to new features.
7.3 Battery Care
- Avoid exposing the device to extreme temperatures, which can degrade battery life.
- Charge the device regularly, but avoid leaving it plugged in for extended periods after it's fully charged.
8. Troubleshooting
If you encounter issues with your Aonerex GPS Navigation, refer to the following common problems and solutions:
- Device does not power on:
- Ensure the device is fully charged or connected to a power source.
- Press and hold the power button for several seconds.
- No GPS signal:
- Ensure the device has a clear view of the sky (not obstructed by buildings or tunnels).
- Move to an open area.
- Restart the device.
- Suction cup does not stick:
- Clean the mounting surface and the suction cup thoroughly with a damp cloth and let it dry completely.
- Ensure the locking mechanism is fully engaged.
- Voice directions stop mid-sentence or are unclear:
- Check the device's volume settings.
- Ensure the firmware is up to date.
- If using FM transmitter, ensure the frequency is clear and not interfered with by other radio stations.
- Device turns on and off repeatedly:
- This may indicate a battery issue. Ensure the device is fully charged.
- Try a different power source or car charger.
- Perform a factory reset (refer to device settings for this option, note that this will erase personal data).
9. Specifications
| Feature | Specification |
|---|---|
| Brand | Aonerex |
| Model Number | B08FM7DXG6 |
| Screen Size | 7 inches |
| Display Type | HD Touch Screen (Capacitive) |
| Memory Storage Capacity | 8 GB |
| Connectivity Technology | USB |
| Supported Satellite Navigation System | GPS |
| Map Type | North America, Satellite |
| Control Method | Touch, Voice |
| Audio Output Mode | Stereo |
| Mounting Type | Dashboard Mount |
| Are Batteries Included | Yes |
| UPC | 791564895200 |
10. Warranty and Support
For warranty information and technical support, please refer to the documentation included with your product or visit the official Aonerex website. Keep your purchase receipt as proof of purchase for any warranty claims.
If you require further assistance, please contact Aonerex customer service through their official channels.