Boncare GF-MT501 10-Second Digital Thermometer User Manual
Model: GF-MT501 | Brand: Boncare
1. Introduction
This manual provides instructions for the safe and effective use of your Boncare GF-MT501 10-Second Digital Thermometer. This device is designed for accurate temperature measurement for individuals of all ages, including infants, children, and adults, and can be used orally, rectally, or axillary (underarm).
Please read this manual thoroughly before using the thermometer and retain it for future reference.
2. Important Safety Information
Do not boil the thermometer. Clean the probe with medical alcohol or soap and water.
Do not drop the thermometer or expose it to heavy shock.
Do not store the unit in direct sunlight, at high temperatures, or in high humidity or dust.
Keep the thermometer out of reach of children.
Do not bite the thermometer.
If the unit is stored at temperatures below freezing, allow it to warm naturally to room temperature before use.
Consult a physician if you experience a fever, especially in children.
The thermometer tip is waterproof; however, do not immerse the entire device in water.
3. Product Components
The Boncare Digital Thermometer consists of the following parts:
Temperature Sensing Probe: The flexible tip containing the sensor.
LCD Display: Shows temperature readings and indicators.
ON/OFF Button: Activates and deactivates the device.
Battery Cap: Located at the end, for battery access.
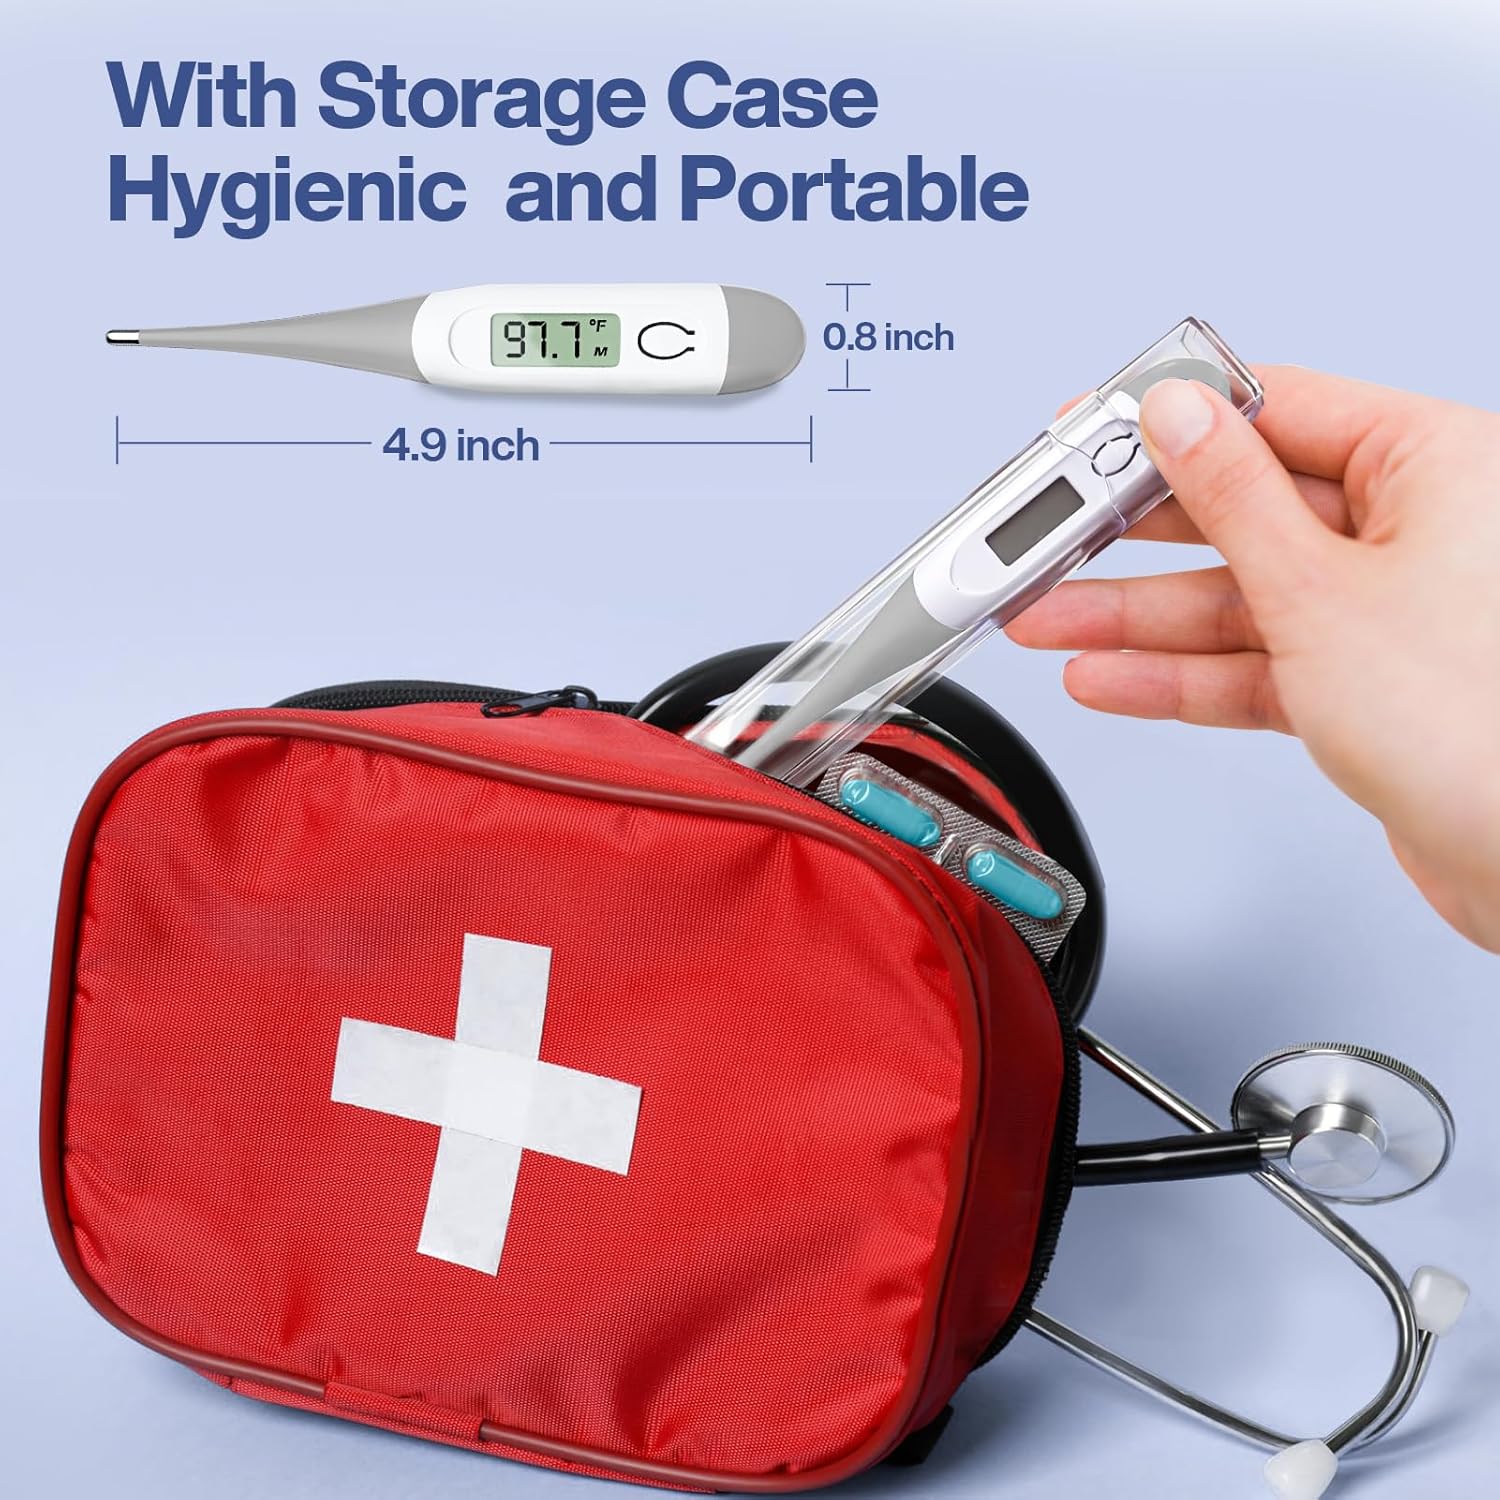
Storage Case: For hygienic storage and portability.
Figure 1: Boncare Digital Thermometer with labeled components including ON/OFF button, battery cap, LCD display, and temperature sensing probe.
Description: This image displays the Boncare Digital Thermometer with its key parts labeled. The flexible tip is the temperature sensing probe. The main body features an ON/OFF button and an LCD display. The opposite end has a battery cap. This visual aid helps users identify each component for proper handling and operation.
4. Setup
Initial Use: The thermometer comes with a pre-installed battery. Remove the protective plastic film from the display if present.
Power On: Press the ON/OFF button. The display will show "188.8°F" briefly, followed by the last measured temperature, and then "Lo°F" (or "Lo°C"). The "Lo" indicates the thermometer is ready for measurement, not that the battery is low.
Select Temperature Unit (°F/°C): With the thermometer off, press and hold the ON/OFF button for approximately 3 seconds to switch between Fahrenheit (°F) and Celsius (°C). The selected unit will be displayed.
Figure 2: Illustration of switching between Fahrenheit and Celsius temperature units on the thermometer's display.
Description: This image shows the thermometer displaying both Celsius and Fahrenheit, indicating the ability to switch between these units. This feature allows users to select their preferred temperature scale for readings.
5. Operating Instructions
Ensure the thermometer is clean before each use. Press the ON/OFF button to turn on the device. When "Lo°F" (or "Lo°C") appears, the thermometer is ready for use.
5.1 Oral Measurement
Place the probe tip under the tongue as close as possible to the heat pocket.
Keep the mouth closed during measurement.
The measurement is complete when the thermometer beeps (approximately 10 seconds).
Read the temperature displayed on the LCD screen.
Figure 3: A person demonstrating oral temperature measurement using the Boncare Digital Thermometer.
Description: This image shows an individual taking their temperature orally with the thermometer placed under the tongue. This illustrates the correct positioning for oral temperature readings.
5.2 Rectal Measurement (Recommended for Infants and Young Children)
Apply a water-soluble lubricant to the probe tip.
Gently insert the probe tip no more than 1/2 inch (1.3 cm) into the rectum.
The measurement is complete when the thermometer beeps (approximately 10 seconds).
Read the temperature displayed on the LCD screen.
Figure 4: An adult performing a rectal temperature measurement on a baby using the Boncare Digital Thermometer.
Description: This image depicts a caregiver taking a baby's temperature rectally with the Boncare Digital Thermometer. This demonstrates the appropriate method for rectal temperature measurement in infants.
5.3 Axillary (Underarm) Measurement
Place the probe tip in the center of the armpit.
Hold the arm firmly against the body to ensure the probe is in contact with the skin.
The measurement is complete when the thermometer beeps (this method may take longer than oral or rectal, typically 1-2 minutes).
Read the temperature displayed on the LCD screen.
Figure 5: A child having their temperature taken axillary (underarm) with the Boncare Digital Thermometer.
Description: This image shows a child using the thermometer for an underarm temperature reading, with the device held securely in the armpit. This illustrates the correct technique for axillary temperature measurement.
6. Key Features
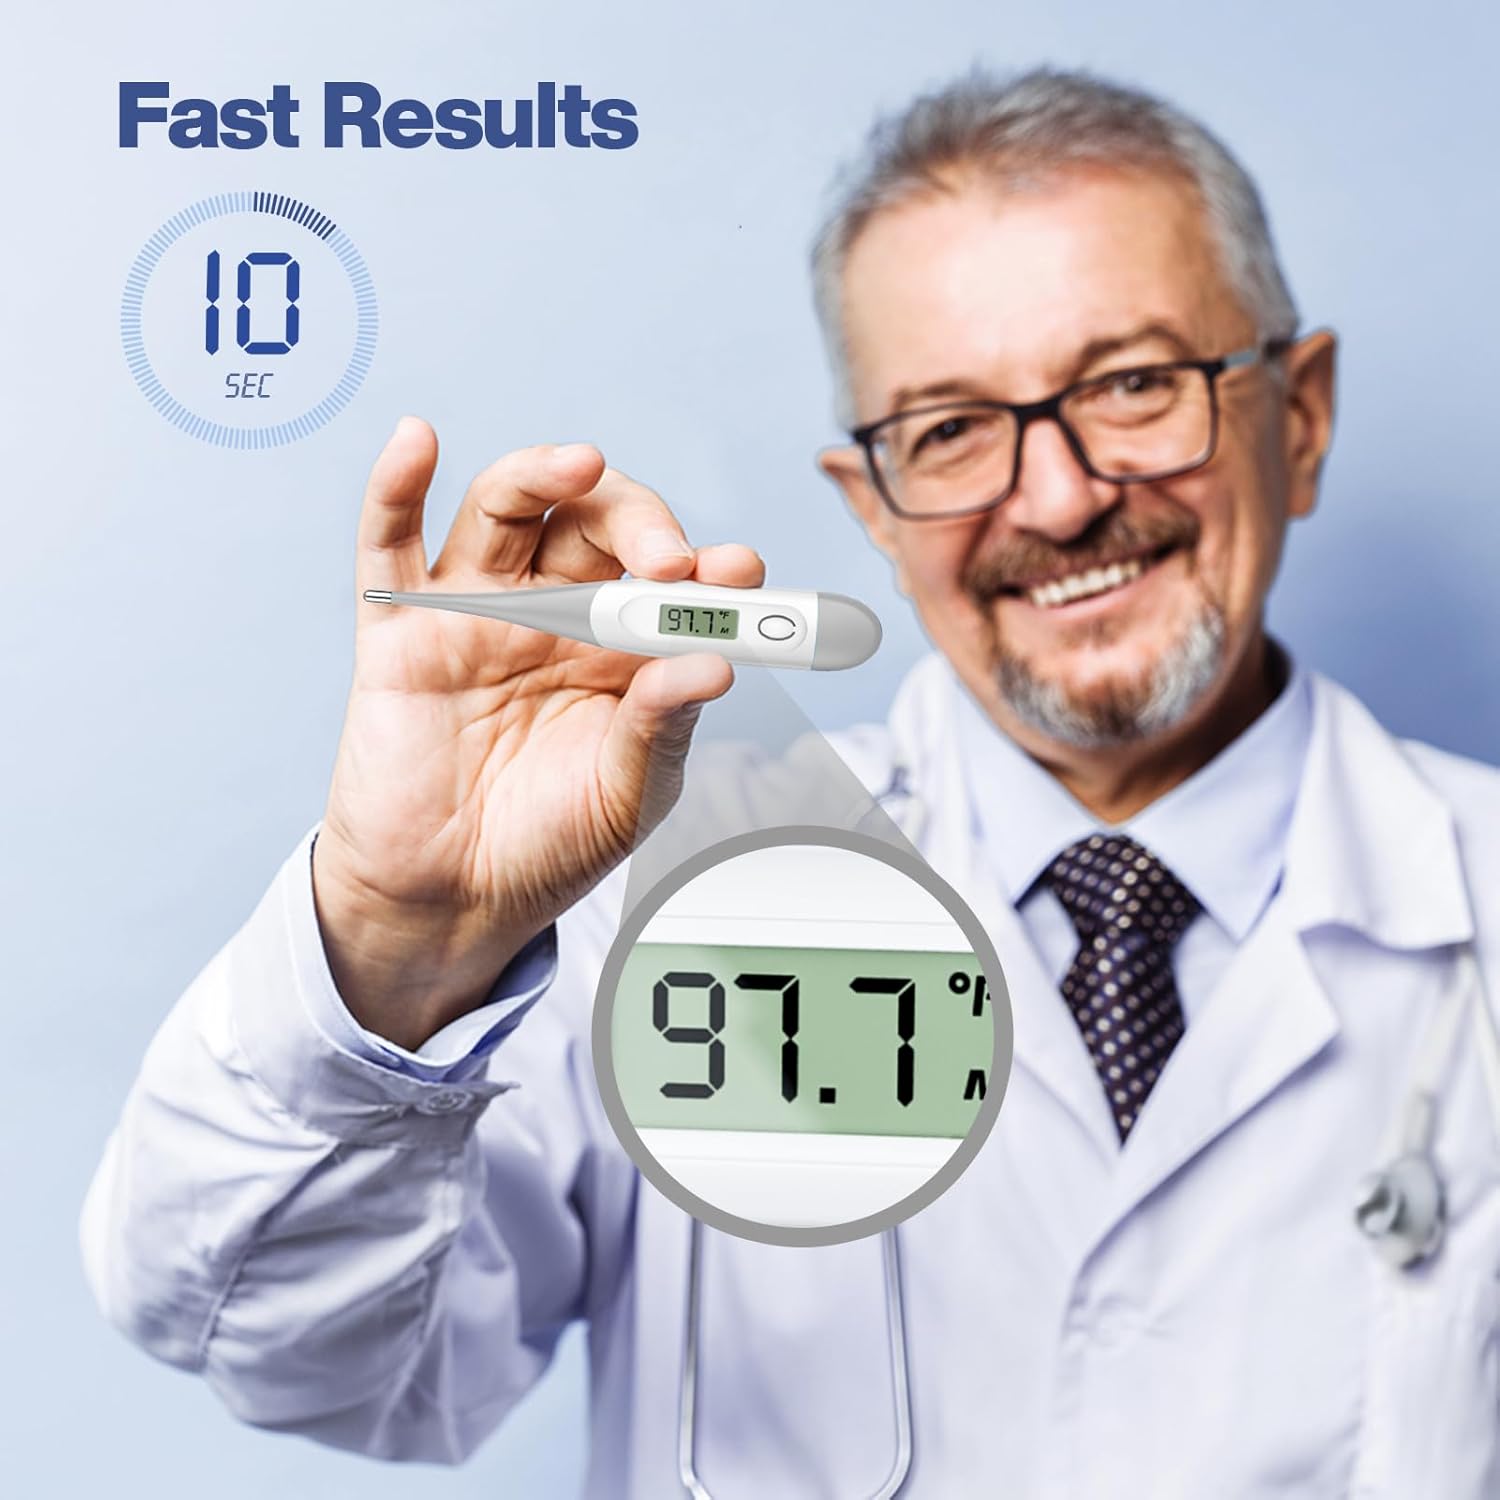
Fast Reading: Provides temperature readings in approximately 10 seconds.
Fever Alarm: An audible beep will sound when the measurement is complete, and a rapid series of beeps will indicate a fever (temperature above 100°F / 37.8°C).
Memory Function: Automatically displays the last measured temperature when powered on.
Waterproof Tip: The probe tip is waterproof for easy and hygienic cleaning.
Auto Shut-Off: The thermometer will automatically turn off after approximately 10 minutes of inactivity to conserve battery life.
Flexible Tip: The soft silicone tip ensures comfort and safety during use.
Figure 6: Visual representation of the thermometer displaying a high temperature with a fever alarm icon.
Description: This image highlights the fever alarm feature, showing the thermometer display with a high temperature reading and an alarm symbol, indicating a fever detection.
7. Maintenance and Cleaning
7.1 Cleaning
After each use, clean the thermometer probe with a soft cloth and 70% isopropyl alcohol or soap and water.
The tip is waterproof, allowing for thorough cleaning. Do not immerse the entire thermometer in water.
Allow the thermometer to air dry or wipe it with a clean, dry cloth.
Figure 7: An illustration showing the waterproof tip of the thermometer being cleaned under running water.
Description: This image visually confirms the waterproof nature of the thermometer's tip, showing it being rinsed under water, emphasizing ease of cleaning.
7.2 Storage
Store the thermometer in its protective storage case when not in use.
Keep it in a cool, dry place, away from direct sunlight and extreme temperatures.
Figure 8: The Boncare Digital Thermometer shown with its clear plastic storage case, highlighting its portability and protection.
Description: This image displays the thermometer neatly stored within its clear plastic case, demonstrating its compact and protected design for storage and travel.
7.3 Battery Replacement
When the battery symbol appears on the lower right corner of the LCD display, the battery needs to be replaced.
Remove the battery cap and replace the old battery with a new 1.5V button cell battery (LR41 or SR41).
Ensure the battery is inserted with the correct polarity.
Figure 9: The thermometer's display showing a low battery indicator, prompting replacement.
Description: This image shows the thermometer's LCD screen with a battery icon in the corner, indicating that the battery level is low and requires replacement.
8. Troubleshooting
Problem
Possible Cause
Solution
"Lo" displayed after power on.
This is normal, indicating the thermometer is ready to measure.
Proceed with temperature measurement.
"Err" displayed.
Measurement error or malfunction.
Ensure proper placement of the probe. If error persists, contact customer support.
No display or dim display.
Low or dead battery.
Replace the battery (refer to Section 7.3).
Inaccurate readings.
Improper placement, movement during measurement, or recent consumption of hot/cold liquids (oral).
Ensure correct measurement technique and wait 15-30 minutes after eating/drinking before oral measurement.
Measurement Time: Approximately 10 seconds (oral/rectal)
Display: LCD
Battery: 1.5V button cell (LR41 or SR41)
Battery Life: Approximately 200 hours of continuous operation
Auto Shut-off: Approximately 10 minutes
Dimensions: 4.93 x 0.76 x 0.49 inches
Weight: 0.37 ounces
Material: Silicone (probe tip)
10. Warranty and Support
Boncare offers a 1-Year Limited Warranty on this product. For warranty claims, technical support, or any questions regarding your Boncare Digital Thermometer, please contact Boncare Customer Service.
Refer to the product packaging or the official Boncare website for the most up-to-date contact information.