World of Nails-Design 11082
User Manual: LED UV Dual Curing Device
Model: SUN X10 MAX (11082) | Brand: World of Nails-Design
1. Product Overview
The SUN X10 MAX 280W LED UV Dual Curing Device is an intelligent nail lamp designed for professional and home use. It features advanced Dual LED / UV technology, utilizing 66 energy-saving diodes that emit light at wavelengths of 365 nm and 405 nm. This allows the lamp to efficiently cure all types of UV gels, hybrid gels, LED gels, and polishes that contain UV and LED photoinitiators.
Key features include a powerful 280W output, a built-in motion sensor for automatic operation, and multiple timer settings for precise curing.

Image 1.1: Front view of the SUN X10 MAX 280W LED UV Dual Curing Device, showing its sleek white design with a digital display and silver accents.
2. Package Contents and Setup
2.1. What's in the Box
- SUN X10 MAX 280W LED UV Dual Curing Device
- Power Adapter
- Removable Base
- User Manual (this document)

Image 2.1: The SUN X10 MAX 280W device shown in its retail packaging, highlighting the product's branding and key features on the box.
2.2. Initial Setup
- Unpack all components from the box.
- Ensure the device is placed on a stable, flat surface.
- Connect the power adapter to the DC input port on the back of the lamp.
- Plug the power adapter into a suitable electrical outlet.
- The lamp is now ready for use. The removable base can be attached or detached as needed for manicures or pedicures.
3. Operating Instructions
3.1. Powering On and Off
The device powers on automatically when connected to an electrical outlet. It enters standby mode when not in use.
3.2. Using the Motion Sensor
The SUN X10 MAX is equipped with an intelligent motion sensor. Simply place your hand or foot into the curing area, and the lamp will automatically activate. Removing your hand or foot will turn the lamp off.
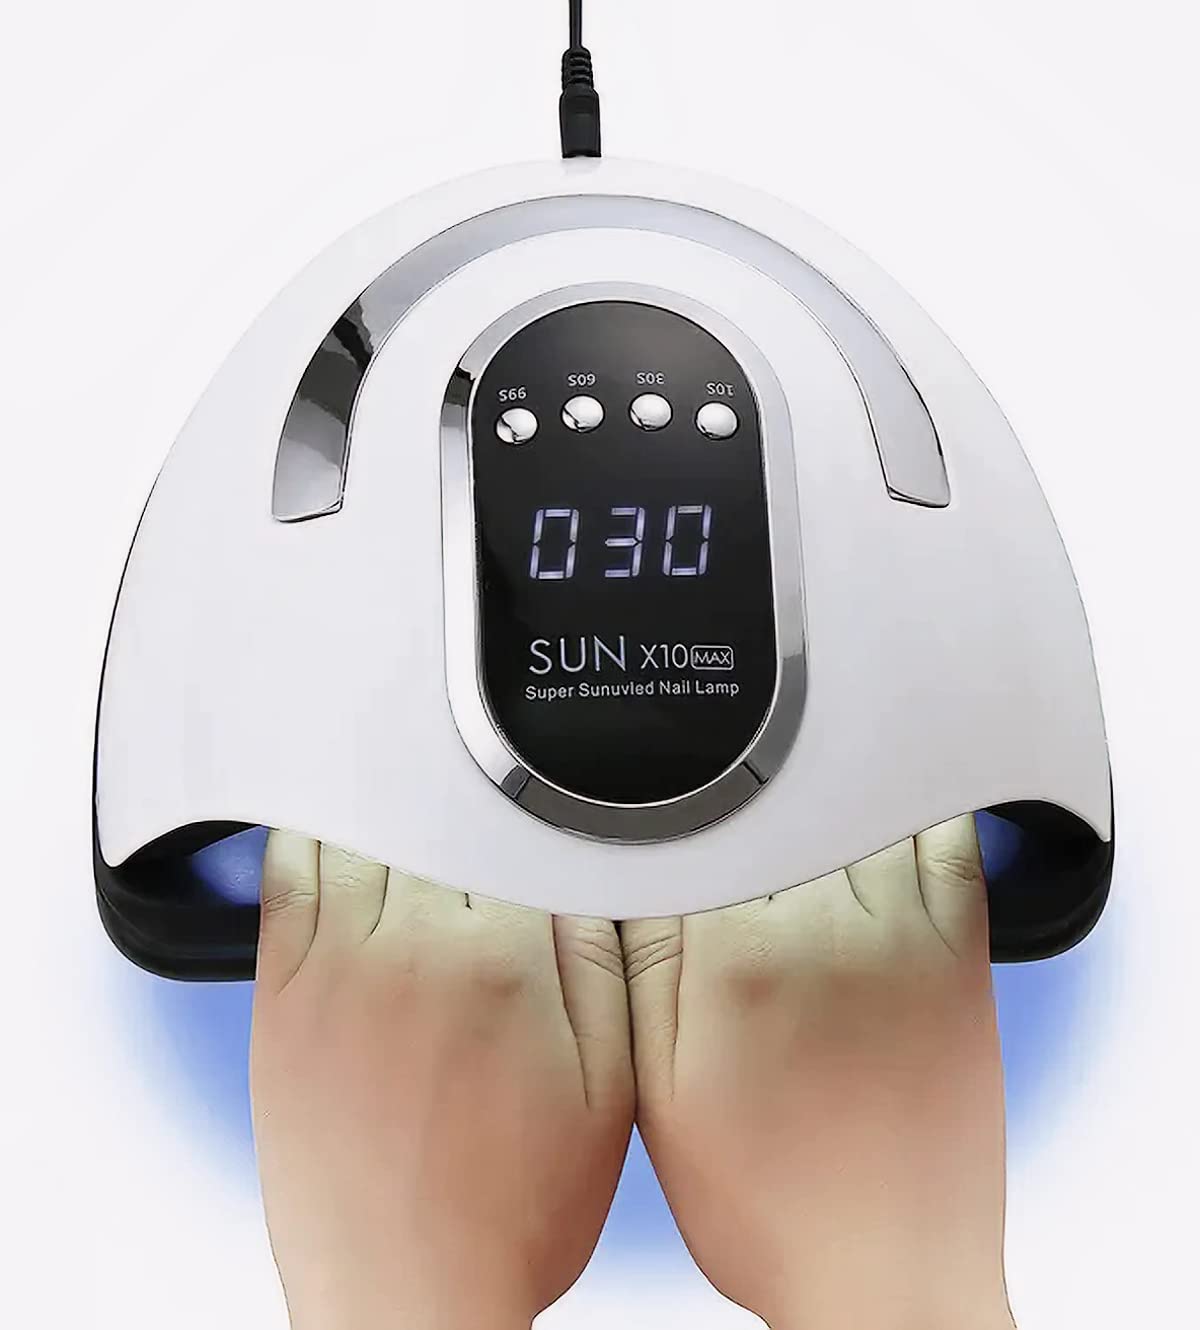
Image 3.1: A user's hands placed inside the curing chamber of the SUN X10 MAX lamp, demonstrating the space available for curing both hands simultaneously.
3.3. Timer Settings
For precise curing times, use the dedicated timer buttons located on the top panel of the device. The available settings are:
- 10s: For quick flash curing or thin gel layers.
- 30s: Standard curing time for many gel polishes.
- 60s: For thicker gel layers or darker pigments.
- 99s (Low Heat Mode): This mode gradually increases power to minimize heat spikes, ideal for sensitive nails or builder gels.

Image 3.2: A close-up view of the control panel on the SUN X10 MAX, clearly showing the digital timer display and the four timer buttons (10s, 30s, 60s, 99s).

Image 3.3: A detailed shot of the timer buttons on the SUN X10 MAX, emphasizing the clear labeling for 10s, 30s, 60s, and 99s settings.
To activate a timer, press the corresponding button. The digital display will count down the remaining time. The motion sensor will override the timer if a hand is removed before the timer finishes.
3.4. Curing Process
- Apply a thin, even layer of gel polish or builder gel to your nails as per the product instructions.
- Place your hand or foot into the lamp, ensuring all nails are within the curing area.
- Select the desired curing time using the timer buttons, or allow the motion sensor to activate the lamp for continuous curing until removed.
- Once the curing cycle is complete, remove your hand/foot.
- Repeat for subsequent layers as required by your gel product.
4. Maintenance and Care
Proper maintenance ensures the longevity and optimal performance of your curing device.
- Cleaning: Disconnect the lamp from power before cleaning. Use a soft, dry cloth to wipe the exterior. For stubborn stains, a slightly damp cloth with mild soap can be used, but ensure no liquid enters the device. Do not use abrasive cleaners or solvents.
- Storage: Store the lamp in a cool, dry place away from direct sunlight and extreme temperatures.
- LED Diodes: The LED diodes are designed for long life and do not require replacement under normal use. Avoid touching the diodes directly.
- Removable Base: The magnetic removable base can be easily detached for cleaning or for use during pedicures. Clean it separately with a damp cloth.
5. Troubleshooting
| Problem | Possible Cause | Solution |
|---|---|---|
| Lamp does not turn on. | Not plugged in correctly; Power outlet issue; Power adapter fault. | Check power connection; Try a different outlet; Contact customer support if adapter is faulty. |
| Gels are not curing properly. | Incorrect curing time; Gel product incompatibility; Too thick gel layer; Nails not positioned correctly. | Increase curing time; Ensure gel is UV/LED compatible; Apply thinner layers; Ensure all nails are centered under the LEDs. |
| Motion sensor not working. | Obstruction to sensor; Sensor malfunction. | Ensure nothing is blocking the sensor area; Contact customer support if issue persists. |
| Lamp overheats. | Prolonged continuous use; Poor ventilation. | Allow lamp to cool down between uses; Ensure proper ventilation around the device. |
6. Specifications
| Model Number | 11082 |
| Power | Up to 280W |
| LED Diodes | 66 Dual-LED (UV/LED) |
| Wavelength | 365nm + 405nm |
| Timer Settings | 10s, 30s, 60s, 99s (Low Heat Mode) |
| Special Features | Motion Sensor, Removable Base, Energy-efficient |
| Product Dimensions (L x W x H) | 24 cm x 24 cm x 13 cm |
| Item Weight | 450 Grams |
| Manufacturer | hurtownia kosmetyczna excellent |
7. Important Safety and Disposal Information
7.1. General Safety Precautions
- Do not look directly into the UV/LED light.
- Keep out of reach of children.
- Do not use if the device or power cord is damaged.
- Do not expose the device to water or excessive moisture.
- Use only with the provided power adapter.
- Unplug the device when not in use or before cleaning.
7.2. Recycling and Disposal
This product contains electronic components and should not be disposed of with household waste. Please follow local regulations for the recycling of electronic devices. For information on recycling this and other types of lamps, consult your local waste management authority or recycling centers.
If the lamp is broken or damaged, handle with care to avoid injury. Do not attempt to repair it yourself. Dispose of broken or damaged lamps according to local hazardous waste guidelines, as they may contain materials that require special handling.
Ask a question about this manual
Ask about setup, troubleshooting, compatibility, parts, safety, or missing instructions. Manuals+ will review the question and use this page’s manual context to help answer it.