1. Introduction
The TOSOT Aovia Series Portable Air Conditioner provides efficient cooling, dehumidification, and fan functions for indoor spaces up to 300 square feet. This unit is designed for ease of installation and quiet operation, ensuring a comfortable environment.
Key features include a 3-in-1 operating mode, an auto-evaporation system to minimize water drainage, and a user-friendly control panel with remote access.

Figure 1.1: TOSOT Aovia Portable Air Conditioner, 9,500 BTU
2. Safety Information
Please read all safety instructions carefully before operating the unit to prevent injury or damage. Keep this manual for future reference.
- Ensure the unit is placed on a flat, stable surface.
- Do not block air inlets or outlets. Maintain at least 12 inches of clearance around the unit.
- Only use the power supply specified on the rating label.
- Do not operate the unit with a damaged power cord or plug.
- Keep children and pets away from the unit during operation.
- Unplug the unit before cleaning or performing any maintenance.
- Do not attempt to repair or modify the unit yourself. Contact qualified service personnel.
- Ensure proper ventilation when using the unit in dehumidifier mode, especially in enclosed spaces.
3. Package Contents
Verify that all components are present in the package:
- TOSOT Portable Air Conditioner Unit
- Exhaust Hose
- Window Panel Kit (adjustable for various window sizes)
- Remote Control
- Drain Hose
- User Manual

Figure 3.1: Included Accessory Kit
4. Setup
Follow these steps for proper installation of your portable air conditioner.
4.1 Unit Placement
Place the unit on a firm, level surface near a window and a grounded electrical outlet. Ensure there is at least 12 inches of space around the unit for proper airflow.
4.2 Window Kit Installation
- Assemble the window panel kit according to your window type (double/single-hung or sliding slash window). The kit is adjustable for window widths between 9.1 and 62 inches.
- Secure the window panel in the open window frame. Use the quick-adjust knob to ensure a snug fit, minimizing air leakage.

Figure 4.1: Flexible Window Installation
4.3 Exhaust Hose Connection
- Attach one end of the exhaust hose to the air outlet on the back of the portable AC unit.
- Connect the other end of the exhaust hose to the adapter on the window panel. Ensure both connections are secure to prevent hot air from re-entering the room.
Video 4.1: Demonstration of TOSOT Portable Air Conditioner Setup and Hose Connection.
4.4 Initial Power-Up
After installation, plug the unit into a grounded electrical outlet. Allow the unit to stand upright for at least 2 hours before turning it on to allow the refrigerant to settle.
5. Operating Instructions
Your TOSOT portable AC unit offers multiple functions for optimal comfort.
5.1 Control Panel Overview
The LED control panel on top of the unit allows you to adjust settings. It displays the current temperature and mode indicators.

Figure 5.1: Simple Control Panel
5.2 Remote Control Usage
The included remote control allows you to adjust settings from up to 20 feet away. Point the remote directly at the unit's receiver for best performance.
Video 5.1: Overview of TOSOT Aovia Series Portable Air Conditioner Functions and Remote Control.
5.3 Operating Modes
Press the 'Mode' button to cycle through the available operating modes:
- Cool Mode: Provides powerful cooling for rooms up to 300 sq ft. Adjust the temperature using the '+' and '-' buttons.
- Dehumidifier Mode: Removes up to 2.1 pints of water per hour, reducing humidity. The fan operates at a low speed in this mode.
- Fan Mode: Circulates air without cooling. Select from Low, Medium, High, or Auto fan speeds.

Figure 5.2: 3-in-1 Operating Modes
5.4 Temperature and Fan Speed Adjustment
In Cool mode, use the '+' and '-' buttons to set your desired temperature between 61°F and 86°F (16°C and 30°C). In Fan mode, press the 'Fan' button to cycle through fan speeds (Low, Medium, High, Auto).
5.5 Sleep Mode
Activate Sleep Mode for quieter operation and optimized comfort during sleeping hours. In this mode, the set temperature will automatically increase by 2°F for the first hour and another 2°F for the second hour, then maintain that temperature.

Figure 5.3: Sleep Mode Temperature Adjustment
5.6 Timer Function
Use the 'Timer' button to set a 24-hour on/off timer, allowing you to schedule when the unit starts or stops operation.
5.7 Auto Evaporation System
The unit features an auto-evaporation system, which typically eliminates the need to manually empty collected water. Condensation water is used to cool internal components, improving efficiency. In very humid environments, manual drainage may still be required.
6. Maintenance
Regular maintenance ensures optimal performance and longevity of your unit.
6.1 Air Filter Cleaning
The air filter should be cleaned regularly, typically every two weeks, or more often depending on usage and air quality. A clean filter improves cooling efficiency and air quality.
- Unplug the unit from the power outlet.
- Locate and remove the air filter from the back of the unit.
- Wash the filter with warm, soapy water. Rinse thoroughly and allow it to air dry completely before reinserting.
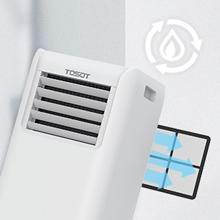
Figure 6.1: Air Filter Maintenance
6.2 Water Drainage
While the auto-evaporation system handles most condensation, in high humidity conditions, the internal water tank may fill. If the unit stops operating and displays a 'FL' or 'P1' error code, the tank needs to be drained.
- Unplug the unit.
- Place a shallow pan or bucket under the drain port at the bottom rear of the unit.
- Remove the drain plug to allow water to flow out.
- Once drained, replace the drain plug securely.
6.3 Storage
Before storing the unit for an extended period:
- Ensure all water is drained from the unit.
- Clean the air filter.
- Run the unit in fan-only mode for a few hours to dry the internal components.
- Store the unit in a cool, dry place, covered to protect from dust.
7. Troubleshooting
Refer to this section for common issues and their solutions.
| Problem | Possible Cause | Solution |
|---|---|---|
| Unit does not turn on | No power; Power cord not plugged in; Circuit breaker tripped. | Check power connection; Reset circuit breaker. |
| Unit not cooling effectively | Dirty air filter; Exhaust hose not properly installed; Room size too large; Doors/windows open; Temperature setting too high. | Clean air filter; Ensure exhaust hose is sealed; Close doors/windows; Lower temperature setting. |
| Unit stops and won't restart immediately | Compressor protection delay. | The unit has a built-in 3-minute delay to protect the compressor. Wait for 3 minutes before attempting to restart. This is normal operation. |
| Water leakage from the bottom | Drain plug loose; Unit not level; High humidity causing excess condensation. | Check and tighten drain plug; Ensure unit is on a level surface; Manually drain water if tank is full. |
| Remote control not working | Batteries dead; Obstruction between remote and unit. | Replace batteries; Ensure clear line of sight to the unit's receiver. |
8. Specifications
| Feature | Detail |
|---|---|
| Brand | TOSOT |
| Model Name | 9,500 BTU Air Conditioner |
| Cooling Power | 9,500 BTU (ASHRAE) / 6,000 BTU (2017 DOE Standard) |
| Coverage Area | Up to 300 sq ft |
| Functions | Cool, Dehumidify, Fan |
| Dehumidification Capacity | 2.1 pints/hour (60 pints/day) |
| Noise Level | 51 Decibels |
| Product Dimensions (D x W x H) | 11.1" x 12" x 27.2" |
| Item Weight | 61 Pounds |
| Voltage | 115 Volts |
| Wattage | 1000 watts |
| Refrigerant | R-32 |
| Control Method | Remote Control, On-unit buttons |
| Window Opening Min/Max Width | 14 Inches / 36 Inches |
| Window Opening Min/Max Height | 34.5 Inches / 34.5 Inches |
9. Warranty & Support
9.1 Product Warranty
This TOSOT portable air conditioner comes with a 1-year limited warranty from the date of purchase. This warranty covers defects in materials and workmanship under normal use. For specific terms and conditions, please refer to the warranty card included with your product or contact customer support.
9.2 Customer Support
For technical assistance, troubleshooting not covered in this manual, or warranty claims, please contact TOSOT customer support. You can typically find contact information on the manufacturer's website or through your retailer.