1. Introduction
This manual provides detailed instructions for the safe installation, operation, and maintenance of your Warehouse of Tiffany Milly Antique Bronze 52-Inch 5-Blade Flower Pattern Metal/Crystal Lighted Ceiling Fan. This lighted ceiling fan features an elegant scroll chandelier design, finished in antique bronze for a vintage aesthetic. It includes both upper and lower lighted shades that can be switched through three different light combinations, providing excellent illumination from six total lights. A three-speed motor ensures optimal cooling comfort, and the fan is conveniently operated via remote control.

Full view of the Milly Antique Bronze 52-Inch Ceiling Fan, showcasing its five blades, ornate metalwork, and crystal-accented light kit.
2. Safety Information
WARNING: To reduce the risk of fire, electric shock, or personal injury, read and follow all instructions carefully.
- Ensure the installation location is structurally sound and can support the fan's weight.
- All electrical wiring must be performed by a qualified electrician and in accordance with national and local electrical codes.
- Disconnect power at the circuit breaker or fuse box before beginning installation, maintenance, or servicing.
- Do not operate the fan with damaged blades or housing. Inspect regularly for any signs of wear or damage.
- Keep hands, clothing, and other objects clear of fan blades when the fan is in operation.
- This product is designed for indoor use only.
- Requires Six (6) 25-Watt E12 Bulbs (not included). Do not exceed the recommended maximum wattage for light bulbs.
3. Package Contents
Verify that all components are present and undamaged before beginning installation:
- Ceiling Fan Motor Assembly
- Fan Blades (5)
- Blade Brackets (5)
- Light Kit Assembly (Upper and Lower sections)
- Glass Crystal Accents
- Remote Control with Wall Mount
- Downrod and Canopy
- Hardware Pack (screws, washers, wire nuts)
- Instruction Manual
4. Setup & Installation
Professional installation is recommended to ensure safety and proper function. Always ensure power is disconnected at the circuit breaker before proceeding with any installation steps.
- Mounting Bracket Installation: Secure the mounting bracket to the ceiling junction box. Ensure the junction box is rated for fan support and the bracket is properly grounded.
- Downrod Assembly: Insert the downrod through the canopy and motor housing. Secure it with the provided cross pin and cotter pin, then tighten the set screw.
- Wiring Connections: Carefully connect the fan's electrical wires to the household wiring according to the wiring diagram provided in the full manual. Use the included wire nuts to secure all connections.
- Motor Housing Attachment: Lift the fan assembly and hang it onto the mounting bracket. Secure the canopy to the ceiling, ensuring all wires are tucked safely inside.
- Blade Attachment: Attach each of the five fan blades to their respective blade brackets using the provided screws. Then, secure the assembled blade-bracket units to the motor housing.
- Light Kit Installation: Connect the light kit wiring to the fan motor wiring. Carefully attach the upper and lower light shades, ensuring the glass crystal accents are properly seated and secured.
- Bulb Installation: Install six (6) E12 base bulbs (not included) into the light sockets. Do not overtighten.
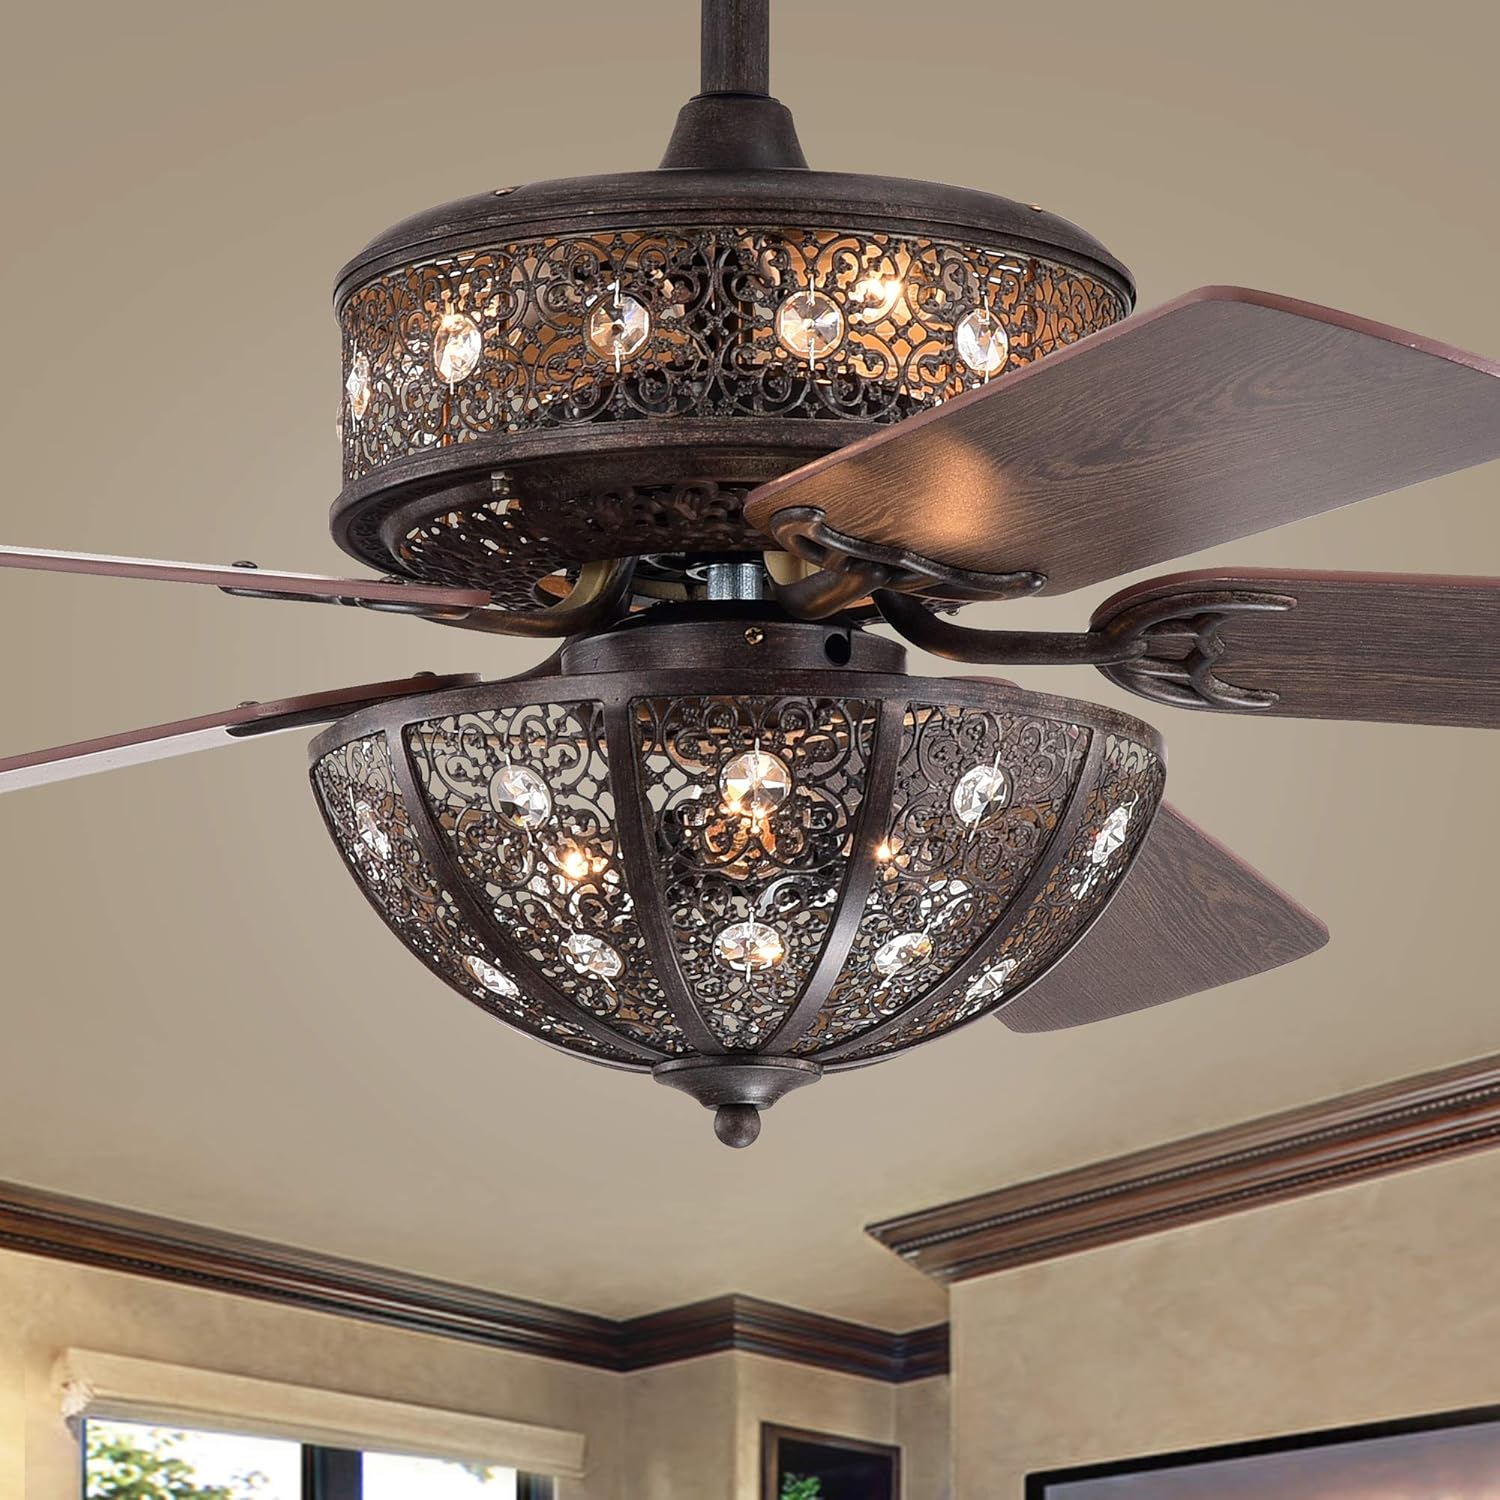
Image showing the intricate metalwork and blade attachment of the fan, relevant for installation steps.
5. Operating Instructions
This ceiling fan is operated via the included remote control.
5.1 Remote Control Functions
- Fan ON/OFF: Press to turn the fan on or off.
- Fan Speed: Dedicated buttons for Low, Medium, and High fan speeds to adjust airflow.
- Light ON/OFF: Press to turn the integrated light kit on or off.
- Light Mode: Cycles through three different light combinations (e.g., upper lights only, lower lights only, both lights illuminated).
- Reverse Function: (If applicable, typically a switch on the fan motor housing) Changes blade rotation direction for seasonal use (downward airflow for summer cooling, upward airflow for winter heat circulation).
5.2 Initial Operation
- Ensure batteries are correctly installed in the remote control.
- Restore electrical power to the fan at the circuit breaker.
- Press the "Fan ON" button on the remote to start the fan. Adjust speed as desired using the speed buttons.
- Press the "Light ON" button to activate the lights. Use the "Light Mode" button to cycle through the available lighting options.
6. Maintenance
Regular maintenance ensures optimal performance, safety, and extends the lifespan of your ceiling fan.
- Cleaning: Periodically dust the fan blades, motor housing, and light kit with a soft, damp cloth. Avoid using abrasive cleaners, solvents, or harsh chemicals, as these can damage the finish.
- Light Bulb Replacement: Always disconnect power to the fan at the circuit breaker before replacing bulbs. Allow bulbs to cool completely before handling. Replace with six (6) E12 base, 25-watt maximum bulbs.
- Tightening Screws: Over time, screws may loosen. Periodically check and tighten all screws on the fan blades, blade brackets, motor housing, and mounting hardware to prevent wobbling and noise.
- Crystal Cleaning: Gently wipe the glass crystals with a soft, lint-free cloth to maintain their sparkle.

Detail of the fan's crystal and metal design, highlighting areas for cleaning and inspection.
7. Troubleshooting
Refer to the table below for common issues and their potential solutions.
| Problem | Possible Cause | Solution |
|---|---|---|
| Fan does not start | No power to the fan; Loose wire connections; Remote control battery dead. | Check circuit breaker and wall switch; Verify all wire connections are secure (ensure power is off first); Replace remote control batteries. |
| Fan wobbles | Loose blade screws; Unbalanced blades; Loose mounting bracket. | Tighten all blade screws; Use a balancing kit (not included) to balance blades; Ensure mounting bracket is securely fastened to the ceiling. |
| Lights do not work | Loose wire connections to light kit; Faulty or incorrect bulbs; Light function not activated on remote. | Check light kit wiring (power off); Replace bulbs with correct type and wattage; Ensure light ON button is pressed on the remote. |
| Remote control not working | Dead batteries; Remote not paired with fan (if applicable); Obstruction between remote and receiver. | Replace batteries; Refer to the full manual for remote pairing instructions if necessary; Ensure clear line of sight to the fan's receiver. |
8. Specifications
| Feature | Detail |
|---|---|
| Model Name | Milly Antique Bronze 52-Inch 5-Blade Flower Pattern Metal/Crystal Lighted Ceiling Fan |
| Model Number | CFL-8448REMO/DR |
| Brand | Warehouse of Tiffany |
| Dimensions | 52 x 52 x 21.7 inches (Width x Depth x Height) |
| Item Weight | 18 pounds |
| Number of Blades | 5 |
| Finish Type | Metal (Antique Bronze) |
| Materials | Metal, Glass Crystal, Wood |
| Light Kit | Integrated, requires 6 x E12 base bulbs (max 25W each, not included) |
| Control Method | Remote Control |
| Fan Speeds | 3 (Low, Medium, High) |
| Voltage | 120 Volts |
| Wattage (Fan Only) | 25 watts (excluding lights) |
| Certification | ETL Listed |
| Indoor/Outdoor Usage | Indoor |

Dimensional drawing of the Milly ceiling fan, indicating overall width, height, and light kit depth.
Energy Information

Energy Guide for the Milly ceiling fan, detailing estimated yearly energy cost and airflow performance.

Detailed energy information at high speed, including airflow, electricity usage, and efficiency.
9. Warranty & Support
9.1 Warranty Information
The manufacturer states: "No warranty." Please refer to your retailer's return policy for details on product returns or exchanges.
9.2 Customer Support
For further assistance or inquiries regarding your Warehouse of Tiffany Milly Ceiling Fan, please contact your point of purchase or visit the Warehouse of Tiffany Store on Amazon.