phopollo PHBL2501RGB53US
phopollo 25ft LED Strip Light Instruction Manual
Model: PHBL2501RGB53US
1. Introduction
This manual provides detailed instructions for the installation, operation, and maintenance of your phopollo 25ft LED Strip Light. Please read this manual thoroughly before use to ensure proper functionality and safety.
2. Package Contents
Verify that all components are present in the package:
- 25ft LED Strip Light
- Remote Control
- Power Adapter (USB Powered)
- User Manual (This document)

Figure 1: Contents of the phopollo 25ft LED Strip Light package, including the coiled LED strip, remote control, USB power adapter, and product box.
3. Safety Information
- This product is designed for indoor use only. Do not expose to water or high humidity.
- Ensure the power supply voltage matches the product's requirements (12 Volts).
- Do not look directly at the LED lights for extended periods, as they can be bright.
- Keep out of reach of children.
- Do not attempt to repair or modify the LED strip or power adapter. Contact customer support for assistance.
- Unplug the power adapter before cleaning or when not in use for a long duration.
4. Setup and Installation
4.1 Preparation
- Choose a clean, dry, and smooth surface for installation.
- Clean the surface thoroughly to ensure optimal adhesion of the strip light.
- Unroll the LED strip light and lay it flat to prevent kinks.
4.2 Installation Steps
- Measure and Cut (Optional): The strip light can be cut every 3 LEDs along the designated cutting marks. Ensure to cut only at these marks to avoid damaging the circuit.
- Peel and Stick: Carefully peel off the adhesive backing from the LED strip.
- Apply the Strip: Press the strip firmly onto the desired surface. For corners, gently fold the strip to create a clean bend.
- Connect to Power: Connect the LED strip to the provided power adapter. Ensure the connectors are aligned correctly (+12V to +12V, etc.).
- Plug In: Plug the power adapter into a suitable USB power source.
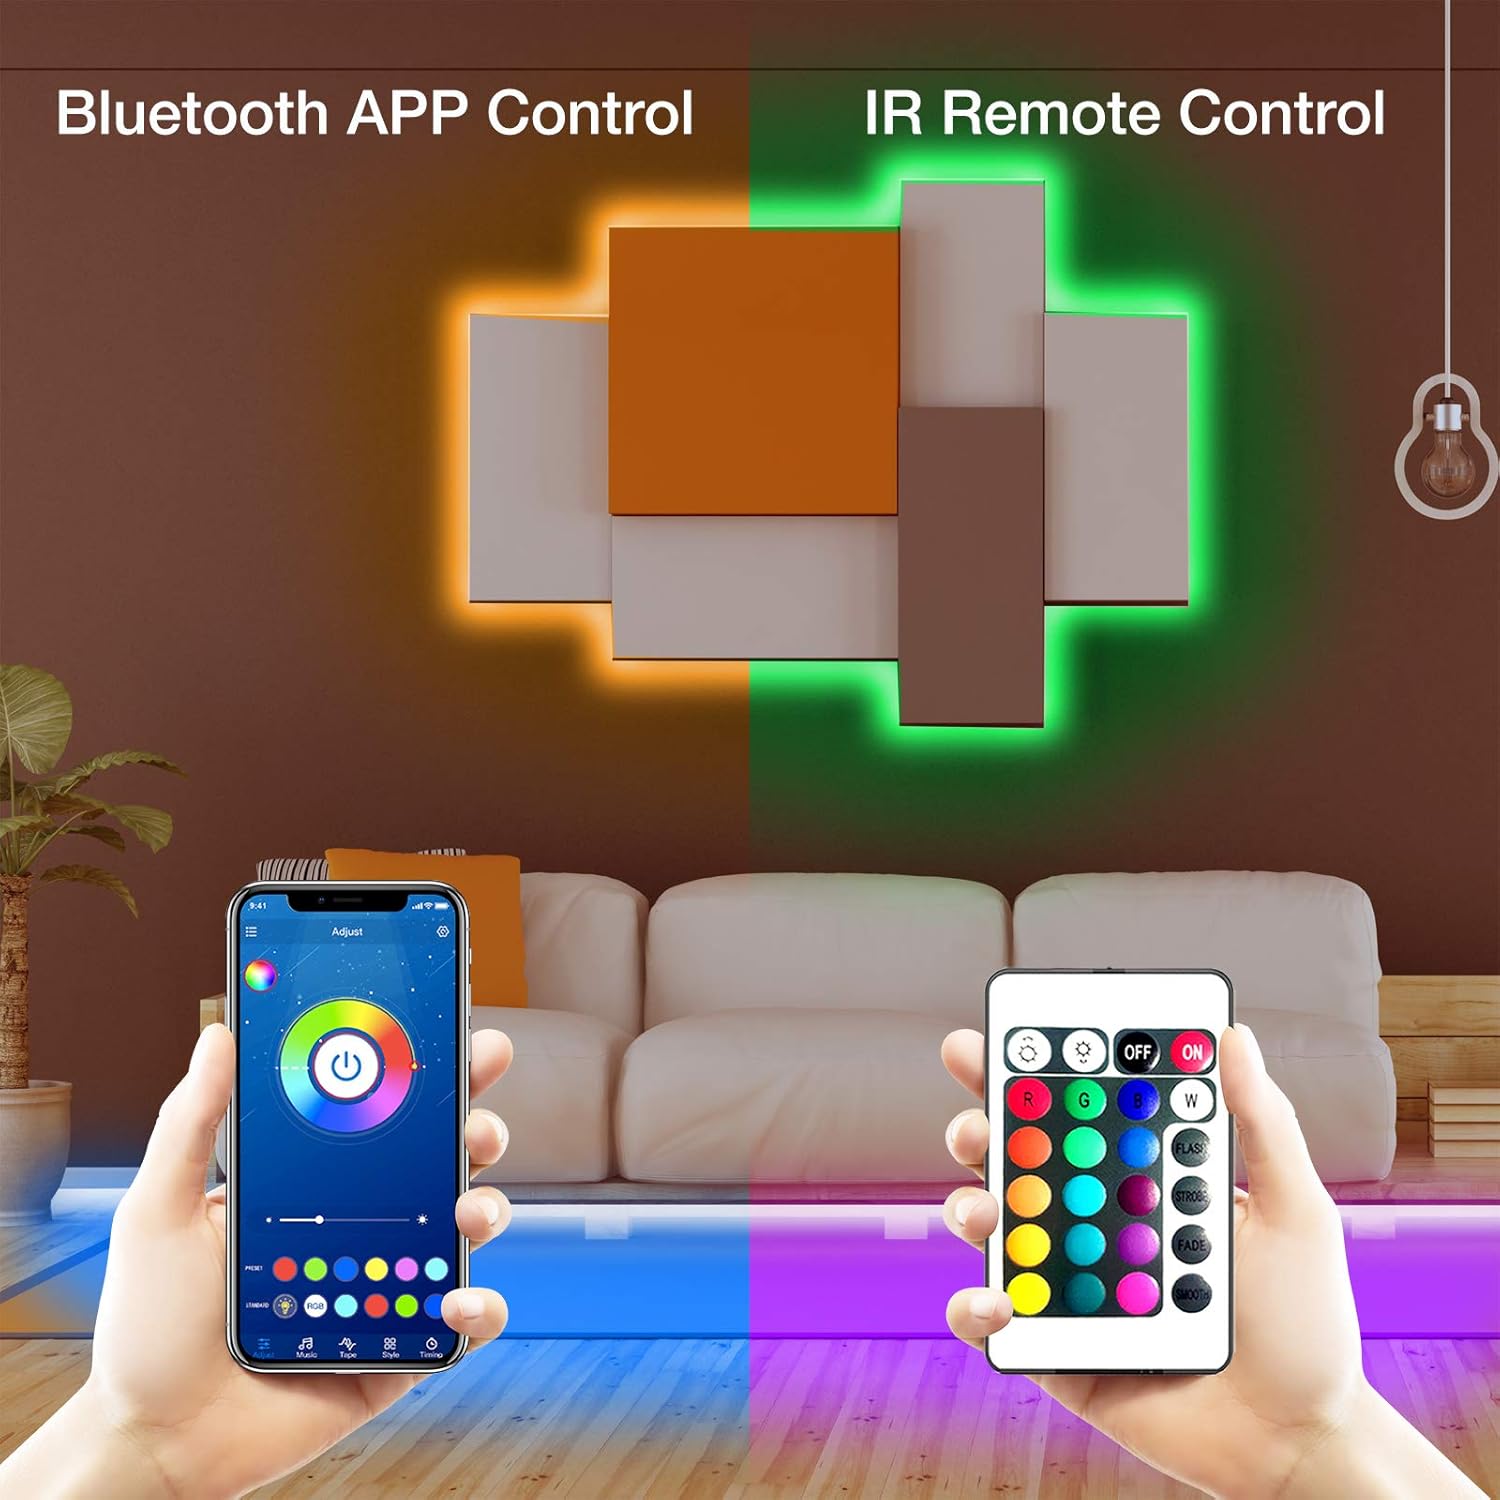
Figure 2: Illustration of LED strip light installation and the two control methods: Bluetooth App Control and IR Remote Control.
4.3 App Download and Pairing
- Download App: Scan the QR code on the packaging or search for the "PHOPOLLO" app in your device's app store.
- Enable Bluetooth: Ensure Bluetooth is enabled on your smartphone.
- Open App: Launch the PHOPOLLO app. It should automatically detect the LED strip light.
- Pair Device: Follow the on-screen instructions within the app to pair your device with the LED strip light.
5. Operating Instructions
5.1 Remote Control Functions
The included IR remote control allows for basic operation of the LED strip light.
- ON/OFF: Power the lights on or off.
- Color Selection: Choose from various preset static colors (R, G, B, W, and other mixed colors).
- Brightness Adjustment: Increase or decrease the light intensity.
- Mode Selection: Cycle through dynamic modes such as FLASH, STROBE, FADE, and SMOOTH.
5.2 App Control Functions
The PHOPOLLO app provides advanced control features:
- 16 Million Colors: Access a full spectrum of colors for customization.
- Music Sync Mode: The built-in microphone allows the lights to synchronize with your favorite music.
- Scene Modes: Select from various pre-programmed scene modes to match different moods or occasions.
- Creative DIY Effects: Customize your own lighting effects and save them.
- Timers: Set schedules for the lights to turn on or off automatically.
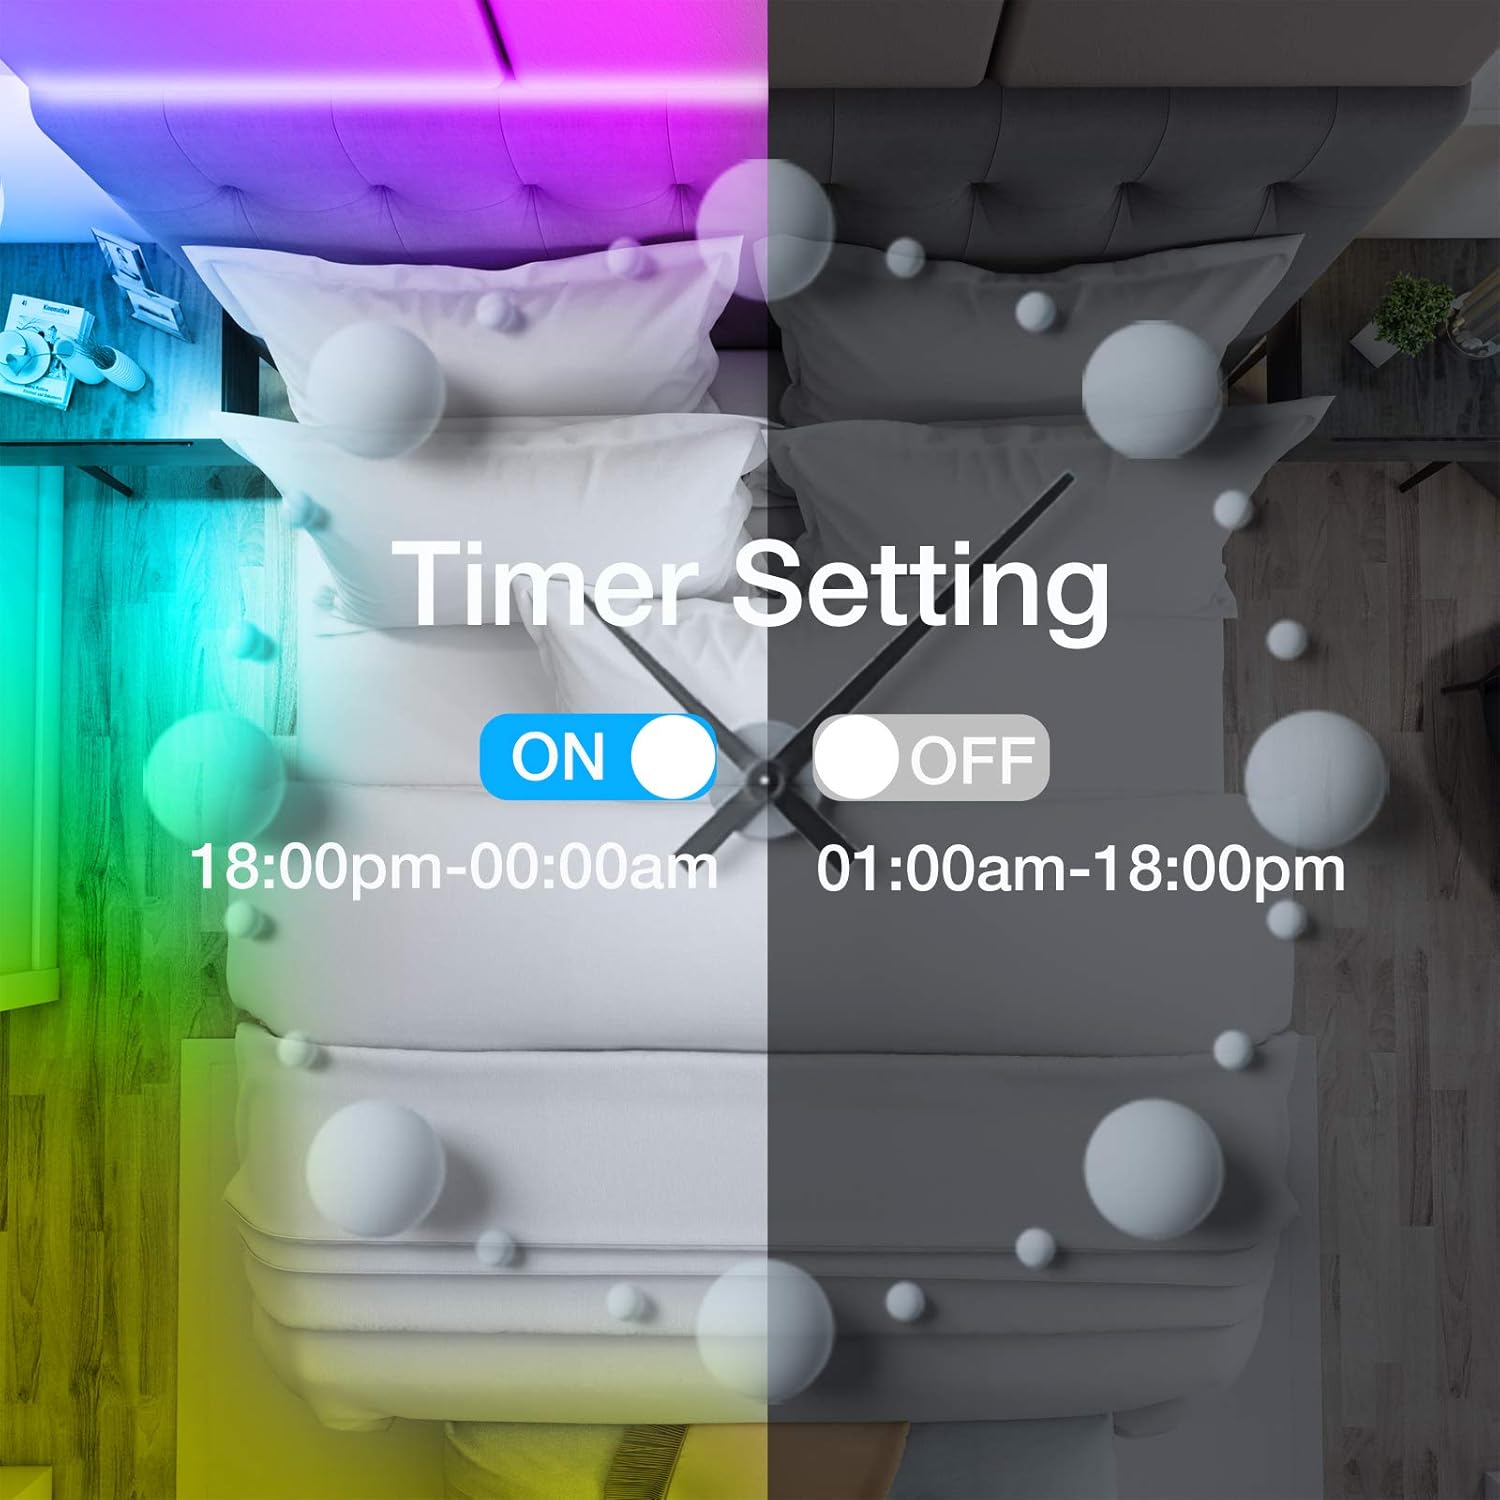
Figure 3: The timer setting feature, allowing users to schedule automatic on/off times for the LED strip lights.
6. Maintenance
- Cleaning: Gently wipe the LED strip with a dry, soft cloth. Do not use liquid cleaners or abrasive materials.
- Storage: If storing the strip light for an extended period, ensure it is clean, dry, and coiled loosely to prevent damage.
- Adhesion: If the adhesive weakens over time, additional mounting clips or double-sided tape may be used.
7. Troubleshooting
| Problem | Possible Cause | Solution |
|---|---|---|
| Lights do not turn on. |
|
|
| Remote control or App is not responding. |
|
|
| Some segments of the strip are not lighting up or are dim. |
|
|
| Interference with other electronic devices (e.g., TV remote). |
|
|
8. Specifications
| Feature | Detail |
|---|---|
| Model Number | PHBL2501RGB53US |
| Length | 25 feet (7.62 meters) |
| Light Source Type | LED (5050 LED beads) |
| Number of Light Sources | 200 |
| Voltage | 12 Volts |
| Wattage | 40 watts |
| Control Method | App Control (Bluetooth), Remote Control (IR) |
| Special Features | Color Changing, Dimmable, Energy Efficient, Music Sync Mode, Timer Function |
| Indoor/Outdoor Usage | Indoor Use Only |
| Material | Plastic |
| Item Weight | 4.2 ounces (0.12 Kilograms) |
9. Warranty and Support
For warranty information or technical support, please refer to the product packaging or contact phopollo customer service directly. Keep your purchase receipt for warranty claims.
Ask a question about this manual
Ask about setup, troubleshooting, compatibility, parts, safety, or missing instructions. Manuals+ will review the question and use this page’s manual context to help answer it.