1. Introduction
Thank you for choosing the Super General SGW75 Twin Tub Semi-Automatic Washing Machine. This manual provides essential information for the safe and efficient operation, installation, and maintenance of your appliance. Please read it thoroughly before use and retain it for future reference.
2. Safety Information
To prevent injury to yourself and others, and to avoid property damage, please observe the following safety precautions:
- Ensure the washing machine is installed on a firm, level surface to prevent vibration and noise.
- Do not operate the machine with a damaged power cord or plug. Contact qualified service personnel for repairs.
- Keep children and pets away from the appliance during operation.
- Do not wash items that are waterproof or water-repellent, as this may cause abnormal vibrations.
- Always unplug the machine before cleaning, maintenance, or if it will be unused for an extended period.
- Do not immerse the electrical parts in water.
- Ensure the water inlet and drain hoses are properly connected to prevent leaks.
3. Product Overview
The Super General SGW75 is a 7 kg capacity twin tub semi-automatic washing machine designed for efficient washing and spinning. It features separate tubs for washing and spinning, allowing for flexible laundry management.

Figure 3.1: Front view of the Super General SGW75 washing machine, highlighting its 7 kg washing capacity, 5 kg spin capacity, 220-240V 50Hz power requirement, 12 kWh annual consumption, and IPX4 waterproof rating. Dimensions are shown as 44.8 cm depth, 76.1 cm width, and 90.5 cm height.
Key Features:
- 7 Kg Washing Capacity: Suitable for medium-sized laundry loads.
- Twin Tub Design: Separate wash and spin tubs for convenience.
- Transparent Lids: Allows monitoring of the washing process.
- High Back Control Panel: Easy access to controls.
- Magic Lint Filter: Effectively collects lint during washing.
- Rust-Proof Durable Plastic Body: Ensures longevity and resistance to corrosion.
- Low Noise Motor: For quieter operation.

Figure 3.2: Top view of the washing machine with both wash and spin tub lids open, illustrating features such as XL Washing-Tub, Low Noise Motor, Rust-Proof, Durable Plastic Body, Lint-Filter, and Spin-Dry Function.
Control Panel:
The control panel is located at the top rear of the machine and includes knobs for Wash Timer, Wash/Drain Selector, and Spin Timer.

Figure 3.3: Detailed view of the control panel, showing the Wash Timer (0-15 minutes), Wash/Drain Selector (Normal, Heavy, Drain), and Spin Timer (0-5 minutes).
4. Setup and Installation
4.1 Unpacking
Carefully remove the washing machine from its packaging. Inspect for any damage during transit. Retain packaging materials for future transport if needed.
4.2 Location
- Place the machine on a flat, stable surface to minimize vibration and noise during operation.
- Ensure there is adequate space around the machine for ventilation and access.
- Avoid direct sunlight or locations with high humidity.
4.3 Water Supply
Connect the water inlet hose to a cold water tap. Ensure the connection is secure to prevent leaks.
4.4 Drain Hose Installation
Position the drain hose to allow for proper water drainage. The hose should be placed in a sink or a dedicated drain pipe. Ensure the hose is not kinked or blocked.

Figure 4.1: Side view of the washing machine, illustrating the flexible drain hose extending from the side of the unit.
4.5 Power Connection
Plug the power cord into a grounded electrical outlet. Ensure the voltage matches the machine's requirements (220-240V, 50Hz).

Figure 4.2: Rear view of the washing machine, showing the power cord and plug, along with the drain hose connection point.
5. Operating Instructions
5.1 Washing Procedure
- Load Laundry: Open the wash tub lid and place clothes loosely into the wash tub. Do not overload the machine beyond its 7 kg capacity.
- Add Water: Fill the wash tub with water to the desired level.
- Add Detergent: Add the appropriate amount of detergent for your load.
- Select Wash Mode: Turn the Wash/Drain Selector knob to "Normal" or "Heavy" depending on the fabric type and soil level.
- Set Wash Timer: Turn the Wash Timer knob to the desired washing time (up to 15 minutes). The machine will start washing automatically.
- Drain Water: Once washing is complete, turn the Wash/Drain Selector knob to "Drain" to empty the water from the wash tub.
- Rinse (Optional): For rinsing, you can either fill the wash tub with clean water and run a short wash cycle, or transfer clothes to the spin tub for rinse spinning.
5.2 Spin Drying Procedure
- Transfer Laundry: Carefully transfer the washed and rinsed clothes from the wash tub to the spin tub. Distribute the clothes evenly to prevent imbalance.
- Place Spin Cap: Place the spin cap (if provided) on top of the clothes in the spin tub to prevent them from flying out during spinning.
- Close Lid: Close the spin tub lid securely.
- Set Spin Timer: Turn the Spin Timer knob to the desired spinning time (up to 5 minutes). The machine will start spinning.
- Remove Laundry: Once the spin cycle is complete, open the lid and carefully remove the spun clothes.

Figure 5.1: Interior view of the spin tub, showing the perforated drum designed for efficient water extraction.
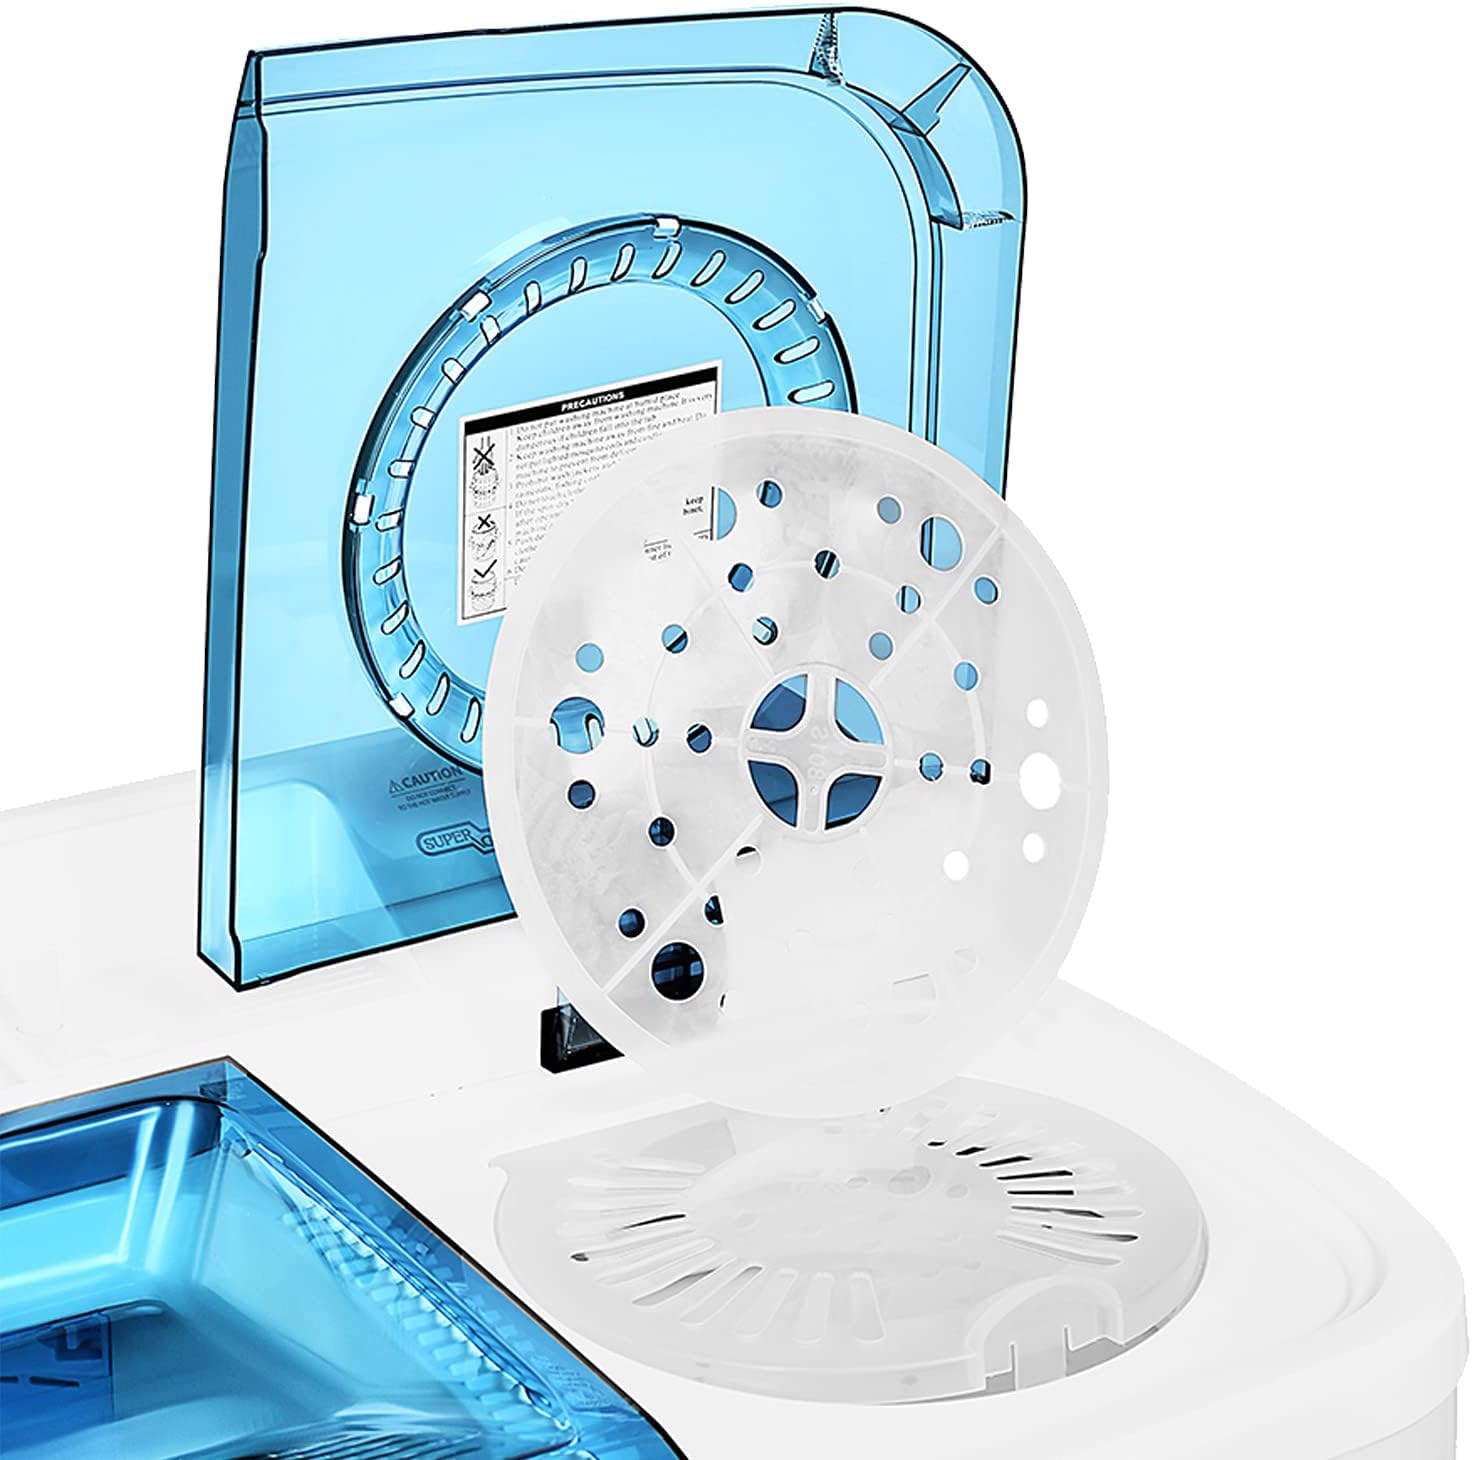
Figure 5.2: Close-up of the spin tub area, showing the removable spin cap and the integrated lint filter mechanism.
6. Maintenance and Cleaning
Regular maintenance ensures the longevity and optimal performance of your washing machine.
6.1 Cleaning the Lint Filter
The magic lint filter should be cleaned after every few washes to maintain washing efficiency.
- Remove the lint filter from the wash tub.
- Open the filter and remove any accumulated lint and debris.
- Rinse the filter under running water.
- Reinstall the clean lint filter securely in its position.

Figure 6.1: Detailed view of the removable lint filter, showing its design for capturing fibers during the wash cycle.
6.2 Cleaning the Exterior
Wipe the exterior of the machine with a soft, damp cloth. Do not use abrasive cleaners or solvents.
6.3 Cleaning the Tubs
Periodically clean the wash and spin tubs to prevent residue buildup. You can run an empty wash cycle with hot water and a cup of white vinegar.
6.4 Winter Storage (if applicable)
If storing the machine in an area where temperatures may drop below freezing, drain all water from the hoses and tubs to prevent damage.
7. Troubleshooting
Before contacting service, please refer to the following table for common issues and their solutions.
| Problem | Possible Cause | Solution |
|---|---|---|
| Machine does not start | Power cord not plugged in; Power outage; Lid not closed properly; Timer not set. | Check power connection; Check circuit breaker; Ensure lids are fully closed; Set the timer. |
| No water filling | Water tap closed; Water inlet hose kinked or blocked. | Open water tap; Straighten hose; Clean filter in inlet hose if clogged. |
| Water not draining | Drain hose kinked or blocked; Drain selector not set to "Drain". | Straighten hose; Clear any blockages; Set drain selector to "Drain". |
| Excessive vibration/noise during spin | Machine not level; Clothes unevenly distributed in spin tub; Overloaded spin tub. | Adjust machine to be level; Redistribute clothes evenly; Reduce load size. |
| Lint on clothes | Lint filter clogged or not installed correctly. | Clean the lint filter; Ensure it is properly seated. |
8. Specifications
| Feature | Detail |
|---|---|
| Brand | Super General |
| Model Info | SGW75 |
| Product Dimensions (L x W x H) | 90.5 x 76.1 x 44.8 cm |
| Item Weight | 19.5 Kilograms |
| Washing Capacity | 7 Kilograms |
| Spin Capacity | 5 Kilograms |
| Installation Type | Freestanding |
| Color | White |
| Control Console | Knob |
| Standard Cycles | 2 (Normal, Heavy) |
| Access Location | Top Load Access for Tubs |
| Voltage | 220-240 Volts |
| Wattage | 475 watts |
| Material Type | ABS Plastic |
| Energy Efficiency | Energy Efficiency |
| Waterproof Grade | IPX4 |
Note: Some specifications may vary slightly. The washing capacity is listed as 7 Kg in the product title and 7.5 Kg in specifications. Please refer to the product label for the most accurate information. The access location is for the tubs, which are top-loading for this twin tub design.
9. Warranty and Support
For warranty information and customer support, please refer to the warranty card included with your product or contact Super General customer service directly. Keep your purchase receipt as proof of purchase for warranty claims.
For service inquiries or technical assistance, please visit the official Super General website or contact their authorized service centers.