1. Important Safety Information
Please read and understand all safety instructions before operating the YIHUA 939-II Pyrography Station. Failure to follow these instructions may result in electric shock, fire, or serious injury.
- Ventilation: Always operate the pyrography station in a well-ventilated area to avoid inhaling smoke and fumes produced during wood burning.
- Hot Surfaces: The pyrography pen and nibs become extremely hot during operation. Avoid direct contact with skin. Use the stable pen holder provided.
- Flammable Materials: Keep flammable materials away from the working area. Ensure your workspace is clean and free of debris.
- Unplug When Not in Use: Always unplug the unit from the power outlet when not in use, before changing nibs, or before cleaning.
- Children and Pets: Keep the pyrography station and all accessories out of reach of children and pets.
- Power Supply: This model is designed to operate on 110-127V 60Hz with a US-standard power plug. Do not use with incompatible power sources.
2. Package Contents
Verify that all items listed below are included in your package:
- YIHUA 939-II Pyrography Station Unit
- Pyrography Pen
- 20 Wire Nibs (various types including Skew, Wire, Shader)
- Stable Pen Holder
- 2 Stencils
- 2 Scrap Wood pieces for practice
- Stainless Steel Tweezers
- Pliers

Image 2.1: Overview of the YIHUA 939-II Pyrography Station and its complete set of accessories.
3. Setup Instructions
3.1 Connecting the Pyrography Pen
- Locate the pen's connector cable.
- Roll back the protective sleeve on the connector.
- Align the connector with the port on the main unit and push it in firmly.
- Tighten the fastener to secure the connection.
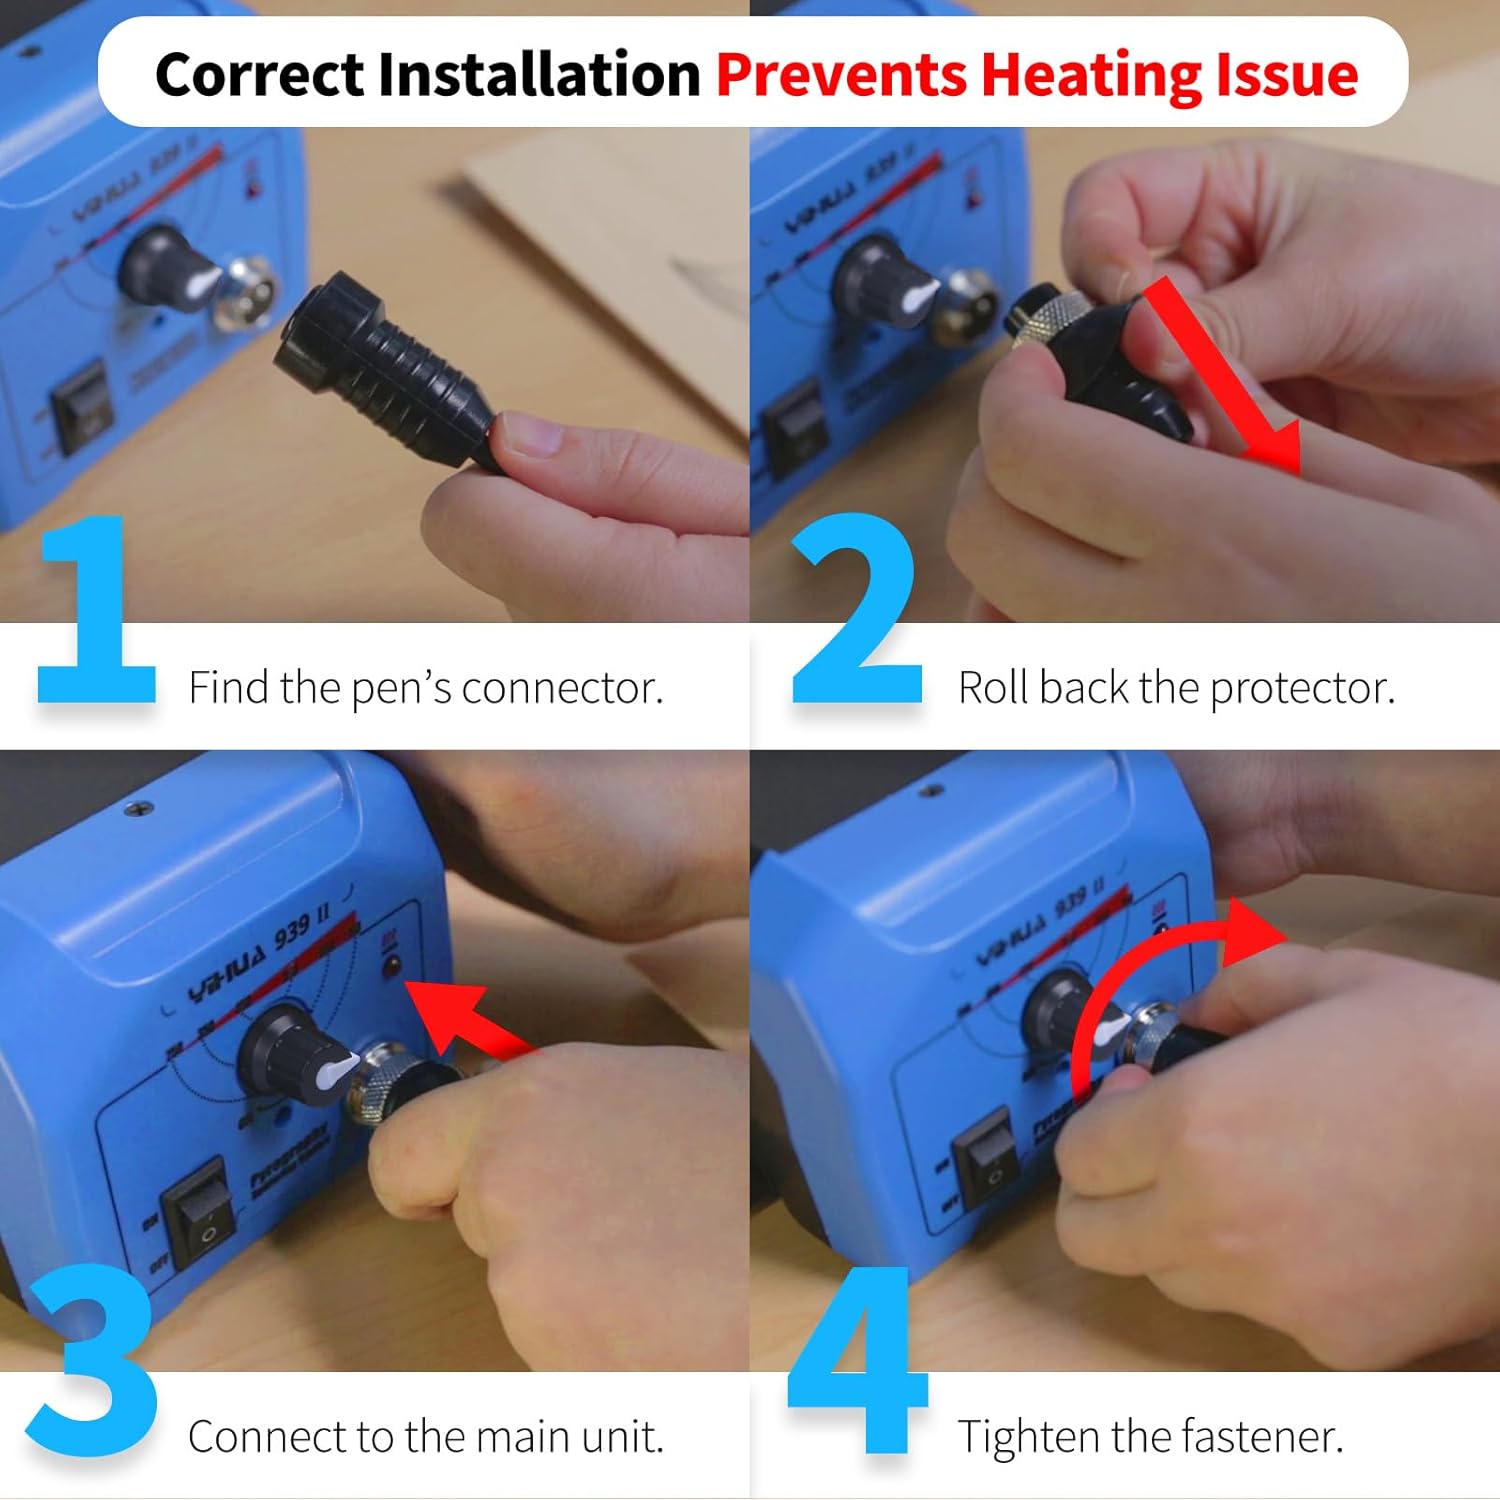
Image 3.1: Visual guide for connecting the pyrography pen to the YIHUA 939-II station.
3.2 Installing Nibs
Ensure the unit is unplugged and the pen is cool before installing or changing nibs.
- Select the desired nib from the provided assortment.
- Carefully insert the nib into the pen's tip receptacle. Ensure the nib is inserted 100% and is correctly tightened.
- Important: Verify that the two wires of the nib are not in contact with each other. A small gap is necessary for proper heating. If the wires are touching, gently adjust them with pliers when the nib is cool.

Image 3.2: Illustration of correct and incorrect pyrography tip installation, highlighting the importance of proper tightening and alignment for consistent heating.
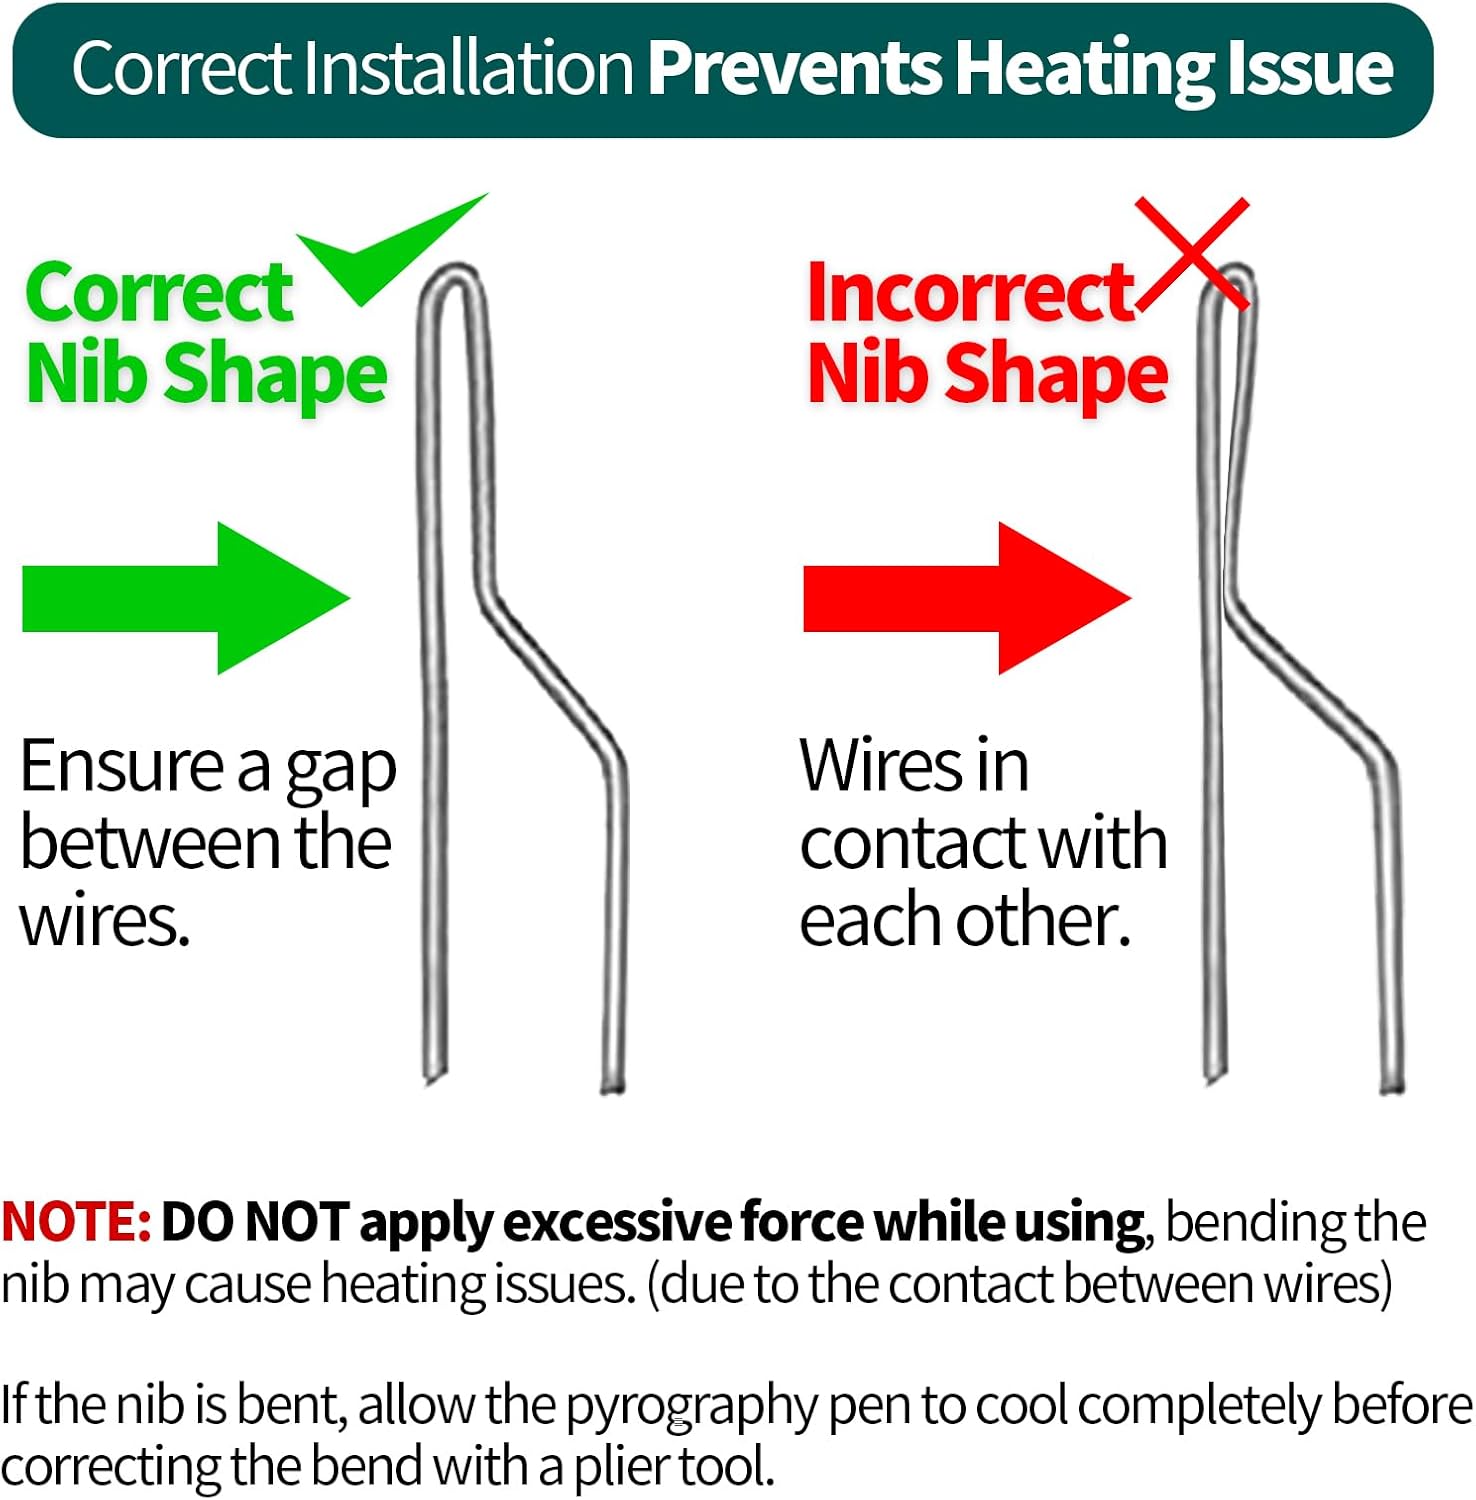
Image 3.3: Demonstrates the correct nib shape with a gap between wires versus an incorrect shape where wires are in contact, which can prevent proper heating.
4. Operating Instructions
4.1 Powering On and Temperature Adjustment
- Place the pyrography pen securely in the stable pen holder.
- Plug the power cord into a compatible 110-127V 60Hz outlet.
- Turn the power switch to the 'ON' position.
- Turn the temperature control knob to the MAXIMUM setting and allow the station to heat up for approximately 1 minute.
- Gradually decrease the temperature as you test the color of the burn on a practice wood or scrap wood piece to find the desired shade. The adjustable temperature range is 482~1382℉ (250~750℃).

Image 4.1: Guide to temperature recommendations and how to adjust the dial for optimal burning results.
4.2 Pyrography Techniques and Tips
- Practice: Use the included scrap wood to familiarize yourself with different nibs and temperature settings.
- Consistent Burn: If the burn becomes lighter as you draw, either increase the temperature slightly or lift the pen from the wood for a few seconds to allow it to reheat, then continue drawing.
- Nibs: Experiment with the 20 different nibs for various effects such as straight lines, curves, calligraphy, stippling, feathering, hair effects, outlining, and crosshatching.

Image 4.2: Instructions on how to adjust temperature or pause to reheat the pen if the burn color becomes lighter during use.

Image 4.3: Encourages users to practice with different temperature settings and wire nibs on scrap wood to develop skill and familiarity.

Image 4.4: Displays the variety of 20 wire nibs included in the kit, suitable for different burning techniques and effects.
5. Maintenance
- Cleaning Nibs: Allow nibs to cool completely before cleaning. Use a soft brush or fine-grit sandpaper to gently remove carbon buildup. Avoid harsh chemicals.
- Storage: Store the pyrography station and all accessories in a dry, safe place away from dust and moisture. Keep nibs organized in the provided collector tin.
- Cable Care: Do not bend or crimp the power cord or pen cable excessively. Inspect cables regularly for any signs of damage.
6. Troubleshooting
Refer to the table below for common issues and their solutions.
| Issue | Possible Cause | Solution |
|---|---|---|
| Nib not heating up |
|
|
| Inconsistent burn color |
|
|
| Excessive smoke |
|
|
7. Specifications
| Feature | Specification |
|---|---|
| Model Number | YIHUA 939-II |
| Temperature Range | 250~750℃ / 482~1382℉ |
| Voltage | 110-127 Volts |
| Wattage | 25 watts |
| Product Dimensions | 5.67 x 4.92 x 3.54 inches |
| Item Weight | 3.83 pounds |
| Display Type | LED |
8. Warranty and Support
The YIHUA 939-II Pyrography Station comes with a 12-month US-exclusive manufacturer technical coverage. For any technical assistance or support, please contact YIHUA customer service. Professional assistance is available 24/7 on Amazon.
For further inquiries or to access support resources, please visit the official YIHUA store on Amazon or refer to the contact information provided with your purchase.


