Product Overview
This manual provides instructions for the Aurax Double-Headed Car Gap Filler Cushion. This product is designed to fill the gap between your car seat and the center console, preventing small items from falling through and offering additional storage space.
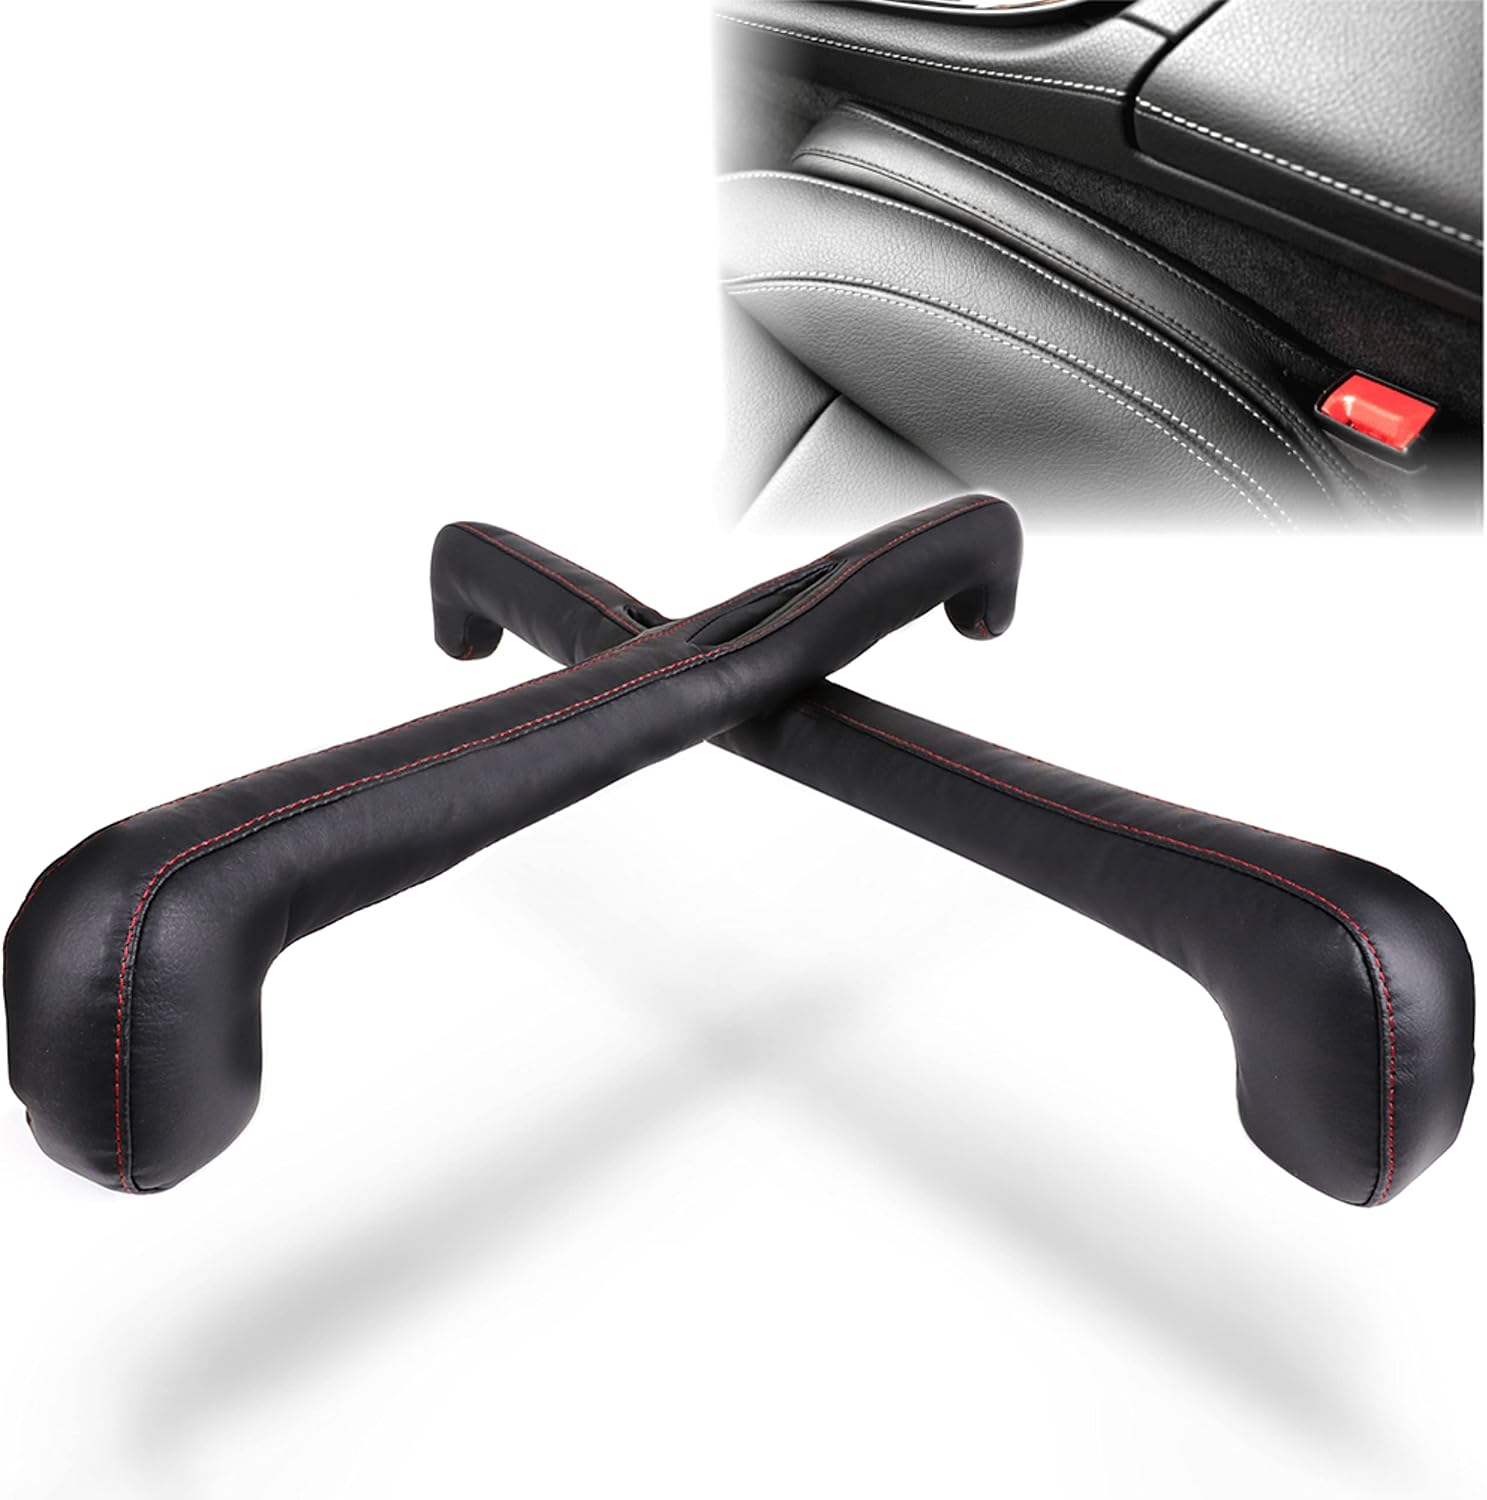
Image: The Aurax Double-Headed Car Gap Filler Cushion, showing its design and how it fits into the car seat gap.
Key Features
Enhanced Double-Headed Design: Overcomes limitations of traditional straight and snake-type gap fillers. The curved ends ensure a snug fit, integrating seamlessly with the seat and console, and preventing dislodgement during driving or seat adjustments.
Prevents Item Drops & Adds Storage: Fills the gap between the seat and center console, preventing items like smartphones and wallets from falling. When inverted, the double-headed design creates a convenient storage space for small items.
Durable PU Leather Construction: Made from high-quality PU leather, offering a luxurious feel that blends well with car interiors. This material is durable, water-resistant, and easy to clean with a dry cloth, requiring minimal maintenance.
Wide Compatibility: Designed to fit a broad range of vehicles, from domestic to imported models (e.g., Toyota, Honda, Nissan, Mazda, Mercedes-Benz). It enhances interior organization and adds a touch of luxury. Please verify gap width (2-5cm) and ensure the seatbelt buckle is not obstructed before purchase.
Setup and Installation
The Aurax Car Gap Filler Cushion is designed for easy installation.
Installation Steps:
Step 1: Pass the Seatbelt Buckle. Locate the seatbelt buckle and thread it through the designated opening in the gap filler cushion.

Image: A hand guiding the seatbelt buckle through the opening in the gap filler cushion.
Step 2: Insert Ends into Gap. Gently push both ends of the cushion into the gap between the car seat and the center console.

Image: A hand pushing one end of the cushion into the car seat gap.
Step 3: Adjust for Fit. Press the middle section of the cushion to adjust and ensure a complete, snug fit along the entire length of the gap.

Image: The cushion fully inserted into the gap, with arrows indicating adjustment points.
Height Adjustment Options:
You can choose between two installation methods to adjust the height of the cushion relative to the seat.
Normal Installation: The cushion sits at the same height as the seat, providing a flush appearance.

Image: The cushion installed normally, appearing flush with the car seat.
Inverted Installation: Flipping the cushion allows it to sit lower than the seat, creating a storage space above it.

Image: The cushion installed inverted, showing the space created for storage.
Operating Instructions
Once installed, the Aurax Car Gap Filler Cushion operates passively by preventing items from falling into the seat gap.
Utilizing Storage Function:
To use the integrated storage function, install the cushion in the "inverted" position as described in the Setup section. This creates a convenient pocket for small items like your smartphone, keys, or wallet.

Image: A smartphone placed in the storage area created by the inverted cushion.
Maintenance and Care
The Aurax Car Gap Filler Cushion is designed for easy maintenance due to its durable PU leather material.
Cleaning: For general cleaning, simply wipe the surface with a dry cloth. For minor spills or dirt, a slightly damp cloth can be used, followed by drying with a clean, dry cloth.
Avoid Harsh Chemicals: Do not use strong detergents, abrasive cleaners, or solvents, as these can damage the PU leather finish.
Storage: If removing the cushion for extended periods, store it in a cool, dry place away from direct sunlight to preserve its material integrity.
Troubleshooting
This section addresses common issues you might encounter with the Aurax Car Gap Filler Cushion.
Common Issues and Solutions:
Cushion does not fit snugly or floats up:
Ensure the gap width between your seat and console is within the recommended range of 2cm to 5cm. If the gap is too narrow (less than 2cm) or too wide (more than 5cm), the cushion may not fit properly. Also, ensure the seatbelt buckle is not obstructing the cushion's placement.

Image: Illustration showing incompatible gap widths (less than 2cm or more than 5cm) and compatible gap width (2cm-5cm).
Cushion slides or moves during driving:
Re-adjust the cushion by pressing the middle section to ensure it is fully inserted and snug against both the seat and console. The double-headed design is intended to prevent this, but a loose initial installation can cause movement.
Difficulty in creating storage space:
Ensure the cushion is installed in the "inverted" position. This specific orientation is required to form the storage pocket. Refer to the "Height Adjustment Options" in the Setup section.
Specifications
Attribute | Detail |
|---|---|
Brand | AURAX |
Model Name | ARX |
Product Model Number | APX010 |
Package Dimensions | 27.71 x 22.3 x 6.2 cm |
Item Weight | 231 g |
Material | PU Leather |
Recommended Gap Width | 2cm - 5cm |

Image: Diagram showing the dimensions of the Aurax Car Gap Filler Cushion (49.5cm length, 9cm/7cm height at ends, 40cm inner length, 5.5cm/3.8cm width, 5cm end width).
Warranty and Support
Aurax provides a warranty for this product.
Warranty Period: This product comes with a 2-year manufacturer's warranty from the date of purchase.
Returns and Exchanges: In the unlikely event that you receive a defective product, you are eligible for a return or free exchange. Please contact customer support for assistance.
Customer Support: For any inquiries or issues, please contact our customer support team. We aim to respond promptly, typically within 24 hours.