
Burigotto Import Prima Lua
Burigotto Prima Lua Gray Portable Playard Crib User Manual
Model: Prima Lua | Brand: Burigotto Import
Introduction
Thank you for choosing the Burigotto Prima Lua Portable Playard Crib. This manual provides essential information for the safe assembly, operation, and maintenance of your product. Please read all instructions carefully before use and retain this manual for future reference.
Important Safety Information
WARNING: Failure to follow these warnings and instructions could result in serious injury or death.
- Always ensure all safety locks are engaged before placing a child in the crib.
- Never leave a child unattended in the crib or on the changing table.
- The crib is designed for children up to 9 kg (approximately 20 lbs) when the padded base is in the elevated position. For children up to 15 kg (approximately 33 lbs), the padded base must be in the lowest position.
- Discontinue use of the changing table when the child can roll over or push up on hands and knees.
- Do not use this product if any parts are broken, torn, or missing.
- Only use the mattress/pad provided by the manufacturer. Do not add an additional mattress, pillow, comforter, or padding.
- Keep all small parts out of reach of children during assembly.
- Ensure the crib is placed on a flat, stable surface.
- Keep the crib away from open flames, heaters, and other sources of strong heat.
- Regularly check the product for wear and tear, loose fasteners, or sharp edges.
Package Contents
Please verify that all components are present before beginning assembly:
- Main Crib Frame (with integrated safety locks)
- Padded Base/Mattress
- Canopy with Mosquito Net
- Changing Table with Safety Belt
- Storage Pocket
- Transport Bag
- Wheels (2 with brakes)
Setup and Assembly
Follow these steps to assemble your Burigotto Prima Lua Playard Crib:
1. Unfolding the Crib
- Remove the crib from its transport bag.
- Stand the crib upright. Pull the four side rails upwards until they lock into place. You should hear a "click" sound. Ensure all four safety locks on the sides are fully engaged.
- Push down the center of the crib floor until it lies flat and stable.
- Place the padded base/mattress inside the crib.
2. Attaching the Canopy with Mosquito Net
The canopy provides shade and protection from insects.

Image: The Burigotto Prima Lua crib shown with its canopy and mosquito net fully attached, providing coverage over the sleeping area.
- Locate the attachment points on the top edges of the crib frame.
- Align the canopy frame with these points and securely clip or slide it into place.
- Ensure the mosquito net is properly draped and secured around the edges of the canopy to prevent gaps.
3. Installing the Changing Table
The padded changing table offers a convenient surface for diaper changes.

Image: A detailed view of the padded changing table accessory, featuring a safety belt for securing the child during changes.
- Attach the changing table to the top rails of the crib, ensuring it is securely fastened on both sides.
- Always use the integrated safety belt when placing a child on the changing table.
- When not in use, the changing table can be folded or removed.
4. Attaching the Storage Pocket
A side pocket is included for storing small items.

Image: The Burigotto Prima Lua crib with the practical side storage pocket attached, suitable for small baby essentials.
- Locate the attachment points on the side of the crib.
- Securely fasten the storage pocket to these points.
Operating Instructions
Adjusting the Padded Base Height
The padded base has two height settings: an elevated position for infants (up to 9 kg) and a lower position for older babies (up to 15 kg).
- Elevated Position (Infants up to 9 kg): The padded base attaches to the upper zipper system inside the crib. Ensure the zipper is fully closed and secure around the entire perimeter.
- Lower Position (Children up to 15 kg): The padded base rests directly on the bottom of the crib frame. Remove the base from the upper zipper system and place it on the lowest level.
WARNING: Always use the lower position once your child can push up on hands and knees, or has reached 9 kg, to prevent climbing out.
Using the Wheels with Brakes
The crib is equipped with wheels for easy movement and brakes for stability.
- To move the crib, unlock the brakes by flipping the brake levers upwards.
- To secure the crib in place, engage the brakes by pushing the brake levers downwards. Ensure both wheels are locked before placing a child in the crib.
Side Mesh for Ventilation

Image: A view of the crib highlighting the mesh side panels, designed to provide optimal ventilation and visibility.
The crib features mesh side panels to ensure proper air circulation and visibility of your child.
Folding and Transporting the Crib
The crib is designed to fold compactly for storage and transport.
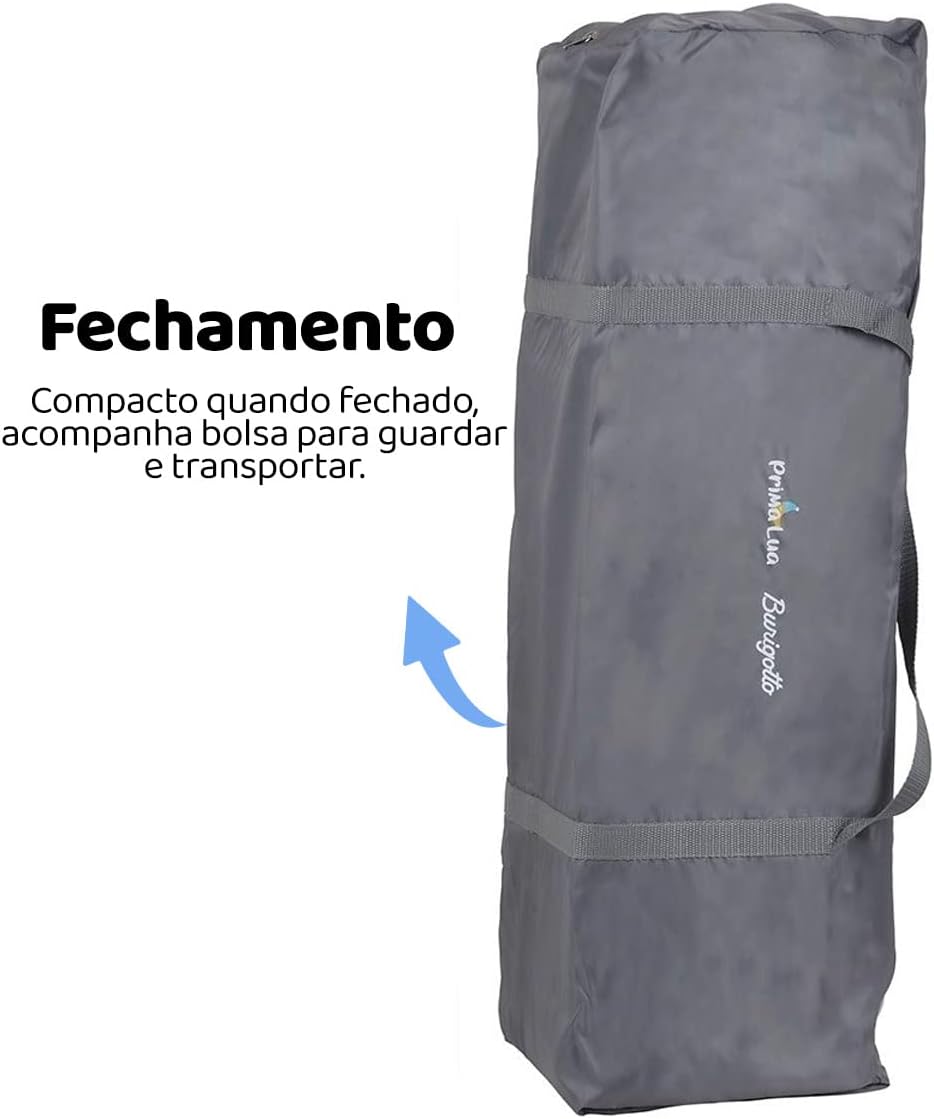
Image: The crib shown in its compact, folded state, neatly packed into its accompanying transport bag for easy carrying.
- Remove the padded base, changing table, and canopy.
- Pull the center handle on the crib floor upwards.
- Locate the release buttons on the side rails (usually in the middle of each rail) and press them while gently pushing the rails downwards to unlock them.
- Once all rails are unlocked, push the sides inwards to fold the crib compactly.
- Secure the folded crib with the provided straps and place it into the transport bag.
Maintenance and Care
- Cleaning: The fabric components can be cleaned with a damp cloth and mild soap. Do not use abrasive cleaners or bleach. Allow to air dry completely.
- Frame: Wipe the metal and plastic parts with a damp cloth.
- Storage: When not in use, store the crib in its transport bag in a dry, cool place, away from direct sunlight.
- Inspection: Regularly inspect all parts for damage, wear, or loose fasteners. Tighten any loose screws or connections. Replace damaged parts immediately.
Troubleshooting
| Problem | Possible Cause | Solution |
|---|---|---|
| Crib sides do not lock into place. | The center of the crib floor is not fully pushed down, or side rails are not pulled up firmly. | Ensure the center of the crib floor is pushed down completely. Pull each side rail upwards until it clicks securely. |
| Crib does not fold compactly. | Side rails are still locked, or the center mechanism is not released. | Ensure all side rail release buttons are pressed and the rails are unlocked. Pull the center handle of the crib floor upwards to release the central mechanism. |
| Wheels are not moving freely. | Brakes are engaged. | Flip the brake levers upwards to disengage the brakes. |
Specifications

Image: The Burigotto Prima Lua crib displaying its overall dimensions: 115 cm in length, 83 cm in width, and 85 cm in height.
| Feature | Detail |
|---|---|
| Model | Prima Lua |
| Brand | Burigotto Import |
| Recommended Age | 0 - 3 years |
| Maximum Recommended Weight (Elevated Base) | 9 kg (approx. 20 lbs) |
| Maximum Recommended Weight (Lower Base) | 15 kg (approx. 33 lbs) |
| Product Dimensions (L x W x H) | 115 x 83 x 85 cm |
| Product Weight | 11.4 kg |
| Composition | Steel tubes, engineering plastic, 100% polyester fabric |
| Color | Gray |
| Manufacturer Reference | IXBE5129CZC20 |
| EAN | 7896502939084 |
| Certification | 000125/2020 - CE-PUR/IQB 000676 53331/19-003 |
Warranty and Support
For warranty information, please refer to the documentation included with your purchase or contact Burigotto Import customer service directly. Keep your proof of purchase for any warranty claims.
For technical support, replacement parts, or further assistance, please visit the official Burigotto website or contact their customer service department. Contact details can typically be found on the product packaging or the brand's official website.
Ask a question about this manual
Ask about setup, troubleshooting, compatibility, parts, safety, or missing instructions. Manuals+ will review the question and use this page’s manual context to help answer it.