1. Introduction
This manual provides essential information for the installation, operation, and maintenance of your UpStart Components WR30X10093 Refrigerator Ice Maker. This high-quality replacement part is designed to restore ice production in compatible General Electric refrigerators, offering an affordable and durable solution to extend the life of your appliance.
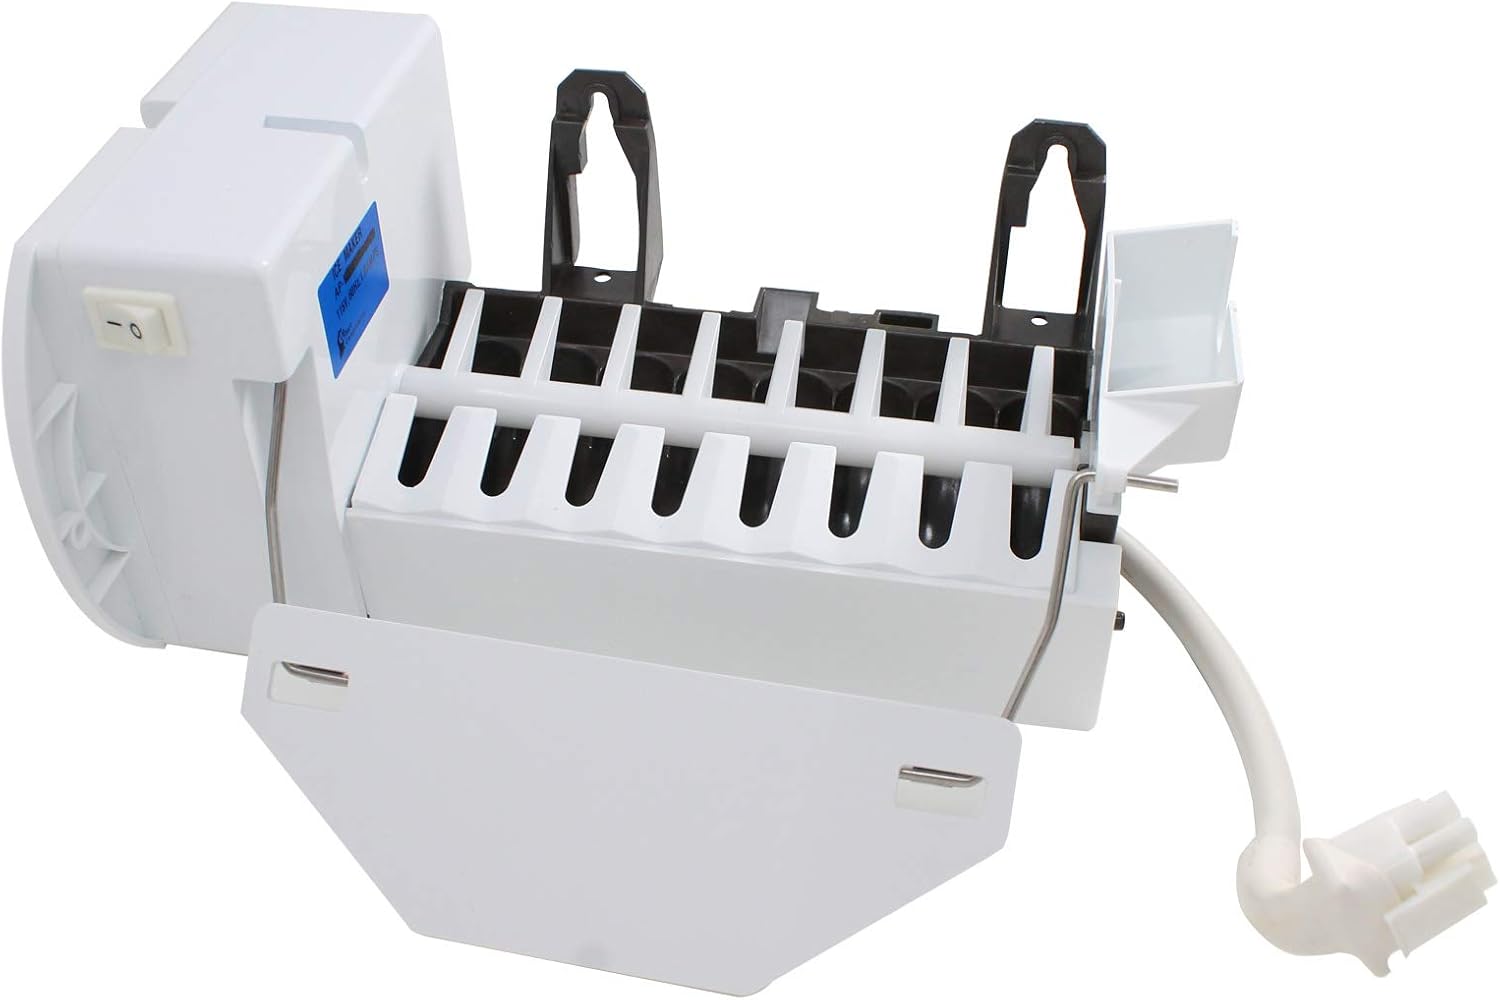
Figure 1: UpStart Components WR30X10093 Refrigerator Ice Maker, front view. This image shows the complete ice maker unit, including the ice mold, motor, and electrical connections.
2. Safety Information
Always prioritize safety when working with electrical appliances. Failure to follow these instructions may result in electric shock, fire, or personal injury.
- Disconnect Power: Before attempting any installation, maintenance, or troubleshooting, always unplug the refrigerator from the power outlet or turn off the circuit breaker supplying power to the refrigerator.
- Wear Protective Gear: Use gloves to protect hands from sharp edges and safety glasses to protect eyes.
- Professional Assistance: If you are unsure about any step of the installation process, consult a qualified appliance technician.
- Handle with Care: The ice maker may have delicate components. Handle the unit carefully to avoid damage.
3. Compatibility
This UpStart Components ice maker is a replacement part compatible with General Electric refrigerators that use the following original part numbers:
- WR30X10093
- WR30X10061
- WR30X0327
- AP4345120
- WR30X10102
- WR29X10080
- WR29X5162
- 1399596
- AH1993870
- EA1993870
- PS1993870
- WR29X0191
- WR29X5007
- WR29X5012
- WR29X5023
- WR30M0149
- WR30M0153
- WR30X0138
- WR30X0147
- WR30X0148
- WR30X0159
- WR30X0169
- WR30X0199
- WR30X0203
- WR30X0213
- WR30X0214
- WR30X0238
- WR30X0241
- WR30X0259
- WR30X0282
- WR30X0283
- WR30X0289
- WR30X0290
Important Note: This is an UpStart Components brand replacement part and is not an OEM (Original Equipment Manufacturer) product. All mentions of brand names or model descriptions are made strictly to illustrate compatibility. This product is not affiliated with any original manufacturers.
4. Setup and Installation
Installation of the replacement ice maker typically involves removing the old unit and connecting the new one. Steps may vary slightly depending on your specific refrigerator model. Refer to your refrigerator's original service manual for detailed instructions if available.
- Prepare for Installation:
- Disconnect the refrigerator from its power source.
- Turn off the water supply to the refrigerator.
- Empty the ice bin.
- Locate the Old Ice Maker: The ice maker is usually located in the freezer compartment, often mounted to the side or top wall.
- Remove the Old Ice Maker:
- Carefully disconnect the electrical wiring harness from the ice maker.
- Unscrew any mounting screws holding the ice maker in place. There are typically 2-3 screws.
- Gently slide or pull the old ice maker out of its mounting brackets.
- Install the New Ice Maker:
- Align the new UpStart Components ice maker with the mounting brackets.
- Secure the ice maker with the mounting screws.
- Connect the electrical wiring harness to the new ice maker, ensuring a secure connection.
- Final Steps:
- Turn on the water supply to the refrigerator.
- Plug the refrigerator back into the power outlet or turn on the circuit breaker.
- Allow several hours for the ice maker to fill with water and begin producing ice. The first few batches of ice may be smaller or irregular.

Figure 2: Side view of the ice maker showing the shut-off arm. This arm detects the ice level in the bin and stops ice production when the bin is full.
5. Operating Instructions
Once properly installed and connected to power and water, the ice maker operates automatically. It will cycle through the following stages:
- Filling: The ice maker mold fills with water.
- Freezing: The water freezes into ice cubes. This process is temperature-dependent and can take several hours.
- Harvesting: Once the ice is frozen, the ice maker's heating element warms the mold slightly to release the cubes. The ejector arm then pushes the ice cubes into the ice bin.
- Shut-off Arm: The metal shut-off arm (visible in Figure 2) automatically stops ice production when the ice bin is full. Ensure this arm is not obstructed and can move freely. If the arm is in the "up" position, the ice maker will not produce ice.

Figure 3: Front view of the ice maker showing the individual ice molds. Water fills these molds to form ice cubes.
6. Maintenance
Regular maintenance helps ensure optimal performance and longevity of your ice maker.
- Cleaning the Ice Maker:
- Disconnect power to the refrigerator.
- Remove the ice maker from the freezer.
- Clean the ice maker and ice bin with a mild soap and warm water solution. Avoid abrasive cleaners.
- Rinse thoroughly with clean water and dry completely before reinstallation.
- Clean the ice maker every 6-12 months, or more frequently if you notice unusual odors or tastes in the ice.
- Check Water Line: Periodically inspect the water supply line for kinks, leaks, or blockages.
- Water Filter: Ensure your refrigerator's water filter (if applicable) is replaced regularly according to the manufacturer's recommendations to prevent mineral buildup in the ice maker.
7. Troubleshooting
If your ice maker is not functioning as expected, try the following troubleshooting steps:
| Problem | Possible Cause | Solution |
|---|---|---|
| No ice production |
|
|
| Small or hollow ice cubes |
|
|
| Ice maker overflowing |
|
|
If these steps do not resolve the issue, contact UpStart Components customer support or a qualified appliance technician.
8. Specifications
| Attribute | Detail |
|---|---|
| Manufacturer | UpStart Components |
| Part Number | AP-WR30X10093-DL11303 |
| Item Model Number | AP-WR30X10093-DL11303 |
| Compatible with | General Electric WR30X10093, WR30X10061, WR30X0327, and other listed part numbers. |
9. Warranty and Support
Any warranties for this UpStart Components product are offered solely by UpStart Components. This product is not covered under any warranties offered by the original manufacturers of the appliances it is compatible with.
For warranty claims, technical assistance, or any questions regarding your UpStart Components WR30X10093 Refrigerator Ice Maker, please contact UpStart Components customer support directly. Refer to the packaging or the retailer's website for contact information.