1. Introduction
This manual provides comprehensive instructions for the installation, operation, and maintenance of your UpStart Components WR30X10093 Refrigerator Ice Maker replacement part. This component is designed to be compatible with various General Electric refrigerator models, including GSH25JFXNBB, and replaces original parts such as WR30X10061 and WR30X0327. Please read this manual thoroughly before proceeding with installation or use to ensure proper function and safety.
2. Safety Information
WARNING: Risk of Electric Shock. Disconnect power before servicing.
- Always disconnect the refrigerator's power supply before attempting any installation, repair, or maintenance.
- Wear appropriate personal protective equipment, such as gloves, during installation.
- If you are unsure about any step, consult a qualified appliance technician.
- Ensure all connections are secure before restoring power.
- This product is a replacement part. Refer to your refrigerator's original service manual for specific safety precautions related to your appliance model.
3. Package Contents
Verify that all components are present before beginning installation:
- UpStart Components WR30X10093 Refrigerator Ice Maker Assembly
- Installation instructions (this manual)
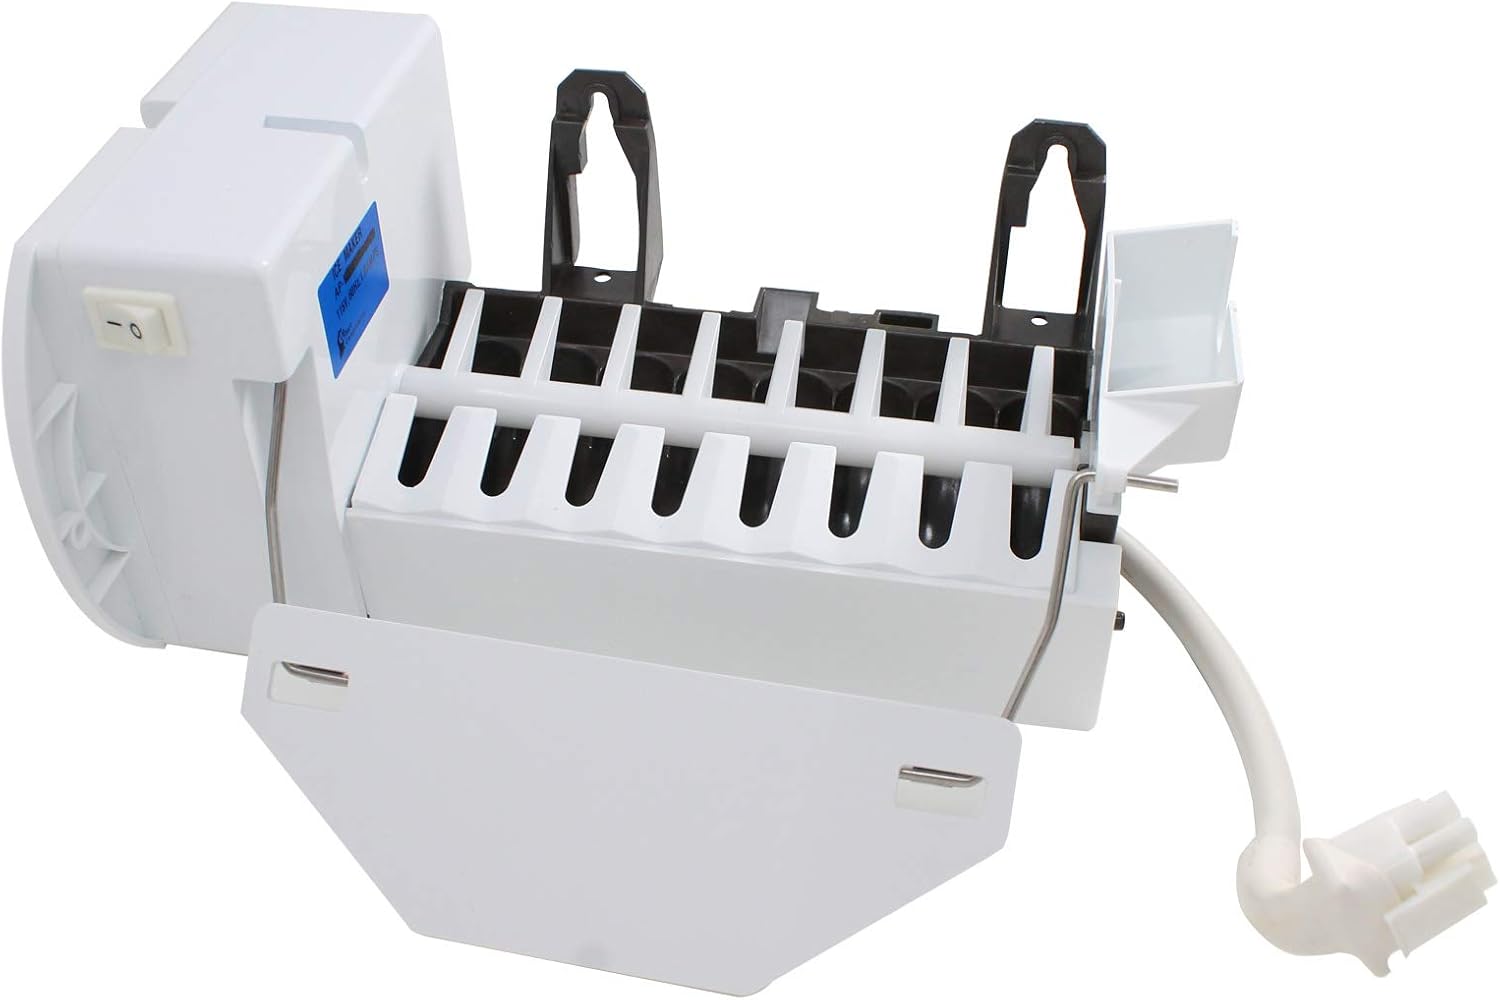
Figure 1: Front view of the UpStart Components WR30X10093 Refrigerator Ice Maker assembly. This image shows the main body of the ice maker, including the ice mold, the bail arm, and the electrical connector.
4. Setup and Installation
This section outlines the general steps for replacing your refrigerator's ice maker. Specific procedures may vary slightly depending on your refrigerator model. Always refer to your appliance's service manual for detailed instructions.
- Disconnect Power: Unplug the refrigerator from the electrical outlet or turn off the circuit breaker supplying power to the refrigerator.
- Access the Ice Maker: Open the freezer door. The ice maker is typically located in the upper left corner of the freezer compartment. You may need to remove the ice bucket to gain full access.
- Remove the Old Ice Maker:
- Locate and disconnect the electrical harness connected to the old ice maker. This usually involves pressing a tab and pulling the connector apart.
- Identify the mounting screws or clips holding the ice maker in place. These are typically on the side or top of the ice maker assembly.
- Carefully remove the screws or release the clips. Support the ice maker as you do this to prevent it from falling.
- Gently pull the old ice maker assembly out of the freezer compartment.

Figure 2: Side view of the ice maker, highlighting the mounting brackets and the electrical connector. These points are crucial for removal and installation.
- Install the New Ice Maker:
- Align the new UpStart Components ice maker with the mounting points in the freezer compartment.
- Secure the ice maker using the original screws or by engaging the clips. Ensure it is firmly in place and does not wobble.
- Connect the electrical harness from the refrigerator to the new ice maker. Ensure the connection is snug and secure.

Figure 3: Top-down view of the ice maker, illustrating the ice mold and the water inlet area. Ensure the water fill tube aligns correctly with the ice maker's inlet during installation.
- Restore Power: Plug the refrigerator back into the electrical outlet or turn on the circuit breaker.
- Initial Test: The ice maker will typically perform a self-test cycle within a few minutes of power restoration. It may take 12-24 hours for the first batch of ice to be produced and for the ice maker to reach full production capacity.
5. Operating Instructions
Once installed and powered, the ice maker operates automatically. It will fill with water, freeze the water into ice cubes, and then eject them into the ice bucket.
- Bail Arm: The ice maker features a metal bail arm. When the ice bucket is full, the bail arm will rise, signaling the ice maker to stop production. Lowering the bail arm (or removing ice from the bucket) will resume ice production.
- Initial Ice Production: Discard the first few batches of ice (approximately 24 hours of production) to ensure any manufacturing residues are flushed out and the ice tastes fresh.
- Water Supply: Ensure your refrigerator's water supply line is connected and the water valve is open for the ice maker to function.
6. Maintenance
Regular maintenance helps ensure optimal performance and longevity of your ice maker.
- Cleaning: Periodically remove the ice bucket and clean it with mild soap and warm water. Rinse thoroughly and dry before returning it to the freezer.
- Ice Maker Cleaning: If necessary, the ice maker itself can be wiped down with a damp cloth. Do not use abrasive cleaners or harsh chemicals. Ensure power is disconnected before cleaning.
- Water Filter: If your refrigerator has a water filter, ensure it is replaced regularly according to the refrigerator manufacturer's recommendations to maintain water quality and ice production.
7. Troubleshooting
If your ice maker is not functioning as expected, review the following common issues and solutions:
| Problem | Possible Cause | Solution |
|---|---|---|
| No ice production |
|
|
| Small or hollow ice cubes |
|
|
| Ice tastes bad or has odor |
|
|
If troubleshooting steps do not resolve the issue, contact UpStart Components customer support or a qualified appliance technician.
8. Specifications
| Feature | Detail |
|---|---|
| Brand | UpStart Components |
| Model Number | WR30X10093 (AP-WR30X10093-DL5288) |
| Compatibility | Compatible with General Electric GSH25JFXNBB, WR30X10061, WR30X0327, and other listed part numbers. |
| Material | Durable, high-quality materials (as per product description) |
9. Warranty and Support
This product is an UpStart Components brand replacement part. Any warranties for this product are offered solely by UpStart Components. This product is not affiliated with any original equipment manufacturer (OEM) brands and is not covered under any warranties offered by the original manufacturers.
For warranty claims, technical support, or further assistance, please contact UpStart Components directly through their official channels. Refer to your purchase documentation for specific contact information.