1. Introduction
This manual provides detailed instructions for the setup, operation, and maintenance of your ZHONGJI Touch POS System Cash Register SET01. This system is designed for efficient point-of-sale operations in restaurants and bars, featuring a touch screen PC, customer display, and a built-in thermal receipt printer. Please read this manual thoroughly before using the product to ensure proper functionality and longevity.
2. Safety Information
- Ensure the system is connected to a grounded power outlet with the correct voltage.
- Do not expose the device to water, excessive moisture, or extreme temperatures.
- Avoid placing heavy objects on the system.
- Do not attempt to open or repair the device yourself. Refer all servicing to qualified personnel.
- Keep ventilation openings clear to prevent overheating.
- Use only approved accessories and power adapters.
3. Product Overview
3.1 Components
- 15-inch Touch Screen PC
- 11.6-inch Customer Display
- Built-in 2 1/4'' Thermal Receipt Printer
- MSJ POS Software (pre-installed)
- Keyboard and Mouse set (gift)
- 10 rolls Thermal Papers (gift)
3.2 Key Features
- Processor: Intel Core i5 (or equivalent)
- RAM: 8GB
- Storage: 128GB SSD
- Operating System: Windows 10
- Display: Full flat smart touch screen monitor
- Interfaces: 6 USB Ports, 1 HDMI, 1 VGA, 1 LAN Port, 2 Audio Output
- Software: MSJ POS Software designed for restaurant and bar operations, no monthly fees, easy to program.

Figure 3.2.1: Main Product View with Touchscreen and Software. This image displays the ZHONGJI POS system from the front-left angle, highlighting the main 15-inch touch screen with a restaurant POS interface, a hand interacting with the screen, and the included MSJ POS software box.
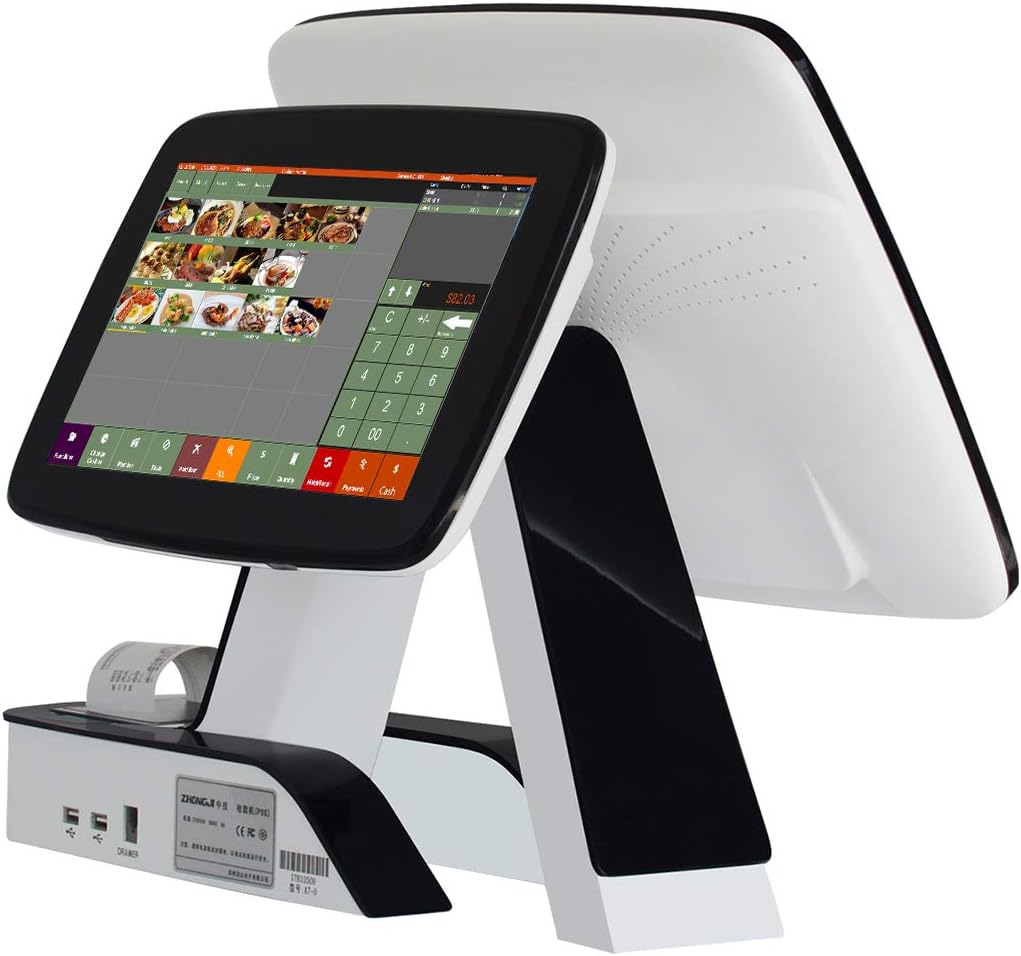
Figure 3.2.2: Side View of POS System with Customer Display and Printer. This image shows the ZHONGJI POS system from a side angle, revealing the 11.6-inch customer display at the back and the integrated thermal receipt printer at the base.

Figure 3.2.3: Rear View of Dual Screen POS System. This image provides a view of the POS system from the back, clearly showing both the main display and the customer-facing display.
4. Setup
4.1 Unpacking and Placement
- Carefully remove all components from the packaging.
- Place the POS system on a stable, flat surface, ensuring adequate ventilation around the unit.
- Ensure the power switch is in the OFF position before connecting any cables.
4.2 Hardware Connections
- Power Connection: Connect the power adapter to the DC-IN port on the POS system and then plug the adapter into a grounded electrical outlet.
- Network Connection: Connect an Ethernet cable to the LAN port for internet access, if required for your operations.
- Peripheral Connections: Connect the provided keyboard and mouse to any available USB ports. Additional peripherals such as barcode scanners or cash drawers can be connected to the remaining USB, Serial (COM), or Parallel (LPT) ports as needed.
- External Display (Optional): If an additional external display is required beyond the built-in customer display, connect it to the HDMI or VGA port.
4.3 Initial Power On
- After all connections are secure, press the power button to turn on the system.
- The system will boot into Windows 10. Follow any on-screen prompts for initial Windows setup if it's the first use.
5. Operating Instructions
5.1 MSJ POS Software Overview
The system comes pre-installed with MSJ POS Software, designed specifically for restaurant and bar environments. This software offers comprehensive features for order management, payment processing, and reporting. It is designed for lifetime use with no monthly fees.
5.2 Basic Operations
- Launching the Software: Double-click the MSJ POS Software icon on the desktop to launch the application.
- User Login: Enter your username and password to log in. Consult your system administrator for initial login credentials.
- Order Entry: Use the touch screen to select menu items. Quantities can be adjusted as needed.
- Payment Processing: Select the 'Payments' option on the screen to process transactions. The software supports various payment methods.
- Printing Receipts: After a transaction is complete, the built-in thermal printer will automatically print a receipt.
5.3 Printer Operation
The system includes a built-in 2 1/4'' thermal receipt printer. Ensure thermal paper is loaded correctly for printing.
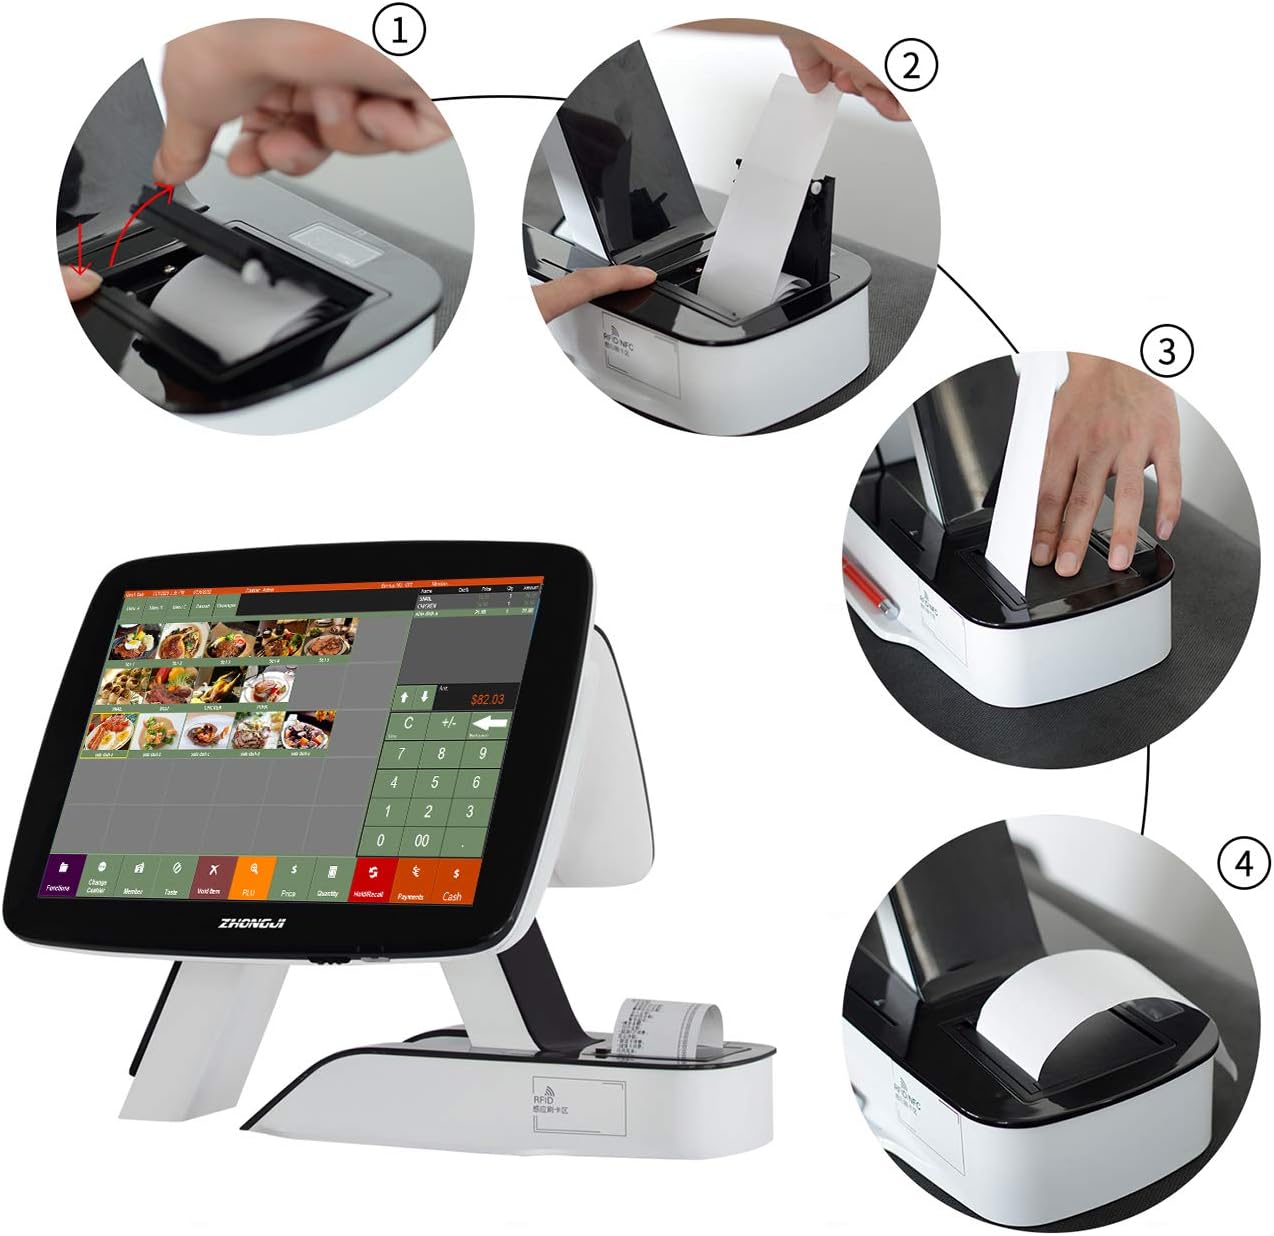
Figure 5.3.1: Thermal Printer Paper Loading Steps. This image illustrates the four-step process for loading thermal paper into the integrated printer of the POS system, showing how to open the cover, insert the roll, pull out the paper, and close the cover.
6. Maintenance
6.1 Cleaning
- Screen: Use a soft, lint-free cloth slightly dampened with a non-abrasive screen cleaner. Do not spray cleaner directly onto the screen.
- Exterior: Wipe the exterior surfaces with a soft, dry cloth. For stubborn marks, use a slightly damp cloth with mild soap, then wipe dry.
- Ventilation: Periodically check and clean the ventilation openings to prevent dust buildup, which can lead to overheating.
6.2 Printer Paper Replacement
- Open the printer cover.
- Remove the empty paper roll core.
- Insert a new 2 1/4'' thermal paper roll, ensuring the paper feeds out from the bottom of the roll.
- Pull a small length of paper out past the cutting edge.
- Close the printer cover firmly until it clicks into place.
7. Troubleshooting
| Problem | Possible Cause | Solution |
|---|---|---|
| System does not power on | Power cable disconnected; Power outlet fault | Check power cable connections; Try a different power outlet |
| Touch screen unresponsive | Software error; Screen calibration issue | Restart the system; Recalibrate touch screen via Windows settings |
| Printer not printing | No paper; Paper loaded incorrectly; Printer error | Replace paper roll; Ensure paper is loaded correctly; Restart the system and printer |
| POS software not launching | Software corruption; System resource issue | Restart the system; Contact support for software reinstallation if necessary |
| No network connection | Ethernet cable disconnected; Router/modem issue | Check Ethernet cable; Restart router/modem; Check network settings in Windows |
8. Specifications
| Feature | Detail |
|---|---|
| Model Number | ZJ-A7DP-RES |
| Main Display | 15-inch 5-Wire Resistive TFT LCD Touch Screen |
| Customer Display | 11.6-inch |
| Processor (CPU) | Intel Core i5 (or equivalent) |
| RAM | 8GB |
| Hard Disk | 128GB SSD |
| Operating System | Windows 10 |
| Printer | Built-in 2 1/4'' Thermal Receipt Printer |
| USB Ports | 6 |
| HDMI Port | 1 |
| VGA Port | 1 |
| LAN Port | 1 |
| Audio Output | 2 |
| Product Dimensions | 16.5 x 11 x 15 inches |
| Item Weight | 22 pounds |
| Operating Temperature | 0°C - 60°C |
| Operating Humidity | 0-95% Relative Humidity, Non-Condensing |

Figure 8.1: Technical Specifications Diagram. This image provides a visual summary of the POS system's technical specifications, including model number, CPU, RAM, display details, and various port information.
9. Warranty and Support
ZHONGJI provides free lifetime software service for this POS system. We are committed to ensuring customer satisfaction and offer comprehensive after-sale support. For any technical assistance, troubleshooting beyond this manual, or service inquiries, please contact ZHONGJI customer support through the vendor's official channels.