1. Introduction and Overview
The AUTOUTLET Digital Inclinometer is a versatile and precise angle measurement tool designed for various applications including woodworking, construction, machinery, telecommunications, and automotive repair. This compact and lightweight device features a 360° measurement range, an EBTN LCD with backlight for clear readability, and powerful magnets on four sides for secure attachment to metallic surfaces. It is also IP54 rated for water resistance, ensuring durability in diverse working conditions.
This manual provides detailed instructions on how to set up, operate, and maintain your digital inclinometer to ensure accurate and reliable performance.

Image 1.1: The digital inclinometer is suitable for a wide range of applications, including woodworking, automotive, and construction.
2. Product Features
- Wide Application Range: Provides fast and accurate measurements for woodworking, construction, machinery, telecommunications, and automotive tasks.
- Four-Sided Magnets: Powerful built-in magnets on the base allow attachment to any iron surface, enhancing stability during measurement.
- Large EBTN LCD Display: Enhanced Background Twisted Nematic LCD significantly improves the reading experience with illuminated digits and letters on a black background, ensuring clear visibility even in bright sunlight or low light conditions.
- Compact and Lightweight: Easy to carry and operate, making it convenient for on-the-go measurements.
- Multiple Functions: Automatic display inversion when the device is upside down, automatic power-off after 3 minutes of inactivity, clear function, low power prompt, and calibration function.
- IP54 Waterproof Rating: Provides protection against dust and splashing water from any direction.
3. Package Contents
Upon opening the package, please verify that all items listed below are present and in good condition:
- 1 x AUTOUTLET Digital Inclinometer (Digital Level Box)
- 2 x AAA Batteries
- 1 x Carrying Pouch
- 1 x User Manual
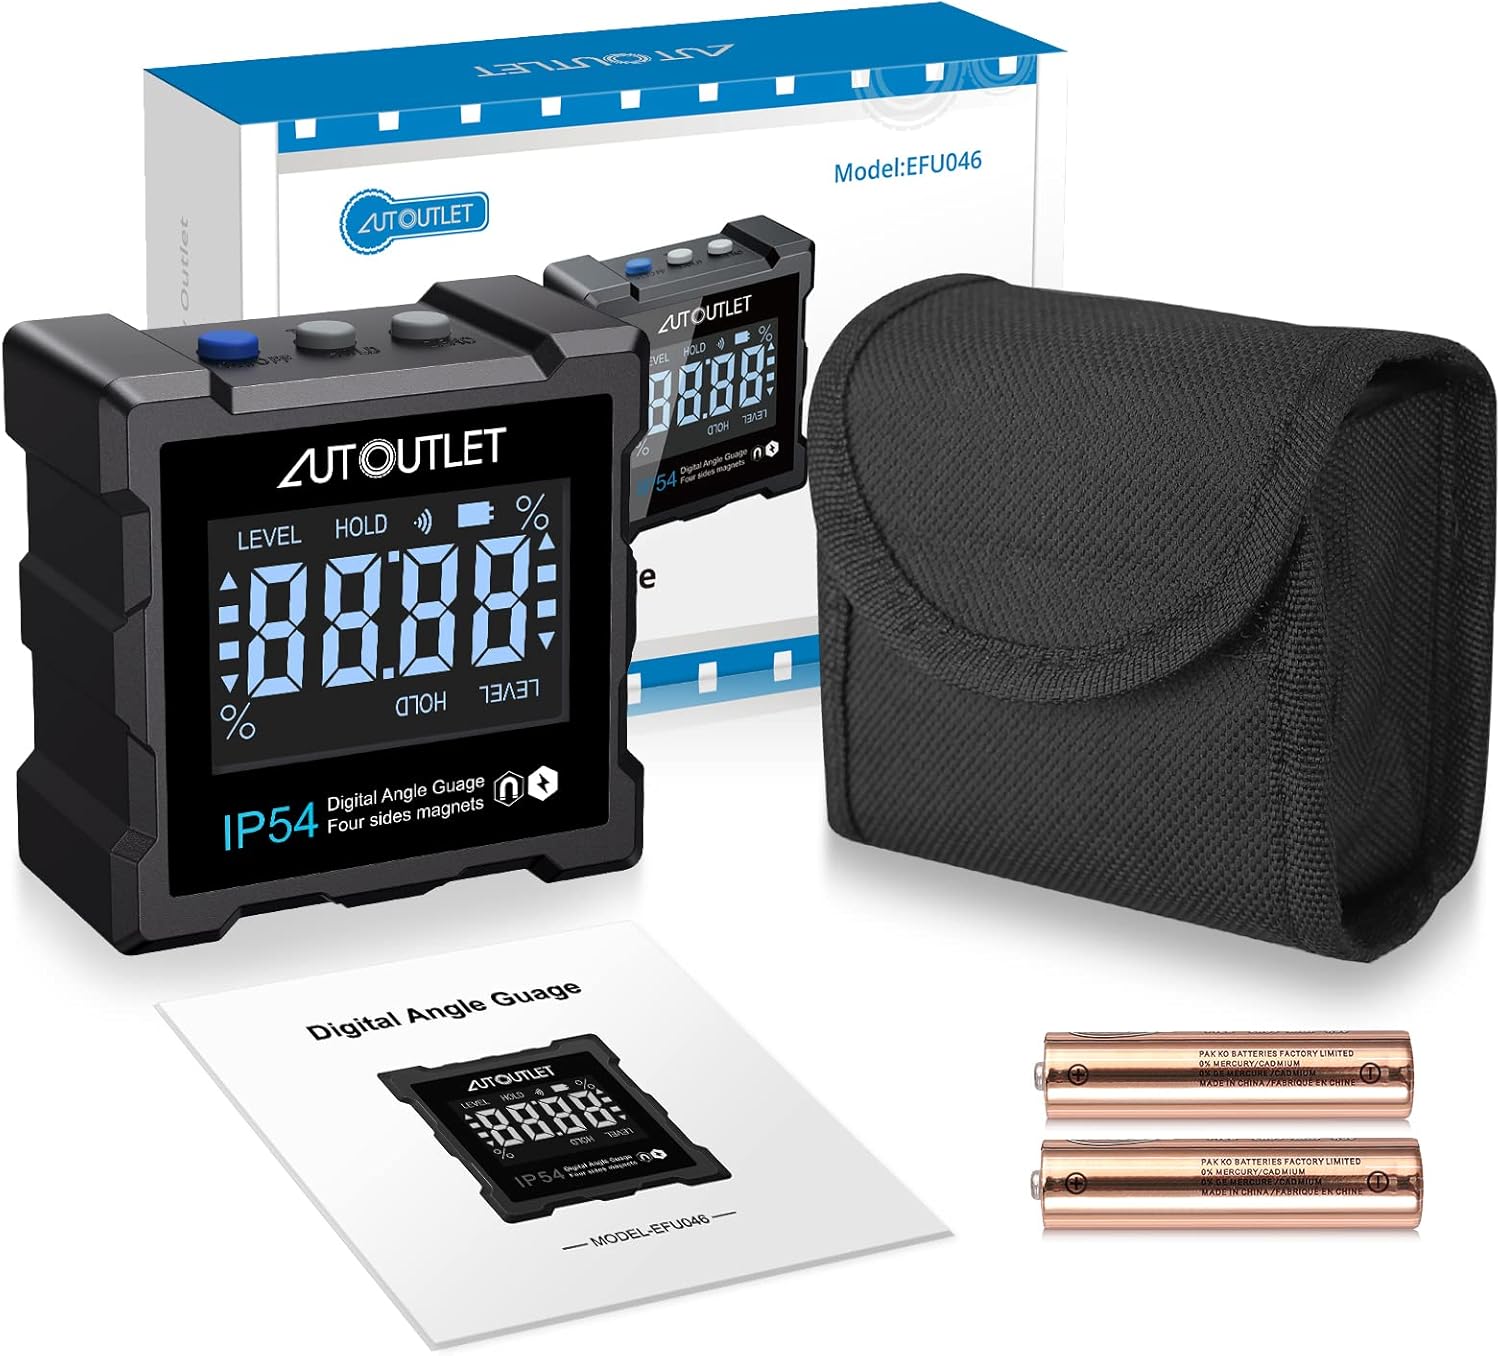
Image 3.1: Included items in the product package.
4. Setup
4.1 Battery Installation
- Locate the battery compartment cover on the back of the device.
- Slide or unclip the cover to open the compartment.
- Insert two AAA batteries, ensuring the correct polarity (+/-) as indicated inside the compartment.
- Replace the battery compartment cover securely.
Note: The device comes with batteries included. Please remove any protective plastic film from the batteries before installation.
5. Operating Instructions
Familiarize yourself with the device's buttons and display elements for optimal use.

Image 5.1: Overview of the inclinometer's components and display.
5.1 Power On/Off
- Press the ON/OFF button (typically blue) to turn the device on.
- Press and hold the ON/OFF button to turn the device off.
- The device will automatically power off after 3 minutes of inactivity to conserve battery life.
5.2 Zero Function
- Place the inclinometer on the surface you wish to use as your reference (0°).
- Press the ZERO button. The display will show 0.00°, indicating that the current position is set as the relative zero point.
- This allows for relative angle measurements from any chosen surface.
5.3 HOLD / Tilt% Function
- Press the HOLD/Tilt% button once to freeze the current reading on the display. The "HOLD" indicator will appear.
- Press the HOLD/Tilt% button again to switch between angle (degrees) and slope (percentage) measurement units.

Image 5.2: Switching between degree and percentage units.
5.4 Automatic Display Inversion
- The display automatically inverts when the device is turned upside down, ensuring that the readings are always upright and easy to read from any orientation.

Image 5.3: Automatic display inversion for easy reading.
5.5 Magnetic Attachment
- The inclinometer features powerful magnets on all four sides, allowing it to be securely attached to any ferrous metal surface for hands-free operation.

Image 5.4: Four-sided magnetic base for secure attachment.
5.6 IP54 Water Resistance
- The device is rated IP54, meaning it is protected against dust ingress and splashing water from any direction. This makes it suitable for use in various environments.
Video 5.1: This video demonstrates the basic button functions (ON/OFF, ZERO, HOLD/Tilt%), the IP54 water resistance, and the magnetic attachment capability of the AUTOUTLET Digital Inclinometer.
6. Calibration Procedure
If you suspect the device's accuracy is compromised or if you wish to re-calibrate it, follow these steps:
- Place the bottom surface of the inclinometer on a calibrated horizontal surface.
- With the device turned OFF, press and hold the ZERO button, then press the ON/OFF button. The LCD display will show "CAL 1".
- Keep the inclinometer steady and press the ZERO button. The LCD display will show "CAL 2".
- Rotate the inclinometer 90° clockwise, keep it steady, and press the ZERO button again until "CAL 3" is displayed on the LCD.
- Rotate the inclinometer 90° clockwise, keep it steady, and press the ZERO button again. "CAL 4" will be displayed on the LCD.
- Rotate the inclinometer 90° clockwise, keep it steady, and press the ZERO button again. "CAL 5" will appear on the LCD.
- Rotate the inclinometer 90° clockwise, keep it steady, and press the ZERO button again. The LCD will display "PASS", followed by "0.00°".
The calibration is now complete, and the new horizontal plane has been set. Ensure the device is not moved while pressing the ZERO button during the calibration process.
7. Specifications
| Specification | Value |
|---|---|
| Measurement Range | 4 x 90° (0-360°) |
| Accuracy | +/- 0.1° at 0° and 90°; +/- 0.2° for other angles |
| Resolution | 0.05° |
| Waterproof Rating | IP54 |
| Power Supply | 2 x AAA Batteries (included) |
| Dimensions (L x W x H) | 6.1 x 6.1 x 3.1 cm (2.40 x 2.40 x 1.22 inches) |
| Weight | 140 grams |
| Material | Metal |
| Model Number | EFU008USJ |
8. Maintenance
- Cleaning: Wipe the device with a soft, dry cloth. Do not use abrasive cleaners or solvents.
- Storage: Store the inclinometer in its carrying pouch in a dry, cool place when not in use. Remove batteries if storing for extended periods to prevent leakage.
- Battery Replacement: Replace batteries when the low power indicator appears on the display to ensure accurate readings.
9. Troubleshooting
- Display shows "ERR": This may occur if the device is placed on a large, flat surface (e.g., its back) where it cannot properly detect an angle. Try placing it on an edge or a surface that allows for angle detection.
- Inaccurate Readings: Ensure the device is properly calibrated. Refer to Section 6 for the calibration procedure. Check battery level and replace if necessary.
- Device does not power on: Check if batteries are correctly installed and have sufficient charge. Remove any protective film from new batteries.
10. Warranty and Support
For warranty information or technical support, please refer to the contact details provided with your purchase or visit the official AUTOUTLET website. Keep your purchase receipt as proof of purchase for any warranty claims.