
Introduction
This manual provides comprehensive instructions for the safe installation, operation, and maintenance of your Globo 67121-50W LED Pendant Lamp. Please read these instructions carefully before installation and use, and retain them for future reference. Proper installation and use will ensure optimal performance and longevity of the product.
Safety Instructions
WARNING: Electrical installation should only be performed by a qualified electrician. Always disconnect the main power supply before beginning any installation, maintenance, or cleaning procedures.
- Ensure the power supply is switched off at the circuit breaker before installation.
- Verify that the voltage rating of the fixture matches your local power supply (230 Volts).
- Do not connect the fixture to a dimmer switch unless it is specifically designed for dimmable LED products. This lamp includes an integrated dimming function via remote control.
- Handle the lamp with care to avoid damage to the acrylic and metal components.
- Keep packaging materials out of reach of children.
- This product is for indoor use only.
Package Contents
Carefully unpack the box and ensure all components are present and undamaged. If any parts are missing or damaged, do not attempt to assemble or install the product. Contact your retailer for assistance.
- 1x Globo 67121-50W LED Pendant Lamp
- 1x Remote Control (with 2x AAA batteries included)
- 1x Mounting Hardware Kit (screws, anchors, terminal block)
- 1x Instruction Manual (this document)
Setup and Installation
Installation of this pendant lamp requires electrical wiring knowledge. It is highly recommended that installation be performed by a certified electrician.
- Prepare for Installation: Turn off the main power supply to the installation area at the circuit breaker. Ensure the power is off before proceeding.
- Unpack and Inspect: Carefully remove all components from the packaging. Inspect the lamp and all parts for any signs of damage.
- Mount the Ceiling Base: Position the mounting bracket (part of the ceiling base) against the ceiling at the desired location. Mark the drilling points. Drill holes and insert appropriate wall anchors if necessary. Secure the mounting bracket to the ceiling using the provided screws.
- Electrical Connections: Connect the household electrical wires to the terminal block provided within the lamp's ceiling base. Ensure correct polarity:
- Live (L) wire to the Live terminal.
- Neutral (N) wire to the Neutral terminal.
- Ground (Earth) wire to the Ground terminal.
- Adjust Suspension Length: The pendant lamp's suspension cables can be adjusted to your desired height. Carefully push the cable grippers on the ceiling base to release the cables, adjust the length, and then secure them. Ensure the lamp hangs level.
- Secure the Lamp: Carefully lift the lamp's ceiling base and attach it to the mounting bracket, securing it with the screws or clips provided. Ensure no wires are pinched.
- Restore Power: Once the lamp is securely installed and all connections are checked, restore power at the circuit breaker.
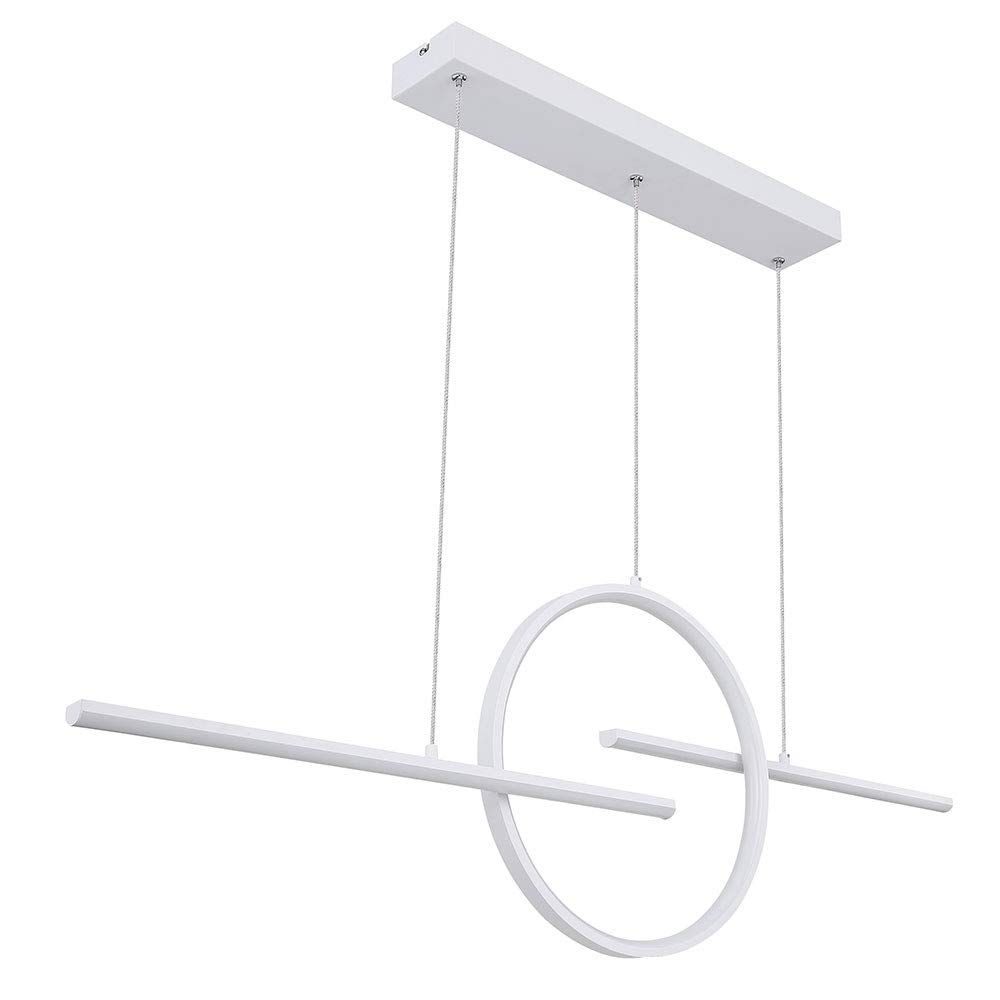
Image 1: The Globo 67121-50W LED Pendant Lamp, showcasing its modern design with linear and circular LED elements suspended from a white ceiling base.
Operating Instructions
Your Globo 67121-50W LED Pendant Lamp is operated using the included remote control. The remote allows you to turn the light on/off, adjust brightness, and change the color temperature.

Image 2: The remote control for the Globo 67121-50W LED Pendant Lamp, showing buttons for power, brightness adjustment, color temperature adjustment, and night mode.
Remote Control Functions:
- On/Off Button (Circle / Vertical Line): Press the 'Circle' button to turn the lamp ON. Press the 'Vertical Line' button to turn the lamp OFF.
- Brightness Adjustment (+ / -): Use the '+' button to increase brightness and the '-' button to decrease brightness. The lamp is fully dimmable.
- Color Temperature Adjustment (Sun / Snowflake): The lamp features CCT (Correlated Color Temperature) adjustment from 3000K (warm white) to 6000K (cool white). Use the 'Sun' button to make the light warmer (lower K value) and the 'Snowflake' button to make the light cooler (higher K value).
- Night Mode (Moon): Press the 'Moon' button to activate a low-brightness, warm light setting suitable for night use.
- Memory Function: The lamp will typically remember the last brightness and color temperature setting when turned off and on again.
Battery Installation (Remote Control):
The remote control uses 2x AAA batteries (included). To install or replace batteries, open the battery compartment cover on the back of the remote, insert the batteries according to the polarity markings, and close the cover.
Maintenance
Regular maintenance will help keep your pendant lamp in optimal condition.
- Cleaning: Ensure the power is off before cleaning. Use a soft, dry, or slightly damp cloth to wipe the lamp's surfaces. Do not use abrasive cleaners, solvents, or harsh chemicals, as these can damage the finish and acrylic components.
- LEDs: The LED light source in this fixture is integrated and not user-replaceable. Do not attempt to open or modify the LED module.
- Inspection: Periodically check the suspension cables and electrical connections for any signs of wear or damage. If any issues are found, disconnect power and consult a qualified electrician.
Troubleshooting
If you encounter issues with your pendant lamp, refer to the following common problems and solutions:
| Problem | Possible Cause | Solution |
|---|---|---|
| Lamp does not turn on. | No power supply. Remote control batteries are dead. Remote control not paired. | Check circuit breaker and wall switch. Replace AAA batteries in the remote. Refer to remote pairing instructions (if applicable, usually automatic). |
| Lamp flickers or dims unexpectedly. | Loose electrical connection. Power supply instability. | Disconnect power and have a qualified electrician check wiring connections. Consult an electrician to check household power supply. |
| Remote control not responding. | Dead batteries. Out of range. Interference. | Replace AAA batteries. Ensure you are within effective range of the lamp. Remove any obstacles or sources of interference. |
| Brightness or color temperature cannot be adjusted. | Remote control issue. Lamp malfunction. | Check remote batteries and functionality. If the issue persists, contact customer support. |
Specifications
Detailed technical specifications for the Globo 67121-50W LED Pendant Lamp:
| Feature | Specification |
|---|---|
| Model Number | 67121-50W |
| Brand | GLOBO |
| Dimensions (L x W x H) | 124 x 10.5 x 150 cm (max height) |
| Weight | 2.2 Kilograms |
| Material | Metal, Acrylic |
| Color | White |
| Light Source Type | Integrated LED |
| Number of Light Sources | 1 |
| Power Consumption | 50 Watts |
| Voltage | 230 Volts |
| Special Features | Dimmable, Remote Control, CCT (3000-6000K) |
| Energy Efficiency Class | A++ |
| Remote Control Batteries | 2x AAA (included) |

Image 3: A close-up view of the integrated LED light elements within the linear and circular acrylic diffusers of the Globo 67121-50W pendant lamp.
Warranty and Support
For warranty information, please refer to the documentation provided with your purchase or contact your retailer. Keep your proof of purchase for any warranty claims.
For technical support or further assistance, please contact GLOBO customer service through their official website or the contact information provided by your retailer.


