PROAIM VCTR-V1-36
PROAIM 36" Victor V1.1 Video Production Camera Cart User Manual
Model: VCTR-V1-36 | Brand: PROAIM
1. Introduction and Overview
The PROAIM 36" Victor V1.1 Camera Cart is a robust and versatile solution designed for video production, film, studio, stage, and lighting applications. Constructed from high-grade aluminum, it offers exceptional stability and strength, supporting a payload of up to 200kg (440.9lbs).
This cart is engineered for efficiency, featuring tool-less assembly and disassembly that can be completed in just 2-3 minutes. It transforms into a compact 7-inch thick rollable case for easy transport. The Victor V1.1 is highly customizable, with a built-in cheese plate on the top shelf and various mounting options for over 50 different accessories, allowing it to adapt to diverse production needs, from a DIT cart to a lighting or sound cart.
Equipped with 9" pneumatic wheels and sealed bearing housing, the cart ensures smooth and silent rolling across various terrains. Its advanced design includes features like height-adjustable shelves and custom-designed foot brakes for reliable parking.

Figure 1.1: The PROAIM 36" Victor V1.1 Video Production Camera Cart.

Figure 1.2: The Victor V1.1 Cart configured for a production setup, demonstrating its versatility and capacity for various equipment.
2. Setup and Assembly
2.1 Unpacking the Cart
Carefully unpack all components from the packaging. Ensure all parts listed below are present before beginning assembly.
In the Box:
- Proaim Victor V1.1 Cart Trolley (main frame)
- 4 x 9" Pneumatic Tyres (wheels)
- 4 x Rods (vertical support poles)
- 2 x Accessory Cross Bars (horizontal support for accessories)
2.2 Assembly Steps
The Victor V1.1 cart is designed for tool-less assembly, making setup quick and efficient. Follow these steps:
- Unfold the Main Frame: Lay the folded cart flat. The latches to close the cart have been moved from the sides to the top and bottom, streamlining the chassis and speeding up setup.
- Insert Vertical Rods: Insert the four vertical rods into the designated slots at each corner of the bottom shelf. Secure them using the locking knobs.
- Attach Cross Bars: Position the two accessory cross bars between the vertical rods at your desired height. These bars help secure the rods and provide additional mounting points.
- Place Top Shelf: Carefully place the top shelf onto the vertical rods. The top shelf's height can be adjusted by simply switching the locking knobs on the rods.
- Attach Wheels: The 9" pneumatic wheels attach quickly and easily via a dovetail system mounted on the bottom of the cart. Slide each wheel assembly into its corresponding dovetail slot until it locks securely.
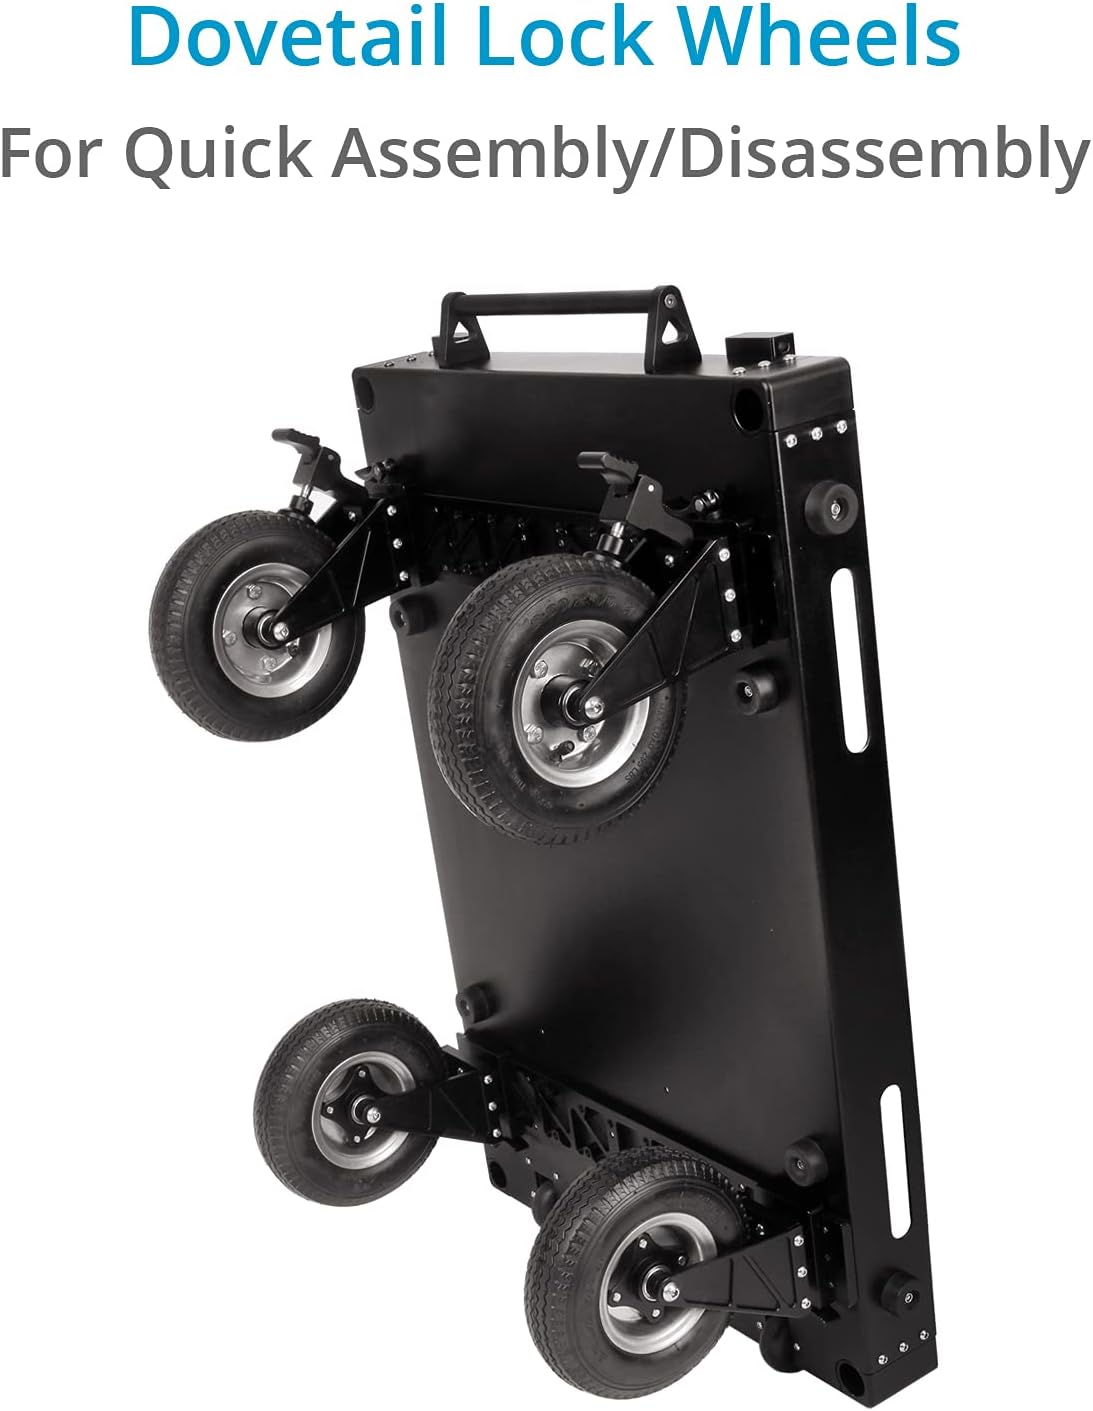
Figure 2.1: The dovetail lock wheel system allows for quick attachment and detachment of the wheels.

Figure 2.2: All components, including the wheels and handles, fit compactly within the folded cart for storage and transport.
2.3 Assembly Demonstration Video
Video 2.1: A detailed demonstration of the PROAIM 36" Victor V1.1 Camera Cart's assembly and key features. This video highlights the tool-less setup and the compact storage capabilities.
3. Operating Instructions
3.1 Adjusting Shelf Height
The top shelf of the Victor V1.1 cart is height-adjustable along the vertical rods. To adjust, loosen the locking knobs on the rods, slide the shelf to the desired height, and then firmly tighten the knobs to secure it in place. This flexibility accommodates various equipment sizes and user preferences.
3.2 Using Foot Brakes
Each of the 9" pneumatic wheels is equipped with a custom-designed foot brake. To engage the brake, press down firmly on the lever located on the wheel assembly. To release, lift the lever. Ensure all brakes are engaged when the cart needs to remain stationary, especially on uneven surfaces, to prevent accidental movement.

Figure 3.1: Detail of the foot brake mechanism on the pneumatic wheels, ensuring stable positioning.
3.3 Transporting the Cart
When fully broken down, the cart packs into a compact, rollable case. Small wheels on the bottom of the folded unit allow for easy transport, similar to luggage. This design significantly simplifies moving the cart between locations or sets.

Figure 3.2: The cart's compact folded form factor with integrated wheels for effortless transportation.
3.4 Utilizing Accessories and Features
The Victor V1.1 cart is designed for extensive customization with various accessories:
- Cheese Plate: The top shelf features a built-in cheese plate with 1/4" and 3/8" threaded holes, allowing for direct mounting of monitors, articulating arms, and other accessories.
- Accessory Bars: The included accessory cross bars provide additional mounting points for various PROAIM accessories, such as baby pin mounts, cable hooks, and accessory racks.
- Grip Handles: The cart includes grip handles that can be attached to the vertical rods, offering additional points for maneuvering or lifting the cart over obstacles.
- Cable Slots: The top shelf also includes four slots for neatly running cables to power sources, keeping your setup organized and safe.

Figure 3.3: The top shelf features integrated cable slots for organized power routing.
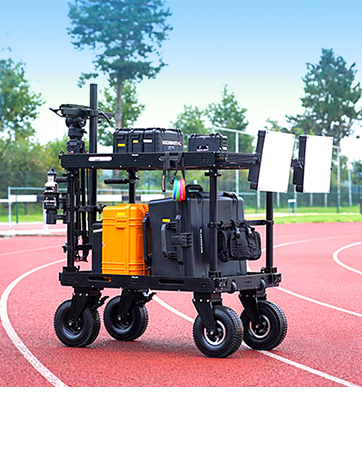
Figure 3.4: The accessory bar provides versatile mounting options for various production tools.
3.5 Operational Overview Video
Video 3.1: An in-depth look at the operational aspects and advanced features of the PROAIM Victor V1.1 Camera Cart, including its adaptability for different production environments.
4. Maintenance
Regular maintenance ensures the longevity and optimal performance of your PROAIM Victor V1.1 Camera Cart.
- Cleaning: Wipe down the aluminum surfaces with a soft, damp cloth to remove dust and debris. For stubborn grime, use a mild, non-abrasive cleaner. Avoid harsh chemicals that could damage the finish.
- Wheel Inspection: Periodically check the pneumatic tires for proper inflation (recommended 50 PSI). Inspect the sealed bearing housings for any signs of wear or damage. Clean any debris from around the wheel axles to ensure smooth rolling.
- Lubrication: Apply a small amount of silicone-based lubricant to the locking mechanisms, latches, and dovetail slots to ensure smooth operation and prevent seizing.
- Fastener Check: Regularly inspect all screws, bolts, and knobs to ensure they are tight. Re-tighten any loose fasteners to maintain the cart's structural integrity and stability.
- Storage: When not in use, store the cart in its folded, compact form in a dry, clean environment to protect it from elements and extend its lifespan.
5. Troubleshooting
This section provides solutions to common issues you might encounter with your PROAIM Victor V1.1 Camera Cart.
- Cart not rolling smoothly:
- Check tire pressure; ensure all tires are inflated to 50 PSI.
- Inspect wheels for debris (e.g., tangled cables, dirt) that might impede movement.
- Verify that the wheel bearings are clean and free of obstruction.
- Latches or locking knobs are stiff/not securing:
- Clean the locking mechanisms and latches to remove any accumulated dirt or grime.
- Apply a small amount of silicone lubricant to the moving parts of the latches and knobs.
- Ensure components are correctly aligned before attempting to lock.
- Cart feels unstable or wobbly:
- Verify that all vertical rods are fully inserted and their locking knobs are securely tightened.
- Check that the top shelf is properly seated and locked onto the rods.
- Ensure all four wheels are correctly attached via the dovetail system and fully engaged.
- Difficulty folding/unfolding the cart:
- Ensure all shelves are clear of obstructions.
- Check that the main folding latches (top and bottom) are fully disengaged.
- Lubricate hinges and folding points if they are stiff.
6. Technical Specifications
| Feature | Specification |
|---|---|
| Construction Material | High Grade Aluminum |
| Color | Black |
| Load Capacity | 200kg / 440.9lbs (661 Pounds) |
| Product Dimensions (L x W x H) | 36"L x 7"W x 24"H (folded) |
| Cross-Bar Length | 31" |
| Cross-Bar Diameter | 1.5" / 38mm |
| Thickness of Cart Edge's | 3mm |
| Tyre Pressure | 50 PSI (Pounds per Square Inch) |
| Wheel Type | Pneumatic (9" diameter) |
| Number of Wheels | 4 |
| Product Net Weight (without packing) | 31kg / 68.34lbs (84.8 pounds) |
| Item Model Number | VCTR-V1-36 |
| ASIN | B08DNZ2QHM |
| UPC | 617270096178 |
| Country of Origin | India |
| Date First Available | July 27, 2020 |
7. Warranty and Support
7.1 Warranty Information
PROAIM stands behind the quality of its products with a 100% Customer Satisfaction Guarantee. For specific warranty terms and conditions, please refer to the product's official documentation or contact PROAIM customer support.
7.2 Customer Support
For any inquiries, technical assistance, or support needs regarding your PROAIM Victor V1.1 Camera Cart, please utilize the following resources:
- Official User Manual (PDF): A comprehensive user manual is available for download at: https://manuals.plus/m/c6932480c8c721a243612a2fd7f5e5972f836f2d150e5e4fc877a73ede43edd9
- PROAIM Store on Amazon: Visit the official PROAIM store for additional product information, accessories, and support options: PROAIM Store
- Direct Customer Service: Refer to your purchase documentation for direct contact information for PROAIM customer service.
Ask a question about this manual
Ask about setup, troubleshooting, compatibility, parts, safety, or missing instructions. Manuals+ will review the question and use this page’s manual context to help answer it.