1. Introduction
This manual provides detailed instructions for the installation, operation, and maintenance of the NuFlush SIAMP Replacement Kit for Single Flush Valves. This kit is designed for two-piece toilets featuring a top button flush system and a 2-inch flush valve opening. Please read this manual thoroughly before beginning installation to ensure proper function and longevity of the product.
2. Safety Information
Always prioritize safety when performing plumbing work. Failure to follow these guidelines may result in property damage or personal injury.
- Turn off water supply: Before starting any work, locate and turn off the main water supply to the toilet. Flush the toilet to drain the tank.
- Wear protective gear: Use appropriate personal protective equipment, such as gloves and eye protection.
- Handle tools carefully: Use tools correctly and ensure they are in good condition.
- Keep work area clean: Prevent slips and falls by keeping the area dry and free of debris.
- Consult a professional: If you are unsure about any step or encounter difficulties, consult a qualified plumber.
3. Package Contents
Verify that all components listed below are present in your NuFlush SIAMP Replacement Kit:
- Single Flush Valve Assembly
- Top Button Flush Mechanism
- Mounting Gasket
- Mounting Nut
- Overflow Tube (integrated or adjustable)

Figure 3.1: Overview of the NuFlush SIAMP Replacement Kit, showing the main flush valve assembly, top button, and associated hardware.

Figure 3.2: The flush valve assembly, illustrating its adjustable height from 8 to 12 inches and a base diameter of approximately 2.3 inches. This image also shows the overflow tube and the adjustable flush slider.
4. Installation Guide
Follow these steps to install the NuFlush SIAMP Replacement Kit:
- Preparation:
- Turn off the water supply to the toilet.
- Flush the toilet to empty the tank.
- Use a sponge or towel to remove any remaining water from the tank.
- Disconnect the water supply line from the fill valve.
- Unscrew the nuts holding the toilet tank to the bowl (if applicable for two-piece toilets) and carefully remove the tank.
- Remove Old Flush Valve:
- Unscrew the large nut on the underside of the toilet tank that secures the old flush valve.
- Remove the old flush valve and gasket from the tank. Clean the flush valve opening thoroughly.
- Install New Flush Valve:
- Place the new mounting gasket onto the base of the NuFlush SIAMP flush valve.
- Insert the flush valve assembly into the flush valve opening from inside the tank. Ensure it is seated correctly.
- From the underside of the tank, thread the large mounting nut onto the flush valve and hand-tighten it securely. Do not overtighten, as this can crack the tank.
- Adjust Flush Valve Height:
- The overflow tube of the flush valve is adjustable. Adjust its height to be approximately 1 inch below the tank's overflow hole or the water level mark. This prevents water from continuously flowing into the overflow.
- Reassemble Tank and Install Button:
- Carefully place the toilet tank back onto the bowl (if removed) and secure it with the tank bolts and nuts.
- Connect the water supply line to the fill valve.
- Insert the top button flush mechanism into the lid hole. The kit supports lid holes between 16mm and 50mm diameter. Adjust the button's height as needed to fit your toilet lid.
- Ensure the button's rod aligns with the flush valve's activation point.
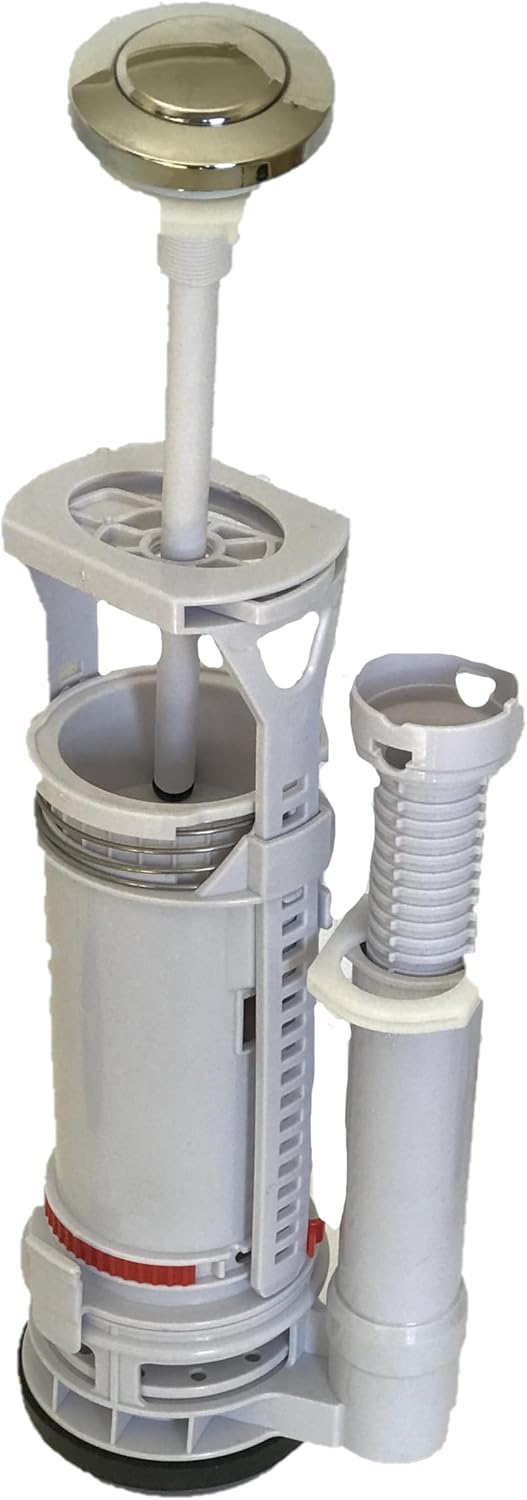
Figure 4.1: The NuFlush SIAMP flush valve assembly with the top button mechanism installed, demonstrating how the button connects to the valve for activation.
- Test and Adjust:
- Turn on the water supply to the toilet. Allow the tank to fill.
- Check for any leaks around the flush valve and water supply connections.
- Press the flush button to test the flush operation. Ensure a complete and efficient flush.
5. Operating Instructions
The NuFlush SIAMP Replacement Kit features a single-flush mechanism with a top button.
- Flushing: Press the top button firmly to activate the flush. The valve will open, allowing water to flow from the tank into the bowl.
- Adjusting Flush Volume: This valve includes an adjustable small flush slider, allowing you to set the flush volume between 2 liters and 4.5 liters. Refer to the markings on the flush valve for precise adjustment. Adjusting this slider can help conserve water.
6. Maintenance
Regular maintenance helps ensure the optimal performance and longevity of your flush valve.
- Cleaning: Periodically inspect the flush valve for mineral buildup or debris. Turn off the water supply, drain the tank, and gently clean components with a soft brush and mild, non-abrasive cleaner.
- Seal Inspection: Check the rubber seal (flapper or canister seal) at the base of the flush valve for wear, cracks, or deterioration. A worn seal can cause leaks. Replace if necessary.
- Overflow Tube: Ensure the overflow tube remains clear and free of obstructions.
7. Troubleshooting
Here are solutions to common issues you might encounter:
| Problem | Possible Cause | Solution |
|---|---|---|
| Toilet runs continuously (leaky toilet) | Worn or dirty flush valve seal; improper overflow tube height; debris under the seal. | Clean or replace the flush valve seal. Adjust the overflow tube height. Remove any debris from the seal area. |
| Weak or incomplete flush | Low water level in tank; flush button not fully activating valve; flush volume set too low. | Adjust the fill valve to increase water level. Ensure the flush button rod is correctly aligned and adjusted. Increase the flush volume using the adjustable slider. |
| Flush button sticks or is hard to press | Button rod misalignment; debris in button mechanism; button too tight in lid hole. | Realign the button rod. Clean the button mechanism. Ensure the button is not overtightened in the lid. |
| Water leaks from tank bottom | Loose mounting nut; damaged gasket; cracked tank. | Tighten the mounting nut (hand-tight only). Inspect and replace the gasket if damaged. If the tank is cracked, it may need replacement. |
8. Specifications
| Feature | Specification |
|---|---|
| Brand | NuFlush |
| Model Number | SIAMP |
| Material | Acrylonitrile Butadiene Styrene (ABS) |
| Exterior Finish | Silicone |
| Inlet Connection Size | 2 Inches |
| Outlet Connection Size | 2 Inches |
| Inlet Connection Type | Compression |
| Outlet Connection Type | NPT |
| Number of Ports | 2 |
| Adjustable Flush Volume | 2 L to 4.5 L |
| Lid Hole Diameter Compatibility | 16 mm to 50 mm |
| UPC | 072632986069 |
9. Warranty and Support
For warranty information or technical support regarding your NuFlush SIAMP Replacement Kit, please refer to the product packaging or contact NuFlush customer service directly. Typically, products are covered by a manufacturer's warranty against defects in materials and workmanship. Please retain your proof of purchase for any warranty claims.
For returns, a 30-day return policy is generally available. Please check with your retailer for specific return procedures.