1. Introduction
This manual provides detailed instructions for the safe and efficient operation of your OUBO 18L Lab Autoclave Steam Sterilizer E218. Please read this manual thoroughly before use and retain it for future reference. The E218 is designed for steam sterilization in laboratory environments, ensuring effective decontamination of equipment.
Key Features:
- Pressure adjustment: Automatically vents if pressure exceeds standard value.
- Overheat protection device.
- Temperature and Pressure display for monitoring.
- Constructed from Stainless steel #304.
- Machine foundation and shell treated with high-temperature baking varnish processing.
2. Unpacking and Setup
Carefully unpack the autoclave and all its components. Ensure all listed items are present before proceeding with the setup.
2.1 Package Contents:
- Main Unit: 1
- Rack: 1
- Trays holder: 1
- Trays: 2
- Exhaust tube: 1
2.2 Initial Placement and Leveling:
Place the autoclave on a stable, level surface. Adjust the two front feet by rotating them to ensure the unit is level and slightly elevated for proper drainage.
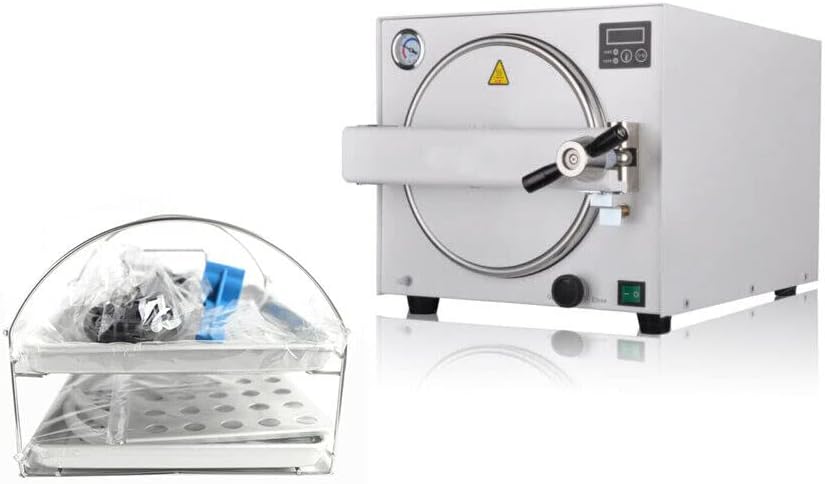
Image: The OUBO 18L Lab Autoclave Steam Sterilizer E218 shown with its included accessories, including trays and an exhaust tube.
Video: Demonstrates unpacking the accessory pack, adjusting the front feet for leveling, and placing the aluminum protective plate above the heating elements.
2.3 Internal Component Installation:
Insert the aluminum protective plate above the heating elements at the bottom of the chamber. Then, place the rack and trays holder inside the chamber.

Image: The autoclave with its door open, revealing the internal chamber with trays and rack in place.
2.4 Water Filling:
Pour distilled water into the chamber, ensuring the water level is below the water level baffle. Use only distilled water to prevent mineral buildup.

Image: A close-up view of the autoclave's interior, highlighting the water level baffle to indicate the maximum fill line for distilled water.
2.5 Drain Tube Connection:
Connect the exhaust tube to the drain outlet located at the rear of the unit. Ensure it is securely attached and leads to a suitable collection container for condensed water.

Image: The rear of the autoclave, indicating the 'Outfall' (drain outlet), 'Rotary drain switch', and 'Power switch' for clear identification.
2.6 Power Connection:
Connect the power cable to the designated power inlet at the back of the autoclave, then plug it into a suitable electrical outlet. Ensure the power switch is in the OFF position before connecting.
Video: Demonstrates connecting the power cable and the drain tube to the autoclave unit.
3. Operating Instructions
Follow these steps to operate the OUBO E218 Autoclave for effective sterilization.
3.1 Loading Instruments:
Place the items to be sterilized onto the trays within the chamber. Ensure items are arranged to allow for proper steam circulation.
Image: The autoclave with its door open, showing the internal chamber ready for loading instruments onto the trays.
3.2 Closing the Door:
Close the chamber door firmly and secure it by rotating the handle until it is tightly sealed. This is crucial for maintaining pressure during sterilization.

Image: The OUBO 18L Lab Autoclave Steam Sterilizer E218 with its door securely closed, ready for operation.
3.3 Power On and Program Selection:
Turn on the main power switch. Use the control panel to select the desired sterilization program (e.g., 121°C or 134°C) based on the type of instruments being sterilized. Refer to the control panel image for button identification.
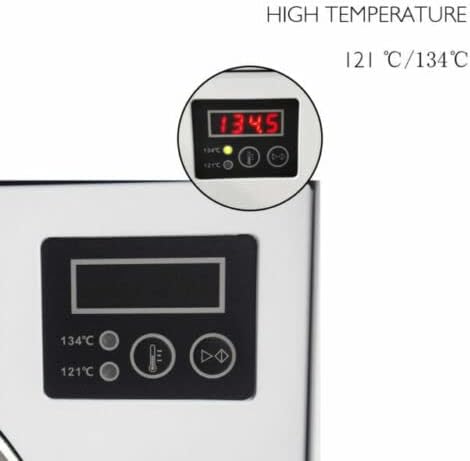
Image: A close-up of the autoclave's control panel, showing the digital display for temperature and pressure, along with program selection buttons.
Video: Demonstrates the process of loading instruments, closing the door, and selecting a sterilization program on the control panel.
3.4 Starting Sterilization:
Once the program is selected, press the 'Start/Stop' button to begin the sterilization cycle. The unit will automatically proceed through heating, sterilization, and drying phases.
Video: Illustrates the digital LCD screen and how to select and start a sterilization program on the autoclave.
3.5 Monitoring and Completion:
Monitor the temperature and pressure readings on the display during the cycle. The autoclave will indicate when the cycle is complete. Allow the unit to cool down before opening the door and removing sterilized items.

Image: A close-up of the autoclave's pressure gauge, providing visual monitoring of internal pressure during operation.
4. Maintenance
Regular maintenance ensures the longevity and optimal performance of your autoclave.
4.1 Cleaning:
- Regularly clean the interior chamber and trays with a soft cloth and mild detergent.
- Ensure no residue remains after cleaning.
- Wipe down the exterior with a damp cloth.
4.2 Water Quality:
Always use distilled water to prevent scale buildup and ensure efficient operation. Drain and refill the water reservoir as needed.
4.3 Gasket Inspection:
Periodically inspect the door gasket for any signs of wear, cracks, or damage. A damaged gasket can compromise the seal and sterilization effectiveness. Replace if necessary.
5. Troubleshooting
If you encounter any issues, refer to the following common troubleshooting tips. For persistent problems, contact customer support.
5.1 No Power:
- Check if the power cable is securely connected to both the autoclave and the electrical outlet.
- Ensure the main power switch is in the 'ON' position.
- Verify the electrical outlet is functional.
5.2 Pressure Not Building:
- Ensure the chamber door is securely closed and the handle is fully tightened.
- Check the door gasket for any damage or improper seating.
- Verify there is sufficient distilled water in the reservoir.
5.3 Error Codes:
If an error code appears on the display, consult the full product manual (if provided separately) or contact OUBO customer support with the specific code for assistance.
6. Specifications
| Attribute | Value |
|---|---|
| Manufacturer | OUBO |
| Power Source | Corded Electric |
| Wattage | 1000 watts |
| ASIN | B08DLTMZCV |
| Date First Available | July 25, 2020 |
7. Warranty and Support
For warranty information, please refer to the documentation included with your product or contact OUBO customer service. For technical support or service inquiries, please visit the official OUBO website or use the contact information provided in your purchase documentation.