1. Introduction
This instruction manual provides comprehensive guidance for the setup, operation, and maintenance of your Marklin HO Digital Electric E-40 Locomotive. This model is a highly detailed, heavy metal electric locomotive featuring digital control, lights, and sound functions, originally part of Starter Set 29855. Please read this manual thoroughly before operating your locomotive to ensure safe and optimal performance.

Figure 1.1: Front-side view of the Marklin HO Digital Electric E-40 Locomotive. This image displays the detailed exterior, including the pantographs, windows, and front coupling mechanism.
2. Safety Information
Always observe the following safety precautions to prevent injury or damage to your model locomotive and accessories:
- This product is recommended for ages 12 and up. Keep out of reach of younger children due to small parts.
- Ensure the power supply is disconnected before performing any maintenance or adjustments.
- Operate the locomotive on a clean, dry track. Avoid contact with water or other liquids.
- Do not attempt to modify the electrical components of the locomotive.
- Use only Marklin-approved power supplies and digital control systems.
3. Package Contents
Upon unpacking, verify that all components are present and undamaged. The package should contain:
- Marklin HO Digital Electric E-40 Locomotive
- Instruction Manual (this document)
- Note: Additional components such as tracks, power supply, and digital controller are typically part of a starter set and may not be included with the standalone locomotive.

Figure 3.1: Side view of the Marklin HO Digital Electric E-40 Locomotive, showcasing its length and detailed side panels.
4. Setup
4.1 Initial Inspection
Carefully remove the locomotive from its packaging. Inspect the model for any visible damage, loose parts, or manufacturing defects. Ensure all wheels are properly seated and the pantographs are intact.
4.2 Placing on Tracks
Place the locomotive gently onto the Marklin HO gauge tracks. Ensure all wheels are correctly positioned on the rails and the center pickup shoe makes proper contact with the center conductor rail.
4.3 Digital System Connection
Connect your Marklin Digital control unit (e.g., Mobile Station, Central Station) to the track power supply according to its specific instructions. The E-40 locomotive is equipped with a digital decoder and will automatically be recognized by compatible Marklin digital systems.

Figure 4.1: Underside view of the locomotive, highlighting the wheel sets and the central pickup shoe essential for power collection on Marklin 3-rail systems.
5. Operating Instructions
5.1 Basic Operation
- Power On: Activate your digital control unit. The locomotive's lights should illuminate briefly as it receives power.
- Select Locomotive: Use your digital controller to select the E-40 locomotive. Its digital address is typically pre-set (refer to your controller's manual for specific selection procedures).
- Control Speed: Use the speed dial or buttons on your controller to increase or decrease the locomotive's speed.
- Change Direction: Press the direction button on your controller to reverse the locomotive's travel direction.
5.2 Digital Functions (Lights and Sounds)
The E-40 locomotive is equipped with various digital functions accessible via your control unit. Common functions include:
- Headlights/Taillights: Typically controlled by function button F0 or a dedicated light button.
- Operating Sounds: The locomotive features realistic operating sounds. These can include engine sounds, horn, bell, and brake sounds, activated by specific function buttons (e.g., F1, F2, F3, etc.). Refer to your digital controller's manual for the exact mapping of functions.
5.3 Coupling
To couple the E-40 locomotive with other rolling stock, gently push the locomotive towards the car until the couplers engage. Ensure the couplers are aligned before making contact.
6. Maintenance
Regular maintenance ensures the longevity and optimal performance of your locomotive. Always disconnect power before performing maintenance.
6.1 Cleaning
- Exterior: Use a soft, dry cloth to wipe down the locomotive body. Avoid abrasive cleaners or solvents.
- Wheels and Pickup Shoe: Periodically clean the wheel treads and the center pickup shoe with a cotton swab lightly dampened with isopropyl alcohol to remove dirt and grime, ensuring good electrical contact.
6.2 Lubrication
Apply a small drop of specialized model train lubricant to the moving parts of the drive train, such as gear shafts and axle bearings, approximately every 20-30 operating hours. Avoid over-lubrication, as this can attract dust.
6.3 Wheel Maintenance
Check wheels for any debris or hair that might impede smooth operation. Ensure all wheels rotate freely.
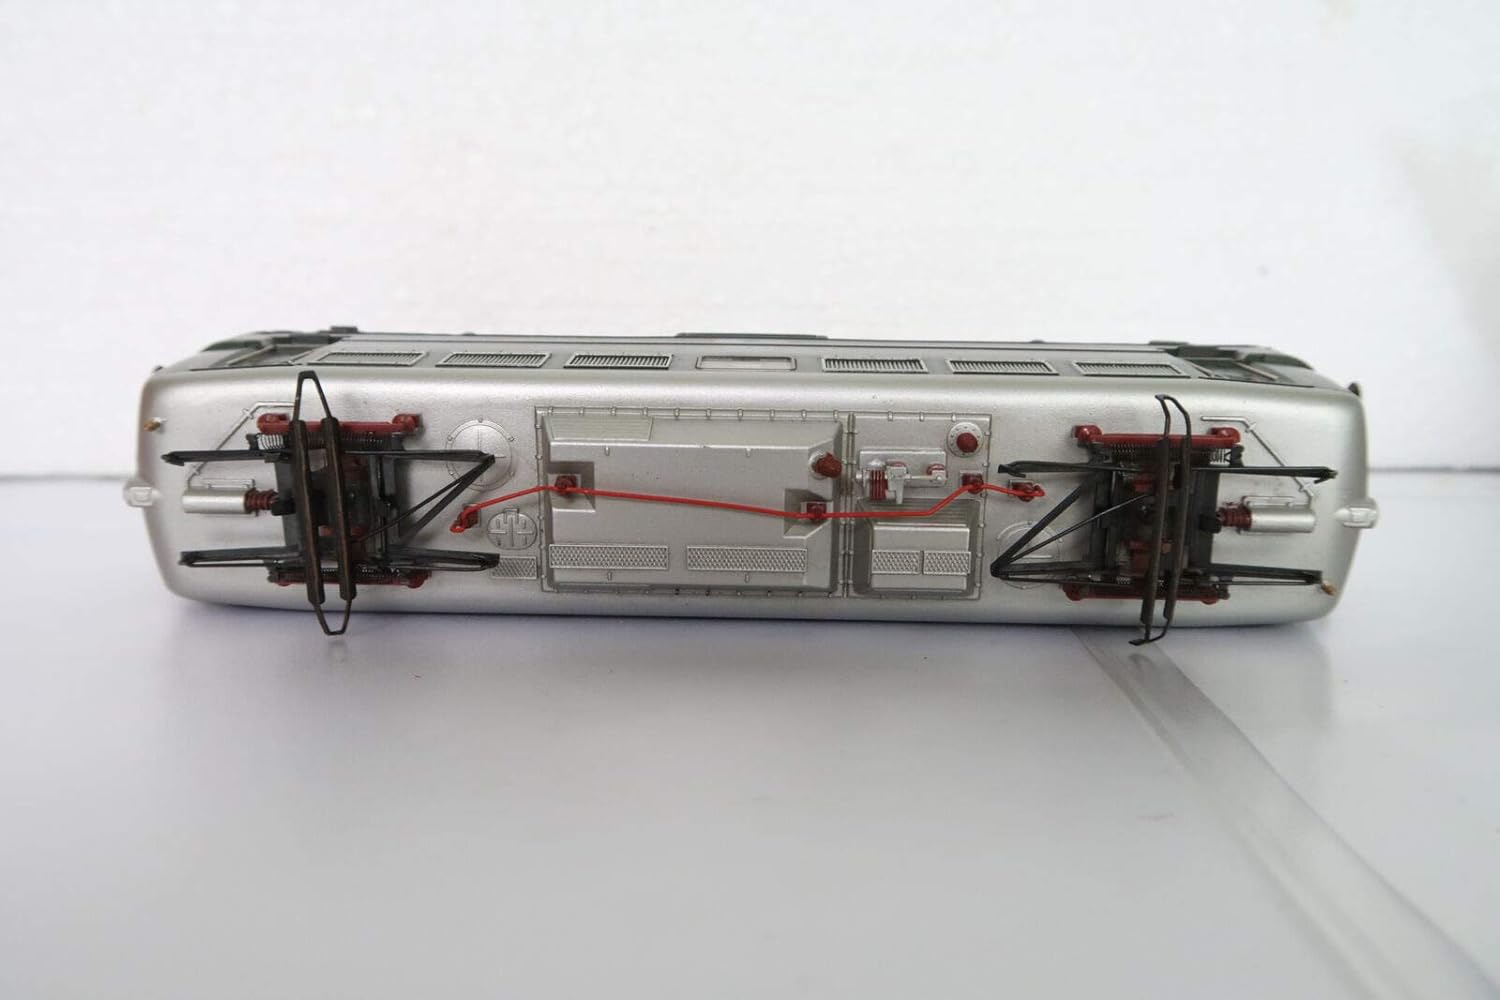
Figure 6.1: Top-down view of the locomotive's chassis, showing internal components and wiring. This view is useful for understanding the layout for maintenance.
7. Troubleshooting
If you encounter issues with your E-40 locomotive, consult the following table for common problems and solutions.
| Problem | Possible Cause | Solution |
|---|---|---|
| Locomotive does not move or respond. | No power to track; poor track contact; incorrect digital address selected. | Check power supply and track connections. Clean track and wheels. Verify correct locomotive address on controller. |
| Lights or sounds not working. | Function not activated; decoder issue; poor power contact. | Ensure correct function button is pressed on controller. Check track power and wheel cleanliness. |
| Erratic movement or stalling. | Dirty track/wheels; insufficient power; mechanical obstruction. | Clean track and locomotive wheels/pickup shoe. Check power supply output. Inspect for debris in drive train. |
8. Specifications
| Feature | Detail |
|---|---|
| Brand | Marklin HO |
| Model | E-40 Electric Locomotive |
| Type | Digital with Lights and Sounds |
| Construction | All Cast Heavy Metal |
| Item Weight | 3 pounds |
| Recommended Age | 12 years and up |
| Manufacturer | MARKLIN |
9. Warranty and Support
For warranty information and technical support, please refer to the official Marklin website or contact your authorized Marklin dealer. Keep your proof of purchase for any warranty claims.
Manufacturer: MARKLIN
Website: www.marklin.com (Note: This is a placeholder URL, please verify the official Marklin support website.)


