1. Introduction
The EziMedPil Automatic Pill Dispenser is designed to simplify medication management, ensuring that users take the right medication at the right time and dose. This device is ideal for individuals seeking to maintain independence in their medication routine, as well as for caregivers managing medication schedules for others. It features programmable alarms, a large capacity, and security features to prevent missed or accidental overdoses.
Key features include:
- Medication adherence management with audio and visual alerts.
- Supports up to 6 alarms per day for a maximum of 28 consecutive days.
- Easy-to-read LCD display.
- High-capacity 28-compartment tray.
- Includes 6 interchangeable dosage rings.
- Secure locking cover with metal keys.
- Battery-operated for wireless operation.
2. What's in the Box
Upon unpacking your EziMedPil Automatic Pill Dispenser, please verify that all components are present:
- 1 x Automatic Pill Dispenser (with Frosted Lid)
- 1 x Medication Tray
- 6 x Dosage Rings
- 2 x Metal Keys
- 1 x User Manual
- 4 x AA Batteries
3. Setup
3.1. Battery Installation
The dispenser requires 4 AA batteries for operation. These are included in the package.
- Turn the dispenser upside down.
- Locate the battery compartment cover.
- Open the cover and insert the 4 AA batteries, ensuring correct polarity (+/-).
- Close the battery compartment cover securely.

Figure 3.1: Battery compartment located on the underside of the dispenser.
3.2. Loading Medication and Dosage Rings
The dispenser features 28 spacious compartments and comes with 6 interchangeable dosage rings to customize your medication schedule.
- Unlock the lid using one of the provided metal keys and open it.
- Remove the clear medication tray.
- Select the appropriate dosage ring based on the number of doses per day (e.g., 1x, 2x, 3x, 4x, 5x, 6x). This ring guides the rotation and indicates the active compartments.
- Place the selected dosage ring onto the central hub of the dispenser.
- Carefully place your pills into the designated compartments of the medication tray, following your prescribed schedule. Ensure pills do not overfill compartments or obstruct the lid's closure.
- Reinsert the medication tray into the dispenser, aligning it correctly.
- Close the lid and lock it using the metal key.

Figure 3.2: Loading medication into the 28 compartments and selecting a dosage ring.

Figure 3.3: Securely locking the lid after loading pills.
3.3. Setting Time and Alarms
The dispenser features an easy-to-use 3-button interface (A, B, C) for programming.
- Setting Current Time: Press button B for approximately 3 seconds until the time flashes. Use buttons A and C to adjust hours and minutes. Press B to confirm each setting.
- Setting Time Format (12HR/24HR): While setting the time, you can toggle between 12-hour and 24-hour formats.
- Setting Alarms: After setting the current time, the alarm setting mode will activate. You can program up to 6 daily alarms. Use buttons A and C to set the desired alarm time. Press B to confirm and move to the next alarm or exit.
- Adjusting Volume: The dispenser offers 3 volume levels. During alarm setting, you can adjust the volume using buttons A or C.
- Selecting Alarm Tone: Choose from 2 different alarm tones. This option is also available during the alarm setting process.

Figure 3.4: Detailed view of the LCD display and programming options.
4. Operating Instructions
4.1. Daily Operation
The EziMedPil dispenser automatically rotates to the next dose compartment at the programmed alarm time.
- At the scheduled time, the dispenser will sound an alarm and flash lights for 30 minutes, or until the dispenser is inverted.
- To retrieve your medication, slide open the drug window located at the front of the dispenser.
- Flip the entire unit upside down to dispense the pills into your hand or a container. This action will also stop the alarm.
- Close the drug window after taking your medication.
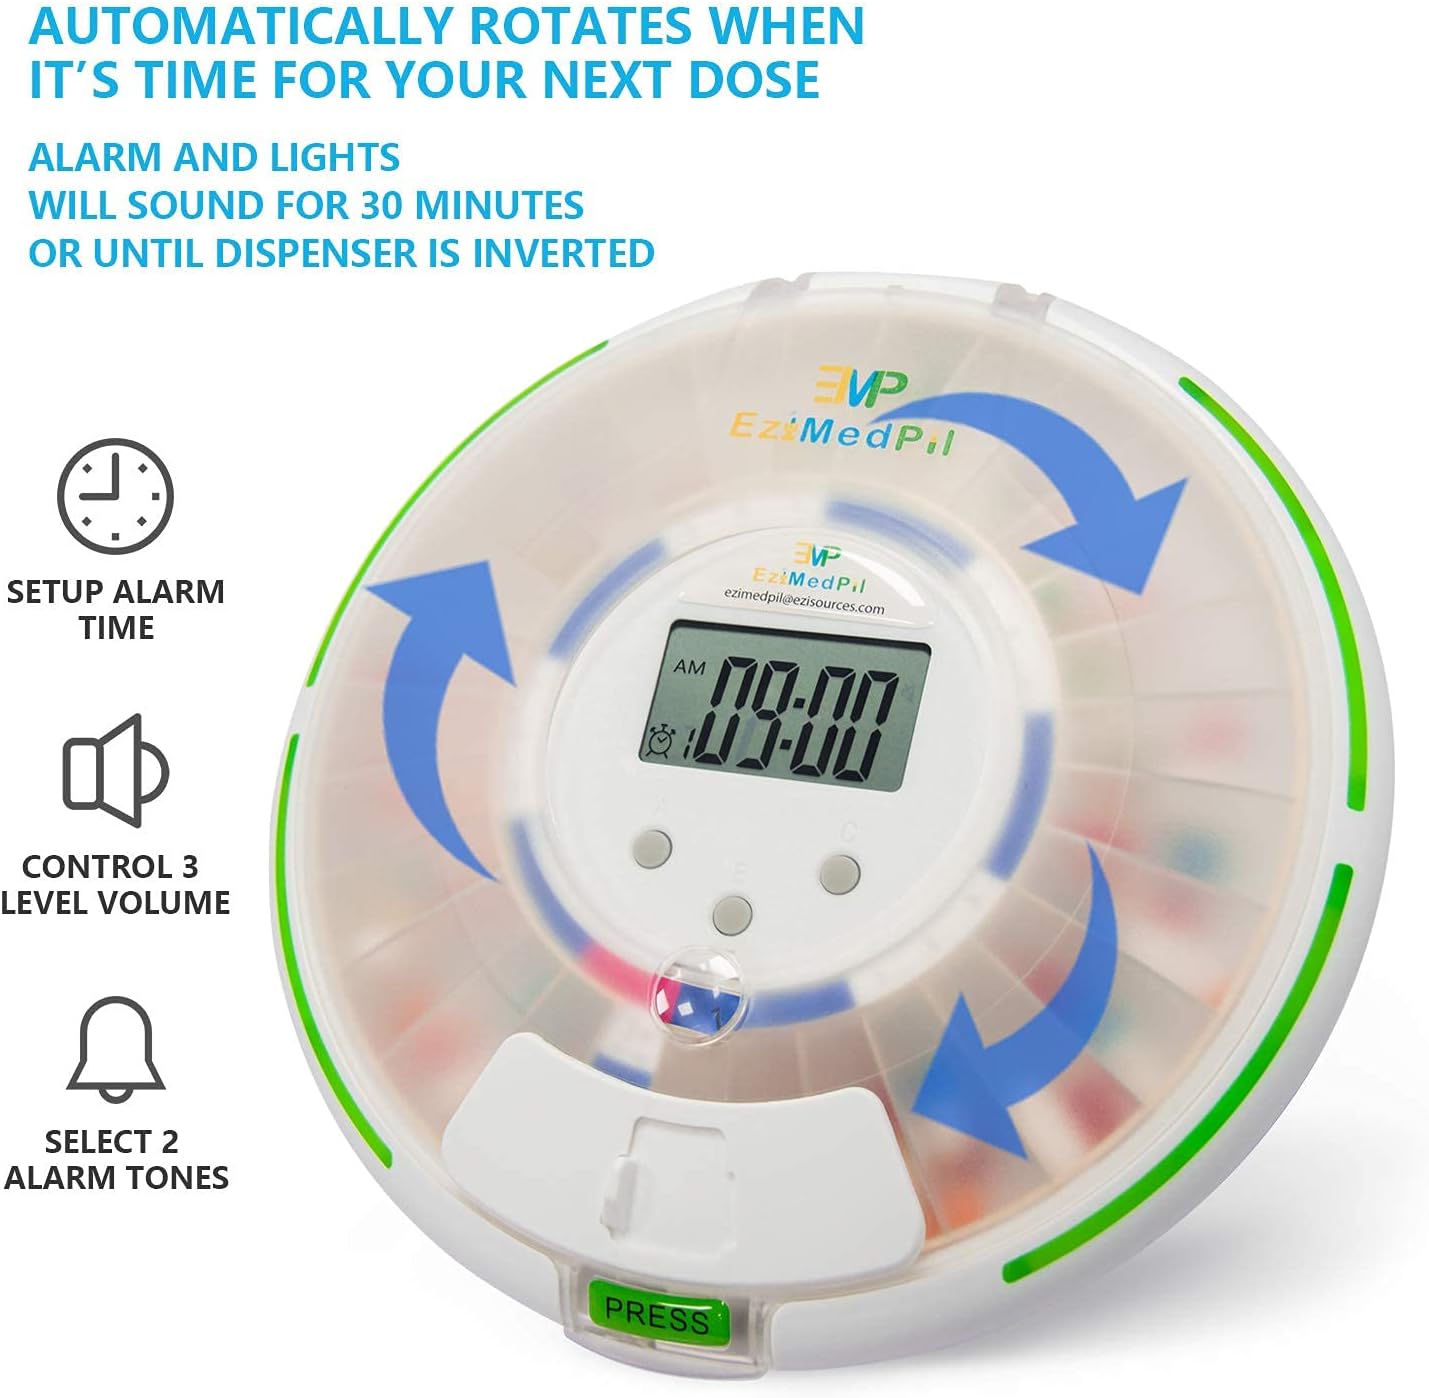
Figure 4.1: Dispenser automatically rotates to the next dose.

Figure 4.2: Dispensing pills and stopping the alarm by inverting the unit.
4.2. Built-in Magnifier
The dispenser includes a mini magnifying glass integrated into the drug window. This feature allows for a close-up view of dosage information or pill details for improved readability.
5. Maintenance
5.1. Cleaning
To ensure proper hygiene and functionality, clean your dispenser regularly:
- Unlock and remove the medication tray.
- Wipe the tray and the interior of the dispenser with a damp cloth. Do not submerge the main unit in water.
- Ensure all parts are completely dry before reassembling and loading medication.
5.2. Battery Replacement
The typical battery life is approximately 6 months. Low or no power can cause the dispenser to malfunction. Replace batteries promptly when the low battery symbol appears on the upper right corner of the LCD display.
- Follow the steps in Section 3.1 for battery installation.
- Always use 4 new AA batteries for optimal performance.
6. Troubleshooting
If you encounter issues with your EziMedPil Automatic Pill Dispenser, refer to the following common problems and solutions:
6.1. "ERR" Displayed on Screen
If the dispenser shows "ERR" on the screen, follow these steps:
- Check if the pill dispenser is at a low battery status. Change to new batteries if necessary.
- Check if anything is obstructing the rotation of the tray under normal power supply. Remove any obstructions.
- Hold button B for approximately 5 seconds to enter test mode. Then, press button B again to check if the tray can rotate one slot. If it rotates, press button C to exit test mode and resolve the problem.
6.2. Dispenser Stops Working Properly After a Few Months
This issue is typically due to low battery power. The battery life is around 6 months. No or low power will cause the pill dispenser to cease functioning correctly. Ensure to change the batteries promptly when the low battery symbol appears on the LCD display.
6.3. Pill Slots Not Aligning Correctly
Misalignment of pill slots is often caused by low battery power, which prevents the dispenser from having enough energy to rotate the pill tray fully. This can result in the pill slot stopping in the middle of the drug window. Change the batteries promptly when the low battery symbol appears.
7. Specifications
| Feature | Detail |
|---|---|
| Product Dimensions | 8.86 x 8.86 x 2.68 inches |
| Weight | 1.9 Pounds |
| Item Model Number | EMP-001 |
| Batteries Required | 4 AA batteries (included) |
| Manufacturer | EZIMEDPIL |
| Color | Frosted Lid |
| Material | Acrylonitrile Butadiene Styrene (ABS) |
| Special Feature | Automatic |
8. Safety Information
Please read and adhere to the following safety guidelines for the proper use and maintenance of your EziMedPil Automatic Pill Dispenser:
- Keep the device out of reach of children and pets to prevent unauthorized access to medication.
- Ensure the lid is always locked when not in use to maintain pill privacy and prevent spills.
- Do not expose the dispenser to extreme temperatures, direct sunlight, or moisture.
- Only use the specified battery type (4 AA batteries). Do not mix old and new batteries or different battery types.
- Dispose of used batteries according to local regulations.
- Do not attempt to force the rotation of the tray or tamper with internal mechanisms.
- If the device is damaged, discontinue use and contact customer support.
8.1. Legal Disclaimer
Statements regarding dietary supplements and medication aids have not been evaluated by the Food and Drug Administration (FDA) and are not intended to diagnose, treat, cure, or prevent any disease or health condition. Always consult with a healthcare professional regarding your medication regimen.
9. Warranty and Support
For any questions, technical support, or warranty inquiries regarding your EziMedPil Automatic Pill Dispenser, please contact the manufacturer, EMP EZIMEDPIL. Refer to the packaging or the official EMP EZIMEDPIL website for contact details.


