Geartree JBX
Janglebox JBX Compression Sustain Effects Pedal User Manual
Model: JBX
1. Introduction
The Janglebox JBX is a professional-grade compression and sustain effects pedal designed for guitar players seeking exceptional tone and dynamic control. This pedal delivers the signature chime, sustain, and brilliance characteristic of JangleBox compressors, enhanced with versatile tone and boost capabilities suitable for both studio recording and live performance environments.
2. Product Overview and Features
The JBX pedal features a robust design with intuitive controls, allowing precise shaping of your guitar's sound. Key features include:
- Dual Mono Outputs: Provides flexible routing options for various setups.
- Separate Full EQ on Both Sides of the Unit: Offers comprehensive tonal adjustment for both the main and J-Boost sections.
- Pre-Set Treble-Boost Switch: Instantly adds clarity and sparkle to your tone.
- J-Boost Gain Switch for On-the-Fly Soloing or Tonal Variation: Engages an additional gain stage for solos or distinct tonal shifts.
- True Bypass: Ensures your signal remains unaffected when the pedal is disengaged.
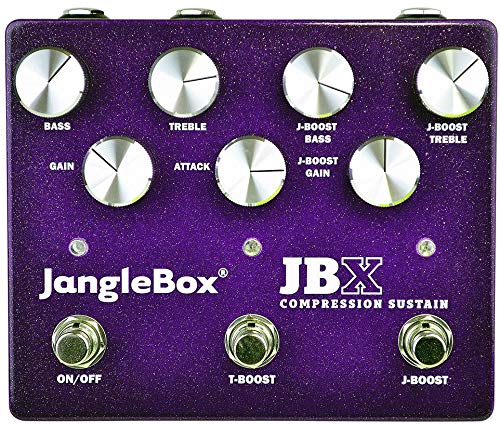
Figure 1: Janglebox JBX Compression Sustain Effects Pedal. The pedal features eight silver control knobs for Bass, Treble, Gain, Attack, J-Boost Bass, J-Boost Treble, J-Boost Gain, and three footswitches labeled ON/OFF, T-Boost, and J-Boost. The pedal's casing is a vibrant purple with a metallic flake finish.
3. Setup
3.1 Power Connection
The Janglebox JBX operates on a standard 9-volt DC power supply (not included) with a center-negative polarity. Connect the power adapter to the 9V DC input jack located on the pedal. Alternatively, the pedal can be powered by a 9V battery (not included) by opening the battery compartment.
3.2 Audio Connections
- Connect your guitar or other instrument to the INPUT jack using a standard 1/4-inch instrument cable.
- Connect the OUTPUT jack to your amplifier or the next pedal in your signal chain using a standard 1/4-inch instrument cable.
- If utilizing the dual mono outputs, connect the second output to a separate amplifier or input for stereo or parallel processing.
Ensure all connections are secure before powering on your amplifier or the pedal.
4. Operating Instructions
Familiarize yourself with the controls to achieve your desired compression and sustain effects.
4.1 Main Compression Controls
- GAIN: Adjusts the input level of the signal entering the compressor. Higher settings increase compression and sustain.
- ATTACK: Controls how quickly the compressor reacts to the input signal. Slower attack times allow more of the initial transient (pick attack) to pass through, while faster times compress the initial attack more heavily.
- BASS: Provides equalization for the low frequencies, allowing you to boost or cut bass response.
- TREBLE: Provides equalization for the high frequencies, allowing you to boost or cut treble response.
4.2 J-Boost Section Controls
The J-Boost section offers additional tonal shaping and gain for lead playing or specific tonal variations.
- J-BOOST GAIN: Controls the gain level of the J-Boost circuit.
- J-BOOST BASS: Provides equalization for the low frequencies within the J-Boost circuit.
- J-BOOST TREBLE: Provides equalization for the high frequencies within the J-Boost circuit.
4.3 Footswitches
- ON/OFF: Engages or bypasses the main compression effect. When engaged, the corresponding LED will illuminate.
- T-BOOST: Activates the pre-set treble boost. This adds a fixed amount of high-end sparkle to your tone.
- J-BOOST: Engages the J-Boost circuit, applying the settings from the J-Boost Gain, Bass, and Treble knobs. Ideal for solos or cutting through a mix.
4.4 General Usage Tips
Experiment with the GAIN and ATTACK controls to find the sweet spot for your playing style. Higher GAIN settings will increase sustain, while ATTACK will determine how much of your initial pick attack is preserved. Use the BASS and TREBLE controls to fine-tune the overall tonal character. Engage the T-BOOST for brighter tones, and the J-BOOST for a powerful lead sound with its own distinct EQ.
5. Maintenance
Proper maintenance ensures the longevity and optimal performance of your Janglebox JBX pedal.
- Cleaning: Wipe the pedal's surface with a soft, dry cloth. Avoid using abrasive cleaners or solvents, which may damage the finish or internal components.
- Battery Replacement: If using battery power, replace the 9V battery when the pedal's performance degrades or the indicator LED dims. Disconnect power and audio cables before opening the battery compartment.
- Storage: Store the pedal in a cool, dry place away from direct sunlight and extreme temperatures. Disconnect all cables when not in use for extended periods.
6. Troubleshooting
If you encounter issues with your Janglebox JBX, consider the following common solutions:
- No Sound:
- Check all cable connections (input, output, power).
- Ensure the power supply is correctly connected and functioning.
- If using a battery, check if it needs replacement.
- Verify that your amplifier and guitar are working correctly.
- Poor Sound Quality / Noise:
- Ensure all cables are in good condition and fully inserted.
- Try a different power supply to rule out power-related noise.
- Check for ground loops if using multiple pedals.
- Adjust the GAIN and EQ settings; excessive gain can introduce unwanted noise.
- LED Not Illuminating:
- Verify power connection and source (battery or adapter).
- Ensure the footswitch is fully engaged.
If problems persist after attempting these steps, contact customer support for further assistance.
7. Specifications
| Feature | Detail |
|---|---|
| Model | JBX |
| Item Weight | 1 pound (approximately 0.45 kg) |
| Package Dimensions | 7.5 x 5.4 x 3.25 inches (approximately 19.05 x 13.72 x 8.26 cm) |
| Hardware Interface | 1/4-inch Audio Jacks |
| Signal Format | Analog |
| Power Source | Battery Powered (9V) or 9V DC Power Adapter (center-negative) |
| Voltage | 9 Volts |
| Color | Purple, Silver |
8. Warranty and Support
For information regarding warranty coverage, product registration, or technical support, please refer to the official Geartree website or contact their customer service department. Keep your proof of purchase for any warranty claims.
Manufacturer: Geartree
Website: www.geartree.com
Ask a question about this manual
Ask about setup, troubleshooting, compatibility, parts, safety, or missing instructions. Manuals+ will review the question and use this page’s manual context to help answer it.