KAKO 6057-GY6150CC
KAKO Complete Wiring Harness Kit User Manual
For ATV Quad 4 Wheelers 150CC-250CC
Product Overview
This KAKO Complete Wiring Harness Kit is designed as a high-quality replacement for the electrical systems of most Chinese-made 4-stroke automatic and semi-automatic upright engine ATVs, Quads, Dirt Bikes, go-karts, and 4-wheelers ranging from 150CC to 250CC. The kit features copper-thickened wiring for enhanced durability and safety.
Important Note: This kit is specifically designed for the stated engine types and will not fit GY6 engine motorbikes or other 49cc, 50cc, 80cc, 90cc, 100cc, 110cc, or 125cc vehicles with different stator or CDI configurations. Always verify compatibility with your existing components before installation.
Package Contents
The KAKO Complete Wiring Harness Kit includes the following components:
- 1x CDI (Capacitor Discharge Ignition)
- 1x Rectifier (Voltage Regulator)
- 1x Spark Plug
- 1x Solenoid Relay
- 1x Main Wiring Harness
- 1x CG125-8 Ignition Coil with lead
- 1x Multi-functional Switch (Handlebar Switch)
- 1x Ignition Switch with 2 keys
- 1x Stator (Magneto Generator)

Figure 1: All components included in the KAKO Complete Wiring Harness Kit, clearly labeled for identification.
Important Safety Information
Please read and understand all safety precautions before attempting installation. Improper installation can lead to serious injury, damage to the vehicle, or fire.
- Professional Installation Recommended: Due to the complexity of electrical systems, professional installation by a qualified mechanic is highly recommended.
- Compatibility Check: Before purchasing and installing, carefully compare your existing stator and CDI with the components shown in the product images to ensure compatibility. This kit is not universal.
- Wiring Diagram: A wiring diagram is essential for correct installation. If one is not included with your kit, please obtain a suitable diagram for your specific ATV/Quad model before proceeding.
- Battery Disconnection: Always disconnect the vehicle's battery before working on any electrical components to prevent electrical shock or short circuits.
- Inspect Components: Before installation, inspect all components for any signs of damage during shipping. Do not install damaged parts.
- Secure Connections: Ensure all connections are secure and properly insulated to prevent loose wires, short circuits, and potential fire hazards.
- Test Thoroughly: After installation, test all electrical functions thoroughly before operating the vehicle.
Setup and Installation
This section provides general guidance for installing the wiring harness kit. Refer to your vehicle's specific service manual and the wiring diagram for detailed instructions.
1. Preparation
- Ensure the vehicle is turned off and the battery is disconnected.
- Gather necessary tools, including wrenches, screwdrivers, wire cutters/strippers, electrical tape, and zip ties.
- Lay out all new components and compare them with your existing parts and the wiring diagram.
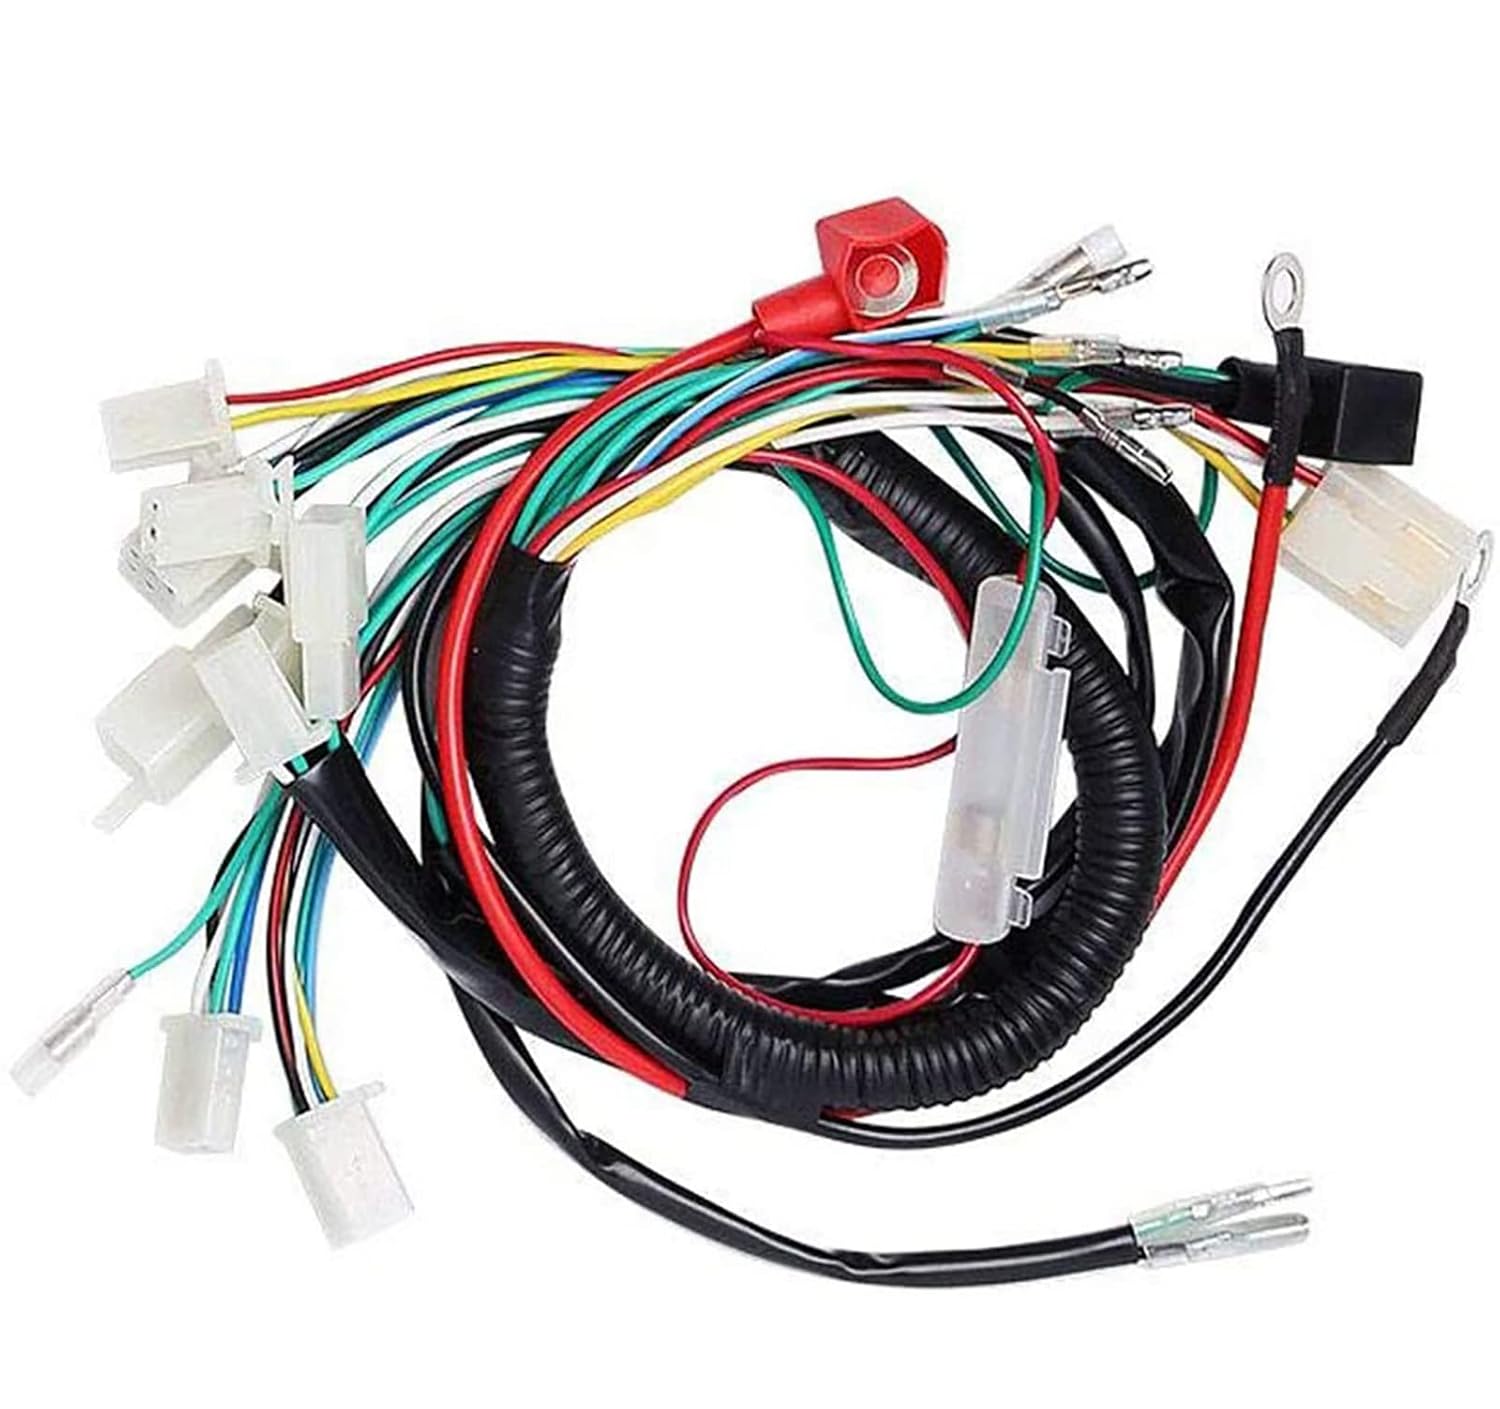
Figure 2: Detailed view of the main wiring harness, showing various connectors and wire colors.
2. Removal of Old Components
- Carefully disconnect and remove the old wiring harness and associated electrical components (CDI, rectifier, ignition coil, stator, switches, etc.). Take photos or make notes of existing connections to aid in new installation.
- Pay close attention to the routing of the old harness to ensure the new one can be installed similarly, avoiding pinch points or heat sources.
3. Installation of New Components
- Stator Installation: Install the new stator into the engine casing. Ensure it is properly seated and secured.
- Main Wiring Harness Routing: Begin routing the new main wiring harness through the vehicle's frame, following the path of the old harness. Connect the main harness to the stator.
- Component Connections: Systematically connect each component to the main wiring harness according to the wiring diagram. This includes:
- CDI unit
- Rectifier/Voltage Regulator
- Solenoid Relay
- Ignition Coil and Spark Plug
- Multi-functional Switch (handlebar controls)
- Ignition Switch
- Battery terminals (positive and negative)
- Ground connections
- Secure Wiring: Once all connections are made, secure the wiring harness using zip ties to prevent it from rubbing against moving parts, hot engine components, or sharp edges.

Figure 3: The stator, a key component for generating electrical power.

Figure 4: An overview of the complete wiring harness layout, illustrating how components connect.

Figure 5: Rectifier, multi-functional switch, and solenoid relay, ready for connection.

Figure 6: CDI unit, ignition coil, ignition switch, and spark plug, essential for engine ignition.
4. Post-Installation Check
- Double-check all connections for tightness and correct placement according to the wiring diagram.
- Reconnect the battery.
- Test all electrical functions: ignition, lights, horn, starter, kill switch, etc., before attempting to start the engine.
- If any issues arise, refer to the Troubleshooting section or consult a professional.
Operating the Vehicle (Post-Installation)
Once the KAKO Wiring Harness Kit is correctly installed, your ATV/Quad's electrical system should function as intended. The harness facilitates the proper flow of electricity to all necessary components for starting, running, and controlling the vehicle's electrical features.
- Starting: Use the ignition switch and starter button as per your vehicle's standard operating procedure.
- Lights & Controls: Operate headlights, taillights, turn signals (if applicable), and horn using the multi-functional switch.
- Engine Kill Switch: Ensure the engine kill switch functions correctly to immediately shut off the engine in an emergency.
Maintenance
Proper maintenance of your wiring harness can extend its lifespan and ensure reliable operation.
- Regular Inspection: Periodically inspect the wiring harness for any signs of wear, fraying, cracks in insulation, or loose connections.
- Cleanliness: Keep the harness and connectors clean and free from dirt, mud, and moisture, which can cause corrosion or short circuits.
- Secure Mounting: Ensure the harness remains securely mounted and away from hot engine parts or sharp edges. Re-secure any loose sections with zip ties.
- Corrosion Prevention: Apply dielectric grease to electrical connectors to prevent corrosion, especially in wet or humid environments.
Troubleshooting
If you encounter issues after installing the wiring harness, consider the following common problems and solutions:
| Problem | Possible Cause | Solution |
|---|---|---|
| No Power / Engine Won't Start | Loose battery connection, blown fuse, faulty ignition switch, incorrect wiring. | Check battery terminals, inspect fuses, verify ignition switch connections, re-check wiring against diagram. |
| Lights Not Working | Loose connections to lights, faulty multi-functional switch, incorrect wiring. | Inspect light connections, test multi-functional switch, confirm wiring to lights. |
| Engine Cranks but Won't Start | Faulty CDI, ignition coil, spark plug, or stator; incorrect wiring to these components. | Check connections to CDI, ignition coil, and stator. Test spark plug. Ensure proper grounding. |
| Battery Not Charging | Faulty rectifier, stator, or loose charging circuit connections. | Verify rectifier and stator connections. Test rectifier output. |
| Smoke or Burning Smell | Short circuit, incorrect wiring, overloaded circuit. | Immediately disconnect battery. Inspect all wiring for shorts or incorrect connections. This indicates a serious issue and requires professional attention. |
If troubleshooting steps do not resolve the issue, it is recommended to consult a professional mechanic or an experienced electrical technician.
Specifications
| Feature | Detail |
|---|---|
| Brand | KAKO |
| Model Number | 6057-GY6150CC |
| Compatibility | Most Chinese-made 4-stroke automatic/semi-auto upright engine 150CC-250CC ATVs, Quads, Dirt Bikes, Go-karts, 4-wheelers. |
| Material | Copper, Fiberglass, Thermoplastic Polyurethane (TPU) |
| Cable Type | Custom Wiring Harness |
| Item Weight | 1.35 Kilograms (approx. 2.97 Pounds) |
Warranty and Support
KAKO stands behind the quality of its products. This wiring harness kit comes with a satisfaction guarantee.
- 30-Day Satisfaction Guarantee: If you are not completely satisfied with your purchase, you may return it within 30 days for a no-hassle refund or credit.
- For any questions, technical assistance, or warranty claims, please contact the seller or KAKO customer support through the platform where the product was purchased.
Ask a question about this manual
Ask about setup, troubleshooting, compatibility, parts, safety, or missing instructions. Manuals+ will review the question and use this page’s manual context to help answer it.