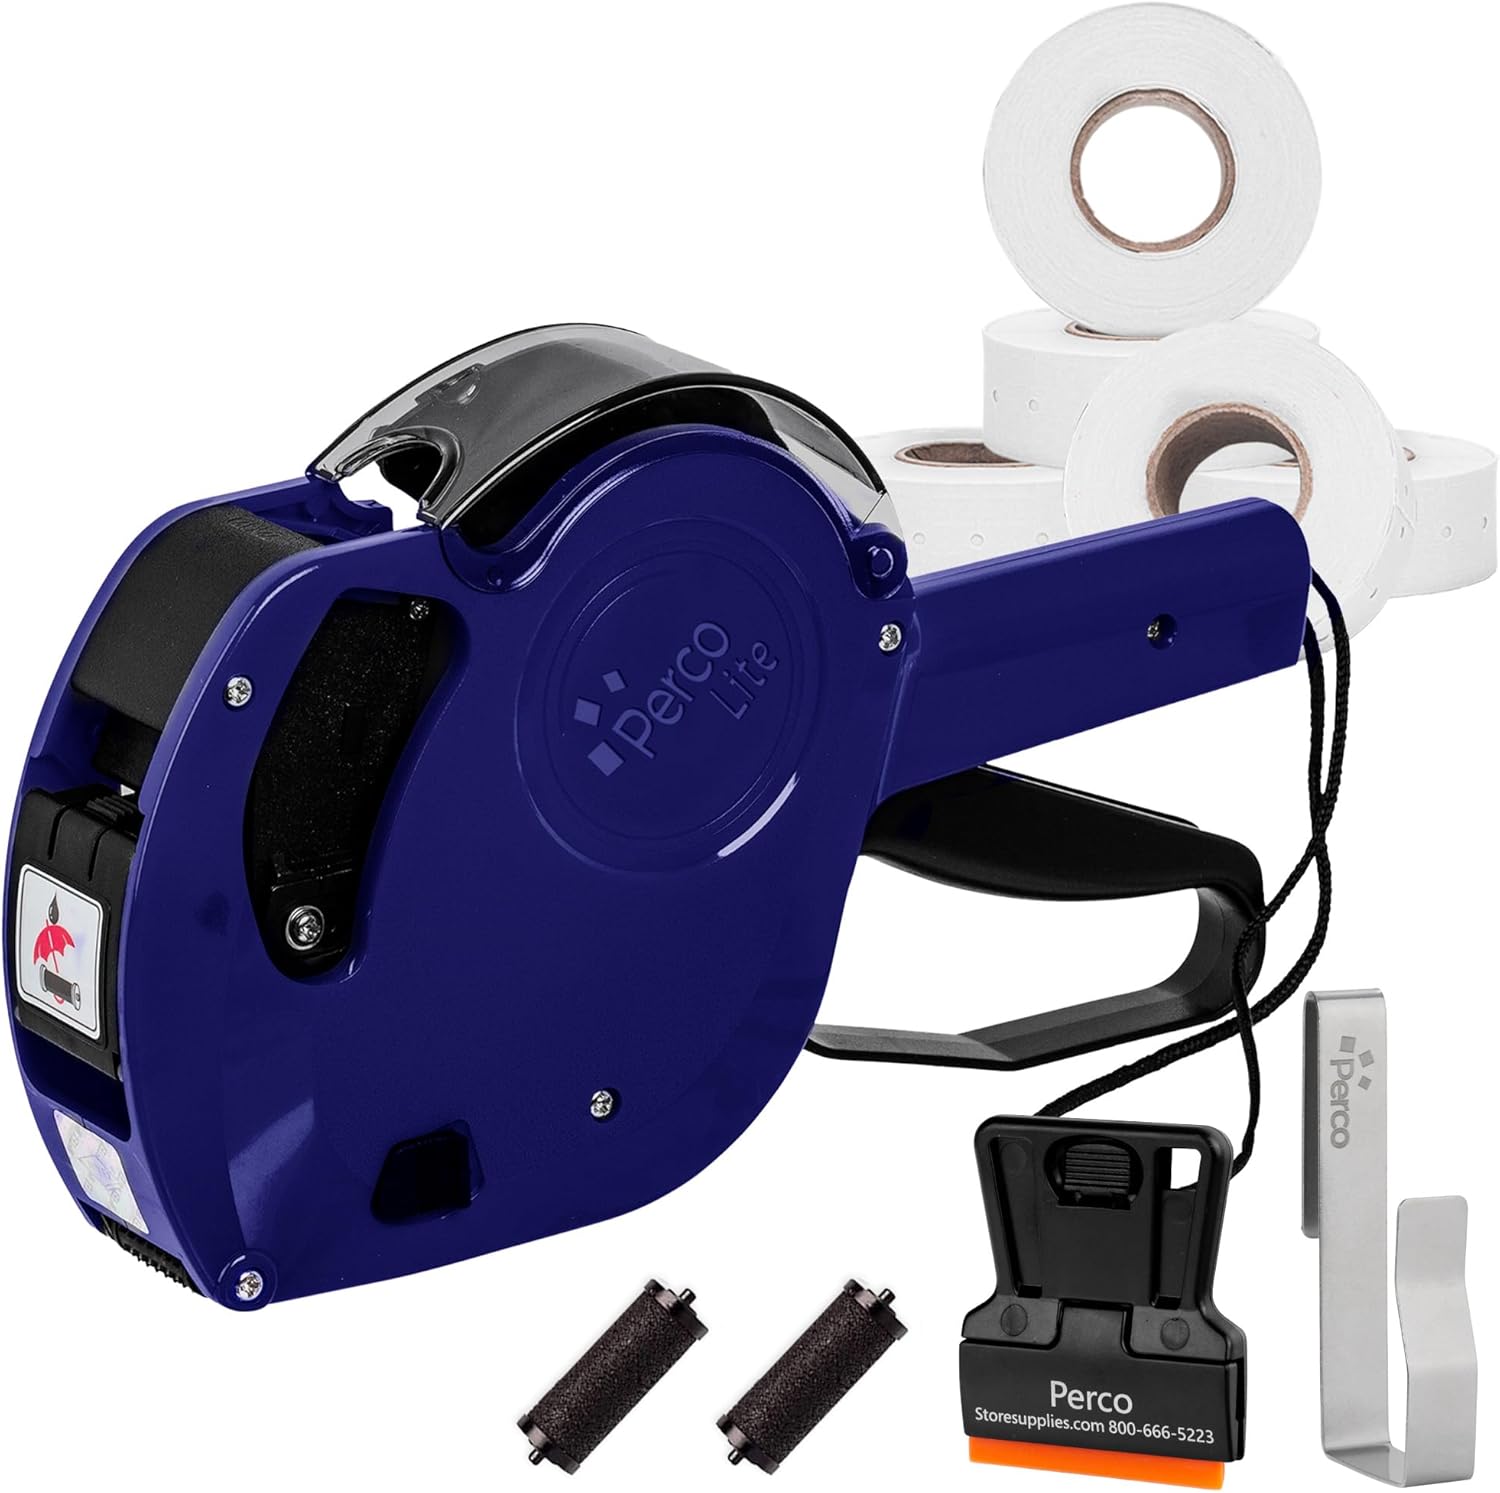
1. Product Overview and Kit Contents
The Perco Lite 1 Line Price Gun is designed for efficient and clear price marking. This manual provides instructions for setting up, operating, and maintaining your price gun to ensure optimal performance.
Kit Contents:
- Perco Lite 1-Line Price Gun
- 5,000 Blank White Price Labels (1 roll pre-loaded)
- 2 Ink Rollers (1 pre-loaded)
- 1 Label Scraper
- 1 Gun Clip

2. Setup and Initial Use
2.1 Loading Labels
Your Perco Lite price gun comes with one roll of labels pre-loaded. If you need to load a new roll, follow these steps:
- Locate the back cover of the price gun.
- Open the back cover by sliding the release button or latch.
- Place the new label roll onto the spindle, ensuring the labels feed from the bottom.
- Pull approximately 25 labels out to ensure smooth feeding and prevent jams.
- Close the back cover securely until it clicks into place.

2.2 Installing/Replacing Ink Roller
The ink roller is crucial for clear printing. One ink roller is pre-installed. To replace it:
- Open the front cover of the price gun, usually located near the handle.
- Carefully remove the old ink roller by pinching its ends and pulling it out.
- Insert the new ink roller, ensuring it snaps into place correctly. Avoid touching the inked surface.
- Close the front cover.
3. Operating the Price Gun
3.1 Setting Characters and Symbols
The Perco Lite price gun features 8 character bands for customization. To set your desired price or code:
- Locate the adjustment knob on the side of the price gun.
- Rotate the knob to select the desired character or symbol for each position. The available characters include numbers (0-9), currency symbols ($, €, £), and other common indicators (e.g., '.', '/', '+TAX', 'DOZ', 'LB').
- Ensure all characters are aligned correctly before printing.

3.2 Applying Labels
Once the characters are set and the labels are loaded:
- Position the gun over the item where you want to apply the label.
- Squeeze the trigger firmly and release. The gun will print the set characters onto a label and dispense it.
- Press the label onto the item to secure it.
4. Maintenance
Regular maintenance ensures the longevity and performance of your Perco Lite price gun.
- Cleaning: Periodically clean the exterior of the gun with a soft, dry cloth. Avoid using harsh chemicals.
- Ink Roller: Replace the ink roller when prints become faint or inconsistent. Refer to section 2.2 for replacement instructions.
- Label Path: Ensure the label path is free from adhesive residue or small label pieces to prevent jams. The included label scraper can assist with this.
5. Troubleshooting
If you encounter issues with your price gun, try the following solutions:
- Labels Not Feeding:
- Check if the label roll is correctly loaded and seated on the spindle (refer to section 2.1).
- Ensure enough labels are pulled out from the roll to engage the feeding mechanism.
- Inspect the label path for any obstructions or jammed labels.
- Unclear or Faint Prints:
- The ink roller may be dry or depleted. Replace it with a new one (refer to section 2.2).
- Ensure the character bands are clean and free from debris.
- Characters Not Changing:
- Verify that the adjustment knob is fully engaged and rotating the character bands.
- Check for any foreign objects obstructing the character bands.
6. Product Specifications
| Feature | Detail |
|---|---|
| Model Number | P-Lite-Universal |
| Brand | Perco |
| Operation Mode | Manual |
| Power Source | Manual |
| Item Weight | 1 pound (16 ounces) |
| Package Dimensions | 9.09 x 7.4 x 2.17 inches |
| Core Size (Labels) | 2 inches |
7. Warranty and Support
7.1 Warranty Information
The Perco Lite 1 Line Price Gun comes with a two-year warranty from the date of purchase. This warranty covers manufacturing defects and ensures reliable operation under normal use. Please retain your proof of purchase for warranty claims.
7.2 Customer Support
For further assistance, technical support, or warranty inquiries, please contact Perco customer service. Refer to the packaging or the official Perco website for the most current contact information.


