1. Introduction
This manual provides essential information for the installation, operation, and maintenance of your Power Stop Z17 Evolution Ceramic Front Brake Pad Kit with Hardware, Model 17-2173. This kit is designed to provide reliable braking performance for specific vehicle applications. Please read these instructions thoroughly before proceeding with installation or use.
Compatible Vehicles:
- Cadillac Escalade: 2021-2024
- Cadillac Escalade ESV: 2021-2024
- Chevrolet Silverado 1500: 2019-2024
- Chevrolet Silverado 1500 LTD: 2022
- Chevrolet Suburban: 2021-2022
- Chevrolet Tahoe: 2021-2022
- GMC Sierra 1500: 2019-2022
- GMC Sierra 1500 Limited: 2019, 2022
- GMC Yukon: 2021-2022
- GMC Yukon XL: 2021-2022
2. Safety Information
WARNING: Brake system work requires specialized knowledge and tools. Improper installation can lead to brake failure, resulting in serious injury or death. If you are not confident in your ability to perform this installation safely, seek assistance from a qualified automotive technician.
- Always wear appropriate personal protective equipment, including safety glasses and gloves.
- Ensure the vehicle is securely supported on jack stands on a level surface before beginning any work.
- Never rely solely on a jack to support the vehicle.
- Refer to your vehicle's service manual for specific torque specifications and procedures.
- Keep brake fluid away from painted surfaces as it can damage paint.
- Do not reuse old brake hardware unless explicitly stated by the manufacturer.
3. Package Contents
Verify that all components are present and undamaged before beginning installation.

Image 3.1: The Power Stop Z17 Evolution Ceramic Brake Pad Kit in its retail packaging. The box displays the 'Evolution Plus' branding and highlights features like 'Clean Ride Ceramic' and 'Premium Hardware'.
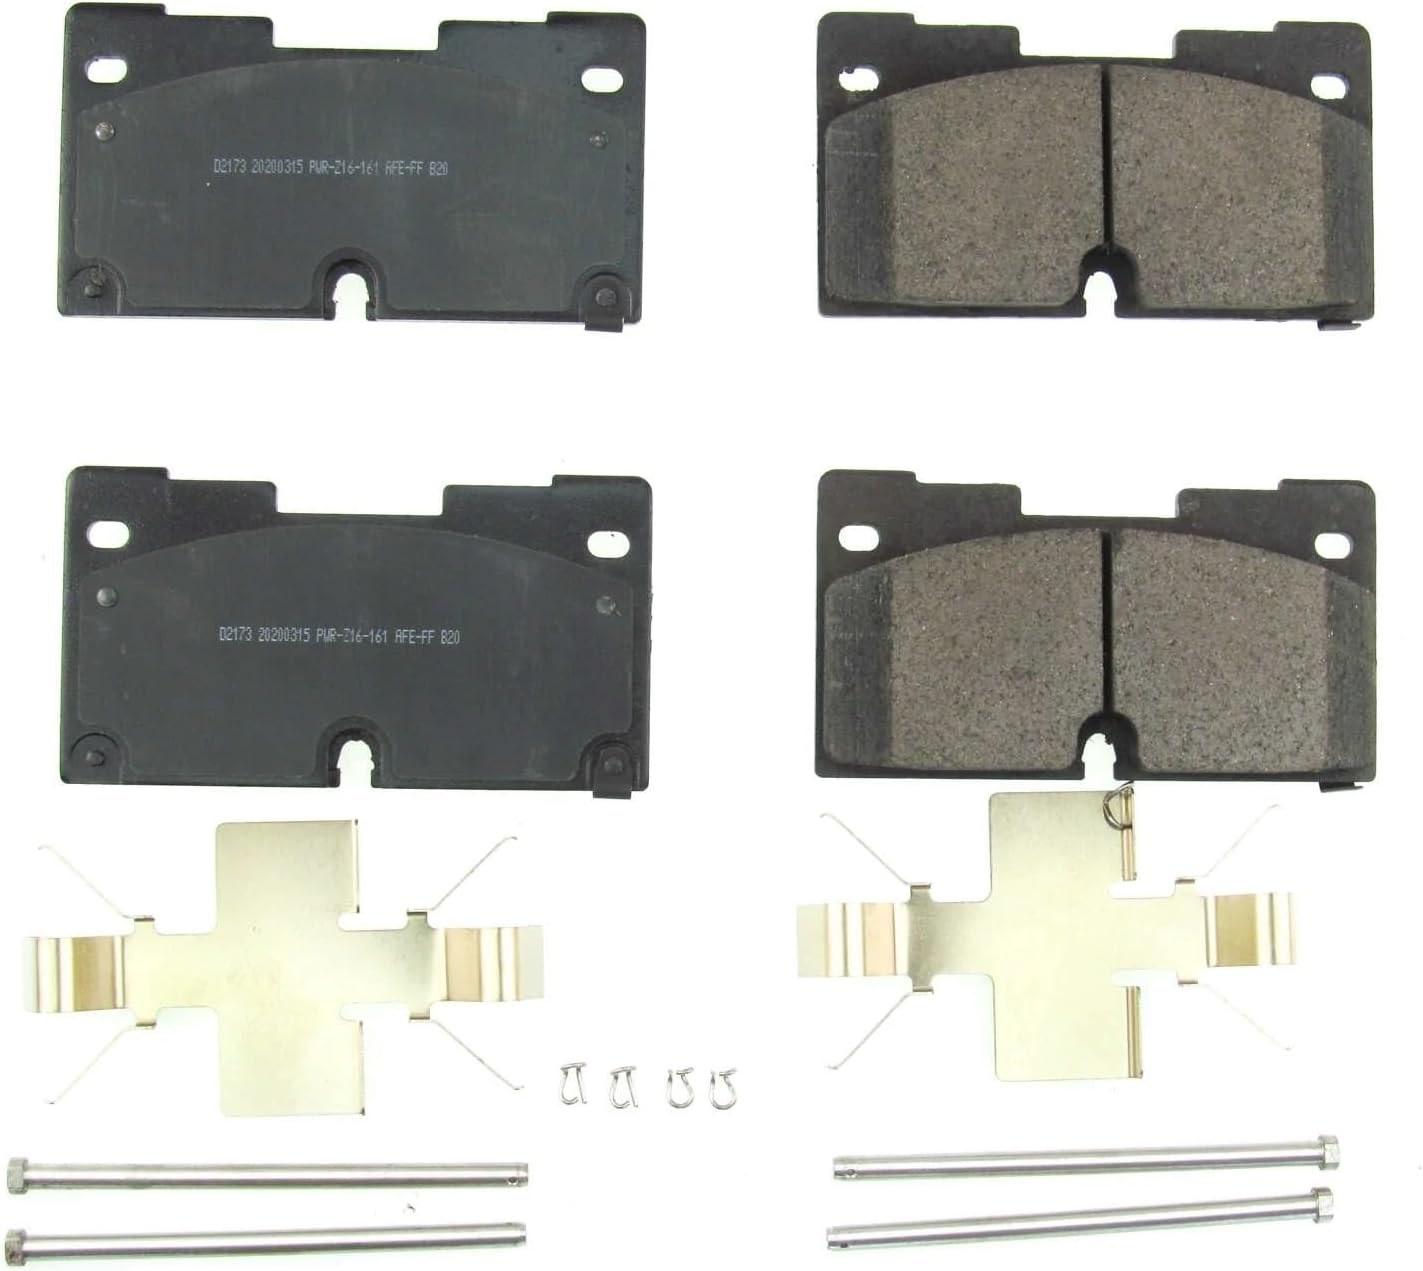
Image 3.2: Contents of the Power Stop Z17 Evolution Ceramic Brake Pad Kit. This includes four ceramic brake pads, two sets of stainless steel brake hardware clips, and two guide pin bolts, all essential for a complete front brake service.
- Z17 Evolution Clean Ride Ceramic Brake Pads (4 pads for front axle)
- Premium Stainless-Steel Installation Hardware Kit (shims, clips, guide pin boots/bolts as applicable)
4. Setup and Installation
This section outlines the general steps for installing your new brake pads. Always consult your vehicle's specific service manual for detailed instructions and torque specifications.
- Prepare Vehicle: Park the vehicle on a level surface, engage the parking brake, and block the rear wheels. Loosen the front wheel lug nuts.
- Lift and Secure: Safely lift the front of the vehicle using a jack and support it with jack stands. Remove the front wheels.
- Remove Caliper: Locate the brake caliper. Remove the caliper guide pin bolts. Carefully slide the caliper off the rotor and support it to prevent hanging by the brake hose. Do not allow the caliper to hang freely.
- Remove Old Pads: Remove the old brake pads and any existing hardware from the caliper bracket.
- Clean and Inspect: Thoroughly clean the caliper bracket and caliper. Inspect the brake rotor for wear, scoring, or cracks. Replace rotors if necessary. Ensure the caliper piston moves freely.
- Install New Hardware: Install the new stainless-steel hardware clips into the caliper bracket. Ensure they are seated correctly.
- Install New Pads: Apply a thin layer of brake lubricant to the back of the new brake pads (where they contact the caliper piston and caliper bracket) and to the guide pins. Install the new Power Stop Z17 Evolution ceramic brake pads into the caliper bracket.
- Retract Piston: Use a suitable tool to retract the caliper piston(s) slowly and evenly. This creates space for the thicker new pads.
- Reinstall Caliper: Carefully slide the caliper back over the new pads and rotor. Reinstall and tighten the caliper guide pin bolts to the manufacturer's specified torque.
- Repeat for Other Side: Repeat the process for the other front wheel.
- Final Steps: Reinstall the wheels and tighten lug nuts to a snug fit. Lower the vehicle and then torque the lug nuts to the manufacturer's specifications. Pump the brake pedal several times until it feels firm before driving. Check the brake fluid level and top off if necessary.

Image 4.1: A close-up view of a mechanic's hands installing a new brake pad into a caliper assembly. This illustrates a critical step in the brake pad replacement process, emphasizing the need for careful handling and proper seating of components.
5. Operating Instructions (Brake Pad Break-In)
Proper break-in (bedding-in) of new brake pads is crucial for optimal performance and longevity. Follow these steps carefully:
- Initial Driving: Drive your vehicle at a moderate speed (e.g., 30-35 mph) for 5-10 minutes, avoiding hard braking.
- Moderate Stops: Perform 5-6 moderate stops from 30-35 mph down to about 5 mph. Allow a few seconds between stops for the pads to cool slightly. Do not come to a complete stop during these initial cycles.
- Harder Stops: Perform 2-3 harder stops from 40-45 mph down to about 5 mph. Again, avoid coming to a complete stop.
- Cool Down: Drive for 5-10 minutes without braking to allow the pads and rotors to cool down completely.
- Avoid Hard Braking: For the next 200-300 miles, avoid sudden, hard braking if possible. This allows the pads to fully seat and transfer material to the rotors.
During the break-in process, you may notice some smoke or a slight odor. This is normal. If you experience excessive smoke, strong burning smells, or a significant loss of braking power, pull over safely and allow the brakes to cool before inspecting them.
6. Maintenance
Regular inspection and maintenance of your brake system are vital for safety and performance.
- Routine Inspection: Inspect brake pads, rotors, calipers, and brake lines at least once a year or every 12,000 miles, whichever comes first.
- Pad Wear: Replace brake pads when the friction material wears down to 3mm or less.
- Brake Fluid: Check brake fluid level regularly and ensure it is within the recommended range. Consult your vehicle's manual for brake fluid replacement intervals.
- Noise/Vibration: Address any unusual brake noises (squealing, grinding) or vibrations promptly.
7. Troubleshooting
This section addresses common issues that may arise with brake pads.
- Excessive Brake Dust:
- Power Stop Z17 Evolution pads are designed for clean ride performance, minimizing dust. If excessive dust occurs, ensure proper break-in was followed. Some dust is normal, especially during initial use.
- Brake Noise (Squealing/Grinding):
- Squealing can be caused by improper installation (lack of lubricant on contact points, incorrect hardware seating), worn rotors, or improper break-in. Grinding typically indicates severely worn pads or a foreign object. Inspect the entire brake system. Ensure shims are properly installed.
- Vibration During Braking:
- Vibration often indicates warped or unevenly worn brake rotors. It can also be caused by improper break-in or loose wheel components. Inspect rotors for runout and replace if necessary.
- Soft Brake Pedal:
- A soft or spongy pedal can indicate air in the brake lines, low brake fluid, or a faulty master cylinder. Bleed the brake system and check for leaks.

Image 7.1: A detailed view of the Power Stop Z17 Evolution brake pads, highlighting the dual-layer rubberized shims. These shims are designed to insulate noise, contributing to quieter braking performance.
8. Specifications
| Feature | Specification |
|---|---|
| Brand | Power Stop |
| Model Number | 17-2173 |
| Material | Ceramic |
| Auto Part Position | Front |
| Vehicle Service Type | Car |
| Specification Met | OEM |
| Item Weight | 6.52 pounds |
| Product Dimensions | 10.2 x 6.1 x 2.9 inches |
9. Warranty Information
For specific warranty details regarding your Power Stop Z17 Evolution Ceramic Front Brake Pad Kit, please refer to the warranty documentation included with your product or visit the official Power Stop website. Warranty terms and conditions may vary.
10. Customer Support
If you have any questions, require technical assistance, or need to report an issue with your Power Stop product, please contact Power Stop customer support directly. Contact information can typically be found on the product packaging or the official Power Stop website.