Camonity FS608R-32GB
Camonity Digital Binocular with Camera User Manual
Model: FS608R-32GB
1. Introduction
The Camonity Digital Binocular with Camera (Model: FS608R-32GB) combines an optical binocular system with digital video and photo recording capabilities. This device features 12x magnification and a 32mm aperture, allowing for clear observation and detailed capture of distant subjects. It supports image capture and video recording at 1280 x 1080 resolution, displayed on a 2.0" TFT LCD screen. The binocular also functions as a webcam when connected to a PC.
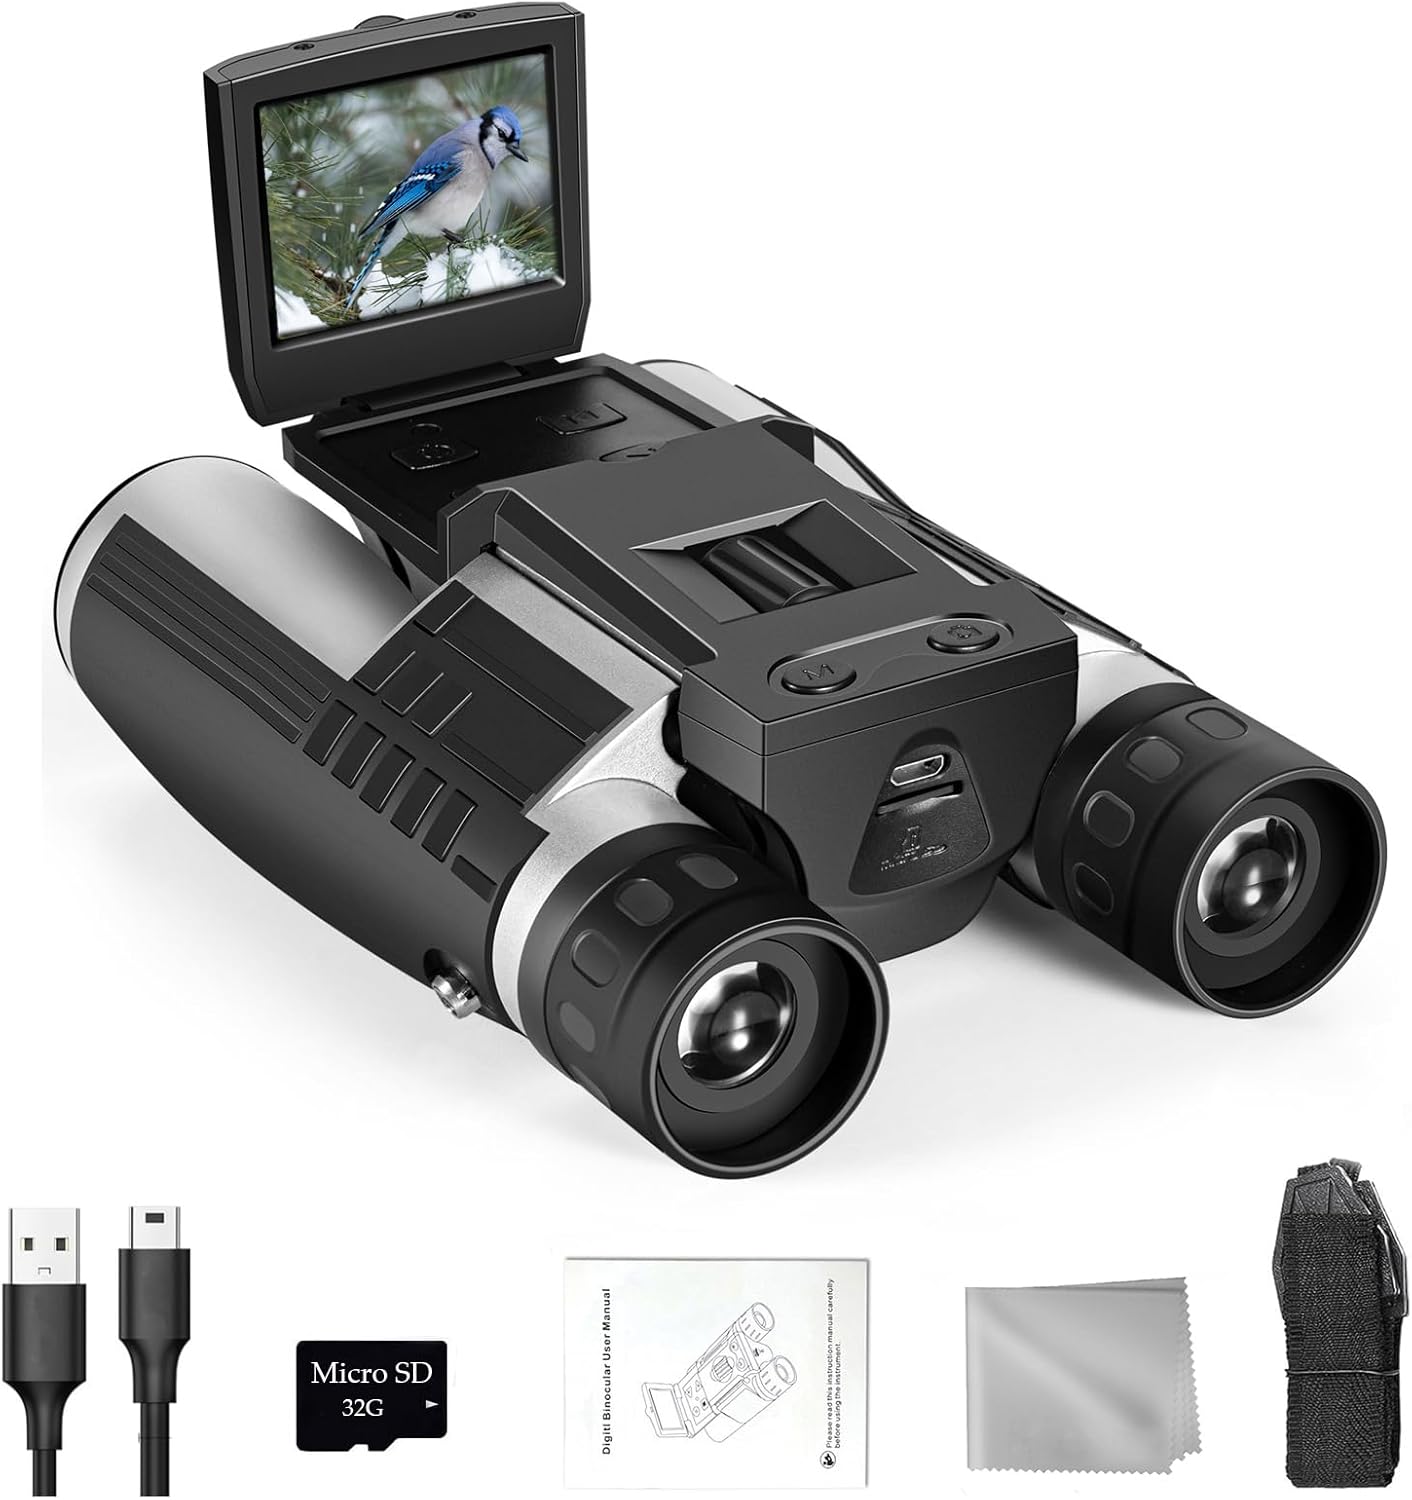
Figure 1.1: Camonity Digital Binocular with Camera and included accessories (USB cables, Micro SD card, user manual, cleaning cloth, neck strap).

Figure 1.2: The digital binocular is suitable for various outdoor activities and events, including hunting, bird watching, hiking, concerts, sports, and general landscape viewing.
2. Product Components and Controls
Familiarize yourself with the main components and controls of your digital binocular.

Figure 2.1: Labeled diagram of the digital binocular's components and controls.
- Large Eyepiece: For viewing through the binoculars.
- Rotating Patch: Adjustable for comfortable viewing.
- Right Eyepiece Focus Regulating Wheel: Adjusts focus for the right eye.
- Power Button: Turns the device on/off.
- Menu Button: Accesses device settings.
- LCD Display: 2.0" TFT screen for viewing images, videos, and menu options.
- Key Functions: Buttons for navigation and selection (Up, Down, Snap/OK, Mode).
- Center Axis Focusing Wheel: Adjusts focus for both eyepieces simultaneously.
- Strap Connector: Point for attaching the neck strap.
- Tripod Compatible Mount: Standard mount for attaching to a tripod (tripod not included).
- Large Lens: Objective lenses for light gathering.
- Micro SD Card Slot: For inserting the memory card.
- USB Port: For charging and connecting to a computer.
3. Setup
3.1 Charging the Battery
Before first use, ensure the rechargeable lithium battery is fully charged. Connect the binocular to a power source using the provided USB cable.
3.2 Inserting the Memory Card
The device supports Micro SD cards up to 32GB (a 16GB card is included). Locate the Micro SD card slot, typically near the USB port, and insert the card until it clicks into place.

Figure 3.1: Included accessories, including the Micro SD card.
3.3 Initial Power-On
Press and hold the Power button to turn on the device. The LCD screen will display a "Welcome" message, then switch to the live view.
3.4 Adjusting Eyepiece Distance
To achieve a single, clear circular field of view, rotate the two lens cones (eyepieces) inward or outward until they align with your eye distance. Make sure to adjust this setting before focusing.

Figure 3.2: Illustration of eyepiece distance adjustment.
3.5 Focusing the Binoculars
To focus, first close your right eye, focus on a distant object using the Center Focus Knob until the image is clear. Then, close your left eye and adjust the Right Eyepiece Focus Regulating Wheel until you see a clear image through the right eyepiece. This ensures both eyepieces are calibrated to your vision.
4. Operating Instructions
4.1 Taking Photos
While viewing through the eyepieces or the LCD screen, press the "Snap/OK" button to capture a still image. Note that when taking a picture while looking through the eyepiece, the picture might be slightly shifted upwards; adjust your aim accordingly before capturing.
4.2 Recording Videos
To switch to video recording mode, press the "Mode" button until the video icon appears on the LCD screen. Press the "Snap/OK" button to start recording. Press it again to stop recording.
4.3 Connecting to a PC
The binocular can be connected to a PC via the USB cable to download captured images and videos or to function as a webcam.

Figure 4.1: Connecting the binocular to a PC for data transfer or webcam use.
5. Maintenance
- Keep the lenses clean. Use the provided cleaning cloth or a soft, lint-free cloth to gently wipe the lenses. Avoid using abrasive materials or harsh chemicals.
- Store the binoculars in a dry, cool place away from direct sunlight and extreme temperatures.
- When not in use for extended periods, remove the battery to prevent leakage.
- Avoid dropping the device or subjecting it to strong impacts, as this can damage internal components.
6. Troubleshooting
This section addresses common issues and their solutions.

Figure 6.1: Common questions and answers regarding the binocular's operation.
- How to focus the item?
Close your right eye, focus on a distant object using the Center Focus Knob until the image is clear. Then, close your left eye and adjust the Right Eyepiece Focus Regulating Wheel until you see a clear image. - How to adjust the eyepieces distance?
Rotate the two lens cones inward or outward until you see a single circle through the lenses. Adjust this setting before focusing. - How to take a picture?
When you take a picture while looking through the eyepiece, the picture would be shifted slightly upwards, so adjust it appropriately before you take a picture. - What are the pixels and resolution of the binoculars camera?
The camera has 5 million pixels, and the video resolution is 1080P (1280 x 1080). - Why doesn't the device support my 64GB card?
Please use a TF Card up to Class A. It supports a maximum capacity of 32GB. (Recommended to use the card included in the package). - Why can't my device be turned on?
Please fully charge the device battery before use. If the problem persists, contact the seller for a replacement.
7. Specifications
| Feature | Detail |
|---|---|
| Product Dimensions | 7.6 x 5.55 x 3.03 inches |
| Item Weight | 1.06 pounds (17 oz.) |
| Model Number | FS608R-32GB |
| Batteries | 1 Lithium Polymer battery required (included) |
| Brand | Camonity |
| Special Feature | Built-In Camera |
| Objective Lens Diameter | 32 Millimeters |
| Magnification Maximum | 12 x |
| LCD Screen | 2.0" TFT |
| Photo Resolution | 5 Megapixels |
| Video Resolution | 1280 x 1080 (1080P) |
| Memory Card Support | Up to 32GB Micro SD (16GB included) |

Figure 7.1: Product dimensions.
8. Warranty and Support
For warranty information or technical support, please refer to the contact details provided with your purchase documentation or contact the manufacturer directly. Specific warranty terms may vary.
Ask a question about this manual
Ask about setup, troubleshooting, compatibility, parts, safety, or missing instructions. Manuals+ will review the question and use this page’s manual context to help answer it.