
1. Introduction
This manual provides detailed instructions for the assembly, operation, and maintenance of your HOMCOM Wall Mounted Desk, Model 836-176BK. Please read this manual thoroughly before assembly and use to ensure proper installation and safe operation of the product. Keep this manual for future reference.
2. Safety Information
WARNING: This product requires assembly and secure wall mounting. Failure to follow these instructions can result in injury or product damage.
- Always follow the included instructions for proper assembly and installation.
- To prevent tip-over and injury, securely fasten the desk to the wall using appropriate hardware for your wall type. Consult a professional if unsure about wall mounting.
- Keep the area around the desk clear of heavy objects.
- Do not place items on the desk that exceed its weight capacity of 44 lbs (desk top), 11 lbs (each grid), and 18 lbs (drawer).
- This product is not intended for use by children without adult supervision.
- Ensure all screws and fasteners are tightened securely before use and periodically check for tightness.
3. Package Contents
Before beginning assembly, verify that all parts and hardware are present. Refer to the included parts list in your packaging. If any parts are missing or damaged, contact customer support.

Figure 1: Overview of desk components and storage areas.
4. Assembly Instructions
Assembly typically requires a Phillips screwdriver and a tape measure. A bubble level is recommended for wall mounting.
- Prepare Components: Unpack all components and lay them out on a clean, soft surface to prevent scratches. Identify each part using the provided parts list. Pay close attention to the finished edges of the boards to ensure they face the correct direction during assembly.
- Assemble the Main Frame: Follow the step-by-step diagrams in your included assembly guide to connect the side panels, back panel, and internal shelves. Ensure all cam locks and screws are securely fastened.
- Install the Drawer: Assemble the drawer components according to the instructions. Insert the drawer into its designated slot. Install the drawer stops as the final step for the drawer. This may require partially inserting the drawer and reaching inside to screw in the stops.
- Attach the Foldable Tabletop: Secure the hinges to the foldable tabletop and the main desk frame. It is recommended to screw in the hinges before attaching the support arms. Test the folding mechanism to ensure smooth operation and proper alignment. Adjust hinge screws if necessary to ensure the tabletop folds cleanly into the frame.
- Install Wall Mounting Cleats: Locate a suitable wall stud for secure mounting. If mounting into drywall, use appropriate drywall anchors (not always included, verify your package contents). Attach the two wall mounting cleats to the wall, ensuring they are level and spaced correctly according to the manual.
- Mount the Desk: Carefully lift the assembled desk and align the pseudo hooks on the back of the desk with the wall mounting cleats. Gently lower the desk onto the cleats. Once mounted, adjust the tension screws on the inside of the desk (if present) to secure it firmly to the cleats and eliminate any wobble.

Figure 2: The desk fully assembled and mounted, with the tabletop open for use.
5. Operating Instructions
5.1 Opening the Desk
- Unlatch the metal hook located at the top center of the desk.
- Gently pull the foldable tabletop downwards until it is fully extended and supported by the metal arms.
5.2 Closing the Desk
- Clear all items from the tabletop.
- Lift the tabletop upwards until it is flush with the main desk unit.
- Secure the metal hook at the top center to keep the desk closed.

Figure 3: Desk in open position, showcasing internal storage and drawer.
5.3 Utilizing Storage
- The internal shelves provide space for books, stationery, and small decorative items.
- The bottom drawer can be pulled out using the metal knob for additional storage of smaller items.
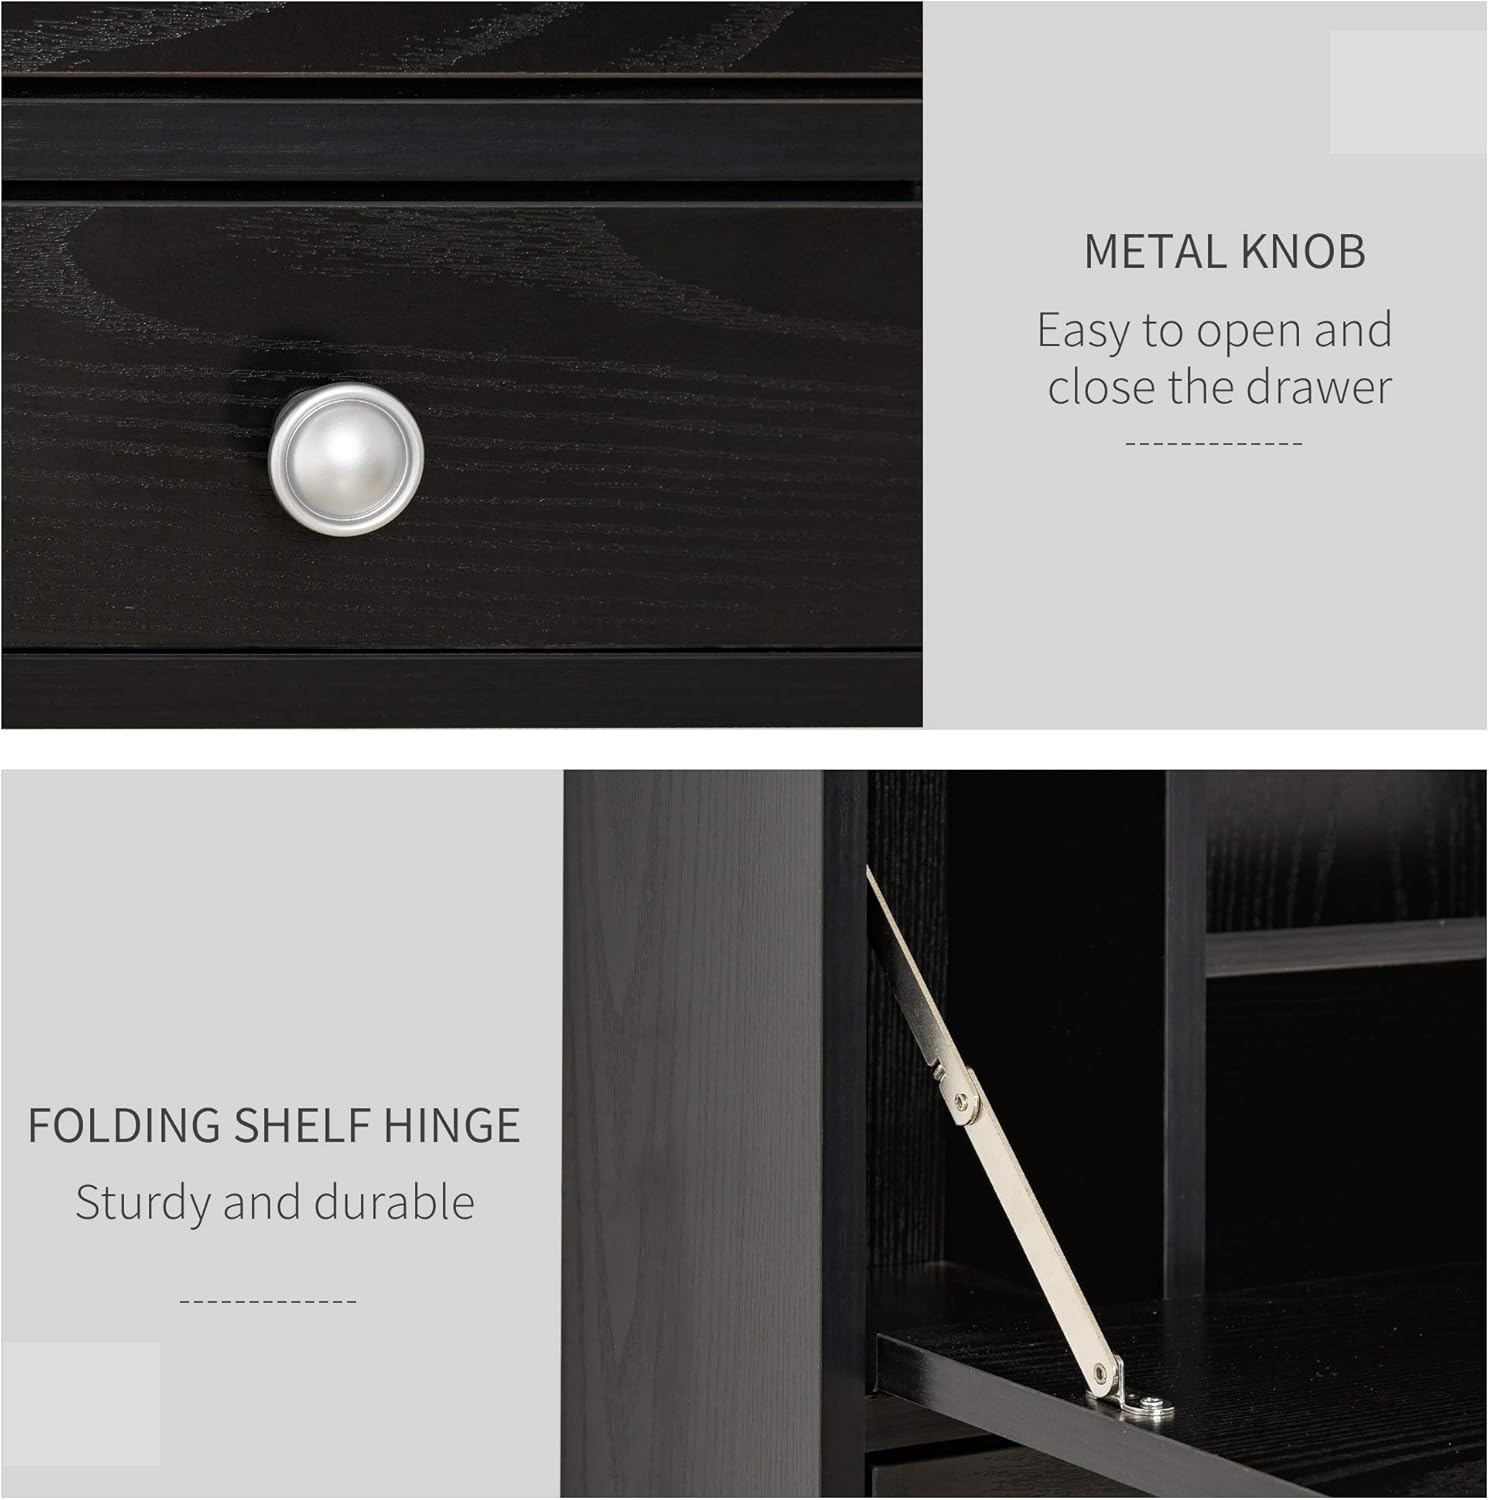
Figure 4: Detail of the drawer knob and folding hinge.
6. Maintenance
To maintain the appearance and functionality of your HOMCOM Wall Mounted Desk:
- Cleaning: Wipe the surfaces with a dry, soft cloth. Avoid abrasive cleaners or harsh chemicals that may damage the finish.
- Hardware Check: Periodically inspect all screws, hinges, and mounting hardware to ensure they remain tight. Retighten as necessary.
- Environmental Conditions: Avoid exposing the desk to excessive moisture or direct sunlight, which can cause warping or fading.
7. Troubleshooting
- Desk Wobbles After Mounting: Ensure the wall mounting cleats are securely fastened to the wall. Check the tension screws on the inside of the desk that secure it to the cleats and tighten them if loose.
- Tabletop Does Not Fold Smoothly: Inspect the hinges for proper alignment. Loosen hinge screws slightly, adjust the tabletop position, and then retighten. Ensure no obstructions are preventing smooth movement.
- Drawer Sticks: Check the drawer slides for any debris or misalignment. Ensure the drawer stops are correctly installed and not causing obstruction.
- Missing Parts: If you find any parts missing during assembly, refer to the parts list in your original packaging and contact HOMCOM customer support for assistance.
8. Specifications
| Feature | Detail |
|---|---|
| Brand | HOMCOM |
| Model Number | 836-176BK |
| Product Dimensions (Overall) | 23.5" L x 6" W x 19.75" H |
| Color | Black |
| Material | P2 Grade MDF, Particle Board, Metal |
| Weight Capacity (Desk Top) | 44 lbs |
| Weight Capacity (Each Grid) | 11 lbs |
| Weight Capacity (Drawer) | 18 lbs |
| Number of Shelves | 2 (internal) |
| Number of Drawers | 1 |
| Assembly Required | Yes |

Figure 5: Product dimensions.
9. Customer Support
For further assistance, missing parts, or warranty inquiries, please contact HOMCOM customer service. Refer to your purchase documentation for specific contact details.