1. Introduction
The WeatherTech Custom Scratch Protection Kit is designed to shield your vehicle's painted surfaces from scuffs, scratches, and chips caused by everyday use. This clear, durable film is custom-fit for specific areas of your Toyota C-HR, providing long-lasting protection without altering the vehicle's appearance.
Key Features:
- Custom-fit for select 2018-2022 Toyota C-HR Models.
- Made from clear, high-performance polyurethane film.
- Resists wear and discoloration.
- Self-healing technology for long-lasting scratch resistance.
- Adheres directly to painted surfaces without damage.
Coverage Areas:
- Door Handle Cups
- Door Edges
- Door Sills
- Trunk Ledge

2. What's in the Box
Your WeatherTech Custom Scratch Protection Kit includes the following items:
- Protective Film Sheets (pre-cut for specific vehicle areas)
- Squeegee
- Written Instructions
3. Required Tools and Materials (Not Included)
To ensure a successful installation, you will need the following additional items:
- Microfiber Towel
- 70% Isopropyl Alcohol
- Baby Shampoo (tear-free formula recommended)
- Two Spray Bottles
- Scissors

4. Safety Information
- Always work in a well-ventilated area.
- Keep isopropyl alcohol and cleaning solutions away from open flames and heat sources.
- Avoid contact of cleaning solutions with eyes. In case of contact, rinse thoroughly with water.
- Keep all materials and tools out of reach of children and pets.
- If you are not comfortable with the installation process, consider seeking professional assistance.
5. Installation Instructions
For optimal results, perform the installation in a clean, dust-free environment with temperatures between 60°F and 80°F (15°C and 27°C). Avoid direct sunlight during installation.
5.1. Preparation
Step 1: Separate Film Pieces
Unroll the scratch protection kit and carefully cut along the dashed markings to separate each individual film piece from the backing sheet using scissors.

Step 2: Prepare Cleaning Solutions
Prepare two spray bottles:
- Alcohol Slip Solution: Mix 1 part 70% Isopropyl Alcohol with 3 parts water in one spray bottle. This solution is for cleaning the application areas.
- Soap Slip Solution: Mix 1 part baby shampoo with 3 parts water in the second spray bottle. This solution is for lubricating the film during application.

Step 3: Clean Application Areas
Thoroughly clean the vehicle surfaces where the film will be applied using the alcohol slip solution. Ensure the surface is free of all contaminants such as dirt, debris, grease, or oil. Dry the area completely with a clean microfiber cloth.

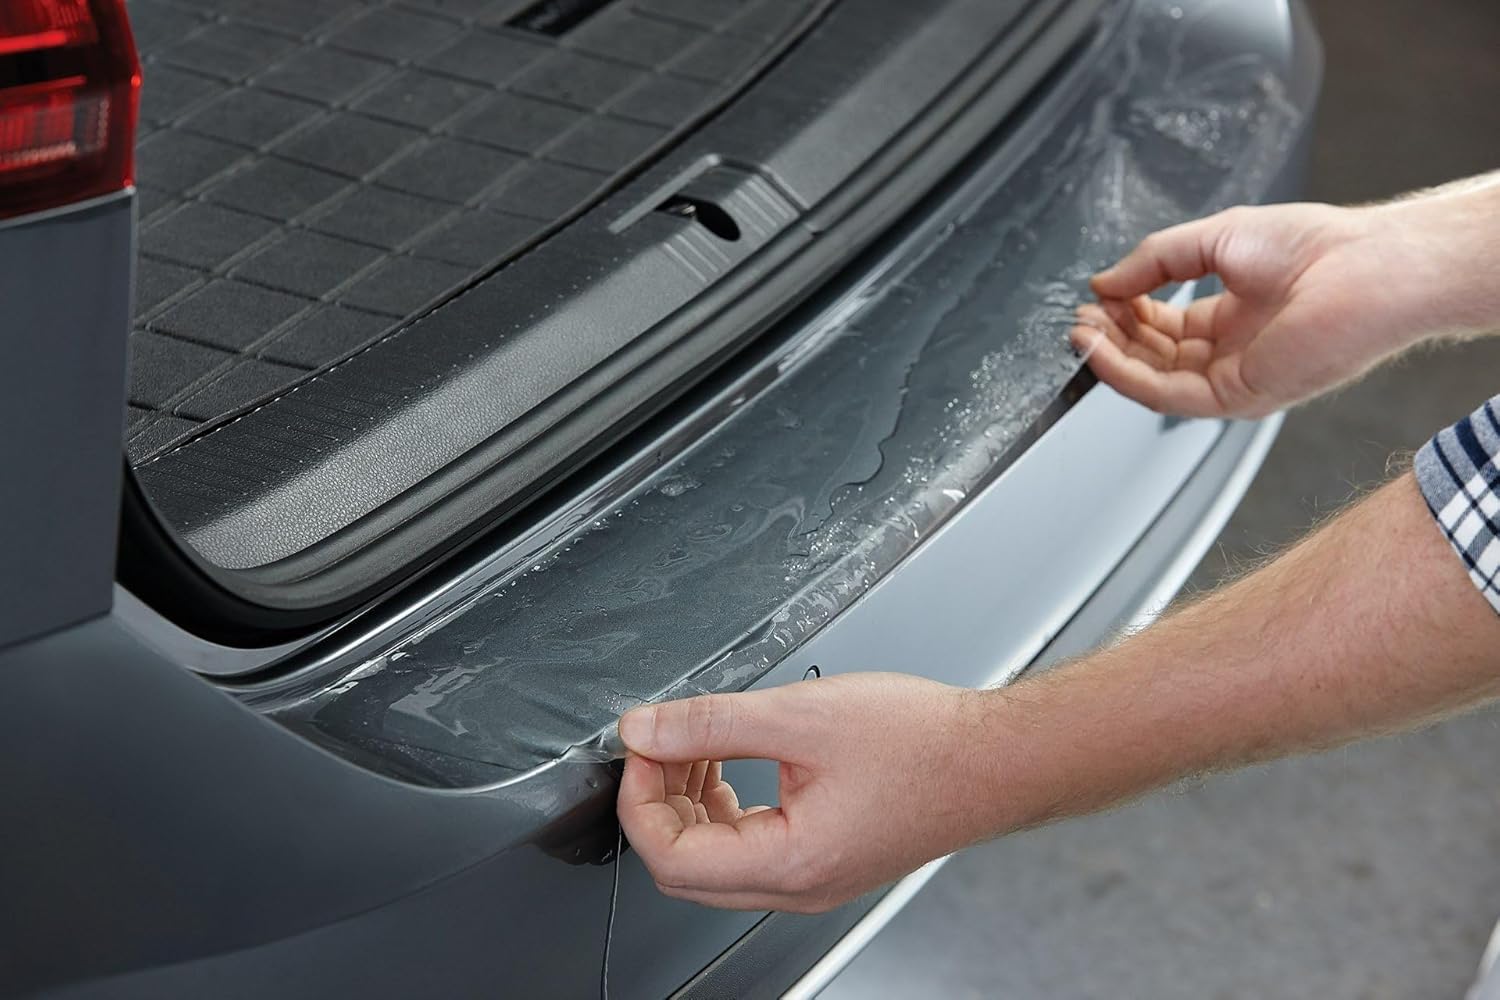
5.2. Application
Important Note: If you are not comfortable installing the WeatherTech Scratch Protection, please consider professional installation.
Door Handle Cup Installation
- Spray the soap slip solution onto your fingers, the protection film (as you remove it from the backing), and the door cup area.
- Apply the film template, centering it in the door cup area.
- Starting from the center, use your fingers to slowly work any bubbles toward the edges with firm, gentle pressure until all bubbles are eliminated.

Door Edge Installation
- Locate the desired starting point for the film on the door edge. Body lines can serve as an excellent guide.
- Peel back 3 to 4 inches of the film from the backing. Apply half of the film width onto the front edge, firmly pressing it down.
- Continue the application until the end of the film is reached. Depending on the starting point chosen, trimming excess material may be required.
- Press the remaining film width onto the inside of the door, working from top to bottom.
- Use the provided squeegee or your hand to set any remaining film into place.

Door Sill Installation
- Locate the desired spot for your film application on the door sill.
- Spray the soap slip solution onto your fingers and the protection film as you remove it from the backing.
- Using the top edge as a guide, apply the film to the door sill.
- Starting from the top and working down, use your fingers to apply slow, gentle strokes to force the solution and air bubbles down and out.
- Use the provided squeegee as needed to finish the application. Note: Aggressive use of the squeegee can damage the film.

Trunk Ledge Installation
- Locate the desired spot for your film application on the trunk ledge.
- Spray the soap slip solution onto your fingers and the protection film as you remove it from the backing.
- Using the top edge as a guide and centering the film as best as you can, apply the film to the trunk ledge.
- Starting from the top and working down, use the provided squeegee to apply slow, gentle strokes to force the solution and air bubbles down and out. Note: Aggressive use of the squeegee can damage the film.
5.3. Curing Time
The protection film will adhere after approximately 20 minutes. The film will be fully cured and achieve maximum adhesion in 24 hours. Avoid washing the vehicle or exposing the newly installed film to excessive moisture during this curing period.
6. Operating Instructions
The WeatherTech Custom Scratch Protection Kit is a passive protective film and does not require any operational procedures. Once installed, it continuously provides protection to your vehicle's surfaces.
7. Maintenance
To maintain the appearance and effectiveness of your scratch protection film:
- Clean the film regularly with mild automotive soap and water.
- Avoid using abrasive cleaners, harsh chemicals, or stiff brushes, as these can damage the film.
- For best results, hand wash the protected areas. If using a pressure washer, maintain a safe distance and avoid directing high-pressure spray directly at the film's edges.
- The film is designed to resist discoloration, but regular cleaning will help maintain its clarity.
8. Troubleshooting
If you encounter any issues with your WeatherTech Scratch Protection film, consider the following:
- Bubbles or Water Pockets: Small bubbles or haziness are normal immediately after installation and should disappear as the film cures over 24 hours. For larger bubbles, gently try to push them towards the nearest edge with the squeegee. If persistent, a small pinprick can release trapped air, then smooth the area.
- Lifting Edges: Ensure the edges were firmly pressed down during installation. If an edge lifts, re-wet the area with soap slip solution, gently lift the film, re-position, and re-squeegee.
- Film Not Adhering: This may indicate insufficient cleaning of the surface or improper application of the slip solution. Ensure the surface is completely free of contaminants before re-attempting application.
9. Specifications
| Specification | Detail |
|---|---|
| Brand | WeatherTech |
| Model | SP0094 (ScratchProtection) |
| Color | Clear |
| Material | High-performance polyurethane |
| Automotive Fit Type | Vehicle Specific Fit (Toyota C-HR 2018-2022) |
| Item Weight | 1 pounds |
| Package Dimensions | 8 x 5 x 5 inches |
| UPC | 787765321044 |
10. Warranty Information
WeatherTech products are backed by a limited lifetime warranty against defects in materials or workmanship. For specific warranty details and claims, please refer to the official WeatherTech website or contact their customer service directly.
11. Support
For further assistance, product information, or to purchase additional WeatherTech products, please visit the official WeatherTech website or contact their customer support team.
WeatherTech Official Store: Visit the WeatherTech Store on Amazon


