Introduction
This manual provides instructions for the safe and effective use of your SURPEER Infrared Thermometer Gun, Model 7D-4. This non-contact device is designed for accurate surface temperature measurement across a wide range of applications, from cooking to industrial use. Please read this manual thoroughly before operation and retain it for future reference.
Safety Information
WARNING: LASER RADIATION. DO NOT STARE INTO BEAM. CLASS II LASER PRODUCT.
- Do not point the laser directly at eyes or indirectly off reflective surfaces.
- Keep the device out of reach of children.
- Do not use the thermometer for medical purposes or to measure human body temperature.
- Do not immerse the device in water or other liquids.
- Avoid exposing the device to extreme temperatures, humidity, or direct sunlight for prolonged periods.
- Use only the specified battery type (9V).
What's in the Box
- SURPEER Infrared Thermometer Gun (Model 7D-4)
- 9V Battery
- Meat Thermometer (additional accessory)
- User Manual
Product Overview
Familiarize yourself with the components and display of your infrared thermometer.

Figure 1: LCD Color Display and Controls
- 1. High/Low-Temperature Alarm Indicator: Lights up when temperature limits are exceeded.
- 2. Laser Indicator: Shows when the laser is active.
- 3. Backlight Display: Illuminates the screen for visibility in low light.
- 4. Temperature Value Display: Shows the measured temperature.
- 5. Mode (Max/Min/Avg/Dif): Indicates the current measurement mode.
- 6. EMS Adjustable: Displays the current emissivity setting.
- SET Button: Accesses settings and alarm thresholds.
- MODE Button: Cycles through measurement modes (MAX, MIN, AVG, DIF, EMS).
- HI/LO Buttons (Up/Down Arrows): Adjust settings and toggle features.
- Trigger: Activates the thermometer for measurement.
Setup
Battery Installation
- Locate the battery compartment on the handle of the thermometer.
- Open the battery compartment cover.
- Insert the included 9V battery, ensuring correct polarity (+/-).
- Close the battery compartment cover securely.
The device is now ready for use. A low battery indicator will appear on the display when the battery needs replacement.
Operating Instructions
1. Basic Temperature Measurement
- Point the thermometer at the target surface. Ensure the distance-to-spot ratio (D:S) of 12:1 is considered for accurate readings. For example, at 12 inches, the measurement spot is 1 inch in diameter.
- Press and hold the trigger to activate the laser and begin scanning the temperature.
- The measured temperature will be displayed on the LCD screen.
- Release the trigger to hold the last measured temperature on the display. The device will automatically shut off after 15 seconds of inactivity to conserve battery.
2. Changing Temperature Units (°C/°F)
With the device powered on, press the "HI/LO" (Up/Down) buttons to toggle between Celsius (°C) and Fahrenheit (°F).
3. Adjustable Emissivity (EMS)
Emissivity (EMS) is the ability of a material to emit thermal energy. Different materials have different emissivity values. Adjusting the emissivity ensures accurate readings for various surfaces.

Figure 2: Adjustable Emissivity for Various Materials
The thermometer's EMS mode allows adjustment from 0.1 to 1.0. To adjust:
- Press the "MODE" button until "EMS" appears on the display.
- Use the "HI/LO" (Up/Down) buttons to increase or decrease the emissivity value.
- Refer to common emissivity tables for typical values of different materials.
4. Temperature Alarm Settings
The device features high and low-temperature alarms that will sound when measured temperatures exceed or fall below set thresholds.

Figure 3: Temperature Alarm Indicators
To set alarms:
- Press the "SET" button to enter the alarm setting mode.
- Use the "MODE" button to select either the High Alarm (HI) or Low Alarm (LO) threshold.
- Use the "HI/LO" (Up/Down) buttons to adjust the desired temperature threshold.
- Press "SET" again to confirm and exit.
5. Max/Min/Avg/Dif Modes
The thermometer can track maximum, minimum, average, and differential temperatures during a continuous scan.
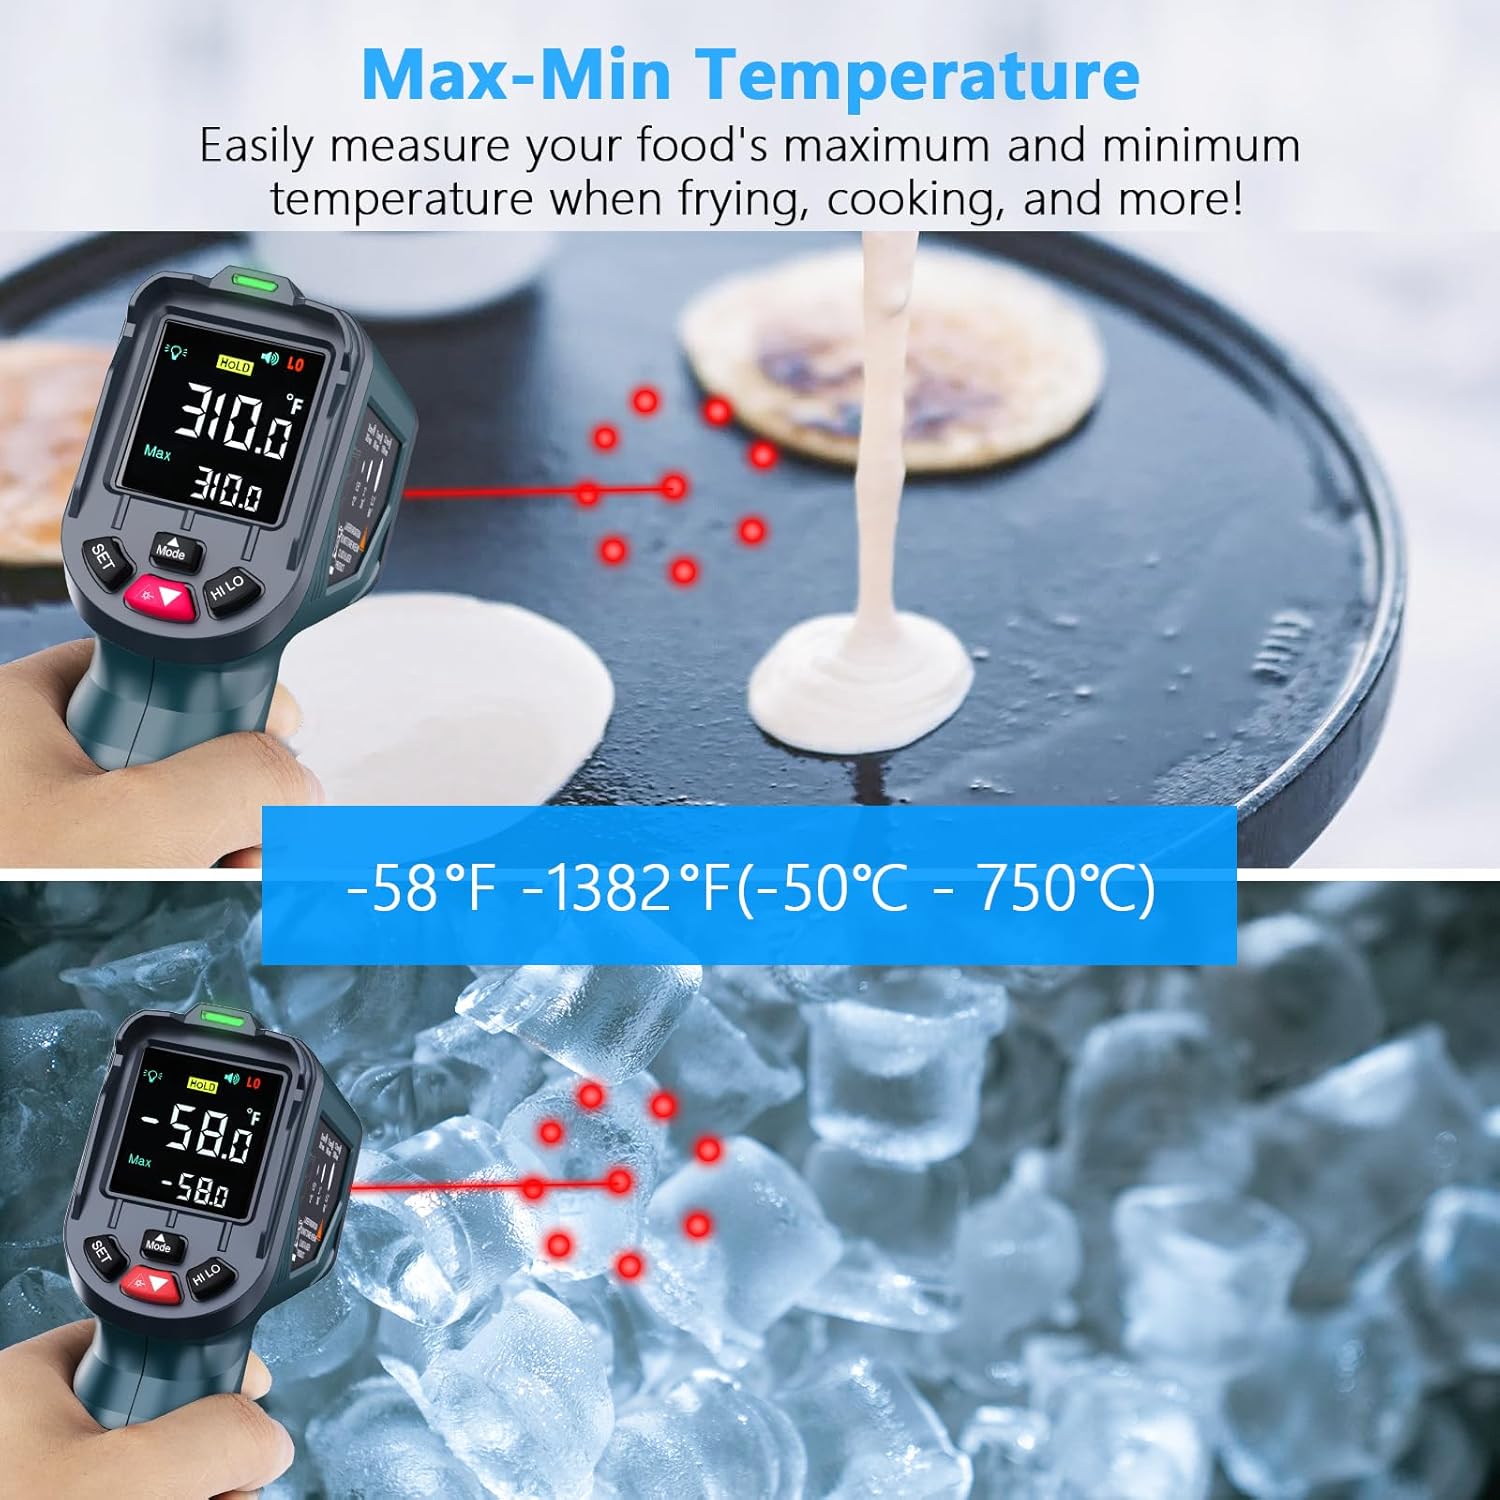
Figure 4: Max-Min Temperature Measurement
To use these modes:
- Press the "MODE" button repeatedly to cycle through MAX (Maximum), MIN (Minimum), AVG (Average), and DIF (Difference) modes.
- While in one of these modes, press and hold the trigger to scan. The display will show the corresponding value.
6. Laser and Backlight Control
Use the "HI/LO" (Up/Down) buttons to toggle the laser pointer and backlight on or off as needed.
7. Advanced Fresnel Lens Technology

Figure 5: Advanced Fresnel Lens System
The thermometer incorporates advanced Fresnel lens technology and a sensitive temperature sensor to provide precise readings within 0.5 seconds. This design enhances the accuracy and speed of temperature detection.
Video Demonstration
The following video provides a visual overview of the SURPEER Infrared Thermometer Gun, demonstrating its features and basic operation. Please note that this video is from a third-party reviewer and not an official seller demonstration.
Video: In Hand Review of Infrared Thermometer Gun -58F to 1382F. This video demonstrates the physical appearance and basic temperature measurement function of the infrared thermometer, including its display and controls. It shows the device being used to measure the temperature of a pie.
Maintenance
Cleaning
- Wipe the device clean with a soft, damp cloth.
- Do not use abrasive cleaners or solvents.
- Do not soak the device in water or any other liquid.
- Keep the lens clean and free of dust or debris for accurate readings.
Storage
- Store the thermometer in a cool, dry place when not in use.
- Remove the battery if the device will not be used for an extended period to prevent leakage.
Troubleshooting
If you encounter issues with your thermometer, please refer to the following common problems and solutions:
| Problem | Possible Cause | Solution |
|---|---|---|
| No display/Device won't turn on | Low or dead battery; Incorrect battery installation. | Replace the 9V battery; Ensure battery is installed with correct polarity. |
| Inaccurate readings | Incorrect emissivity setting; Lens is dirty; Distance to spot ratio not optimal; Object temperature outside range. | Adjust emissivity for the target material; Clean the lens; Ensure proper distance (12:1 D:S ratio); Verify target temperature is within -58°F to 1382°F. |
| Laser not working | Laser is turned off in settings. | Toggle the laser on using the "HI/LO" buttons. |
| Alarm not sounding | Alarm thresholds not set; Sound is turned off. | Set high/low alarm thresholds via the "SET" button; Ensure sound is enabled. |
If the problem persists, please contact customer support.
Specifications
| Feature | Detail |
|---|---|
| Temperature Range | -58°F to 1382°F (-50°C to 750°C) |
| Distance-to-Spot Ratio (D:S) | 12:1 |
| Response Time | 0.5 seconds |
| Emissivity | Adjustable from 0.1 to 1.0 |
| Laser Pointer | 9-Point Laser (Class II) |
| Display Type | Color LCD with Backlight |
| Auto Shut-off | 15 seconds (approx.) |
| Power Source | 1 x 9V Battery |
| Special Features | High/Low Temperature Alarm, Max/Min/Avg/Dif Modes, Low Battery Indicator |
| Certifications | CE, FCC, RoHS |
| Item Weight | 160 Grams |
| Dimensions (Approx.) | 6.1 Inches (Length) |
Warranty and Support
SURPEER products are manufactured to high-quality standards. For information regarding warranty coverage, technical support, or service, please refer to the contact information provided with your purchase or visit the official SURPEER website. Please retain your proof of purchase for warranty claims.