1. Introduction
This instruction manual provides important information regarding the installation, operation, and maintenance of your EUROPLAST Bathroom Fan. Designed for efficient air extraction in residential and commercial spaces such as bathrooms, kitchens, and small offices, this fan features a decorative front panel for aesthetic integration, a humidity sensor, and a timer for enhanced control. It is built with durable, UV-resistant ABS plastic and equipped with ball bearings for reliable performance and longevity.
2. Product Overview
The EUROPLAST Bathroom Fan is engineered for optimal air circulation and humidity control. Its sleek design with a round facade allows it to blend seamlessly into various interior styles. The fan's robust construction ensures resistance to temperature fluctuations and UV exposure, making it suitable for long-term use.

Figure 2.1: Front view of the EUROPLAST Bathroom Fan with its decorative panel slightly open, revealing the fan blades. This design allows for easy access for cleaning while maintaining a discreet appearance when closed.

Figure 2.2: The EUROPLAST Bathroom Fan with its front panel fully closed, showcasing its minimalist and round design. This view highlights how the fan integrates discreetly into a room's decor.

Figure 2.3: An angled view of the fan with the front panel detached, providing a clear look at the internal fan blades and the main housing. This illustrates the components responsible for air extraction.
3. Specifications
| Feature | Detail |
|---|---|
| Model Number | EAT |
| Diameter | 100 mm (3.9 inches) |
| Power | 15 Watts |
| Voltage | 240 Volts |
| Noise Level | 32 dB |
| Airflow | 100 m³/h |
| Material | High-quality ABS Plastic (UV Resistant) |
| Dimensions (L x W x H) | 11.5 x 15.2 x 15.2 cm (4.5 x 6 x 6 inches) |
| Weight | 540 grams (1.2 lbs) |
| Special Features | Humidity Sensor, Timer, Water-resistant |
| Mounting Type | Wall Mount |
| Recommended Use | Air extraction in bathrooms, kitchens, toilets, small offices |

Figure 3.1: Detailed dimensions of the fan, including the duct diameter (99mm / 3.9 inches), overall width (152mm / 6 inches), and duct length (80mm / 3.1 inches) with a 35mm (1.4 inches) offset.

Figure 3.2: Rear view of the fan, showing the exhaust duct and mounting points. This perspective is crucial for understanding installation requirements.
4. Setup and Installation
Important: Installation should only be performed by a qualified electrician in accordance with local wiring regulations and building codes. Ensure the power supply is disconnected before commencing any installation work.
- Preparation: Choose a suitable location for installation, typically on a wall or ceiling in the desired room. Ensure there is adequate space for the fan's dimensions and ducting.
- Mounting: Secure the fan body to the wall or ceiling using appropriate fasteners. The fan is designed for wall mounting.
- Electrical Connection: Connect the fan to the main power supply. The fan operates on 240 Volts. Pay close attention to the wiring diagram provided with the product. The fan includes connections for live (L), neutral (N), and switched live (LS) for the timer function.
- Ducting: Connect the fan's exhaust duct (Ø 100 mm) to the ventilation system or directly to the outside. Ensure all connections are sealed to prevent air leakage.
- Front Panel Attachment: Once the electrical connections and ducting are complete, securely attach the decorative front panel.
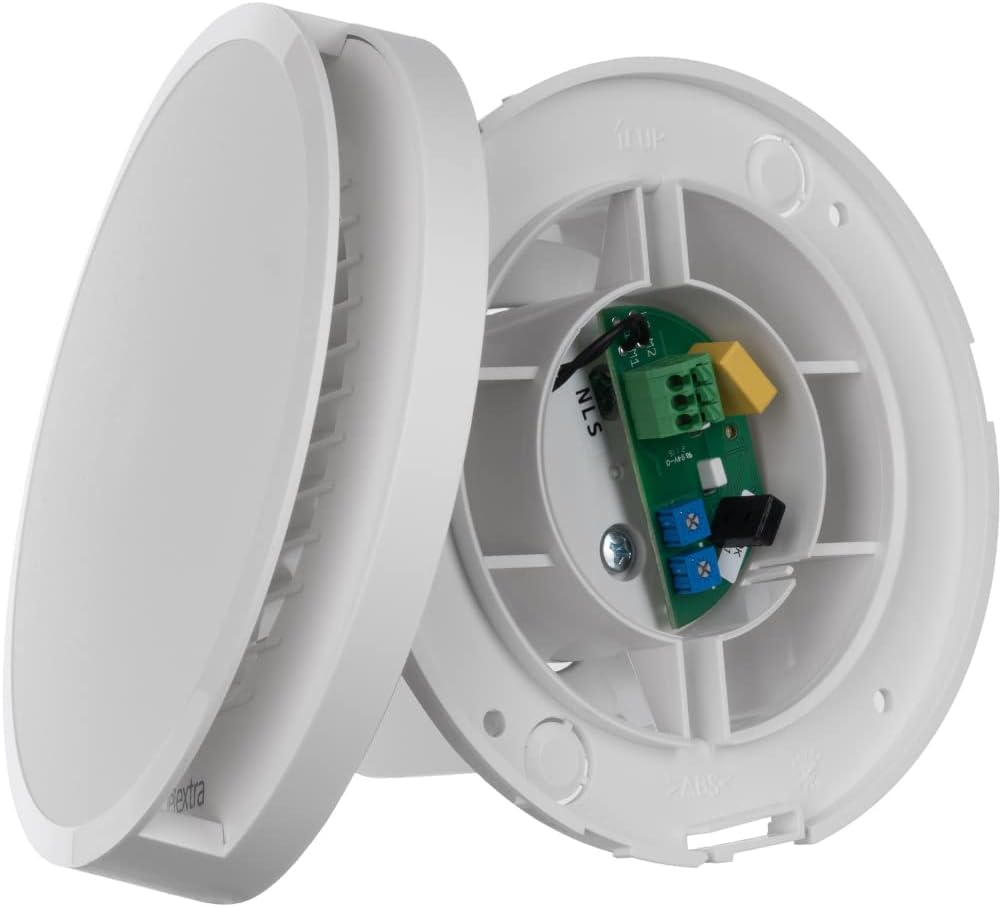
Figure 4.1: View of the internal wiring terminal block and circuit board. This shows the connection points for power input and control settings for the humidity sensor and timer.
5. Operating Instructions
The EUROPLAST Bathroom Fan is equipped with an integrated humidity sensor (hygrostat) and a timer function for automated operation.
- Humidity Sensor Operation: The fan will automatically activate when the humidity level in the room exceeds a preset threshold. It will continue to operate until the humidity drops below this level, ensuring optimal air quality and preventing condensation. The sensitivity of the humidity sensor can typically be adjusted via a small potentiometer on the circuit board (refer to Figure 4.1 for location).
- Timer Function (Run-on Control): When the fan is manually switched off (e.g., via a light switch), the timer function allows the fan to continue running for a set period before shutting down. This ensures complete air extraction after use. The run-on time can usually be adjusted from a few minutes up to a longer duration via a potentiometer on the circuit board (refer to Figure 4.1 for location).
- Manual Override: The fan can also be activated manually via a separate switch, if wired accordingly.
Consult the detailed wiring diagram provided with your fan for specific adjustment procedures for the humidity sensor and timer settings.
6. Maintenance
Regular maintenance ensures the longevity and efficient operation of your fan. Always disconnect the power supply before performing any maintenance.
- Cleaning the Front Panel: The decorative front panel can be easily removed for cleaning. Wipe it with a soft, damp cloth and a mild detergent. Avoid abrasive cleaners.
- Cleaning Fan Blades: Carefully clean the fan blades and the interior of the housing to remove dust and debris. A soft brush or vacuum cleaner attachment can be used. Ensure no moisture enters the electrical components.
- Reassembly: Once clean and dry, reattach the front panel securely.
Perform cleaning at least once every 3-6 months, or more frequently in dusty or high-humidity environments.
7. Troubleshooting
| Problem | Possible Cause | Solution |
|---|---|---|
| Fan does not turn on. | No power supply; faulty wiring; tripped circuit breaker. | Check power connection and circuit breaker. Verify wiring connections (consult electrician if unsure). |
| Fan is excessively noisy. | Accumulation of dust/debris on blades; loose mounting; obstruction in ducting. | Clean fan blades and housing. Ensure fan is securely mounted. Check ducting for obstructions. |
| Humidity sensor not activating/deactivating correctly. | Incorrect sensitivity setting; sensor obstructed or dirty. | Adjust humidity sensor sensitivity (refer to wiring diagram). Ensure sensor area is clean and unobstructed. |
| Timer function not working. | Incorrect timer setting; incorrect wiring for switched live (LS). | Adjust timer duration (refer to wiring diagram). Verify LS wiring connection. |
If problems persist after attempting these solutions, contact a qualified technician or the manufacturer's support.
8. Warranty and Support
Information regarding the specific warranty period and support contact details for this product was not available in the provided data. Please refer to the product packaging, the manufacturer's official website, or your point of purchase for detailed warranty terms and customer support information.
For technical assistance or spare parts inquiries, it is recommended to contact EUROPLAST directly or an authorized service center.